
Sony A6100: settings, tips and tricks
Introduction
Like other Sony APS-C, cameras, the Sony a6100 boasts a 24MP APS-C sensor, BIONZ X image processor, and 425-point hybrid autofocus system with 84% frame coverage. It, too, can shoot at up to 11fps with focus tracking, features a 3-inch flip-up touchscreen LCD, oversampled 4K video recording with full-pixel readout, and Sony’s Real-Time Tracking autofocus system is included as well.
If you’re looking for an advanced guide for the Sony A6100 with tips and tricks to improve your understanding of this little wonder, you’ve come to the right place. I believe that the best way to learn all the features and functions is to have a good look at the menu system and gradually try to understand how everything works. This might take some time if you’ve never owned a Sony mirrorless, and even if you have, the menus have changed it this product. You can bookmark this page and simply refer back to it or continue reading whenever you feel like it.
If you are looking for an A6000, A6300 A6400, A6500, A6600 guide, you can find them by clicking on the camera name.
So take your ILCE-A6100, press the Menu button and follow along.
Sony A6100 camera Menu system walkthrough
MENU – Red Camera Icon – page 1 (Quality settings and image size settings page 1)
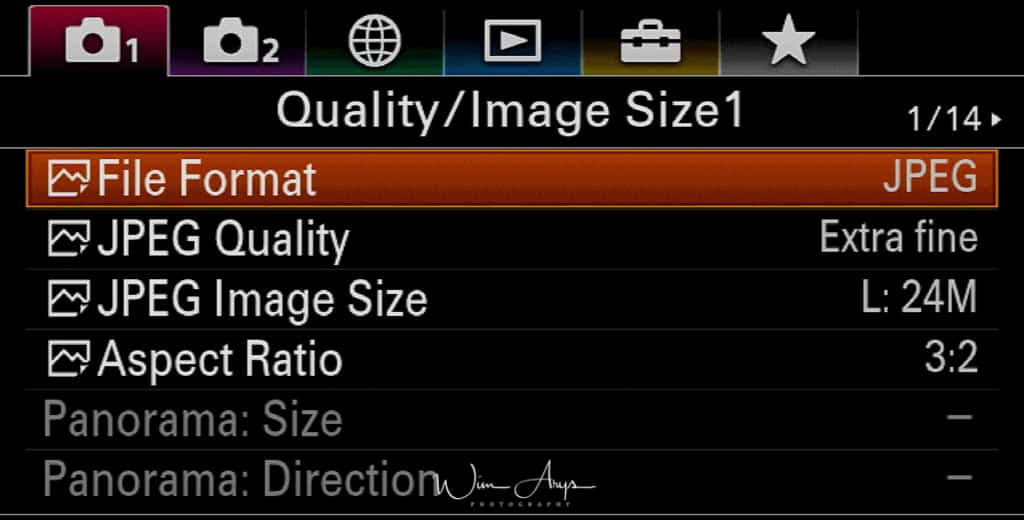
File Format:
Do you edit your pictures on your desktop? If so, set to RAW or RAW+jpeg. A RAW file saves all information the Sony A6100 pixels register during shooting and will make for better quality images if you want to edit in something like Adobe Lightroom.
RAW images recorded with this camera have a resolution of 14 bits per pixel. However, the resolution is limited to 12 bits in the following shooting modes:
- Long Exposure NR
- Bulb
- Cont. Shooting (including continuous shooting in Superior Auto)
- Silent Shooting
JPEG Quality
A jpeg is a compressed image (available in FINE (larger) and STANDARD (smaller, less quality) which takes up less space on your SD card but is less suited for editing afterward. Jpeg images will also have in-camera noise reduction applied, something you might or might not want to take care of yourself later, depending on your style and preference.
JPEG Image size:
Large, medium or small is selectable (when you set Quality to jpeg). Set it to large for optimal quality, if SD card space is an issue, you can set it to Small.
Knowing the pixel size can tell you how large you can print your images without quality degradation. There are techniques nowadays to print larger, but this information might be interesting to some.
When Aspect Ratio is set to 3:2:
- L: 24M
- M: 12M
- S: 6M
When Aspect Ratio is set to 16:9:
- L: 20M
- M: 10M
- S:5.1M
When Aspect Ratio is set to 16:9:
- L: 16M
- M: 8M
- S: 4M
Aspect ratio:
You can choose 3:2 (which uses the full sensor surface), 16:9 (crop but a more broad view) or 1:1 for Instagram. Leave as is at 3:2, you can always crop your pictures later when you shoot RAW.
Panorama Size:
(when in panorama shooting mode) Size is selectable between standard and wide. Wide means your picture will cover a larger area. Set it to standard, having to scan an even broader area when making panoramas will take some experience with the Sony A6100 to do efficiently.
Panorama direction
A panorama picture (only available in jpeg) is a composite of several images stitched together. When in this mode, you’ll see an arrow that guides you in what direction and speed you should pan the Sony A6100 to take the sequential images that will be stitched together. You can choose the path in this menu (either, up, down, left or right).
MENU – Red Camera Icon – page 2 (Quality settings and image size settings page 2)
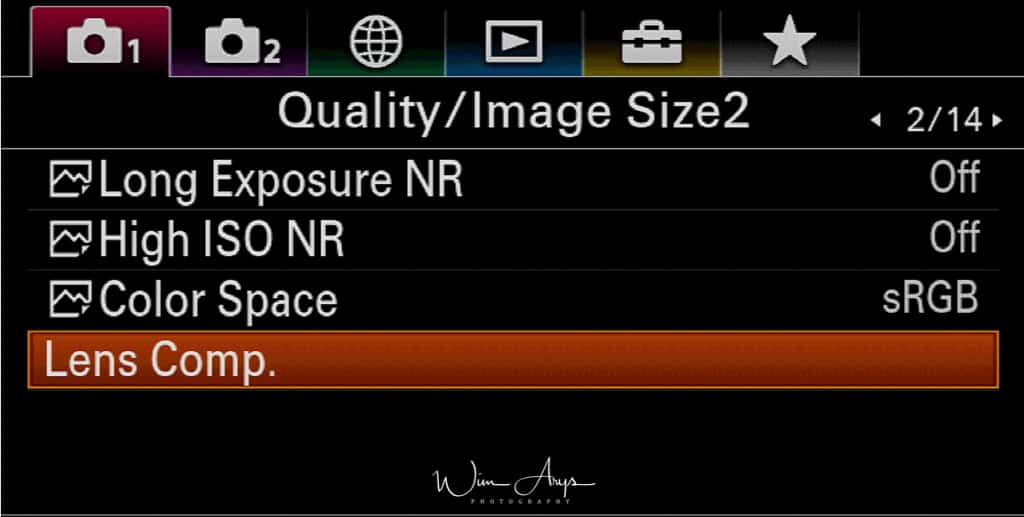
Long Exposure NR
Set if you want the processing engine to apply noise reduction for images captured with a long exposure time. Leave it ON as there is no way of duplicating this process in post-production, except to take a black frame of the same length in the same atmospheric conditions.
High ISO NR
Here you can select the amount of noise reduction applied to images with high ISO settings (when quality is set to jpeg). As Sony has rather aggressive noise reduction, I would change it to Low. (if not, you run the risk of getting paint-like, smeared images at higher ISO values).
Color Space
You can choose between Standard and Adobe (extended color range) RGB. This is only important if you shoot JPEG and not RAW. Adobe RGB would be preferable if you print many images because of the extended color range.
Lens Comp
The Sony A6100 allows you to select whether you would like to apply various lens compensations (shading, chromatic aberration, distortion) even when shooting in RAW. I leave this ON, but you might get a conflict with RAW files and using a lens profile in programs like Lightroom where you’ll see a reverse vignette for instance.
MENU –Red Camera Icon – page 3 (Shoot Mode and Drive settings page 1)
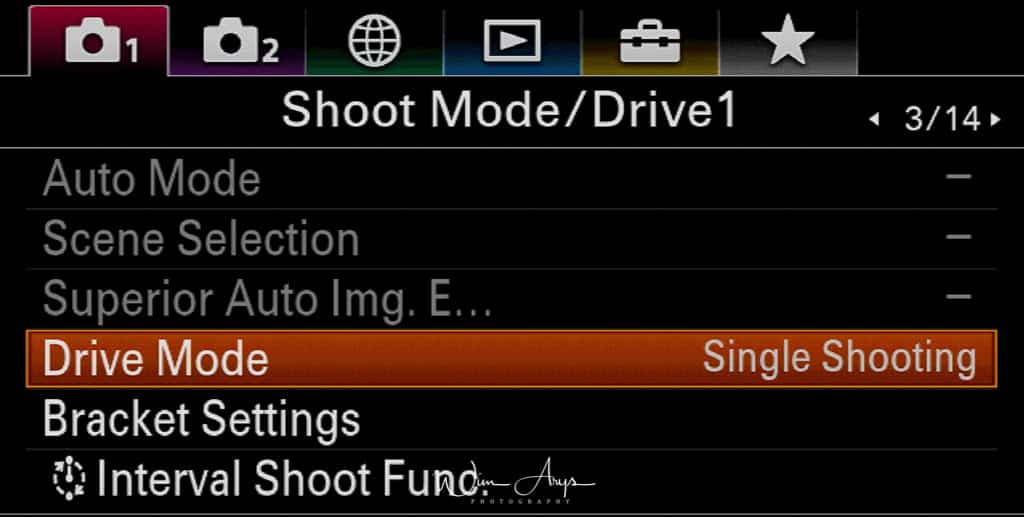
Auto Mode
Switch the auto mode between Intelligent Auto and Superior Auto.
Intelligent Auto:
This mode automatically detects the type of scene you’re shooting and adjusts the scene automatically. You’ll see the icon for the recognized scene appears on the top right hand of the screen.
These scenes are the same ones that can be selected individually in SCENE mode. The Sony A6100 will also use the most appropriate FOCUS AREA, and ISO value (the ISO range cannot be changed in iAuto though). Drive Mode (single shooting, continuous shooting Lo-Mid-Hi), Self-timer and Self-timer cont (multiple images with the self-timer) can be changed by using the Fn button. Works for both RAW and JPEG shooting. Disadvantage: ISO range is fixed to 50-6100 (you can’t change the range).
Superior Auto:
Superior Auto is similar to iAuto, as it also detects scenes automatically, except it uses more complex processing. This includes composite layering (layering different shots on top of each other for HDR style pictures) and automatically choosing what it thinks is the best image. You can either choose whether you want the Sony A6100 to save all images captured or just the composite image, by selecting S. Auto Img. Extract in the MENU system. Disadvantage: ISO range is (like in iAuto) fixed and only useable for jpeg shooting.
Scene Selection
It allows you to shoot with preset settings according to the scene. (like when setting the mode dial to SCN)
Menu item details
- Portrait: Blurs background and sharpens the subject. Accentuates the skin tones softly.
- Sports Action: Shoots a moving subject at a fast shutter speed so that the subject looks as if it is standing still. The product shoots images continuously while the shutter button is pressed.
- Macro: Shoots close-ups of the subjects, such as flowers, insects, food, or small items.
- Landscape: Shoots the entire range of scenery in sharp focus with vivid colors.
- Sunset: Shoots the red of the sunset beautifully.
- Night Scene: Shoots night scenes without losing the dark atmosphere.
- Night Portrait: Shoots night scene portraits using the flash.
- Anti Motion Blur: Allows you to shoot indoor shots without using the flash and reduces subject blur. The product shoots burst images and combines them to create the image, reducing subject blur and noise.
Superior Auto Img Extract
When in Superior Auto, the Sony A6100 takes multiple images and combines them into one (jpeg only). You can either save all images captured (OFF) or only the combined image (ON). Turn it OFF; I’ve tried this functionality, and the combined image feature does not work well.
Drive Mode
Do you want to take a single picture when you press the shutter button or multiple images? You can select this here, as well as self-timer functions and bracketing. Bracketing is taking a series of pictures, each with different settings, useful for combining your images with various exposures for HDR effects in software afterward, to name just one example.
You can also press the dedicated drive mode button to get to these settings.
- Single Shooting: Normal shooting mode.
- Cont. Shooting: Shoots images continuously while you press and hold down the shutter button.
- Self-timer: Shoots an image using the self-timer after a designated number of seconds has elapsed since the shutter button was pressed.
- Self-timer(Cont): Shoots a designated number of images using the self-timer after a designated number of seconds have elapsed since the shutter button was pressed.
- Cont. Bracket: Shoots images while holding the shutter button down, each with different degrees of brightness.
- Single Bracket: Shoots a specified number of images, one by one, each with a different degree of brightness.
- WB Bracket: Shoots a total of three images, each with different color tones according to the selected settings for white balance, color temperature, and color filter.
- DRO Bracket: Shoots a total of three images, each at a different degree of D-Range Optimizer.
Bracket Settings
You can set the self-timer in bracket shooting mode, and the shooting order for exposure bracketing and white balance bracketing.
- Self-timer during Brkt: Sets whether to use the self-timer during bracket shooting. It also sets the number of seconds until the shutter is released if using the self-timer. (OFF/2 Sec/5 Sec/10 Sec)
- Bracket Order: Sets the order of exposure bracketing and white balance bracketing.
interval shoot Func.
The Interval Shooting Function is a built-in Intervalometer that can be setup up to take images at regular intervals. Using Sony’s ‘Imaging Edge’ edit application these still images can be used to create a Time-Lapse movie. On the second page of options, you will see that there is an option for Silent Shooting which will save the wear and tear on your camera when shooting thousands of images. If you would prefer the camera to make a movie so that you don’t have to process the files you can use the new S&Q feature.
Menu item details
Interval Shooting: Sets whether to perform interval shooting. (On or Off)
- Shooting Start Time: Sets the time from when you press the shutter button to when interval shooting starts. (1 second to 99 minutes 59 seconds)
- Shooting Interval: Sets the shooting interval (time from when one exposure starts to when the exposure for the next shot starts). (1 second to 60 seconds)
- Number of Shots: Sets the number of shots for interval shooting. (1 shot to 9999 shots)
- AE Tracking Sensitivity: Sets the tracking sensitivity of the auto exposure against the change in luminance during interval shooting. If you select Low, exposure changes during interval shooting will be smoother. (High, Mid or Low)
- Silent Shoot. in Interval: Sets whether or not to perform silent shooting during interval shooting. (On or Off)
- Shoot Interval Priority: Sets whether or not to prioritize the shooting interval when the exposure mode is Program Auto or Aperture Priority and the shutter speed becomes longer than the time set for Shooting Interval.(On or Off)
A little bit of background: The A6100 was the last A6000 series camera that used the ‘PlayMemories Apps’. These Apps could be purchased from Sony to add specialized functions to the camera. One of the most useful of these was the TimeLapse App. Sony has added this functionality to the A6100 via the new Interval Shooting Function.
MENU – Red Camera Icon – page 4 (Shoot Mode and Drive settings page 2)
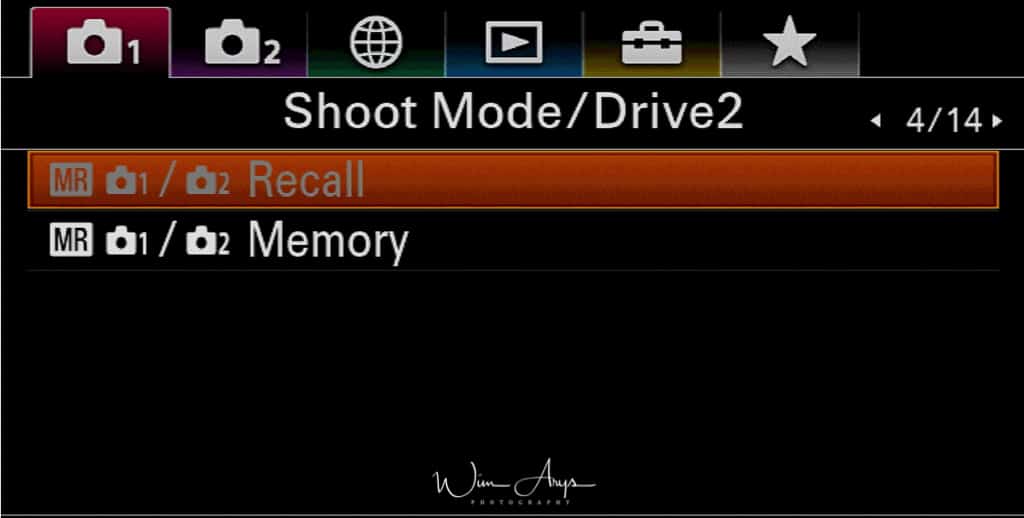
Recall (Camera Settings1/Camera Settings2)
This functionality allows you to shoot an image after recalling often-used modes or camera settings registered with the Mode Dial memory positions in advance. It is now also possible to save your camera settings to a memory card and recall them later (or on a different camera). This is done by using the ‘select Rec. media’ function inside this menu.
Memory (Camera Settings1/Camera Settings2)
This setting allows you to register up to 3 often-used modes or product settings to the product and up to 4 (M1 through M4) to the memory card. You can recall the settings using just the mode dial. You can register various functions for shooting. The items that you can register are displayed on the menu of the Sony A6100. Aperture and Shutter speed are always available. You’ll need to select your SD card first using the ‘select Rec. media’ function inside the prior menu.
MENU –Red Camera Icon – page 5 (Autofocus settings page 1)
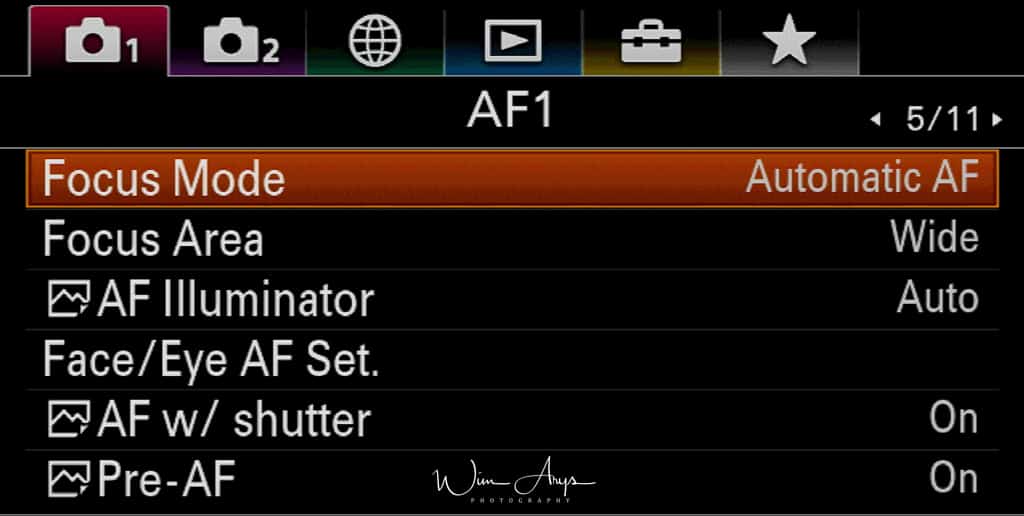
Focus Mode:
Here, you can select how the autofocus engine will behave when you half-press the shutter button. Novice users should set into AF-A. This functionality is partly dependent on what focus area you select (see next)
- AF-S: With a half-press of the shutter button, the Sony A6100 will focus only once. Suitable for capturing stills.
- AF-A: AF Automatic intelligently switches between S and C, depending on whether the camera detects movement or not. This is the standard-setting and the easiest to use.
- AF-C: The Sony A6100 will continuously focus on any movement when you half-press the shutter button.
- DMF: The Sony A6100 focuses on your subject and allows you to fine-tune your focus area further using the manual focus ring on the lens.
- MF: No autofocus is used, and you focus manually using the focus ring on the lens.
You can see a focus indicator on-screen or EVF. When it is lit, the subject is in focus and the focus is locked.
Tip: if autofocus doesn’t seem to be working, check the lens barrel to see if the AF/MF slider is set to AF. It’s also possible to assign a button for what is called ‘Focus Hold’. With Focus Hold, you can freeze your focus point when you press this button. This is often used by photographers to allow for greater flexibility in composition.
Another important fact is that in Movie mode, only Continuous AF and MF are available.
Focus area
The Sony A6100 has a dual-phase/contrast on-sensor autofocus system This makes it one of the fastest and most reliable AF systems in the world. You might think it is best to leave it on the wide factory setting (as this uses all AF points), but for certain scenes, it is often better to use a zone or flexible spot to get it to focus on what you want.
- Wide: Wide focus area uses all focus points on the sensor. Ideal for action scenes where there is a lot of movement going on in your frame.
- Zone: Select a zone on the monitor on which to focus, and the product will automatically select a focus area.
- Center: Focusses on whatever is centered on your images. A fail-proof way of getting the Sony A6100 to focus on what you want. If you have any problems using the autofocus and are in a situation where you don’t want to miss any shots, revert to Center and just make sure you have your subject-centered.
- Flexible spot: Allows you to move the focusing frame to the desired point on the touch screen and focus on an extremely small subject in a narrow area. If you want to use this focus area, set it to medium or large, as the Sony A6100 will struggle to find focus when set to small (except perhaps for close-up portraits where you’d want to focus on the iris of the eye)
- Expand Flexible Spot: If the camera can’t focus on a single selected point, it uses focus points around the flexible spot as a secondary priority area for focusing.
- Tracking: When the shutter button is pressed and held halfway down, the product tracks the subject within the selected autofocus area. This setting is available only when the focus mode is set to Continuous AF. Point the cursor at Tracking on the Focus Area setting screen, and then select the desired area to start tracking using the left/right sides of the control wheel. You can also move the tracking start area to the desired point by designating the area as a zone, flexible spot or expand flexible spot. Accurate tracking can also make a difference when you lock onto a specific part of your subject.
Tip: You can move the focus area in Flexible Spot, Expand Flexible Spot or Zone by touching the screen.
AF illuminator
The AF illuminator is a little red light allowing the Sony A6100 to focus more easily when the shutter button is pressed halfway. It automatically is switched off when you fully press the shutter. Leave it on except if you are using an underwater housing.
Face/Eye AF Set.
This function is used to determine whether or not the camera will focus on priority on human faces or eyes.

Eye AF Settings:
- Face-Priority in AF: Sets whether or not to detect faces inside the focusing area and focus on the eyes Eye AF when autofocus is activated. (On or Off)
- Subject detection: either human or animal for animal eye AF
- Right/Left Eye Select: Specifies the eye to be detected. If the Right Eye or Left Eye is selected, only the selected eye is detected. Auto: The camera detects eyes automatically. Right Eye: The right eye of the subject (the eye on the left side from the photographer’s perspective) is detected. Left Eye: The left eye of the subject (the eye on the right side from the photographer’s perspective) is detected.
- Face Detect. Frame Disp.: Sets whether or not to display the face detection frame when Face Priority in AF is set to On. (On or Off)
- Animal Eye Display: this will show a square around the eye of the animal, indicating focus.
Eye AF by custom key
The Eye AF function can also be used by assigning Eye AF to a custom key. The camera can focus on human eyes as long as you are pressing the key. This is useful when you want to temporarily apply the Eye AF function to the entire screen regardless of the setting for Focus Area.
For instance, if Focus Area is set to Flexible Spot and you want the camera to focus on an eye outside of the focusing frame, you can apply the Eye AF function by pressing the custom key to which Eye AF has been assigned, without changing Focus Area.
Switch Right/Left Eye by custom key
When Right/Left Eye Select is set to Right Eye or Left Eye, you can switch the eye to be detected by pressing the custom key to which you have assigned the Switch Right/Left Eye function.
When Right/Left Eye Select is set to Auto, you can temporarily switch the eye to be detected by pressing the custom key to which you have assigned the Switch Right/Left Eye function.
The temporary left/right selection is canceled when you perform the following operations, etc. The camera returns to automatic eye detection.
AF with shutter
Selects whether to focus automatically when you press the shutter button halfway down. Leave ON.
Pre-AF
Pre-AF by default was normally set to OFF on previous models. This can be a useful feature when taking selfies but can cause issues in Continuous AF (AF-C) with an AF Tracking Area selected. The camera is likely to latch on to a subject before you have identified which subject you would like to track. I recommend switching this to OFF if you are more interested in shooting action/sports rather than selfies.
MENU – Camera Settings – page 6 (Autofocus settings page 2)
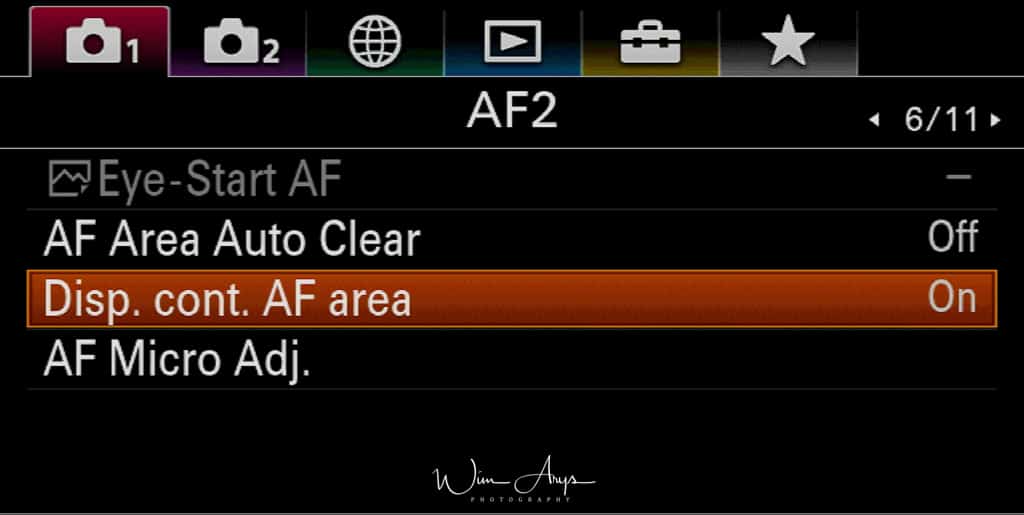
Eye-Start AF:
This configuration starts AF once the EVF sensor has detected your eye near the viewfinder. I’ve never used it personally, but some people might find this setting interesting as it can prolong battery life.
AF Area Auto Clear:
Sets whether the focus area should be displayed all the time or should disappear automatically shortly after focus is achieved.
Disp. cont. AF Area:
You can set whether or not to display the focus area that is in focus when the Focus Area is set to Wide or Zone and Focus Mode is set to Continuous AF.
AF Micro Adj.
It allows you to adjust and register autofocused positions for each lens when using an A-mount lens with the Mount Adaptor LA-EA2 or LA-EA4. In general use, you do not need to adjust the autofocused position using this function. Use this function only when adjustments are needed for certain focus areas or focal lengths. Use this function only when adjustments are needed for certain focal lengths.
MENU – Red Camera Icon – page 7 (Exposure settings)
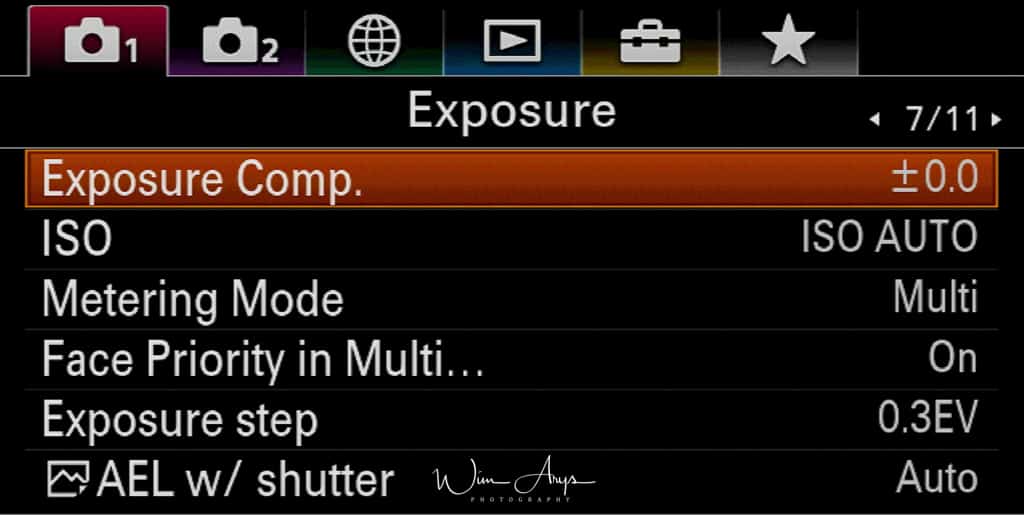
Exposure Comp
(Also available in the Quick Menu, accessed by pressing the FN button):
If you find that your image is overexposed (for instance when you are shooting at large apertures for a shallow depth-of-field in bright daylight), you can tweak the exposure compensation here in a plus or minus 5 (exact EV dependent on next step) range.
ISO
You can select at which ISO value you’d like to capture your image or change the Auto ISO range.
I have this range set between 100-3200 as this range is virtually noise-free, and I don’t like the ISO performance above 3200. In a pinch, when you’re getting blurred images due to a too long shutter speed at low ISO, you can experiment with higher ISO settings. It’s better to get a sharp but noisy image than a blurred one….
Metering Mode
This feature appeared in the A6100 and allows the user to take a spot meter reading from the position of the Spot AF point. If you change the setting to Focus Point Link you will also need to set the metering Mode and the AF Area to Spot.
Metering mode refers to the way the Sony A6100 reads the light and sets the exposure. In multi, it considers the whole frame and sets exposure according to internal algorithms programmed in camera. In spot or center, the Sony A6100 only considers what is in that spot or the center (per example, if your subject is completely black, the camera will try to compensate by overexposing the image).
- Multi: Measures light on each area after dividing the total area into multiple areas and determines the proper exposure of the entire screen (Multi-pattern metering).
- Center: Measures the average brightness of the entire screen, while emphasizing the central area of the screen (Center-weighted metering).
- Spot: Measures only the central area (Spot metering). This mode is suitable for measuring light on a specified part of the entire screen. The size of the metering circle can be selected from Spot: Standard and Spot: Large. The position of the metering circle depends on the setting for [Spot Metering Point].
- Entire Screen Avg.: Measures the average brightness of the entire screen. The exposure will be stable even if the composition or the position of the subject changes.
- Highlight: Measures the brightness while emphasizing the highlighted area on the screen. This mode is suitable for shooting the subject while avoiding overexposure.
Tip: When Spot is selected and Focus Area is set to either Flexible Spot or Expand Flexible Spot while Spot Metering Point is set to Focus Point Link, the spot metering point can be coordinated with the focus area.
Face-Priority in Multi…
Sets whether the camera measures brightness based on detected faces when Metering Mode is set to Multi.
Exposure step
You can set the setting range for the shutter speed, aperture, and exposure compensation values either .3 or .5 EV steps.
AEL w shutter
Sets whether to fix the exposure when you press the shutter button halfway down. Select Off to adjust the focus and the exposure separately.
- Auto (default setting): Fixes the exposure after adjusting the focus automatically when you press the shutter button halfway down when Focus Mode is set to Single-shot AF.
- On: Fixes the exposure when you press the shutter button halfway down.
- Off: Does not adjust the exposure when you press the shutter button halfway down. Use this mode when you want to change focus and exposure separately.
The Sony A6100 keeps adjusting the exposure while shooting in Cont. Shooting or Spd Priority Cont. mode. Operation using the AEL button is prioritized over the AEL w/ shutter settings.
MENU –Red Camera Icon – page 8 (Flash settings)
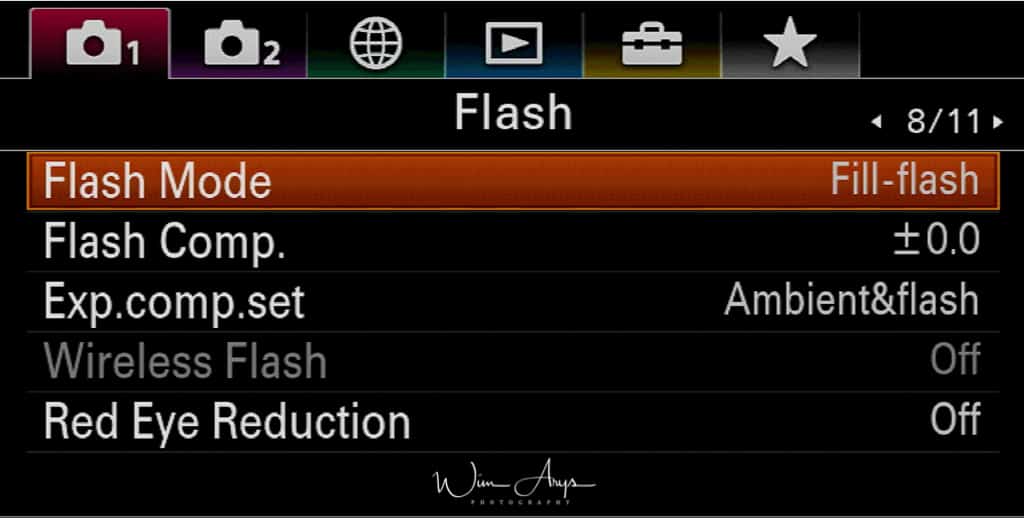
Flash Mode:
If you’re interested in flash photography, you’ll need to purchase a hot shoe flash. I would suggest a Godox, as these can both use HSS and TTL, and are quite cheap. (Also available in the Quick Menu accessed by pressing the FN button
If you’d like to get more into flash photography, you should read up on the different possibilities and what their effect would be on your images. This is a basic explanation of what the different modes do:
- fill flash: A fill flash is useful even in daylight to fill the shadows with light (like a person in the shade).
- Slow sync: Tells the camera to use a longer shutter speed along with a flash, and thus is better for night shots. In manual and shutter priority modes, there is no difference in flash power. But when using aperture priority, program, or auto, choosing slow sync tells the Sony A6100 to use a longer shutter speed than it would ordinarily pick. What the slow sync flash mode does is the first fire the flash for the subject exposure, then allow for a longer shutter speed that will allow for more ambient light to be captured by the sensor.
- Rear Sync: Capturing an image involves two shutter actions: one when the capture starts and on when it stops. Rear Sync tells the flash to fire right before the shutter closes. Moving objects will show a streak where they came from and a sharp image where they were at the end of the exposure. This conveys a sense of speed with moving objects. Rear Sync is a creative technique, if you’d like to know more about this type of photography, I’d suggest doing a Google search on ‘Rear Sync Flash Photography.’
- Wireless: Select wireless is if you want to use the in-camera flash to trigger an external flash like the Sony HVL-43M (with TTL!). Using an external flash is helpful when shooting weddings and dimly-lit subject matter, You can use your main flash to light the subject, and your external flash to light the background.
Flash comp or Flash compensation:
Especially when using Slow Sync or Rear Sync Flash modes, you might have to lower the power of the Flash to get a decently exposed image. (Also available in the Quick Menu accessed by pressing the FN button).
Exp comp set:
Selects if the Exposure compensation function (+-5 in 0.5EV or 0.3EV steps) also reduces flash power or not. Leave it to Ambient And Flash, unless if you want to use HSS sync with flashes, then it is handy to be able to control exposure and flash output separately.
Wireless Flash:
There are two methods for wireless flash shooting:
- light-signal flash shooting that uses the light of the flash attached to the camera as a signal light,
- radio-signal flash shooting that uses wireless communication. To perform radio-signal flash shooting, use a compatible flash or the Wireless Radio Commander (sold separately). For details on how to set each method, refer to the instruction manual of the flash or the Wireless Radio Commander.
Red-Eye Reduction:
This anti-Red Eye setting quickly fires the flash before your image capture starts, reducing the red-eye effect often seen when using a flash.
MENU – Red Camera Icon – page 9 (Color, White Balance, and Image processing settings page 1)
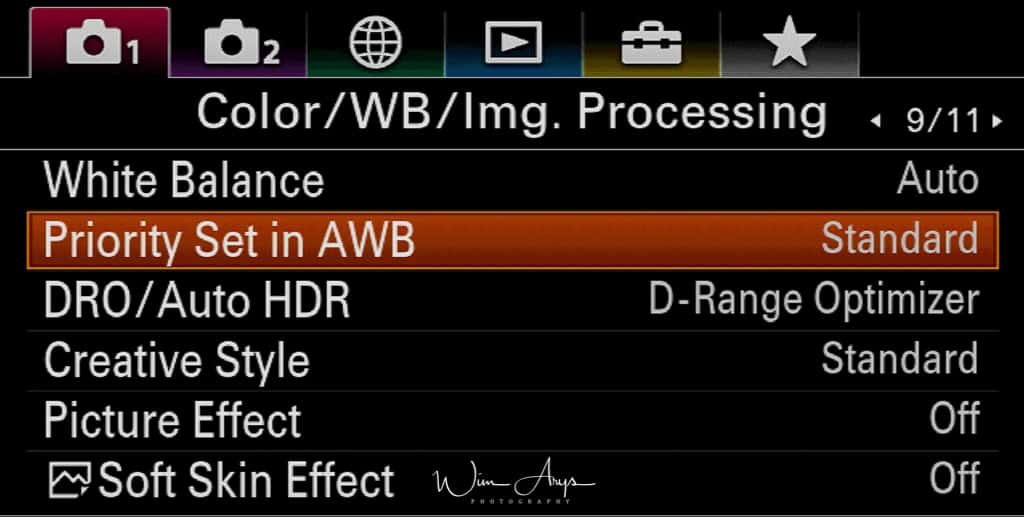
White Balance
You can either set the white balance to Auto, where the camera tries to guess what the neutral grey value is, or use one of the preset white balance settings for different lighting conditions or customize the white balance according to your preference or using a grey card.
Priority Set in AWB
Selects which tone to prioritize when shooting under lighting conditions such as incandescent light when White Balance is set to Auto.
Standard: Shoots with standard auto white balance. The camera automatically adjusts the color tones.
Ambiance: Prioritizes the color tone of the light source. This is suitable when you want to produce a warm atmosphere.
White: Prioritizes a reproduction of white color when the color temperature of the light source is low.
DRO/Auto HDR
DRO:
This stands for Dynamic range optimize and analyses the contrast of your scene in real-time. It produces an image with optimal brightness and recovered shadow detail. You can use this function even while the subject is moving or during the continuous shooting.
Auto HDR:
(not available for RAW captures) this feature Shoots three images with different exposures and then overlays the bright area of the underexposed image and the dark area of the overexposed image to create a picture with an extended range from highlight to shadow.
The highlight detail in auto HDR is better than that in DRO and with reduced noise. The shutter is released three times, so using this function for moving subjects is not recommended.
Creative Style
The Sony creative styles can best be explained as being film emulations (the same way as do some other camera manufacturers implements this). There is a range of styles available from vivid color to black and white. If you’re shooting RAW, these styles are embedded, but can always be zeroed after importing them to your RAW editor of choice. Jpegs are saved with this styling applied. It is always useful to try some of these and can be a real boost for your creativity, as you will notice that you make different images in say black-and-white as opposed to color.
- Standard: For shooting various scenes with rich gradation and beautiful colors.
- Vivid: The saturation and contrast are heightened for shooting striking images of colorful scenes and subjects such as flowers, spring greenery, blue sky, or ocean views.
- Neutral: The saturation and sharpness are lowered for shooting images in subdued tones. This is also suitable for capturing image material to be modified with a computer.
- Clear: For shooting images in clear tones with limpid colors in highlight, suitable for capturing radiant light.
- Deep: For shooting images with deep and dense colors, suitable for capturing the solid presence of the subject.
- Light: For shooting images with bright and simple colors, suitable for capturing a refreshingly light ambiance.
- Portrait: For capturing skin in a soft tone, ideally suited for shooting portraits.
- Landscape: The saturation, contrast, and sharpness are heightened for shooting vivid and crisp scenery. Distant landscapes also stand out more. Sunset: For shooting the beautiful red of the setting sun.
- Night Scene: The contrast is lowered for reproducing night scenes.
- Autumn leaves: For shooting autumn scenes, vividly highlighting the reds and yellows of changing leaves.
- Black & White: For shooting images in black and white monotone.
- Sepia: For shooting images in sepia monotone.
- You can edit these different styles and save your creative style if you want.
- This functionality can be changed:
- Contrast: The higher the value selected, the more the difference between light and shadow is accentuated, and the bigger the effect on the image.
- Saturation: The higher the value selected, the more vivid the color. When a lower value is selected, the color of the image is restrained and subdued.
- Sharpness: Adjusts the sharpness. The higher the value selected, the more the contours are accentuated, and the lower the value selected, the more the contours are softened.
Picture Effect
Think of this menu as an Instagram app right in your Sony A6100, with all kinds of retro filters and effects. These are only available when quality is set to Jpeg (Not in RAW).
- Off: Disables the Picture Effect function.
- Toy Camera: Creates a soft image with shaded corners and reduced sharpness.
- Pop Color: Creates a vivid look by emphasizing color tones.
- Posterization: Creates a high contrast, abstract look by heavily emphasizing primary colors, or in black and white.
- Retro Photo: Creates the look of an aged photo with sepia color tones and faded contrast.
- Soft High-key: Creates an image with the indicated atmosphere: bright, transparent, ethereal, tender, soft.
- Partial Color: Creates an image that retains a specific color, but converts others to black and white.
- High Contrast Mono.: It creates a high-contrast image in black and white.
- Rich-tone Mono.: Creates an image in black and white with rich gradation and reproduction of details.
Soft Skin Effect
If you’re using this camera mainly for pics of friends and family, this is an excellent feature, as it will soften and smooth skin tones make you and your beloved ones look their best. (only available when quality is set to Jpeg)
MENU – Red Camera Icon – page 10(Focus Assist settings)
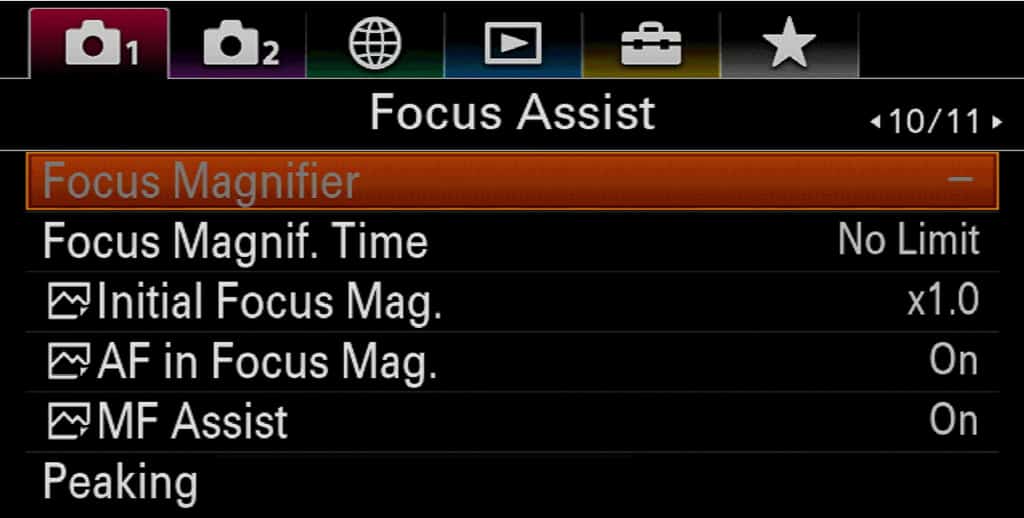
Focus Magnifier
When focussing manually or in DMF mode, you can set the Sony A6100 to magnify a part of the screen so you can check focus. This sub-menu allows you to select the part of the image that will be magnified during shooting.
Focus Magnif Time
You can set how long to hold the magnified area during MF assist. 2 sec, 5 seconds or no limit. 2 seconds is how I have it set up.
AF in Focus Mag.
You can focus on the subject more accurately using auto-focus by magnifying the area where you want to focus. While the magnified image is displayed, you can focus on a smaller area than the flexible spot.
Magnify the image by pressing the center of the control wheel, and then adjust the position using top/bottom/right/left of the control wheel.
Press the shutter button halfway down to focus.
Press the shutter button down to shoot.
MF assist
This works in conjunction with the Focus Magnifier found on this page too You might remember that you can select the area to magnify there when using manual focus (MF). MF assist will need to be turned on if you want to use this feature.
Peaking
Peaking Level
Peaking Level is a manual focusing aid that works when you have your Sony A6100 set to MF or DMF.
Peaking Color
You can choose the color of this Peaking between Red, white, blue and yellow. I have it set to red, as this contrasts nicely with most scenes you capture.
MENU – Red Camera Icon – page 11 (Face Detection and shoot assist settings)
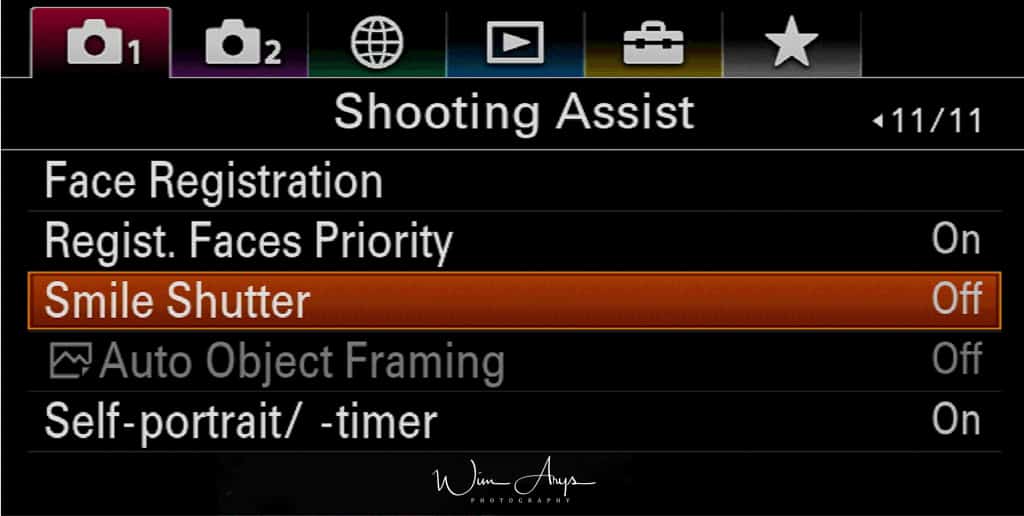
Face Registration
If you register faces in advance, the product can detect the registered face as a priority when [Face Detection] is set to [On (Regist. Faces)]. Shoot the face from the front in a brightly lit place. The face may not be registered correctly if it is obscured by a hat, a mask, sunglasses, etc.
- MENU – Camera Settings 1 – Face Registration – New Registration
- Align the guide frame with the face to be registered, and press the shutter button.
- When a confirmation message appears, select Enter.
Regist. Faces Priority
Sets whether to focus with higher priority on faces registered using Face Registration when Face Priority in AF]is set to On.
Smile Shutter
Great for selfies as the camera automatically shoots an image when it detects a smiling face. Up to 8 faces of your subjects can be detected.
Auto Object Framing
When enabled, the Sony 6100 will automatically crop your captured image to what it deems best. Meaning it will cut the picture for a nicer composition. Only available for Jpegs, though, a nice feature if you don’t want to bother too much with the technical side of photography.
Self-portrait/ -timer
As you probably know, you can change the angle of the monitor and shoot images while watching the monitor.
Simple turn this setting on, flip the screen and press the shutter button. The camera will start shooting after three seconds.
MENU – Purple Camera Icon – page 1 (Movie settings page 1)
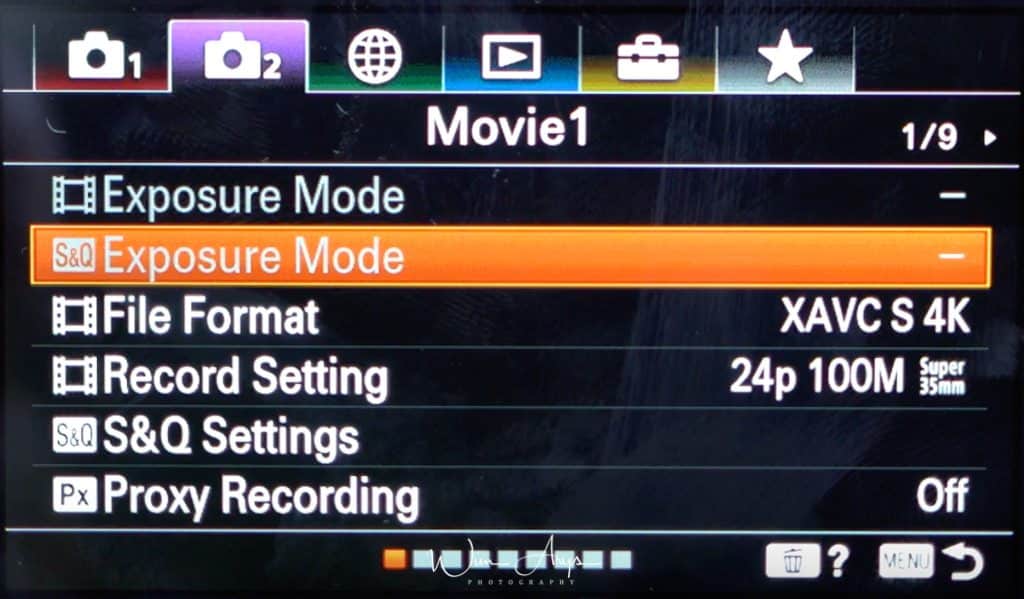
Exposure Mode
You can select the exposure mode for movie shooting here.
- Program Auto / Program Auto: Allows you to shoot with the exposure adjusted automatically (both the shutter speed and the aperture value).
- Aperture Priority / Aperture Priority: Allows you to shoot after adjusting the aperture value manually.
- Shutter Priority / Shutter Priority: Allows you to shoot after adjusting the shutter speed manually.
- Manual Exposure / Manual Exposure: Allows you to shoot after adjusting the exposure (both the shutter speed and the aperture value) manually.
S&Q Exposure Mode
You can select the exposure mode for slow-motion/quick-motion shooting. You can change the setting and playback speed for slow-motion/quick-motion shooting with S&Q Settings later.
- Program Auto / Program Auto: Allows you to shoot with the exposure adjusted automatically (both the shutter speed and the aperture value).
- Aperture Priority / Aperture Priority: Allows you to shoot after adjusting the aperture value manually.
- Shutter Priority / Shutter Priority: Allows you to shoot after adjusting the shutter speed manually.
- Manual Exposure / Manual Exposure: Allows you to shoot after adjusting the exposure (both the shutter speed and the aperture value) manually.
File Format (video)
You can choose between XAVC S 4K, XAVC S H or AVCHD. You’ll need a fast UHS Speed Class U3 SD card to record at 100 Mbps or more.
- XAVC S 4K: Records 4K movies in the XAVC S format. This format supports a high bit rate. Audio: LPCM
- XAVC S HD: Records HD movies in the XAVC S format. This format supports a high bit rate. Audio: LPCM. The file size of movies is limited to approx. 2 GB. If the movie file size reaches approx. 2 GB during recording, a new movie file will be created automatically.
- AVCHD: Records HD movies in the AVCHD format. This file format is suitable for high-definition TV. Audio: Dolby Digital
Record-Setting (video):
You can choose the quality of the recorded video here. Select the image size, frame rate, and image quality for movie recording. The higher the bit-rate, the higher the picture quality. Frame- and bit-rate differ depending on your movie file format.
When File Format is set to XAVC S 4K you have these options:
- 30p or 25p 100M: (Records movies in 3840×2160).
- 30p or 25p 60M: (Records movies in 3840×2160).
- 24p 100M: Records movies in 3840×2160 (24p).
- 24p 60M: Records movies in 3840×2160 (24p).
When File Format is set to XAVC S HD you have these options:
- 60p 25M/50p 25M: Records movies in 1920×1080 (60p/50p).
- 30p 50M/25p 50M: Records movies in 1920×1080 (30p/25p).
- 30p 16M25p 16M: Records movies in 1920×1080 (30p/25p).
- 24p 50M: Records movies in 1920×1080 (24p).
- 120p 100M/100p 100M: Records high-speed movies in 1920×1080.
- 120p 60M/100p 60M: Records high-speed movies in 1920×1080.
When File Format is set to AVCHD you have these options:
- 60i 24M(FX)/50i 24M(FX): Records movies in 1920×1080.
- 60i 17M(FH)/50i 17M(FH): Records movies in 1920×1080.
S&Q settings
You can do slow-motion recording or record quick-motion recording. The sound will not be recorded. In a slow-motion recording, the shutter speed becomes faster and you may not be able to obtain the proper exposure. If this happens, decrease the aperture value or adjust the ISO sensitivity to a higher value.
How to record slow-motion movie on the Sony A6100:
- Set the mode dial to (Movie/S&Q Motion).
- Select MENU- (Camera Settings2)-[Movie/S&Q Motion]- and select the desired setting of slow-motion/quick-motion (S&Q) ( Program Auto, Aperture Priority, Shutter Priority, or Manual Exposure).
- Select MENU- (Camera Settings2)-[ S&Q Settings] and select the desired settings for [ Record Setting] and [ Frame Rate].
- Press the MOVIE (movie) button to start recording. Press the MOVIE button again to stop recording.
Record-Setting: Selects the frame rate of the movie.
Frame Rate: Selects the shooting frame rate.
Playback speed: The playback speed will vary as below depending on the assigned Record-Setting and the Frame Rate.
Proxy Recording
MENU –Purple Camera Icon– page 2 (Movie settings page 2)

AF Drive Speed (movie)
You can switch focusing speed when using autofocus in movie mode.
- Fast: Sets the AF drive speed to fast. This mode is suitable for shooting active scenes, such as sports.
- Normal: Sets the AF drive speed to normal.
- Slow: Sets the AF drive speed to slow. With this mode, the focus switches smoothly when the subject to be focused is changed.
AF Track Sens (movie)
You can set the AF sensitivity separately in movie mode.
- Responsive: Sets the AF sensitivity to high. This mode is useful when recording movies in which the subject is moving quickly.
- Standard: Sets the AF sensitivity to normal.
- Locked on: Sets the AF sensitivity to low. You can shoot with a stable focus by ignoring the influence of anything in front of the subject.
Auto Slow Shut. (movie)
Sets whether or not to adjust the shutter speed automatically when recording dark scenes.
- On: Uses Auto Slow Shutter. The shutter speed automatically slows when recording in dark locations. You can reduce noise in the movie by using a slow shutter speed when recording in dark locations.
- Off: Does not use Auto Slow Shut. The recorded movie will be darker than when On is selected, but you can record movies with smoother motion and less object blur.
Initial Focus Mag. (movie)
Sets the initial magnification scale for the Focus Magnifier functionality in the movie shooting mode. You can choose between 1 or 4 times magnification to check focus.
Audio Recording
You can switch off audio recording in movie mode. When you record audio movies with loud volumes, set Audio Rec Level to a lower sound level. Doing so enables you to record more realistic audio. When you record audio movies with lower volumes, set Audio Rec Level to a higher sound level to make the sound easier to hear. Regardless of the Audio Rec Level settings, the limiter always operates.
Audio Rec Level
You can adjust the audio recording level while checking the level meter.
MENU -Purple Camera Icon- page 3 (Movie settings page 3)
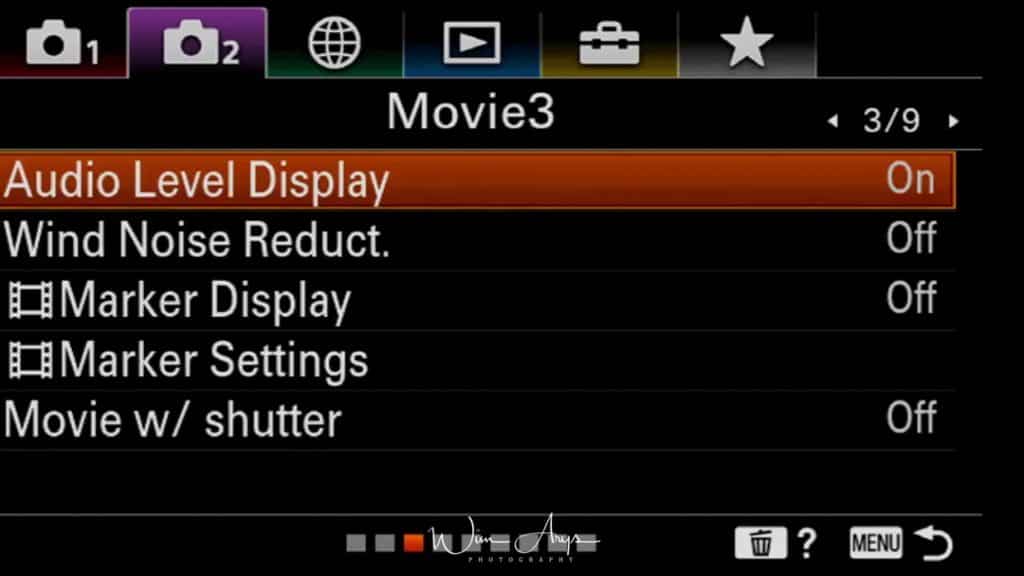
Audio Level Display
Sets whether to display the audio level on the screen.
Don’t see the audio level display?
- Check if Audio Recording]is set to Off.
- Check if DISP (Display Setting) is set to No Disp. Info.
During slow-motion/quick-motion shooting, audio is automatically turned OFF.
Wind Noise Reduction
This helps reduce noise from the wind during video recording.
Marker Display (movie)
Select if you want guidelines (a grid) in movie mode. The markers are displayed on the monitor or viewfinder
Marker Settings (movie)
Sets the markers to be displayed while shooting movies. You can display several markers at the same time.
- Center: Sets whether or not to display the center marker in the center of the shooting screen. (Off or On)
- Aspect: Sets the aspect marker display. (Off, 4:3, 13:9, 14:9, 15:9, 1.61:1, 1.85:1, 2.35:1)
- Safety Zone: Sets the safety zone display. This becomes the standard range that can be received by a general household TV. (Off, 80%, 90%)
- Guide frame: Sets whether or not to display the guide frame. You can verify whether the subject is level or perpendicular to the ground.
Movie w/ shutter
You can start or stop recording movies by pressing the shutter button, which is bigger and easier to press than the Movie button.
MENU – Purple Camera Icon- page 4 (Shutter and Steadyshot settings)
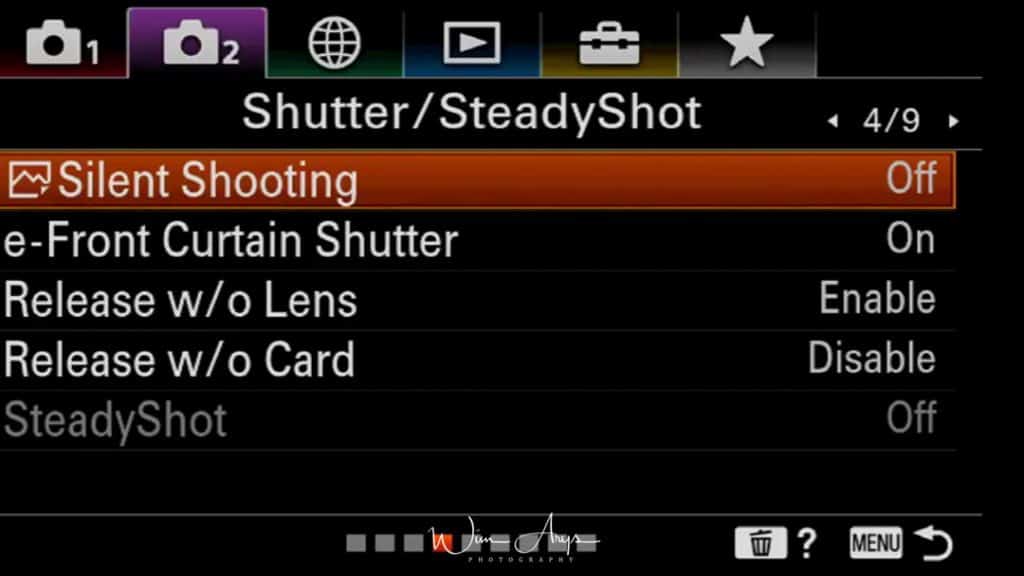
Silent Shooting
You can shoot images without the shutter sound, i.e. only using the electronic shutter.
e-Front Curtain Shut.
This shortens the time lag between shutter releases. When you shoot at high shutter speeds with a large diameter lens attached, the ghosting of a blurred area may occur, depending on the subject or shooting conditions. When a lens made by another manufacturer (including a Minolta/Konica-Minolta lens) is used, set this function to Off. If you set this function to On, the correct exposure will not be set or the image brightness will be uneven.
Release without lens
It makes it possible to capture images even if a lens is not supported by the Sony A6100. (Like when using an adapter with vintage lenses)
Release without card
If set to Off, you won’t be able to engage the shutter when there is no SD card in the slot. This is a useful failsafe to prevent you from shooting images without the ability to save them.
SteadyShot
Sets whether or not to use the SteadyShot (digital) function. For optimal sharpness, turn it off when using a tripod.
MENU – Purple Camera Icon- page 5 (zoom settings)
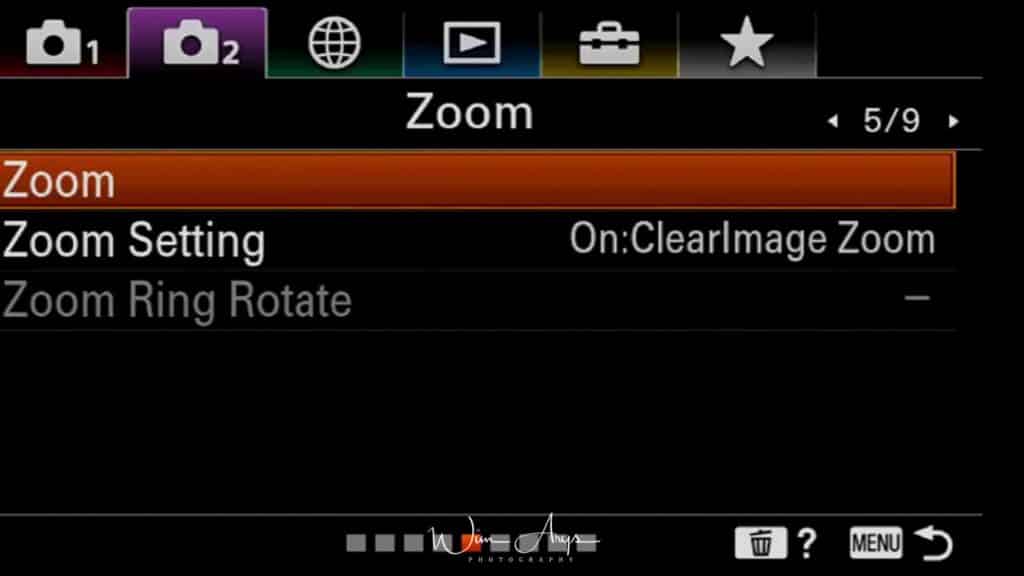
Zoom
Turn the digital zoom functionality on or off.
Zoom setting
Set to Optical zoom only (using the optical zoom capabilities of your lens. Two other settings are available which use digital zoom (cropping of the original image).
Digital zoom:
Pictures captured by the image sensor of the Sony A6100 are enlarged using digital signal processing. As the magnification level increases, signals to be also estimated growth and can reduce the picture quality.
Clear Image Zoom:
Zoomed images are captured close to the original quality when shooting a still picture. The camera first zooms to the maximum optical magnification, then uses Clear Image Zoom technology to enlarge the image an additional 2x, producing clear, sharp images despite the increased zoom ratio. If you don’t have a zoom lens, this might be an option as the Sony A6100 uses the RAW file to zoom; although still some image quality will be lost.
Zoom ring rotate
Assigns zoom in (T) or zoom out (W) functions to the zoom ring rotation direction. Available only with power zoom lenses that support this function.
MENU – Purple Camera Icon- page 6 (Display and Auto Review settings page 1)
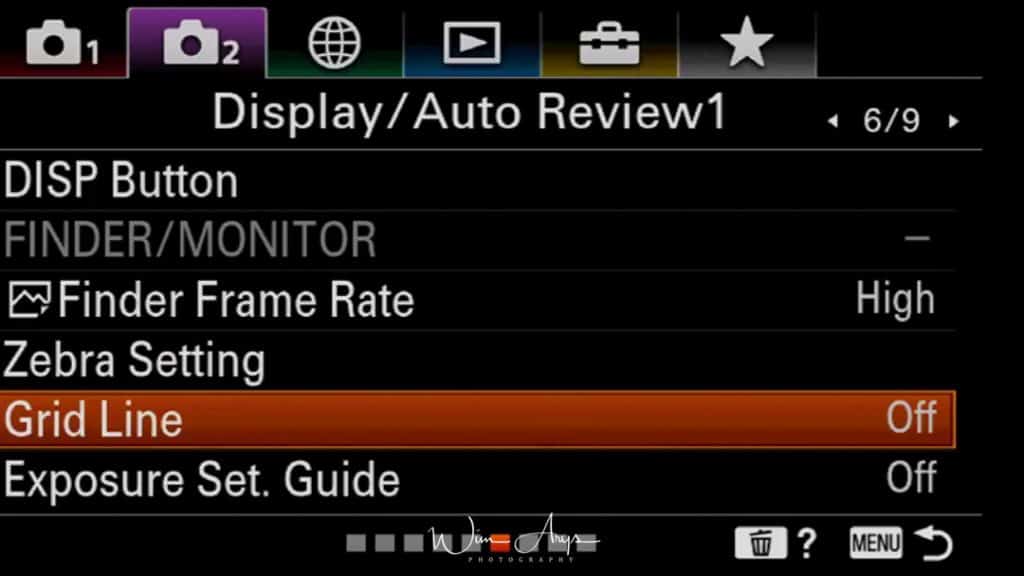
Disp button
Selects the functionality (what is shown) on the screen when you press the DISP button (on the control wheel). You can choose Graphic Display, all info, no disp info, and histogram.
Finder/Monitor
You can set the behavior of the EVF and screen here. Do you want your screen on all the time, switch between screen and EVF once your eye has been detected near the viewfinder? Or turn the screen off and only use the EVF? It can all be selected here.
Finder Frame Rate
Display the subject’s movements more smoothly by adjusting the frame rate of the viewfinder during still image shooting. This function is convenient when shooting a fast-moving subject.
- 120fps/100fps: Displays the movements of the subject more smoothly on the viewfinder.
- 60fps/50fps: Displays the subject at a normal frame rate on the viewfinder.
Zebra setting
The zebra function shows a zebra pattern on the screen while shooting in any area that is in danger of highlight clipping.
You can switch this OFF or anywhere in a range between 70 and 100.
The Zebra Pattern is a highlight warning indicator that is common in video cameras. It does not control exposure but just warns you that your highlights are blown out. It is not recorded in the resulting image.
I have it set halfway at around 75, and it is a very useful indication of correct exposure of the entire scene.
Grid Line
Sets whether the grid line is displayed or not. The grid line will help you to adjust the composition of images.
- Rule of 3rds Grid: Place main subjects close to one of the grid lines that divide the image into thirds for a well-balanced composition.
- Square Grid: Square grids make it easier to confirm the horizontal level of your composition. This is suitable to determine the quality of the composition when shooting landscape, close-up, or duplicated images.
- Diag. Square Grid: Place a subject on the diagonal line to express an uplifting and powerful feeling.
- Off: Does not display the grid line.
Exposure set guide
The exposure set guide is an on-screen scroller that tells you the relation between your chosen aperture and the appropriate shutter speed for the scene you are shooting. I find this quite handy, but you can turn it off if you don’t.
MENU – Purple Camera Icon- page 7 (Display and Auto Review settings page 2)
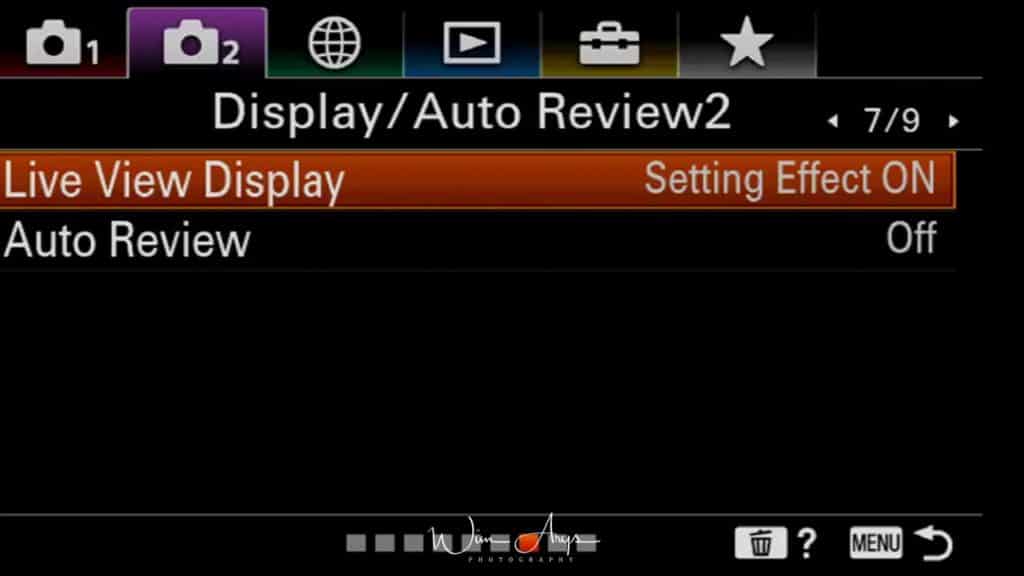
Live View Display
Live view display allows you to see the image you’re going to capture with the settings you have dialed-in like aperture and shutter speed. Some users report easier autofocusing in low light when it’s turned OFF, and you’d need to turn it off when using external flashes too that can’t be used with Sony’s TTL (through the lens) functionality.
Auto Review
You can check your captured image on the screen directly after shooting. You can select how long the image will stay on the screen (10, 5 or 2 seconds). I find this very annoying, so I turned it off. If you want to review your image, you can simply press play to do so.
MENU – Purple Camera Icon- page 8 (Custom operation settings page 1)
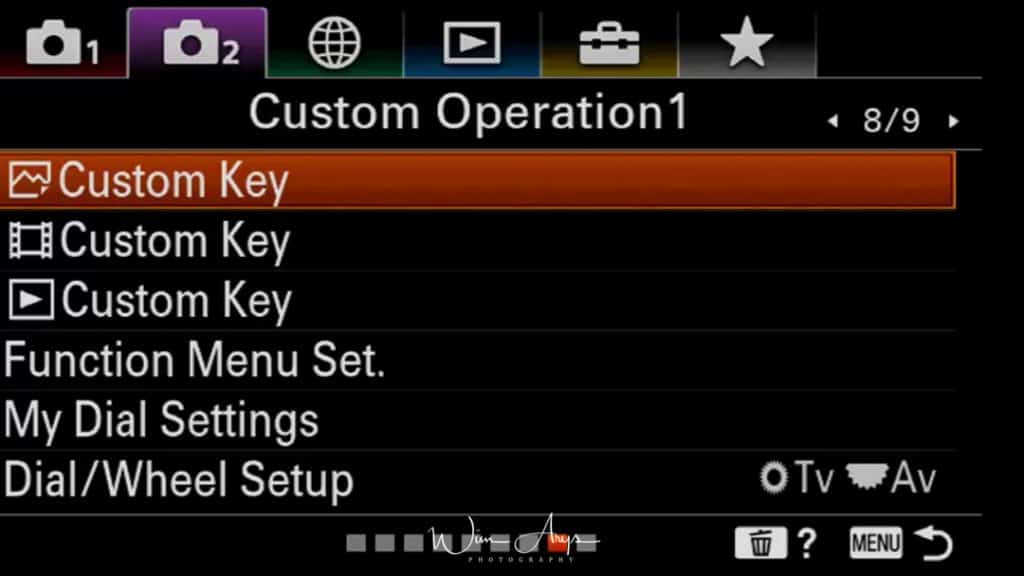
Custom Key(Shoot.)/Custom Key(PB)
You can assign the desired function to the desired key. Some functions are available only when they are assigned to a custom key.
The keys that can be assigned functions are different for Custom Key Shoot.]and Custom Key PB.
You can assign the desired functions to the following keys. You can also assign a shooting function to the focus hold button on the lens. However, some lenses do not have a focus hold button.2 1.
- Custom Button 1
- Custom Button2
- AF/MF Button/AEL Button
- Fn/ Button
- Control Wheel (Center Button/Down Button/Left Button/Right Button)
- Custom Button 3
In the Custom Key menu, I have assigned the AEL button to cycle between the 6 remaining AF area. I typically start wide and only come down in size if I am trying to avoid picking up subjects that are nearer to the camera than my primary subject. Some will start with an Expand Flexible Spot but you have to be quick at moving the Spot onto a moving target to start the tracking to be successful.
Before the new AF Tracking, I would normally recommend people to use a Wide or Zone AF area and only use Lock-on AF Areas when obstacles might appear in front of the subject. Now I will be recommending ‘Tracking’ as the default AF Area for shooting action/sports.
Function Menu Set.
You can assign the functions to be called up when you press the Fn (Function) button.
My Dial Settings
You can switch the functions of the front/rear dial between shutter speed and aperture.
Dial/Wheel Setup
You can switch the functions of the control dial and the control wheel.
MENU – Purple Camera Icon- page 9 (Custom operation settings page 2)
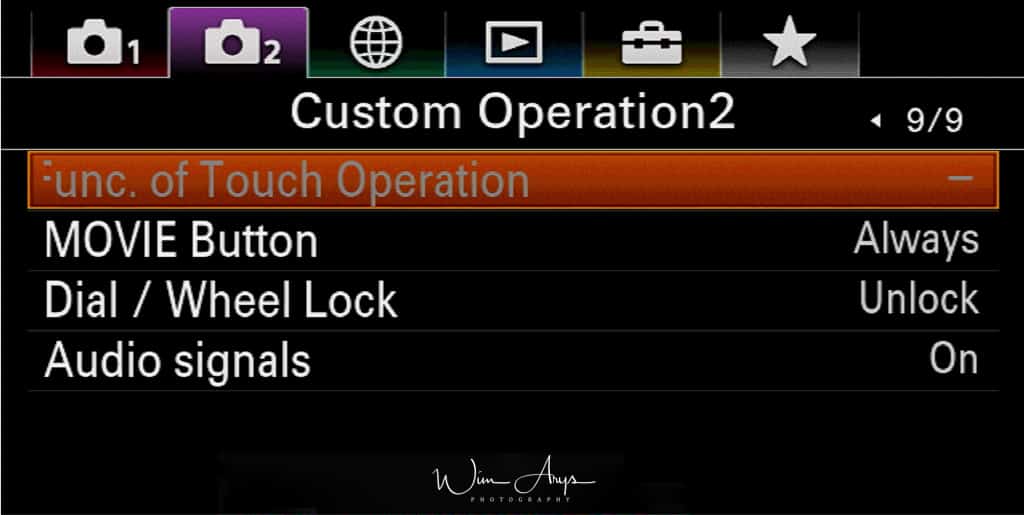
Func. of Touch Oper.
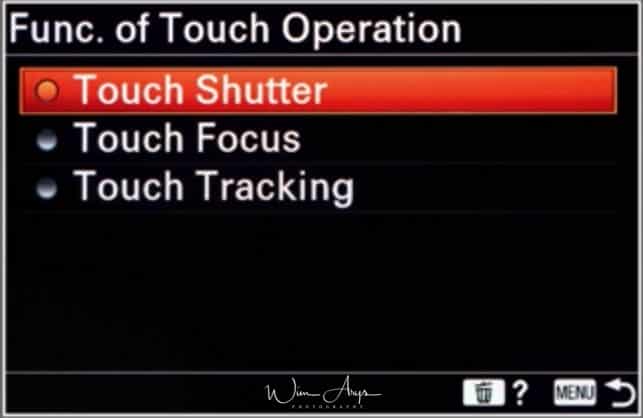
Select the functionality of the touch screen. There are three choices:
- Touch Shutter: When you shoot using the monitor, the camera automatically focuses on the point you touch and shoots a still image.
- Touch Focus: You can select a subject on which to focus using touch operations in the still image and movie recording modes.
- Touch tracking: select your subject via the touch screen to start tracking.
MOVIE Button
Sets whether or not to activate the Movie button.
Always: Starts movie recording when you press the MOVIE button in any mode.
Movie Mode Only: Starts movie recording when you press the MOVIE button only if the shooting mode is set to “Movie/S&Q Motion” mode.
Dial/Wheel Lock
You can set whether the dials and wheels will be locked by pressing and holding the Fn (Function) button. You can release the lock by holding the Fn (Function) button down again.
- Lock: Locks the front and rear dials when you press and hold the Fn button.
- Unlock: The front or rear dials are not locked, even if you press and hold the Fn (Function) button.
Audio Signals
Selects whether the product produces a sound or not, for example when the focus is achieved by pressing the shutter button halfway down.
MENU – Network Settings – page 1 (Wireless settings page 1)
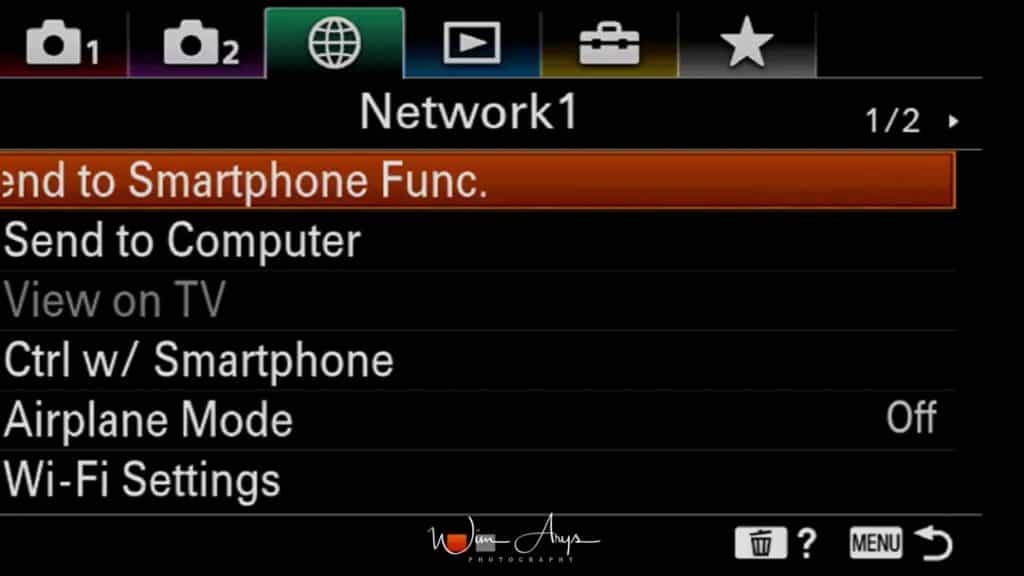
Send To Smartphone
You can send one or several images directly to your wireless device (phone or tablet) by pressing this button.
You can either decide to choose which images you want to transfer on the Sony A6100 or the wireless device (via the Sony PlayMemories app, available for free in the apple or android store).
You’ll have to connect the-the camera via Wifi first (it makes a Wifi access point), using the instruction on the A6100 screen.
It works just like connecting to any other access point with your phone or tablet.
You should do this as quickly as possible, just to get it out of the way.
When your phone has wirelessly connected to the camera once, and you’ve entered the password, it will remember this, and make it a lot faster to connect later.
Send to Computer
You’ll need to connect the computer physically to the Sony A6100 using the supplied USB cable, and you can push selected pictures to your Sony PlayMemories desktop software (installed from the CD or downloaded from their website). This can even be set up to continue pushing images after the camera has turned off.
View On TV
If you have a Wifi-enabled TV, you can see pictures and slideshows directly from your Sony A6100 through your home wireless network.
One Touch NFC
Enables Quick, one-touch connection (as opposed to first accessing the camera’s wireless network and then navigating to the Playmemories app) with NFC (near-field communication) capable devices.
I have not tried this (as my iPhone does not have NFC), but it looks a lot easier to use.
Airplane Mode
Disables all wireless functionality, just like airplane mode does on your phone.
Wi-Fi Settings:
WPS Push
If your access point has the Wi-Fi Protected Setup (WPS) button, you can register the access point to this product easily by pushing the Wi-Fi Protected Setup (WPS) button.
Access Point Set.
You can register your access point manually. Before starting the procedure, check the SSID name of the access point, security system, and password. The password may be preset on some devices. For details, see the access point operating instructions, or consult the access point administrator.
Disp MAC Address
Displays the MAC address of your Sony ILCE-A6100.
SSID/PW Reset
Your Sony A6100 shares the connection information for [Send to Smartphone] and [ Connection Info.] with a device that has permission to connect. If you want to change the device that is permitted to connect, reset the connection information.
MENU – Network Settings – page 2 (Wireless settings page 2)
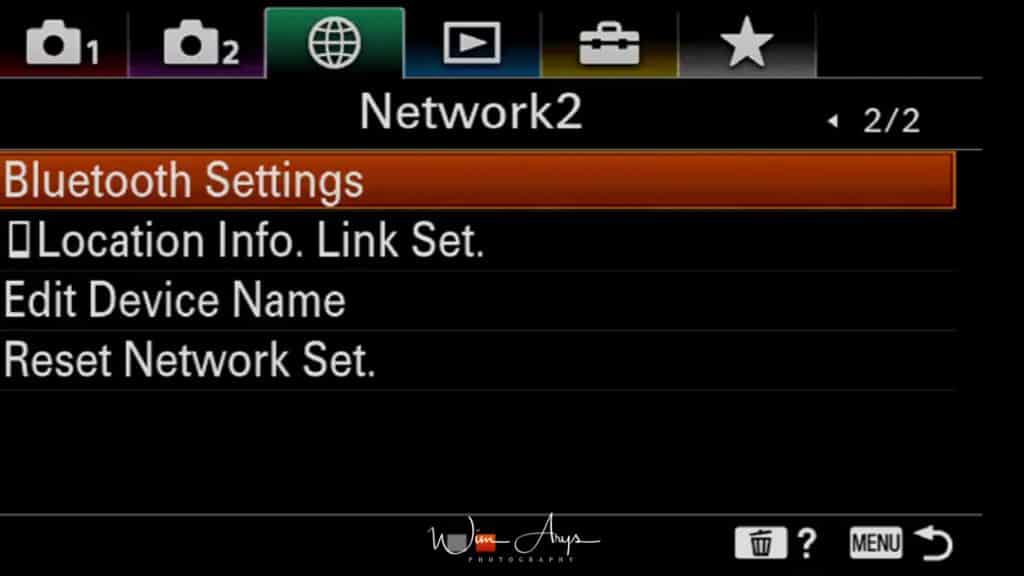
Bluetooth Settings
Controls the settings for connecting the camera to a smartphone via a Bluetooth connection. You need to pair the camera and smartphone before using the location information interlocking function. If you want to pair the Sony A6100 and smartphone to use the location information interlocking function, refer to “Loc. Info. Link Set..”
Loc. Info. Link Set
You can use the application PlayMemories Mobile to obtain location information from a smartphone that is connected with your camera using Bluetooth communication. You can record the obtained location information when shooting images.
To use the location information linking function of the Sony A6100, you need the PlayMemories Mobile application on your smartphone and transfer an image to your smartphone to test the connection
Procedure:
Confirm that the Bluetooth function of your smartphone is activated. (Do not perform the Bluetooth pairing operation on the smartphone setting screen!!! In steps 2 to 7, the pairing operation is performed using the camera and the application PlayMemories Mobile. If you accidentally perform the pairing operation on the smartphone setting screen in step 1, cancel the pairing and then perform the pairing operation by following Steps 2 through 7 using the camera and the application PlayMemories Mobile.)
- On the camera, select MENU – (Wireless) – [Bluetooth Settings] – [Bluetooth Function] – [On].
- On the camera, select MENU – (Wireless) – [Bluetooth Settings] – [Pairing].
- Launch PlayMemories Mobile on your smartphone and tap “Location Information Linkage.”
- Activate [Location Information Linkage] on the [Location Information Linkage] setting screen of PlayMemories Mobile.
- Select [OK] when a message is displayed on the monitor of the camera. The pairing of the camera and PlayMemories Mobile is complete.
- On the camera, select MENU – (Wireless) – [ Loc. Info. Link Set.] – [Location Info. Link] – [On].
- (obtaining location information icon) will be displayed on the monitor of the camera. Location information obtained by your smartphone using GPS, etc., will be recorded when shooting images.
Options in this Menu:
- Location Info. Link: Sets whether to obtain the location information by linking it with a smartphone.
- Auto Time Correct.: Sets whether to automatically correct the date setting of the Sony A6100 using information from a linked smartphone.
- Auto Area Adjust.: Sets whether to automatically correct the area setting of the camera using information from a linked smartphone.
Edit Device name
If you wish, you can change the name of the Device Access point) perhaps to make it easier to identify which A6100 is yours in particular situations.
Reset Network set
Resets all network settings.
If something does not function properly, and you want to start from scratch, can be useful.
MENU – playback options – page 1 (Playback settings page 1)
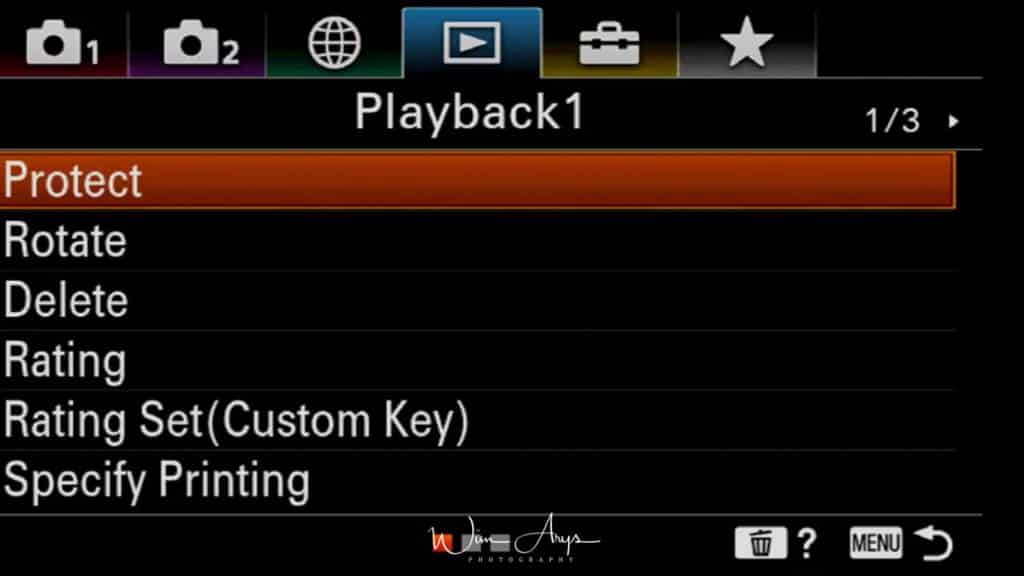
Protect
Set your camera to not shoot images without inserting an SD card.
Rotate
Change the orientation of images in-camera.
Delete
Delete one or multiple images stored on your SD cards.
Rating
Rate your images in-camera for easy culling in Lightroom afterward.
Rating Set (Cust Key)
Set a custom key for easy rating.
Specify Printing
Specify Printing is a feature that allows images to be marked for printing later. Registered images are displayed with the DPOF mark. (DPOF stands for Digital Print Order Format)
MENU – playback options – page 2 (Playback settings page 2)
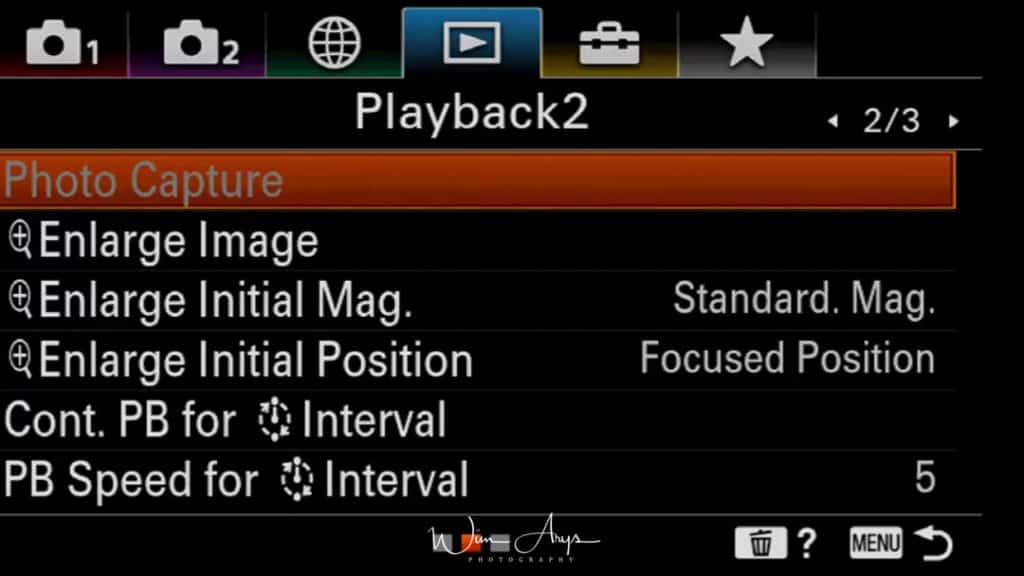
Photo Capture
Captures a chosen scene in a movie to save as a still image. First, shoot a movie, then pause the movie during playback to capture decisive moments that tend to be missed when shooting still images, and save them as still images.
Enlarge Image
Select an image and expand a portion of that picture. Useful for checking details and focus.
Enlarge Initial Mag.
Sets the initial magnification scale when playing back enlarged images.
Enlarge Initial Position
Sets the initial position when enlarging an image in playback. You can select either the image center or the focus position.
Cont. PB for interval
Continuously plays back images shot using interval shooting.
You can create movies from still images produced by interval shooting using the computer software Imaging Edge. You cannot create movies from the still images on the camera.
PB Speed for interval
Sets the playback speed for still images during Continuous PB for an interval.
MENU – playback options – page 2 (Playback settings page 3)
Slide Show
Select whether you want the camera to repeat slideshows when all pictures are viewed or not, and choose the interval between slides.
View Mode
Select how the camera will arrange captured pictures in the viewing browser.
Image Index
Choose whether you want the image browser to display 12 (larger) or 30 (smaller) images per page.
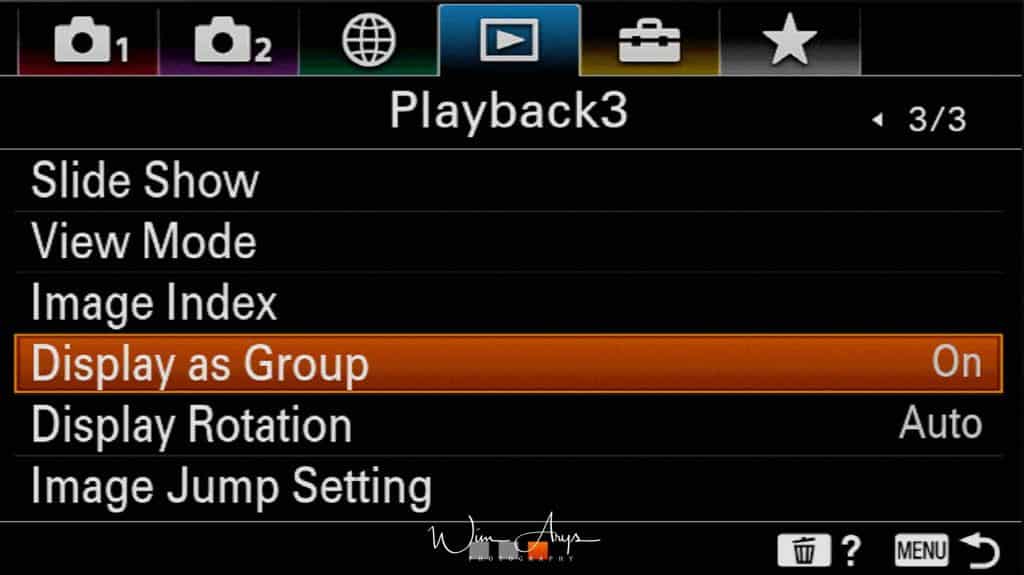
Display as group
When shooting bursts of images in Continuous Shooting it is possible during playback to see the groups of images rather than all images. When cycling through the groups you can see individual images in that group by pressing the Center Button in the Control Wheel.
Display Rotation
Select whether you want the camera to rotate images automatically when you rotate the camera or not.
Image Jump Setting
Image Jump Settings allows you to choose which images you choose to see when reviewing them in Playback, e.g., you can choose only to see your rated images. This will be useful to implement when you want to show somebody just your hero images from the day’s shoot.
You can see all images by using the dial you have NOT assigned to see only the rated images.
MENU – Camera Setup – page 1
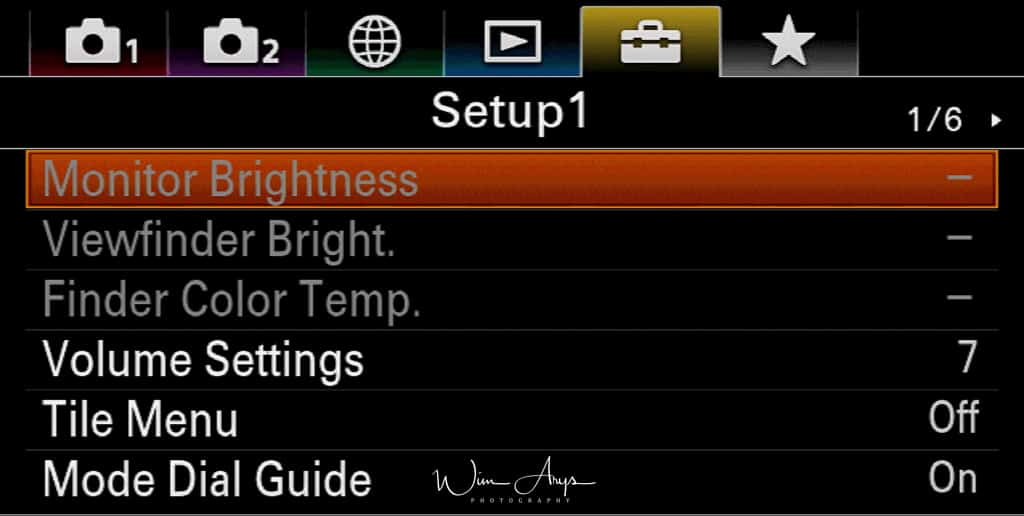
Monitor Brightness
Manually set the Monitor brightness (recommended leave to zero) or change to a brighter setting for Sunny Weather.
Viewfinder Brightness
Set to Auto, which adapts to the lighting circumstances or manually changes to your preferred setting.
Finder Color Temp
Change the color temperature of the viewfinder (colder-warmer) to you liking. I don’t make any adjustments here.
Volume settings
Modify the playback volume for recorded video or demos.
Title Menu
choose between tiles or a tiled front page when accessing the MENU or a linear tab style menu layout.
Mode Dial Guide
Turn the description for each shooting mode ON or OFF. Can be handy at first for a novice user to get familiar with what the different shooting modes do.
MENU – Camera Setup – page 2
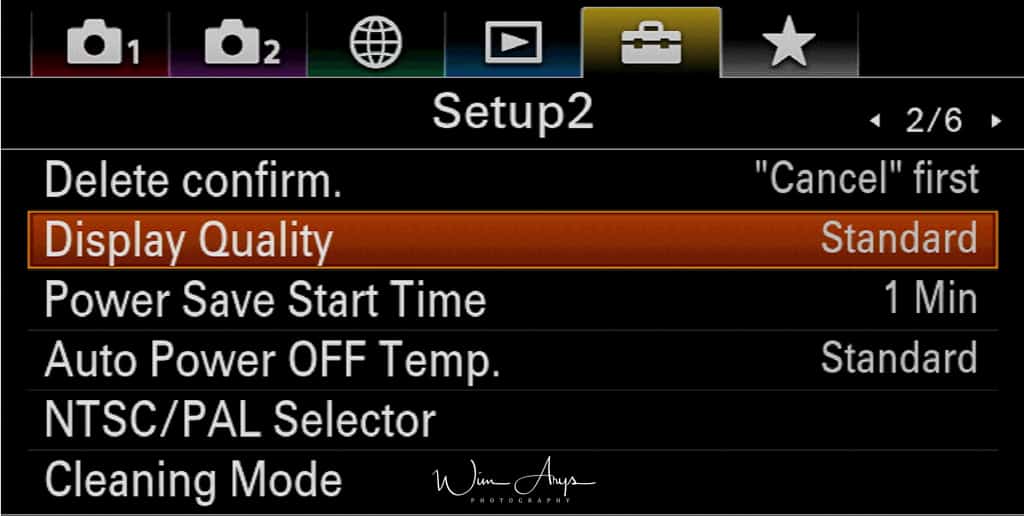
Delete Confirm
When deleting images on your SD card, you’ll have to confirm every deletion (to make sure you don’t accidentally delete anything). You can turn Off this confirmation here if you wish.
Display Quality
You can change the display quality from standard to high at the expense of shorter battery life.
Power Save Start time
Sets time intervals to automatically switch to power save mode when you are not performing operations to prevent wearing down the battery pack. To return to shooting mode, perform an operation such as pressing the shutter button halfway down. I have it set to 5 minutes, a good balance between usability and battery life.
Auto Power OFF Temp.
Sets the temperature of the camera at which the Sony A6100 turns off automatically during shooting (overheating). When it is set to High, you can continue shooting even when the temperature of the camera gets hotter than normal. Do not shoot while holding the camera in your hand as it can cause burns. Use a tripod. This will give you a 9-minute increase in movie recording at high ambient temperatures.
NTSC/PAL Selector
Plays back movies recorded with the product on an NTSC/PAL system TV.
Cleaning Mode
If dust or debris gets inside the Sony A6100 and adheres to the surface of the image sensor (the part that converts the light to an electric signal), it may appear as dark spots on the image, depending on the shooting environment. If this happens, follow the steps below to clean the image sensor.
MENU – Camera Setup – page 3

Touch Operation
Sets whether or not to activate touch operations on the monitor. Touch operations when shooting with the monitor are referred to as “touch panel operations,” and touch operations when shooting with the viewfinder are referred to as “touch pad operations.”
Touch Panel/Pad
- Touch Panel+Pad: Activates both the touch panel operations when shooting with the monitor and touchpad operations when shooting with the viewfinder.
- Touch Panel Only: Activates only the touch panel operations when shooting with the monitor.
- Touch Pad Only: Activates only the touch pad operations when shooting with the viewfinder. Off: Deactivates all touch operations.
- Off: Deactivates all touch operations.
Touch Pad Settings
Sets the area to be used for touchpad operations when shooting with the viewfinder. You can prevent unintentional operations caused by your nose, etc. touching the monitor.
- Whole Screen: Uses the entire monitor as the touchpad.
- Right 1/2 Area: Uses only the right half of the monitor as the touchpad.
- Right 1/4 Area: Uses only the right quarter of the monitor as the touchpad.
Demo Mode
The Demo Mode function displays the movies recorded on the memory card automatically (demonstration) when the Sony A6100 has not been operated for a certain time. Normally select Off.
HDMI Settings
When you connect the product to a High Definition (HD) TV with HDMI terminals using an HDMI cable (sold separately), you can select HDMI Resolution to output images to the TV.
- Auto: The product automatically recognizes an HD TV and sets the output resolution.
- 2160p/1080p: Outputs signals in 2160p/1080p.
- 1080p: Outputs signals in HD picture quality (1080p).
- 1080i: Outputs signals in HD picture quality (1080i).
4K Output Select
Outputs still image in 4K resolution to an HDMI-connected TV that supports 4K.
MENU – Camera Setup – page 4
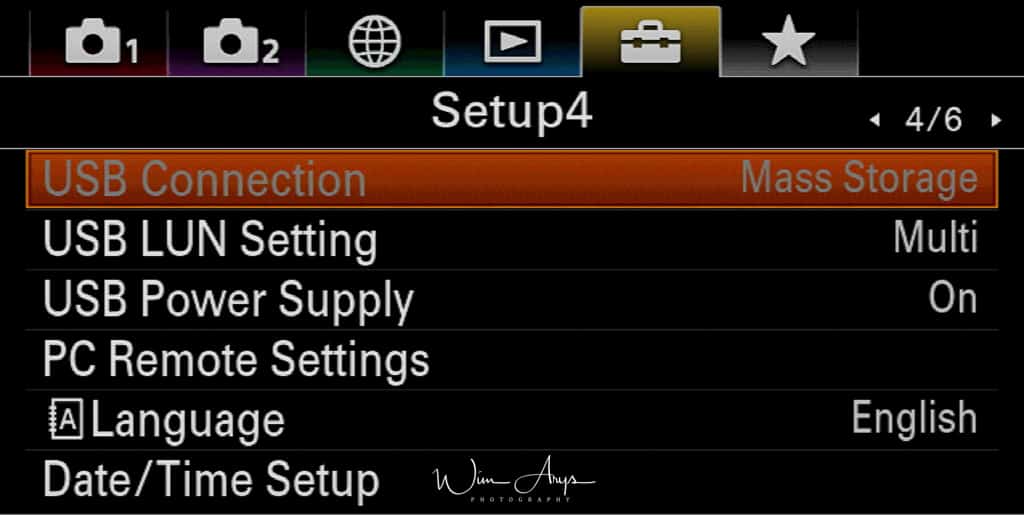
USB connection
Selects what will happen when you connect your Sony A6100 to your PC or MAC.
Auto: Establishes a Mass Storage or MTP connection automatically, depending on the computer or other USB devices to be connected. Windows 7 or Windows 8 computers are connected in MTP, and their unique functions are enabled for use.
Mass Storage: Establishes a Mass Storage connection between this product, a computer, and other USB devices.
MTP: Establishes an MTP connection between this product, a computer, and other USB devices. Windows 7 or Windows 8 computers are connected in MTP, and their unique functions are enabled for use.
PC Remote: Uses “Remote Camera Control” to control this product from the computer, including such functions as shooting and storing images on the computer
USB LUN Setting
It improves compatibility with external devices by limiting the functions of the USB connection. Older devices that are not able to connect to the Sony A6100 might work when set to single. Otherwise, use Multi.
USB Power Supply
You can extend battery life by providing a power supply over USB.
PC Remote settings
Sets whether to save still images stored in both the camera and the computer during PC Remote shooting. This setting is useful when you want to check recorded images on the camera without leaving the camera.
Language
Selects the language to be used in the menu items, warnings, and messages.
Date/Time Setup
The Clock Set screen is displayed automatically when you turn on your A6100 for the first time.
MENU – Camera Setup – page 5

Area Settings
Sets where in the world where you are using your camera.
Format
When you use a memory card with this camera for the first time, we recommend that you format the card using the Sony A6100 for the stable performance of the memory card. Note that formatting permanently erases all data on the memory card, and is unrecoverable.
File Number
Name your files according to some shots or reset it to start from 1.
Select REC folder
Selects where the Sony A6100 will store newly captured images.
New Folder
Make a new folder for quickly organizing events and locations.
Folder name
Choose whether to have folder names in standard form (DSC) or create a new one by date. Setting folders by date will make organizing your images easier.
MENU – Camera Setup – page 6
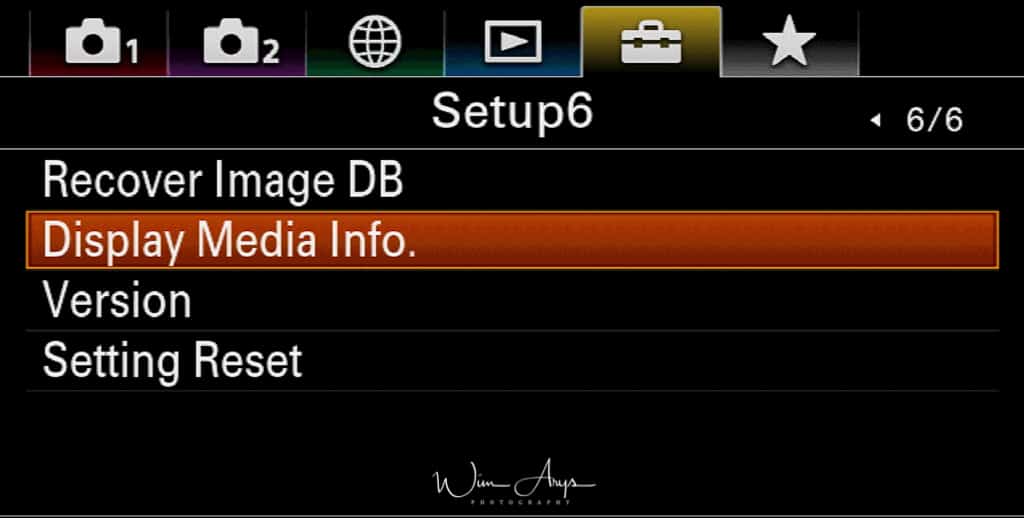
Recover Image DB
If you have a storage card error, you can try to rebuild the database to retrieve lost images possibly.
Display media info
You can check how much space is left on your SD card (have pictures in your desired quality and how many minutes of video)
Version
Check what version of the operating system your camera and the lens is running. Sony sporadically releases updates with new features, so it might be worth checking if any new firmware versions are available.
Setting Reset
Fully resets the Sony A6100 to factory settings.
The Next Chapter is about the various shooting Modes available, another concept that is necessary to understand fully.
Shooting modes available via the Mode Dial
Intelligent Auto:
This mode automatically detects the type of scene you’re shooting and adjusts the scene automatically. You’ll see the icon for the recognized scene appears on the top right hand of the screen. These scenes are the same ones which can be selected individually in SCENE mode. The Sony A6100 will also use the most appropriate FOCUS AREA, and ISO value (the ISO range cannot be changed in iAuto though). Drive Mode (single shooting, continuous shooting Lo-Mid-Hi), Self-timer and Self-timer cont (multiple images with the self-timer) can be changed by using the Fn button. Works for both RAW and JPEG shooting. Disadvantage: ISO range is fixed to 50-6100 (you can’t change the range).
P (Program Auto):
Program (P) mode automatically adjusts exposure and aperture according to your desired setting. See this as a more advanced iAuto mode, as you’ll be able to change all other settings through the touch screen (Focus area, creative style, exposure compensation,…); tip: lower the automatic ISO range to 100-1600 for better image quality (ISO-Auto range in MENU SYSTEM)
A (Aperture Priority):
Allows you to adjust the aperture and shoot, for example when you want to blur the background (large aperture like f/1.8), or want a sharp corner-to-corner image (around f/5.6-f/8). The aperture value can be changed during movie recording, a technique that will be familiar to videographers. Smaller F-value: The subject is in focus, but objects in front of and beyond the subject are blurred (what is called Bokeh). Larger F-value: The subject and its foreground and background are all in focus. If proper exposure cannot be set, the shutter speed on the shooting screen blinks.
S (Shutter Priority):
The go-to mode if you can’t shoot fast-moving subjects, by manually adjusting the shutter speed. You can express the movement of a moving subject in various ways by changing the shutter speed, for example, at the instant of motion with a high-speed shutter, or as a trailing image with a low-speed shutter. The shutter speed can be changed while recording movies. The aperture is automatically adjusted to obtain proper exposure. If a correct exposure cannot be obtained, the aperture value on the shooting screen blinks.
Use a tripod to prevent blurring when you use a slow shutter speed.
M (Manual Exposure):
Both shutter speed and the aperture value can be changed in this mode, also during movie recording. Press the bottom side of the control wheel to select the shutter speed or aperture value, then turn the control wheel to select a value. When ISO Auto is used, the ISO value automatically changes to achieve the appropriate exposure using the aperture value and shutter speed you have set.
If the aperture value and shutter speed you have set are not suitable for adequate exposure, the ISO value indicator will blink.
Bulb Mode in Manual exposure
Bulb is the mode used to shoot a trailing picture of a subject’s’ movement with a long exposure time. Think light trails from cars, or fireworks.
Set the mode dial to M (Manual Exposure).
Tips:
Use a tripod for long exposures.
Can’t get the shutter speed to Bulb Mode? Check these settings and turn them OFF:
Is Smile Shutter activated?
Movie:
Although you can capture movies in any mode, it is easiest to change all related settings for video recording here. You can adjust the shutter speed or aperture value to your desired settings for recording movies. You can also check the image angle before shooting. Press the MOVIE button to start recording and again to stop recording. Menu:
Program Auto: Allows you to shoot with the exposure (both the shutter speed and the aperture value) adjusted automatically. Other settings can be set manually, and the settings are retained.
When a zoom lens is mounted, you can also zoom by operating that lens. When a motor zoom lens is mounted, move the zoom lever of the zoom lens to enlarge subjects.
Sweep Panorama:
Allows you to shoot a panoramic image by compositing the footage.
Panorama mode will capture a series of images in succession.
TIP: Panorama size (standard or wide) and panning direction can be changed in the MENU–.
Scene Selection Mode (SCN)
It allows you to shoot with preset settings according to the scene. iAuto and Superior Auto detect these scenes automatically for you and applies the presets it deems best and does an excellent job at that. However, in certain circumstances (when you know what you are going to capture) it is better to select the appropriate scene yourself, as it takes the guessing work out of the equation. The Sony A6100 has a decent range of well-designed presets:
Portrait:
Blurred background for a beautiful Bokeh, and sharpens the subject. How good this will look relies heavily on the lens you’re using. A zoom is less suited to this kind of photography; best use a prime, fast lens. This preset accentuates the skin tones softly (you can select skin softening for all Modes in the Menu system too).
Sports Action:
Shoots a moving subject at a fast shutter speed so that the subject looks as if it is standing still. The product shoots images continuously while the shutter button is pressed.
Macro:
Shoots close-ups of the subjects, such as flowers, insects, food, or small items.
Landscape:
Shoots the entire range of scenery in sharp focus with vivid colors. The Sony A6100 will go to a smaller aperture to achieve this, as lenses are sharper corner-to-corner at smaller apertures.
Sunset:
Shoots the red of the sunset beautifully.
Night Scene:
Shoots night scenes without losing the dark atmosphere. Will go to higher ISO values and larger apertures to achieve a useable shutter speed, enabling you to capture sharp images without blur.
Hand-held Twilight:
Shoots night scenes with less noise and blur without using a tripod. A burst of shots are taken, and image processing is applied to reduce subject blur, camera shake, and noise.
Night Portrait:
Shoots night scene portraits using the flash. The flash does not pop up automatically. Pop up the flash manually before shooting.
Anti Motion Blur:
It allows you to shoot indoor shots without using the flash and reduces subject blur. The product shoots burst images and combines them to create the image, reducing subject blur and noise.
Other essential Sony A6100 functions
Eye AF
Eye AF has been totally updated since the A6100. Its no longer necessary to push a button to engage Eye AF. It is now also possible to select either the left or the right Eye!
Face Priority in AF:
Sets whether or not to detect faces inside the focusing area and focus on the eyes (Eye AF) when autofocus is activated. ([On]/[Off])
Right/Left Eye Select:
Specifies the eye to be detected. If [Right Eye] or [Left Eye] is selected, only the selected eye is detected.
[Auto]: The camera detects eyes automatically.
[Right Eye]: The right eye of the subject (the eye on the left side from the photographer’s perspective) is detected.
[Left Eye]: The left eye of the subject (the eye on the right side from the photographer’s perspective) is detected.
Face Detect. Frame Disp.:
Sets whether or not to display the face detection frame when [Face Priority in AF] is set to [On]. ([On]/[Off])
Auto Obj. Framing (not available in RAW)
Menu – Red camera icon- page 13- Auto Obj. Framing – desired setting (On or Off)
When the A6100 detects and shoots faces, macro shooting subjects or subjects that are tracked by Lock-on AF, the Sony A6100 automatically trims the image into an appropriate composition and saves it.
Live View Display
MENU – purple camera icon – page 7 – Live View Display – desired setting
Live view shows your images as they’ll appear out of the camera, with effects of the exposure compensation, white balance, Creative Style, or Picture Effect on the screen.
- Setting Effect ON (default setting and Intelligent Auto, Superior Auto, Sweep Panorama, Movie or Scene Selection): Displays Live View in conditions close to what your picture will look like as a result of applying all your settings. This setting is useful when you want to shoot pictures while checking the results of the shot on the Live View screen. Live View is always displayed with the appropriate brightness even in Manual Exposure mode.
- Setting Effect OFF: Shows Live View without the effects of exposure compensation, white balance, Creative Style, or Picture Effect. This is useful for precisely checking your composition in particular conditions. Like when you use a third-party Flash, such as a studio flash, Live View Display may be dark for some shutter speed settings.
e-Front Curtain Shut.
MENU – purple camera icon – page 4 – e-Front Curtain Shut – desired setting ON or OFF
Yes the Sony A6100 has an electronic front curtain shutter! This shortens the time lag between shutter releases.
Remember that when you shoot at high shutter speeds with a large diameter lens attached, the ghosting of a blurred area may occur, depending on the subject or shooting conditions.
When a lens made by another manufacturer (including a Minolta/Konica-Minolta lens) is used, turn this function off. If you set this function to On, the correct exposure will not be set, or the image brightness will be uneven.
Lens compensation features
The Sony A6100 has a range of built-in lens compensation functions. I can see this being useful for journalism and sports shooters who want to quickly get their jpegs to their editors with the minimum amount of editing.
Shading Comp.
MENU – Red camera icon – page 2 – Lens Comp – Shading Comp – desired setting ( Auto or Off)
Compensates for the shaded corners of the screen caused by certain lenses.
The Shading Comp function is only available with certain A-mount lenses.
Chromatic Aberration Compensation
MENU -Red camera icon – page 2 – Lens Comp – Chro. Aber. Comp – desired setting (Auto or Off)
Reduces the color deviation at the corners of the screen, caused by certain lens characteristics.
The Shading Comp function is only available with certain A-mount lenses.
Distortion Compensation
MENU -Red camera icon – page 2 – Lens Comp – Distortion Comp – desired setting (Auto or Off)
Compensates for the distortion of the screen, caused by particular lens characteristics.
The Shading Comp function is only available with certain A-mount lenses and with some cannot be turned Off.
Memory card issues
Some people have reported problems with certain memory cards. These problems include:
- Unable to magnify images on the card.
- Buffer related problems.
- Inability to read the memory card.
- SD, SDHC, SDXC memory card and Memory Stick PRO Duo, Pro-HG Duo, PRO-HG HX Duo media are all supported.
Make sure you:
- Format the memory card once you’ve inserted it in the camera.
- If you’re using fast burst speeds, use a fast card (32GB 95MB/s read and 45mB/s) write is my recommendation to take advantage of the Sony A6100 FR and Buffer.
- If you’re using larger cards (64 or 138GB), make sure you get the fastest available.
- An SDHC UHS-I card (stands for “Ultra High Speed”) is recommended for best performance in burst mode.
- Sandisk Extreme Pro SDHC UHS-I cards seem to work very well.
Conclusion
Here it is, the advanced manual for the Sony A6100 with plenty of tips and tricks to get you started. If you’re somewhat overwhelmed by this large post, I would suggest that you use the search function in a browser like Chrome at first to find the subject you are actually looking for.
If you have any questions or need extra information on any subject covered here, feel free to write something in the comments section below. Have Fun!

Hi,
Where can I find ‘AF Area Registration’ and ‘Reg. custom shoot set’ in the Sony a6100 menu?
Thanks
Hi Lars, these settings are not on the A6100.
Thank you 1,000,000 times over. This is very helpful and just what I need to really dig into my camera. Cheers!
This was a very thorough and helpful look at exploring and understanding the menu. Thank you!
how can I find, have it those all 425 af points or less. Is that automatic or must to do manually?
You need to be in A, P, S or M modes, not in Automatic.
Is there any option to shoot photos in REAL color (not Standard)for accurate reproduction of colors?
You can calibrate your camera with a colour chart from Datacolor and other suppliers. Each camera brand has their own colour science, one is more realistic than the other.
This is wonderful information – I’ve learned more here than in four months of owning the a6100. This ought to be included by Sony in every new camera kit.
One question – I’ve somehow changed my picture review screen and cannot determine how to change it back. Instead of simply displaying my pictures, it displays a four color graph on the right side and the shooting information (f stop, shutter speed, ISO and other information) below the small picture. How do I remove that information from my display after a shot?
have you tried pushing the DISP (up) button on the back Marty?
Thank you so much for this guide.
One question- I have a hard time reading on the computer screen, is their a way to print this out so I can read a hard copy and make notes for myself?