Olympus E-PL9 settings, tips and tricks
Olympus E-PL9 settings, tips and tricks
Introduction
If you’re looking for an advanced guide for the Olympus E-PL9 with tips and tricks to improve your understanding of this little wonder, you’ve come to the right place.
I believe that the best way to learn all the features and functions is to have a good look at the menu system and gradually try to understand how everything works. This might take some time if you’ve never owned a Olympus mirrorless, and even if you have, the menus have totally changed it this product.
You can bookmark this page and simply refer back to it or continue reading whenever you feel like it.  So take your Pen, press the Menu button and follow along.
Olympus E-PL9 menu run-through
MENU → camera icon 1 → shooting menu page 1
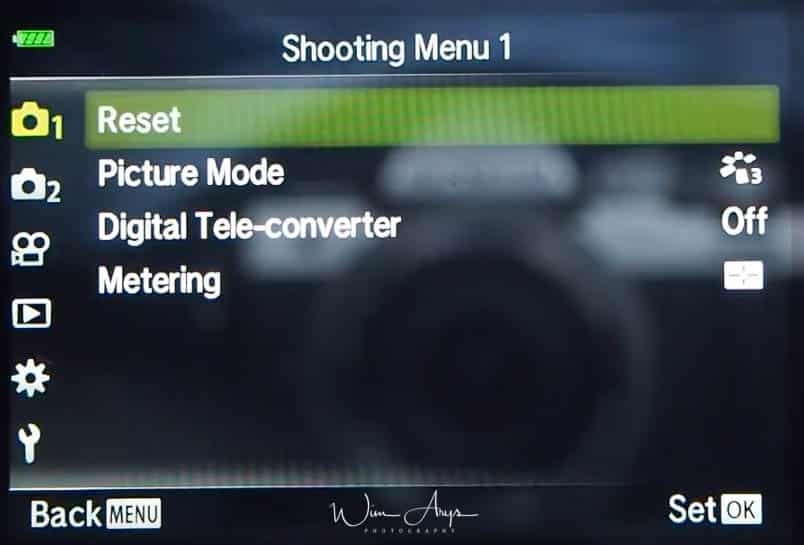
Reset:
The Olympus E-PL9 settings can be easily restored to default settings. To reset all settings except the time, date, and a few others, highlight Full and press the Q button.
Picture Mode:
You can make individual adjustments to contrast, sharpness and other parameters in Picture Mode settings. Changes to parameters are stored for each picture mode separately.
Digital Tele-converter:
Digital Tele-converter is used to zoom in beyond the current zoom ratio. The Olympus E-PL9 saves the center crop. The subject is nearly doubled in size. When a RAW image taken with Digital Tele-converter, the area visible in the monitor is indicated by a frame.
Metering:
You can choose how the Olympus E-PL9 meters subject brightness.
- Digital ESP metering: Meters exposure in 324 areas of the frame and optimises exposure for the current scene or portrait subject if an option other than OFF is selected for Face Priority. This mode is recommended for general use.
- Center weighted averaging metering: Provides the average metering between the subject and the background lighting, placing more weight on the subject at the center.
- Spot metering: Meters a small area (about 2% of the frame) with the Olympus E-PL9 pointed at the object you wish to meter. Exposure will be adjusted according to the brightness at the metered point.
- Spot metering (highlight): Increases spot metering exposure. Ensures bright subjects appear bright.
- Spot metering (shadow): Lowers spot metering exposure. Ensures dark subjects appear dark.
MENU → camera icon 2 → shooting menu page 2
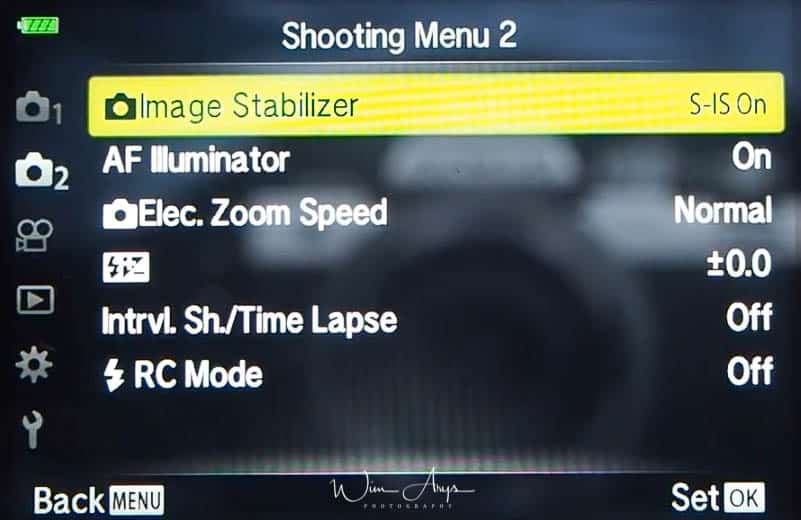
Image stabiliser
You can reduce the amount of camera shake that can occur when shooting in low light situations or shooting with high magnification.
The image stabilizer starts when you press the shutter button halfway.
Still picture (S-IS) ON: the Olympus E-PL9 detects the panning direction and applies the appropriate image stabilisation.
Movie (M-IS):
- M-IS 1: the Olympus E-PL9 uses both sensor shift (VCM) and electronic correction. In this case the edges of the frame are cropped out reducing the area recorded.
-
M-IS 2: The Olympus E-PL9 uses sensor shift (VCM) correction only. Electronic correction is not used.
Turn the image stabiliser OFF when using a tripod to get the best possible sharpness and rendering.
AF Illuminator
The Olympus E-PL9 AF illuminator (AF assist lamp) lights to assist the focus operation in dark environments. Select Off to disable AF illuminator.
Elec. Zoom Speed
Choose the speed at which electronic zoom lenses can be zoomed in or out using the zoom ring during still photography.
Flash plus/minus: Adjusting flash output
Flash output can be adjusted if you find that your subject to appears overexposed, or is underexposed even though the exposure in the rest of the frame is just right. Only Available in P, A, S or M mode. Changes to flash intensity made with the external flash unit are added to those made with the Olympus E-PL9.
Of course, this setting has no effect when the flash control mode for the external flash unit is set to MANUAL.
Interval. Sh./Time Lapse
You can set the Olympus E-PL9 to shoot automatically with a set time lapse. The shot frames can also be recorded as into a single movie. This setting is only available in P/A/S/M modes.
These settings can be adjusted:
- Number of Frames: Sets the number of frames to be shot.
- Start Waiting Time: Sets waiting time before starting to shoot.
- Interval Length: Sets interval between shots after shooting starts.
- Time Lapse Movie: Sets recording format of frame sequence. (Off: Records each frame as a still picture. On: Records each frame as a still picture and generates a single movie from the frame sequence.)
- Movie Resolution: Choose a size for time lapse movies.
- Frame Rate: Choose a frame rate for time lapse movies.
RC Mode
You can take wireless flash photos using the built-in flash and a special flash with a remote control function.
External flash units that are designated for use with this Olympus E-PL9 and have a remote control mode can be used for wireless flash photography. The Olympus E-PL9 can separately control each of three groups of remote flash units, and the internal flash.
MENU → Video icon 1 → Video Menu
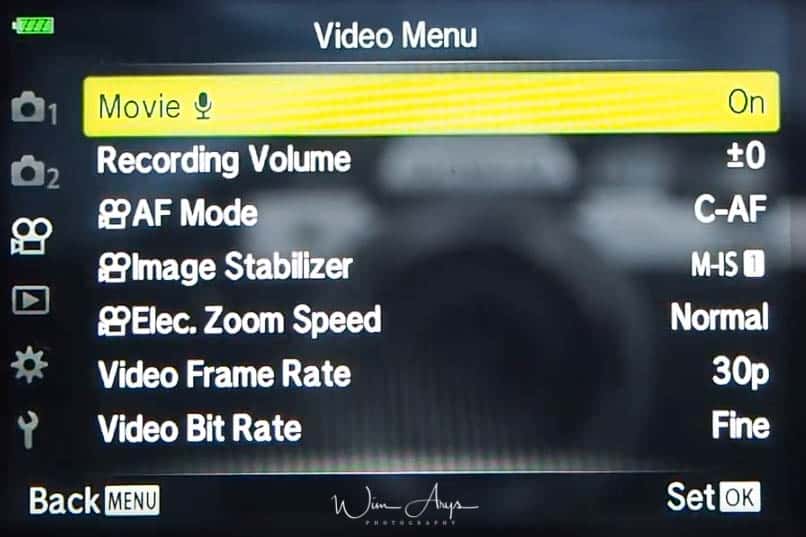
Movie mic
Turn the internal microphone on or off here. It’s also possible to turn on wind noise reduction which will suppress noise free the wind blowing into the microphone.
Recording Volume
You can adjust the sensitivity of the built-in microphone. Adjust the sensitivity using the up and down buttons while checking the peak sound level picked up by the microphone over the previous few seconds.
AF Mode
Choose the autofocus mode for movie recording here.
- S-AF (Single AF): The Olympus E-PL9 focuses once when the shutter button is pressed halfway. When the focus is locked, a beep sounds, and the AF confirmation mark and the AF target mark light up. This mode is suitable for taking picture.
- C-AF (Continuous AF): The Olympus E-PL9 repeats focusing while the shutter button remains pressed halfway. When the subject is in focus, the AF confirmation mark lights up on the monitor and the beep sounds when the focus is locked at the first time. Even if the subject moves or you change the composition of the picture, the Olympus E-PL9 continues trying to focus.
- MF (Manual focus): This function allows you to manually focus on any near position by operating the focus ring on the lens.
- S-AF+MF (Simultaneous use of S-AF mode and MF mode): After pressing the shutter button halfway to focus in [S-AF] mode, you can turn the focus ring to fine-adjust focus manually.
- C-AF+TR (AF tracking): Press the shutter button halfway to focus; the Olympus E-PL9 then tracks and maintains focus on the current subject while the shutter button is held in this position.
A word on AF tracking: The AF target is displayed in red if the Olympus E-PL9 can no longer track the subject. Release the shutter button and then frame the subject again and press the shutter button halfway. Also be aware of the fact that the tracking range will be narrow when using a Four Thirds systemlens. Autofocus does not work while the AF target is displayed in red even if the Olympus E-PL9 is tracking the subject.
Image stabiliser
Sets image stabilisation for movie recording. The image stabiliser starts when you press the shutter button halfway.
These options are available
- M-IS Off: Image stabilizer is off.
- M-IS 1: The Olympus E-PL9 uses both sensor shift (VCM) and electronic correction.
- M-IS 2: the E-PL9 uses sensor shift (VCM) correction only. Electronic correction is not used.
Just like in the stills section, the edges of the frame are cropped out when [M-IS ] is selected, reducing the area recorded.
You can also use focal length information to reduce Olympus E-PL9 shake when shooting with lenses that are not Micro Four Thirds or Four Thirds system lenses.
Here is how to do this:
- Press the INFO button while Image Stabilizer is selected, use FGHI to highlight a focal length, and press the Q button.
- Choose a focal length between 0.1mm and 1000.0mm.
- Choose the value that matches the one printed on the lens.
- Selecting Reset and ‘basic’ in Shooting Menu 1 does not reset the focal length.
Elec. Zoom Speed
Choose the speed at which electronic zoom lenses can be zoomed in or out during movie recording.
Video frame rate
Choose the frame rate for movie recording. When shooting movies that will be viewed on a TV, choose a frame rate that matches the video standard used in the device, as otherwise the movie may not play back smoothly. Video standards vary by country or region: some use NTSC, others PAL.
Video bit rate
Choose the compression ratio for movie recording. The options available for movie quality vary with the movie mode and the options selected for Video Frame Rate (previous menu item) and Video Bit Rate in the video menu. It’s a case of mixing these according to your needs.
The following options are available when Standard is selected for movie mode or the mode dial is rotated to a position other than movie mode:
- 1920×1080 Super Fine 60p
- 1920×1080 Super Fine 30p
- 1280×720 Super Fine 30p
- 1920×1080 Fine 60p
- 1920×1080 Fine 30p
- 1280×720 Fine 30p
- 1920×1080 Normal 60p
- 1920×1080 Normal 30p
- 1280×720 Normal 30p
- 1920×1080 Super Fine 50p
- 1920×1080 Super Fine 25p
- 1280×720 Super Fine 25p
- 920×1080 Fine 50p
- 1920×1080 Fine 25p
- 1280×720 Fine 25p
- 1920×1080 Normal 50p
- 1920×1080 Normal 25p
- 1280×720 Normal 25p
- 1920×1080 Super Fine 24p
- 1280×720 Super Fine 24p
- 1920×1080 Fine 24p
- 1280×720 Fine 24p
- 1920×1080 Normal 24p
- 1280×720 Normal 24p
The following options are available when 4K is selected for movie mode:
- 3840×2160 30p
- 3840×2160 25p
- 3840×2160 24p
These options are available when ‘Clips’ is selected for movie mode:
- 1920×1080 Normal 60p
- 1920×1080 Normal 30p
- 1280×720 Normal 30p
- 1920×1080 Normal 50p
- 1920×1080 Normal 25p
- 1280×720 Normal 25p
- 1920×1080 Normal 24p
- 1280×720 Normal 24p
When High-speed is selected for movie mode, only 1280×720 HighSpeed 120fps is available.
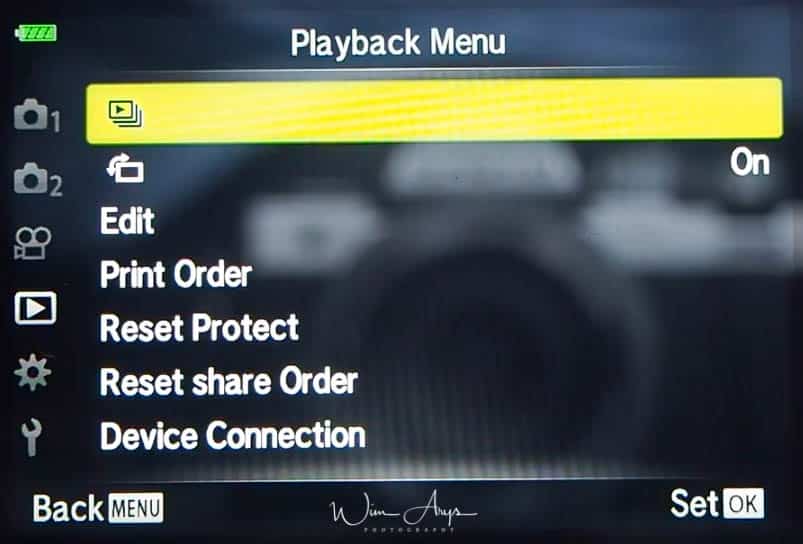
MENU → play icon → Playback Menu
Slideshow
This function displays images stored on the card one after another on the Olympus E-PL9.
You can adjust some of the settings:
- Start: Start the slideshow. Images are displayed in order, starting with the current picture.
- BGM: Set Happy Days or Off.
If set to On, images in portrait orientation are automatically rotated to be displayed in the correct orientation on the playback display.
Edit
Editing still images
Recorded images can be edited and saved as separate images.
RAW Data Edit is displayed if a RAW image is selected, and JPEG Edit if a JPEG image is selected. For images recorded in RAW+JPEG format, both RAW Data Edit and JPEG Edit are displayed. Select the desired option from them.
RAW Data edit:
- Current: The JPEG copy is processed using the current E-PL9 settings. Adjust the camera settings before choosing this option. Some settings such as exposure compensation are not applied.
- ART BKT: The image is edited using settings for the selected art filter.
JPEG Edit:
- Aspect: Changes the aspect ratio of images from 4:3 to 3:2, 16:9, 1:1, or 3:4. After changing the aspect ratio, use FGHI to specify the trimming position.
- Black & White: Creates black and white images.
- Sepia: Creates sepia-toned images.
- Saturation: Increases the vividness of images. Adjust the color saturation checking the image on the screen.
- Q: Converts the image size to 1280 × 960, 640 × 480, or 320 × 240. Images with an aspect ratio other than 4:3 (standard) are converted to the closest image size.
- e-Portrait: Compensates the skin look for smoothness.
- Compensation cannot be applied in such a case that a face cannot be detected.
Audio recording
Audio can be added to still images up to 30 sec. long.
Image overlay
Up to 3 frames of RAW images taken with the Olympus E-PL9 can be overlaid and saved as a separate image.
The image is saved with the record mode set at the time the image is saved. (If RAW is selected, the copy will be saved in YN+RAW format.)
In-Movie Image Capture
Save selected frames from 4K movies as still images.
Movie Trimming
Trimming movies, cutting parts from the start or end can be done here.
Print order
You can save digital print orders to the memory card listing the pictures to be printed and the number of copies of each print. You can then have the pictures printed at a print shop that supports DPOF or print the pictures yourself by connecting the Olympus E-PL9 directly to a DPOF printer. A memory card is required when creating a print order.
Reset Protect
Protections of multiple images can be canceled at a time.
Reset share order
You can select an image you wish to share through WiFi, by setting ‘Share Order’ on the image. To cancel sharing selections. Clear share order from the selected images. If you want to reset the share order, this can be done here.
Device connection
You can adjust the settings for connection to your Smartphone here.
To connect to your smartphone:
- Install and start the OI.Share App on your smartphone.
- Select Device Connection in the Playback Menu and press the Q button.
- Follow the on-screen guide to adjust Wi-Fi/Bluetooth settings.
- Tap the Olympus E-PL9 icon at the bottom of the OI.Share display.
- Follow the on-screen instructions in OI.Share to scan the QR code and adjust connection settings.
Some smartphones will need to be con fi gured manually after reading the QR code. If the smartphone is connected to another Wi-Fi network or device, you may need to change the network selected in the smartphone’s Setting app to the Olympus E-PL9 SSID
MENU → gear icon → Menu A (autofocus/manual focus settings)
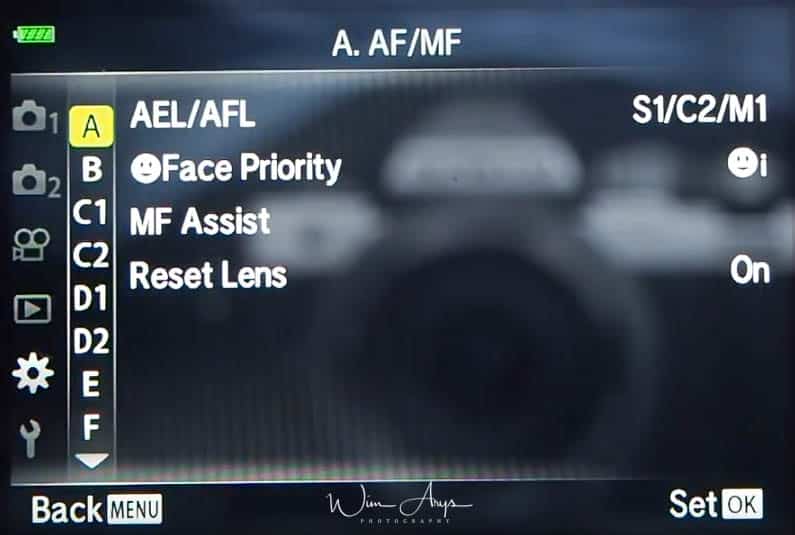
AEL/AFL
Backbutton focus, a method where you decouple the autofocus function from the shutter button, is widely used for different shooting techniques like focus and recompose and birds-in-flight. The E-PL9 has a range of settings available to to this.
Firstly, you’ll need to assign the AEL/AFL functionality to a button of your choice.
Secondly, you have a few modes available with different functionality depending on you shooting mode.
Single AF (S-AF)
Mode 1:
-
-
- Half pressing the shutter button engages Single Autofocus and Exposure is locked.
- A Full press of the shutter button does nothing.
- Holding dow your preferred AEL/AFL button locks Exposure.
-
Mode 2:
-
-
- Half pressing the shutter button engages Single Autofocus.
- A Full press of the shutter button locks Exposure.
- Holding dow your preferred AEL/AFL button locks Exposure.
-
Mode 3: half pressing the shutter button
-
-
- Half pressing the shutter button locks Exposure.
- A Full press of the shutter does nothing.
- Holding dow your preferred AEL/AFL engages Single Autofocus.
-
Continuous AF (C-AF)
Mode 1:
-
-
- Half pressing the shutter button engages Continuous AutoFocus and Exposure is locked.
- A Full press of the shutter locks Focus at that point.
- Holding down your preferred AEL/AFL button locks Exposure.
-
Mode 2:
-
-
- Half pressing the shutter button engages Continuous AutoFocus.
- A Full press of the shutter locks Focus at that point as well as Exposure.
- Holding down your preferred AEL/AFL button locks Exposure.
-
Mode 3:
-
-
- Half pressing the shutter button locks Exposure.
- A Full press of the shutter locks Focus at that point.
- Holding down your preferred AEL/AFL button starts Continuous Autofocus.
-
Mode 4:
-
-
- Half pressing the shutter does nothing.
- A Full press of the shutter locks Focus at that point as well as Exposure.
- Holding down your preferred AEL/AFL button starts Continuous Autofocus.
-
ManualFocus (MF)
Mode 1:
-
-
- Half pressing the shutter button locks Exposure.
- A Full press of the shutter does nothing.
- Holding down your preferred AEL/AFL locks Exposure
-
Mode 2:
-
-
- Half pressing the shutter button does nothing.
- A Full press of the shutter locks Exposure.
- Holding down your preferred AEL/AFL locks Exposure.
-
Mode 3:
-
-
- Half pressing the shutter button locks Exposure.
- A Full press of the shutter does nothing.
- Holding down your preferred AEL/AFL actually starts single Autofocus.
-
Face Priority
The Olympus Pen detects faces and adjusts focus and digital ESP.
These settings are available:
-
-
- Face Priority On: Face priority is on.
- Face Priority Off: Face priority is off.
- Face & Eye Priority On : The autofocus system selects the eye closest to the Olympus E-PL9 for face-priority AF.
-
MF Assist
This is a focus assist function for MF. When the focus ring is rotated, the edge of the subject is enhanced or a portion of the screen display is magnifi ed. When you stop operating the focus ring, the screen returns to the original display.
These options are available:
-
-
- Magnify: Magnifies a portion of the screen. The portion to be magnifi ed can be set in advance using AF target.
- Peaking: Displays clearly defi ned outlines with edge enhancement. You can choose the color of the outlines in the Peaking Menu.
-
Reset Lens
When set to Off, the focus position of the lens is not reset even when the power is turned off. When set to On, the focus of power zoom lenses is also reset.
MENU → gear icon → Menu B (Button and dial settings)
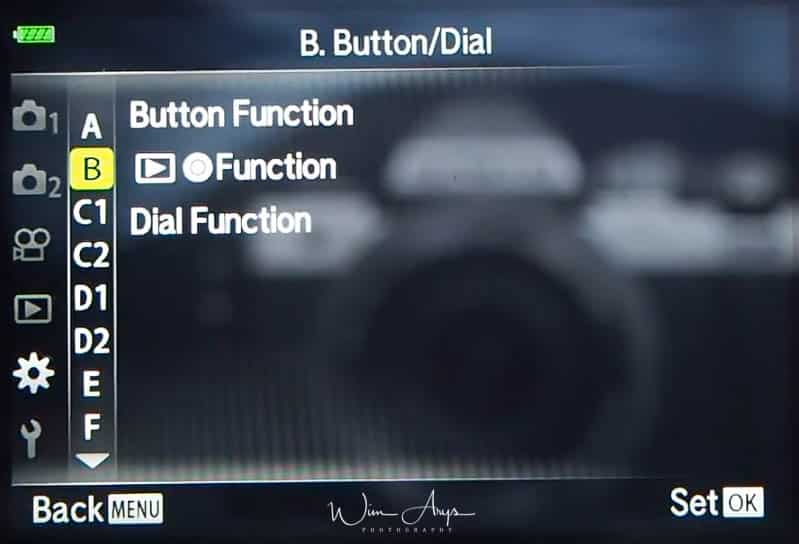
Button Function
At default settings, the following functions are assigned to the buttons:
- Fn Function: Digital tele-converter
- Video record button: starts video recording
- AEL/AFL:Press the button to use AE lock or AF lock. The function changes according to the AEL/AFL setting. When AEL is selected, press the button once to lock the exposure and display AEL on the monitor. Press the button again to cancel the lock.
- One-touch white balance: Press the shutter button while the button is pressed to acquire a white balance value. Highlight the desired number and press the OK button to save the value.
- AF Area Select: Press the button to choose the AF target.
- MF: Press the button to select Manual Focus mode. Press the button again to restore the previously selected AF mode. Hold the button and rotate the control dial to choose a focus mode.
- Exposure compensation (plus/minus): Press the button to adjust exposure compensation. In P, A, S, ART, movie, and some AP modes, you can adjust exposure compensation by pressing the button and using left-right to choose the desired value. Some modes also offer program shift. In M mode, you can adjust shutter speed or aperture by pressing the button and using up/down/left/right or the control dial to choose the desired values.
- Magnify: Press the button to display the magnifi cation frame and press it again to magnify the image. Press and hold the button to cancel magnified display.
- Peaking: Press the button to turn on and off the peaking display. When peaking is displayed, histogram and highlight/ shadow display are not available.
- Switch/Lock: Press and hold the button to enable and disable touch screen operation.
You can, of course, change the function of all the buttons here in this menu!
Record button Function during
Choose the role played by the video record button during playback here:
- Select multiple pictures.
- Protect pictures.
- Mark pictures for sharing.
- Mark pictures for printing at a later date. The number of copies is set to 1. The date is not printed.
Dial Function
You can also change the function of the control dial.
MENU → gear icon → Menu C1 (Display, WiFI and PC settings)
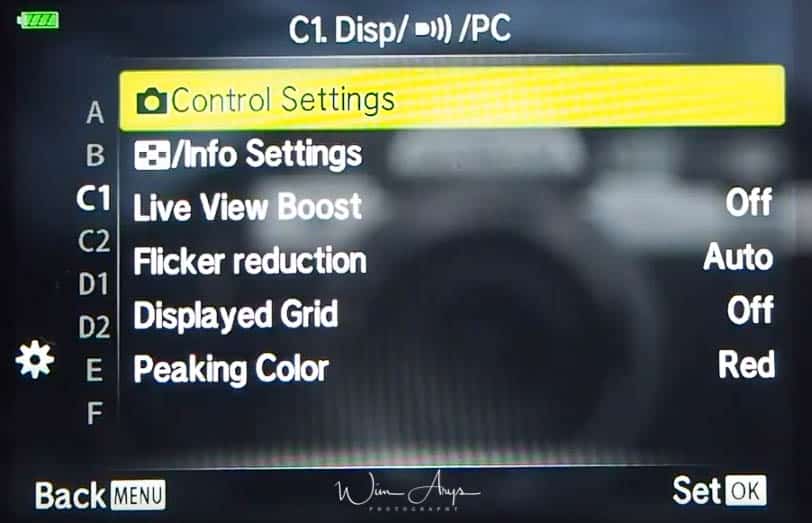
Control Settings
For each shooting mode except movie, choose whether pressing the OK button displays live controls or LV super controls.
Info Settings
Choose the information displayed when the INFO button is pressed.
- Playback Info: Choose the information displayed in full frame playback.
- LV-Info: Choose the information displayed when the Olympus E-PL9 is in shooting mode.
- Information Settings: Choose the information displayed in index, “My Clips”, and calendar playback.
Live View Boost
- Off: Changes to settings such as exposure compensation are refl ected in the display in the monitor.
- On: Changes to settings such as exposure compensation are not refl ected in the display in the monitor; instead, brightness is adjusted to bring the display as close as possible to optimal exposure.
Flicker reduction
Reduce the effects of flicker under some kinds of lighting, including fluorescent lamps. When flicker is not reduced by the Auto setting, set to 50Hz or 60Hz in accordance with the commercial power frequency of the region where the Olympus E-PL9 is used.
Displayed Grid
Select the different types of grid to be displayed on the monitor to help you compose your shots.
Peaking Color
Choose the color of the outlines (red, yellow, white, or black) in the focus peaking display.
MENU → gear icon → Menu C2 (Display, WiFI and PC settings page 2)
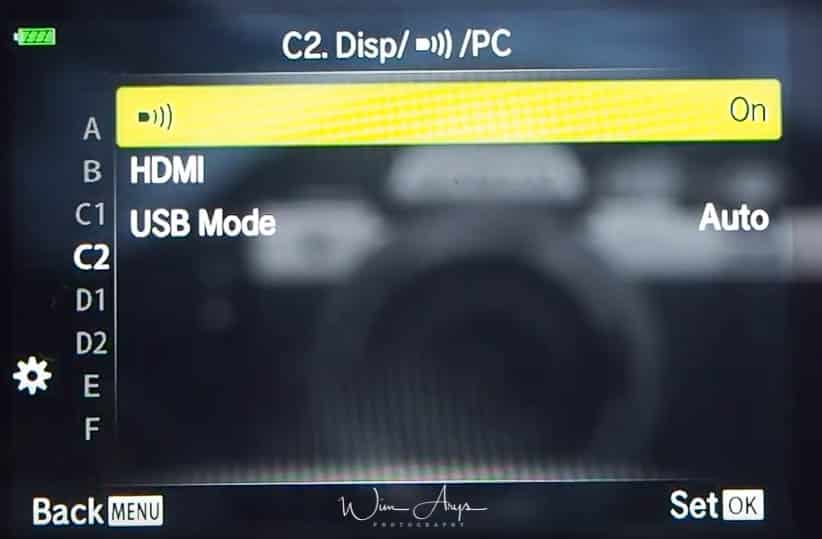
Beep Sound
When set to Off, you can turn off the beep sound that is emitted when the focus locks by pressing the shutter button.
HDMI
Output Size: Selecting the digital video signal format for connecting to a TV via an HDMI cable.
HDMI Control: Select On to allow the Olympus E-PL9 to be operated using remotes for TVs that support HDMI control. This option takes effect when pictures are displayed on a TV.
If the E-PL9 is connected via an HDMI cable, you will be able to choose the digital video signal type. Choose a format that matches the input format selected with the TV.
- 4K: Priority is given to 4K HDMI output.
- 1080p: Priority is given to 1080p HDMI output.
- 720: Priority is given to 720p HDMI output.
- 480p/576p: 480p/576p HDMI output.
USB Mode
Choose a mode for connecting the Olympus E-PL9 to a computer or printer. Choose Auto to display USB mode options every time the Olympus E-PL9 is connected.
MENU → gear icon → Menu D1 (Exposure, ISO and Bulb settings)
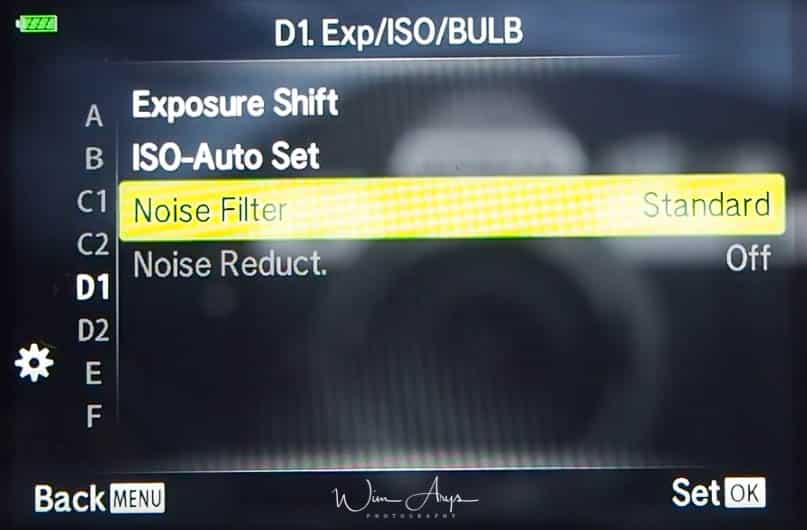
Exposure Shift
Adjust correct exposure separately for each metering mode.
- This reduces the number of exposure compensation options available in the selected direction.
- The effects are not visible in the monitor. To make normal adjustments to the exposure, perform exposure compensation.
ISO-Auto Set
Choose the upper limit and default value used for ISO sensitivity when Auto is selected for ISO.
- High Limit: Choose the upper limit for auto ISO sensitivity selection.
- Default: Choose the default value for auto ISO sensitivity selection.
Noise Filter
Choose the amount of noise reduction performed at high ISO sensitivities.
While shooting at slow shutter speeds, noise may appear on screen. These phenomena occur when the temperature rises in the image pickup device or image pickup device internal drive circuit, causing current to be generated in those sections of the image pickup device that are not normally exposed to light. This can also occur when shooting with a high ISO setting in a high-temperature environment. To reduce this noise, the Olympus E-PL9 activates the noise reduction function.
Noise Reduct.
This function reduces the noise that is generated during long exposures.
- Auto: Noise reduction is performed at slow shutter speeds, or when the internal temperature of the Olympus E-PL9 has risen.
- On: Noise reduction is performed with every shot.
- Off: Noise reduction off.
- The time required for noise reduction is shown in the display.
- Off is selected automatically during sequential shooting.
- This function may not work effectively with some shooting conditions or subjects.
MENU → gear icon → Menu D2 (Exposure, ISO and Bulb settings page 2)

Bulb/Time Timer
Choose the maximum exposure for bulb and time photography.
Live Bulb
Choose the display interval during shooting. The number of update times is limited. The frequency drops at high ISO sensitivities. Tap the monitor or press the shutter button halfway to refresh the display. Choose Off to disable the display.
he shutter remains open while the shutter button is pressed. The exposure ends when the shutter button is released. The view through the lens is not displayed while exposure is in progress.
- Press the MENU button to choose the display interval for Live Bulb or Live Time photography. Select Off to disable the display while exposure is in progress.
- To refresh the display while exposure is in progress, tap the monitor or press the shutter button halfway (LIVE TIME only).
- BULB and LIVE TIME are not available at some ISO sensitivity settings.
- To reduce blur caused by Olympus E-PL9 shake, fix the Olympus E-PL9 securely to a tripod and use a remote shutter release controlled via OI.Share.
- During shooting, there are limits on the settings for the following functions.
- Sequential shooting, self-timer shooting, time lapse shooting, image stabilizer, etc.
Live Time
Settings for bulb/time maximum exposure and live composite photography apply only in mode M.
The exposure begins when the shutter button is pressed all the way down. To end the exposure, press the shutter button all the way down again. The view through the lens is displayed while exposure is in progress.
Composite Settings
Set an exposure time to be the reference in composite photography.
You can combine several exposures to create a photo that records light trails from stars or fireworks and other objects without changing the brightness of the background.
- In M mode, set the shutter speed to LIVECOMP. In M mode, rotate the control dial in the direction shown until LIVECOMP is displayed in the monitor.
- Press the MENU button to display [Composite Settings] and press FG to choose the exposure time for the individual exposures.
- Press the shutter button to ready the Olympus E-PL9. The Olympus E-PL9 will shoot a frame as a reference for noise reduction. The Olympus E-PL9 is ready when [Ready for composite shooting] is displayed in the monitor.
- Press the shutter button halfway down to focus. If the focus indicator blinks, the Olympus E-PL9 is not in focus.
- Press the shutter button all with way down to start live composite photography. The combined image will be displayed in the monitor with each exposure.
- Press the shutter button again to stop shooting. View the changing result in the monitor and press the shutter button to end shooting
- once the desired result is achieved. The maximum length of composite shooting is 3 hours. However, the available shooting time will vary depending on shooting conditions, and charging state of the Olympus E-PL9.
MENU → gear icon → Menu E (Flash and custom settings)
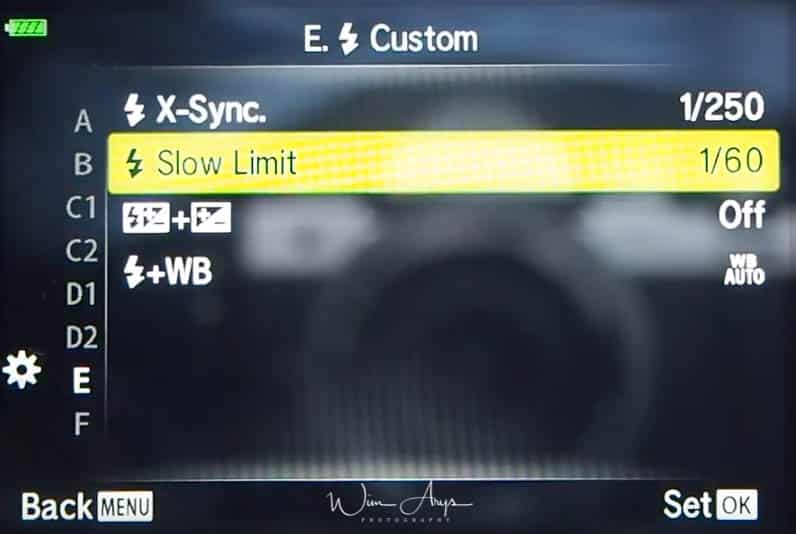
Flash X-Sync
Choose the shutter speed used when the flash fires.
Flash Slow Limit
Choose the slowest shutter speed available when a flash is used.
- In P and A modes; The Olympus E-PL9 automatically sets the shutter speed. and the X-Sync setting is honoured.
- In S and M modes; The set shutter speed is used Adobe the X-Sync setting is no applied. There is no lower limit.
Plus/Minus
When set to ON, the exposure compensation value is added to the flash compensation value.
Choose positive values to make pictures brighter, negative values to make pictures darker. Exposure can be adjusted by ±5.0 EV.
-
In mode P, ART mode, movie mode, and some AP modes, exposure compensation can be adjusted by rotating the control dial or by pressing the plus/minus button and then using up/down.
-
In modes A and S, exposure compensation can be adjusted by pressing the plus/minus button and then rotating the control dial or using left-right.
-
Exposure compensation is not available in Auto, M, or SCN mode or when Live Time or panorama is selected in AP mode.
-
During live view, the brightness of the monitor will be adjusted to a maximum of only ±3.0 EV. If the exposure exceeds ±3.0 EV, the exposure bar will begin flashing.
-
Movies can be corrected in a range up to ±3.0 EV.
Flash output can also be adjusted if you find that your subject to appears overexposed, or is underexposed even though the exposure in the rest of the frame is just right.
Flash Plus WB
Adjust white balance for use with a flash.
MENU → gear icon → Menu F (Sound, white balance and color settings)

Set
You can select the JPEG image quality mode from combinations of three image sizes and four compression rates.
- Large: 4608×3456 pixels
- Middle: 3200×2400 pixels
- Small: 1280×960 pixels
You can also choose between four compression rates ranging from Super Fine to Basic.
Since SD cards are cheap now, I suggest using lange and Super Fine for Jpeg.
WB
Set the white balance. You can also fi ne-tune the white balance for each mode.
- White balance ensures that white objects in images recorded by the Olympus E-PL9 appear white. AUTO is suitable in most circumstances, but other values can be selected according to the light source when AUTO fails to produce the desired results or you wish to introduce a deliberate color cast into your images.
- Auto white balance: For most light conditions (when there is a white portion framed on the monitor). Use this mode for general use.
- Preset white balance: 5300 K clear day outdoors, 7500 K clear day in the shadows, 6000 K, cloudy day, 3000 K tungsten light, 4000 K fluorescent light, 5500 K for flash.
- One-touch white balance: Press the INFO button to measure white balance using a white or gray target when using a flash or other light source of an unknown type or when shooting under mixed lighting.
- Custom white balance: select a color temperature and then press the OK button.
WB Auto Keep Warm Color
Select On to preserve “warm” colors in pictures taken under incandescent lighting.
Color Space
You can select a format to ensure that colors are correctly reproduced when shot images are regenerated on a monitor or using a printer.
This option is equivalent to the Color Space in Custom Menu.
- sRGB: This is the RGB color space standard stipulated by the International Electrotechnical Commission (IEC). Normally, use sRGB as the standard setting.
- AdobeRGB:This is a standard provided by Adobe Systems. Compatible software and hardware such as a display, printer etc. are required for a correct output of images.
MENU → gear icon → Menu G (Record Settings)
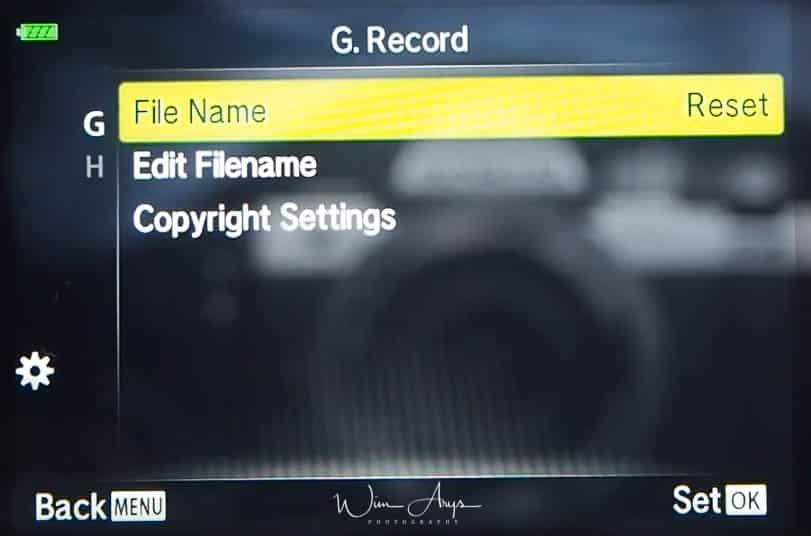
File Name
-
-
-
- Auto: Even when a new card is inserted, the file numbers are retained from the previous card. File numbering continues from the last number used or from the highest number available on the card.
- Reset: When you insert a new card, the folder numbers starts at 100 and the file name starts at 0001. If a card containing images is inserted, the fi le numbers start at the number following the highest file number on the card
-
-
Edit Filename
Choose how image files are named by editing the portion of the filename highlighted below in gray.
Copyright Settings
Add the names of the photographer and copyright holder to new photographs. Names can be up to 63 characters long.
-
-
-
- Copyright Info.: Select On to include the names of the photographer and copyright holder in the Exif data for new photographs.
- Artist Name: Enter the name of the photographer.
- Copyright Name: Enter the name of the copyright holder.
-
-
MENU → gear icon → Menu H (Olympus E-PL9 Utility Settings)

Pixel Mapping
The pixel mapping feature allows the Olympus E-PL9 to check and adjust the image pickup device and image processing functions. Before using the pixel mapping function to ensure that it operates correctly, wait for 1 minute or longer immediately after shooting or playback.
Level Adjust
You can calibrate the angle of the level gauge.
-
-
-
- Reset: Resets adjusted values to the default settings.
- Adjust: Sets the current Olympus E-PL9 orientation as the 0 position.
-
-
Touchscreen Settings
Activate the touch screen. Choose Off to disable the touch screen.
Sleep
The Olympus E-PL9 will enter sleep (energy saving) mode if no operations are performed for the selected period. The Olympus E-PL9 can be reactivated by pressing the shutter button halfway.
Eye-Fi
Enable or disable upload when using an Eye-Fi card. The setting can be changed when an Eye-Fi card is inserted.
Certification
Display certifi cation icons.
MENU → spanner icon → Setup Menu
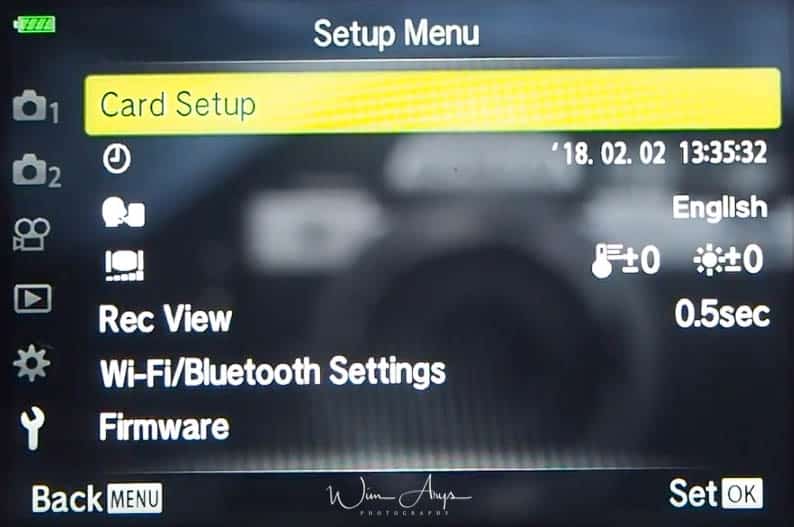
Card Setup
Cards must be formatted with this Olympus E-PL9 before fi rst use or after being used with other Olympus E-PL9s or computers. All data stored on the card, including protected images, is erased when the card is formatted. When formatting a used card, confi rm there are no images that you still want to keep on the card.
Time and date
Set the local time and date of the Olympus E-PL9. This information will also be written to the EXIF data of your photos.
Language
Select the language of your menu and Olympus E-PL9 settings. I alway recommend to use the English language since most information available on the E-PL9 online will be in English.
Screen brightness and color temperature
You can adjust the brightness and color temperature of the monitor.
Rec View
Sets whether to display the captured image on the monitor after shooting, and the length of time for the display. This is useful for a brief check of the picture you have taken. You can shoot the next shot by pressing the shutter button halfway even while the captured image is displayed on the monitor.
0.3sec – 20sec: Sets the length of time (seconds) to display the captured image on the monitor.
Off: The captured image is not displayed on the monitor.
Auto q: Displays the captured image, and then switches to playback mode. This is useful for erasing a picture after checking it.
Wi-Fi/Bluetooth Settings
Adjust settings for connection to Wi-Fi/Bluetooth compatible smartphones using the Olympus E-PL9’s wireless function.
- You can choose whether the Olympus E-PL9 will maintain a wireless connection to the smartphone when off.
- Disable wireless LAN/Bluetooth.
- Change the Wi-Fi/Bluetooth passwords.
- Restore Wi-Fi/Bluetooth Settings to default values.
Firmware
Displays the fi rmware versions of the Olympus E-PL9 and connected accessories. Check the versions when you inquire about the Olympus E-PL9 or accessories or when you download the software.
 Olympus E-PL9 Mode dial and different Modes
The mode dial on top of the Pen E-PL9 is of course one of the more powerful features of any digital Olympus E-PL9. You can select any of these 9 modes that will substantially alter the way the Olympus E-PL9 handles and operates. Let’s Look at these different modes a little closer
Program Mode (P)
The P mode allows you to have more control of the Olympus E-PL9. In P mode you can change your settings (including exposure) to what you like, but the Olympus E-PL9 will set Aperture and Shutter automatically for you.
In the P (program) Mode, there is a feature called Program Shift. Program Shift allows you to select Aperture Priority or Shutter Priority on the fly while still in Program Mode. When the Olympus E-PL9 is set to the P Mode, the letter P appears in the upper left corner of the LCD screen.
Aperture Mode (A)
The A mode allows you to set the aperture manually while the Olympus E-PL9 sets the shutter speed automatically. Changing the aperture value you can give your pictures different expressions – you can have separate subjects in the front and back of the picture both in focus, or you can narrow the area of the picture that is in focus so the main subject stands out against the background.
Shutter mode (S)
The S mode allows you to set the shutter speed manually while the Olympus E-PL9 sets the aperture value automatically. By changing the shutter speed you can “freeze” the subject’s movement in the picture, or you can deliberately create a blur, giving a stronger sense of motion to the picture.
Full Manual Mode (M)
In Manual Mode (M), the user selects both the aperture and the shutter speed. When shooting the moon in the night sky or the multi-colored lights shining in a night scene there is a great difference in light level with the brightness of the surroundings. In manual mode you can shoot without the brightness of the surroundings affecting the exposure of the main subject.
Bub Mode/Live Time
You can useBulb mode for photos such as fireworks or night scenery. In M mode, rotate the control dial in the direction shown until BULB or LIVE TIME is displayed in the monitor.
- Bulb photography (BULB): The shutter remains open while the shutter button is pressed. The exposure ends when the shutter button is released. The view through the lens is not displayed while exposure is in progress.
- Time photography (LIVE TIME): The exposure begins when the shutter button is pressed all the way down. To end the exposure, press the shutter button all the way down again. The view through the lens is displayed while exposure is in progress.
Movie mode (movie Olympus E-PL9 icon)
Movie movie sets your Olympus E-PL9 up for recording 4K movies. This crops and reformats your screen for video aspect.
Art Filter Mode (ART)
Your Olympus E-PL9 has a series of artistic filters built in. The are great fun and can also help you to get a sense of your photography style.
Simply turning your mode dial to ART allows you access to these art filters.
- Pop Art I/II: Creates an image that emphasizes the beauty of color.
- Soft Focus: Creates an image that expresses a soft tone atmosphere.
- Pale&Light Color I/II: Creates an image that expresses warm light by scattering overall light and slightly overexposing the image.
- Light Tone: Creates a high-quality image by softening both shadows and highlights.
- Grainy Film I/II: Creates an image that expresses the roughness of black and white images.
- Pin Hole I/II/III: Creates an image that looks as if it was taken using an old or toy Olympus E-PL9 by dimming the image perimeter.
- Diorama I/IICreates a miniature-like image by emphasizing saturation and contrast, and blurring unfocused areas.
- Cross Process I/II: Creates an image that expresses a surreal atmosphere. Cross Process II creates an image that emphasizes magenta.
- Gentle Sepia: Creates a high-quality image by drawing out shadows and softening the overall image.
- Dramatic Tone I/II: Creates an image that emphasizes the difference between brightness and darkness by partially increasing contrast.
- Key Line I/II: Creates an image that emphasizes edges and adds an illustrative style.
- Watercolor I/II: Creates a soft, bright image by removing dark areas, blending pale colors on a white canvas, and further softening contours.
- Vintage I/II/III: Expresses an everyday shot in a nostalgic, vintage tone using printed film discoloration and fading.
- Partial Color I/II/III: Impressively expresses a subject by extracting colors you want to emphasize and keeping everything else monotone.
- Bleach Bypass I/II: the “bleach bypass” effect, which you may recognize from motion pictures and the like, can be used to great effect in shots of streetscapes or metal objects.
- Instant Film: A contemporary take on the skin tones and shadow gradations typical of film.
Advanced Photo Mode (AP)
In the AP mode you can choose from 9 different shooting modes. These are all from the Olympus special tips and tricks cabinet and worth a closer look.
Live Composite
Creates photos that record light trails from stars and other objects without changing the brightness of the background; during shooting, the changing results can be viewed on screen. You can adjust white balance or picture mode and other settings not available with the SCN mode “Light Trails” option.
Highlight Live Composite in the AP mode menu and press the OK button.
- Press the shutter button halfway down to focus. (To reduce blur caused by Olympus E-PL9 shake, use a tripod and use a remote shutter release)
- Press the shutter button all the way down to shoot. (The Olympus E-PL9 configures the proper settings automatically and starts shooting)
- Press the shutter button again to stop shooting. (View the changing result in the monitor and press the shutter button to end shooting once the desired result is achieved.)
Live Time
You can make long exposures without having to keep the shutter button pressed. The changing result can be viewed in the monitor during shooting.
- Highlight Live Time in the AP mode menu.
- Press down, use left/right to choose the maximum exposure time, and press the OK button. (The shorter the maximum exposure time, the faster the display refresh rate.)
- Press the shutter button halfway down to focus. (If the focus indicator blinks, the Olympus E-PL9 is not in focus.)
- Press the shutter button all the way down to start live time photography. (The Olympus E-PL9 adjusts settings automatically and begins shooting.)
- Press the shutter button again to stop shooting. (Shooting ends automatically when the selected exposure time is reached.)
Multiple Exposure
Combines two different images on top of one another.
- Highlight Multiple Exposure in the AP mode menu and press the OK button.
- Press the shutter button halfway down to focus. ( If the focus indicator blinks, the Olympus E-PL9 is not in focus.)
- Press the shutter button all the way down for the first shot. (The image is shown superimposed on the monitor. Press bin to delete the last shot.)
- Take the second shot. (Use the first image as a guide to compose the second shot.)
HDR
Capture details in both highlights and shadows.
- HDR1: Four shots are taken, each with a different exposure, and the shots are combined into one HDR image inside the Olympus E-PL9.
- HDR2: provides a more processed image than HDR1. ISO sensitivity is fixed to 200.
Silent heart
Disable Olympus E-PL9 sounds and lights in situations in which they may be unwanted.
Since you’re using only the electronic shutter, flickering light sources such as fluorescent or LED lamps might cause banding. If the subject moves to quickly, you might get stretched features.
Panorama
Take a series of shots that are joined together to create a wide-angle photo. Choose from angles of view approximately double or four times the angle of normal shots.
Pan the Olympus E-PL9 following an on-screen guide to create a single wide-angle (panorama) photo.
- STD: Take panoramas with an angle of view of approximately double that of other shots.
- FULL: Take panoramas with an angle of view of approximately four times that of other shots.
Keystone Compensation
Correct the effects of perspective in photos of buildings or landscapes, really cool feature.
Firstly, make the vertical adjustment while viewing the effect in the display and frame the shot.
- Use the control dial to choose the compensation amount.
- Use the left and right buttons to choose the area to be recorded. Depending on the compensation amount, you may be unable to choose the area recorded.
- Press and hold the OK button to cancel any changes.
Secondly, press the INFO button and then make the horizontal adjustment and frame the shot.
- Use the control dial to choose the compensation amount.
- Use HI to choose the area to be recorded. Depending on the compensation amount, you may be unable to choose the area recorded.
Then press and hold the Q button to cancel any changes.
- Press the INFO button to toggle between the vertical (Step 2) and horizontal (Step 3) adjustment displays as desired.
Finally press the shutter button halfway down to focus.
- If the focus indicator blinks, the Olympus E-PL9 is not in focus. 5 Press the shutter button all the way down to shoot.
Remember always that photos are recorded in RAW+JPEG format when RAW is selected for image quality.
AE Bracketing
Each time the shutter button is pressed, the Olympus E-PL9 takes a series of photos, varying exposure with each shot.
- 3f: Take 3 shots, the first at optimal exposure (±0.0 EV), the second at −1.0 EV, and the third at +1.0 EV.
- 5f: Take 5 shots, the first at optimal exposure (±0.0 EV), the second at −1.3 EV, the third at −0.7 EV, the fourth at +0.7 EV, and the fifth at +1.3 EV.
Focus Bracketing
Each time the shutter button is pressed, the Olympus E-PL9 takes a series of eight photos, varying the focus distance with each shot. 46
- Small distances: The focus distance changes by a small amount with each shot.
- Large distances: The focus distance changes by a large amount with each shot.
Scene Mode (SCN)
The Olympus E-PL9 automatically optimizes settings for the subject or scene. These are very helpful preset scenarios for beginners.
People
- Portrait: Suitable for portrait shooting. Brings out skin texture.
- e-Portrait: Smooths out skin tones and texture. This mode is suitable when viewing images on a high-definition TV. The Pen E-PL9 records two pictures: one with the effect applied and one without.
- Portrait + Landscape: Suitable for portraits featuring a landscape in the background. Blues, greens, and skin tones are captured beautifully.
- Portrait + Nightscape: Suitable for portrait shooting against a background of night view. Raise the flash and use of a tripod and remote control via OI.Share.
- Children: Suitable for photographs of children and other active subjects.
Nightscapes
- Nightscape: Suitable for tripod shooting of night scenes. Use of a tripod and remote control via OI.Share is recommended
- Portrait + Nightscape: Suitable for portrait shooting against a background of night view. Raise the flash (P. 71). Use of a tripod and remote control via OI.Share is recommended.
- Handheld Starlight: Suitable for shooting night scenes without a tripod. Reduces blur when shooting low light/illuminated scenes. The Pen E-PL9 makes eight exposures and combines them into a single photograph.
- Fireworks: Suitable for shooting fireworks at night. Use of a tripod and remote control via OI.Share is recommended.
- Light Trails: The Pen E-PL9 automatically shoots multiple images, takes newly bright areas only, and composites them into a single image. With normal long exposure, an image of light trace such as star trails with bright buildings tends to get too bright. You can capture them without over exposure while checking the progress. Press the shutter button to start shooting, then view the changing result in the monitor and press the shutter button again to end shooting once the desired result is achieved (maximum 3 hours). Use of a tripod and remote control via OI.Share is recommended. Advanced settings can be accessed via live composite photography (dark and light field composite) in M mode.
Motion
- Sport: Suitable for fast action shooting. The Pen E-PL9 will take photos while the shutter button is pressed.
- Children: Suitable for photographs of children and other active subjects.
- Panning: Choose to blur the background behind moving objects. The Olympus camerachooses the optimal shutter speed for panning shots based on Pen E-PL9 motion.
Scenery
- Landscape: Suitable for landscape shooting. Sunset: Suitable for shooting the sunset. Beach & Snow: Suitable for shooting at snow-capped mountains, seascapes in the sun, and other whitish scenes.
- Panorama: Take panoramas with an angle of view of approximately double that of other shots.
- Backlight HDR: Suitable for high-contrast scenes. Each time the shutter button is pressed, the Pen E-PL9 takes four shots and subsequently merges them into one, correctly exposed image.
Indoors
- Candlelight: Suitable for shots of candlelit scenes. Warm colors are preserved.
- Silent hart: Disable Pen E-PL9 sounds and lights in situations in which they may be unwelcome.
- Portrait: Suitable for portrait shooting. Brings out skin texture.
- e-Portrait: Smooths out skin tones and texture. This mode is suitable when viewing images on a high-definition TV. The Pen E-PL9 records two pictures: one with the effect applied and one without.
- Children: Suitable for photographs of children and other active subjects.
- Backlight HDR: Suitable for high-contrast scenes. Each time the shutter button is pressed, the Pen E-PL9 takes four shots and subsequently merges them into one, correctly exposed image.
Close-Ups
- Macro: Suitable for close-ups. j Nature Macro Suitable for vivid close-ups of flowers or insects.
- Documents: Suitable for scanning photos of timetables or other documents. The Olympus cameraheightens the contrast between the text and background.
- Multi Focus Shot: The Olympus cameratakes eight photos, varying the focus distance with each shot.
Auto Mode (AUTO)
The Pen E-PL9 adjusts settings to suit the scene; all you have to do is press the shutter button.


You provide good tips. It is hard to describe the vast settings in the EPL9, which may have changed from the EPL8 or EPL7. I will share my observations for you or others using your tips. I’m sorry this is lengthy.
In my newly purchased EPL9 in the U.S.A., “Settings” look different than described.
1. In the ‘Settings’ portion of this post, tip 1 is not needed to show the ‘cog/gear’ menu
-The ‘cog/gear’ is described as a sub-menu of the ‘spanner/wrench’
-But in my EPL9, the ‘cog/gear’ is its own selection, not part of the ‘spanner’
2. In the ‘Settings’ portion of the post, tip 2 identifies ‘D.Disp/PC’ as what you see when you select the cog
In my EPL9,
…the cog has a sub-menu with selections A, B, C1, C2, D1, D2, E, F, G, H
…selecting cog then C1 shows the screen titled ‘C1. Disp/=)))/PC’
…selecting cog then C1 shows the screen titled ‘C2. Disp/=)))/PC’
>>Note: I used ‘=)))’ to represent the “Beep sound” symbol in the title of that screen.
…the ‘Control Settings’ function described in your post is the first function in ‘C1.’
…the ‘iAuto’ setting is just the word ‘Auto’ inside a camera icon
…there are not checkboxes to untick for the each of the four modes (Auto, P/A/S/M, Art, Scn)
…there is instead a choice for each mode of either LV-C or LV-SCP
…LV-SCP is the “Super Control Panel” recommended in the post for expansive control of settings via the touchscreen
…LV-C is a simpler ‘Control Panel’ (?) with far fewer options on the touchscreen
On the E-M5 body, you can bracket the Art filters selected when the image is taken.
On the E-PL9, it seems just one Art filter is available for each image.
Is it possible to bracket three or four Art filters at one time?
Don’t think so Jerry