Best quality photo export for instagram
Best quality photo export for Instagram
Introduction
Instagram is a mobile photo-sharing and social networking platform. You can share pictures and videos with other users and repost automatically to Facebook. This mobile-only app allows you to add a bunch of retro filters and effects.
Some Instagrammers have problems with maintaining quality when posting to the platform. The pictures look fine beforehand, but once posted they look less sharp and blurry. Like Instagram took the magic away. This loss in quality can be because of many factors. I’ll go over all problems here and hopefully fix your problem.
 Why do we get a loss in quality when posting to Instagram? According to the Instagram Help Center , they will crop photo’s down to 1080p (in 2020 it’s 1920 pixels) and compress high quality images (image compression due to too large file size). It can cause your problems. If your image is too small, Instagram will expand it. This can also cause pixilation and fuzziness.
This all means it’s very important to optimise your images before uploading to Instagram.
How to upload landscape or portrait photos?
Understanding Instagram Image Size and Aspect Ratio Size involves the number of pixels that amount to the width and height of your photo or video.
Images have to be within a 4:5 to 1.91:1 aspect ratio range, these numbers equate to width and height.
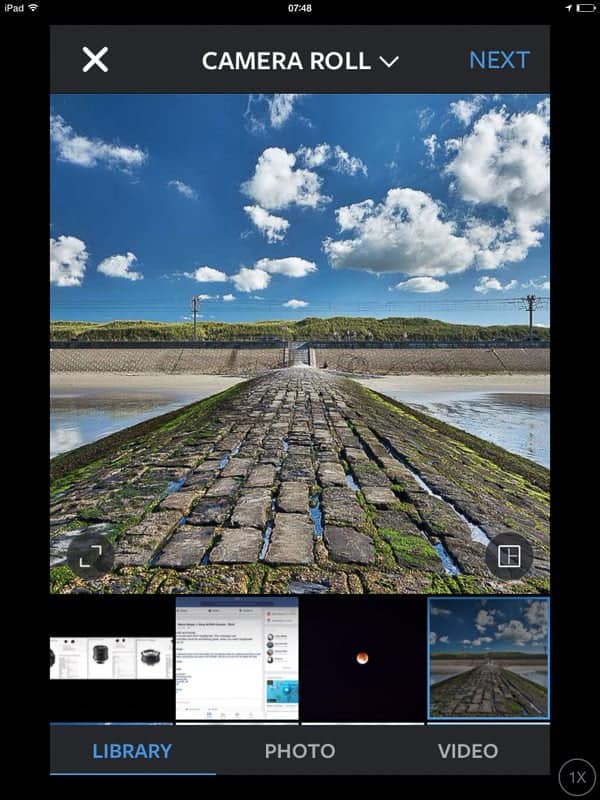
What does this mean? If you take an image using the Square’ option on your phone, that is a 1:1 aspect ratio. There is a format button above the camera roll when you access your photos from within Instagram. You can toggle this switch between square and full-size images.
Again remember that resolution should be above 150 pixels and below maximum 1920 to show up sharp and clear on Instagram. This to keep up with Retina and other high-resolution displays available on smartphones, tablets, and laptops. If it’s smaller or larger, they will scale your image up or down to size, be warned!
How to export your high-quality images for Instagram
You need to be careful that Instagram compression doesn’t ruin your pictures because their compression algorithm will kick in when your image size exceeds 1.6MB and 1920px. Be careful not to upload too large files.The compression algorithm can reduce the file size of the original by a factor of almost 13. This isn’t necessarily bad in some contexts, only if you see a visible loss in quality.
Adobe Lightroom
In Adobe Lightroom, it’s easy to export your images as Jpeg via the Export to function.
First, we should set file Settings to JPEG and sRGB. (PNG works too, but it’s format less used for photos) If you’re not using a compression plug-in, I would also advise you to set Quality to 50.
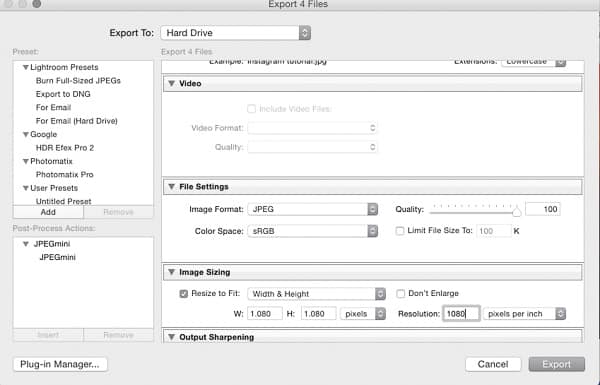
Now you must resize your image to fit in the 1920 by 1080 resolution limits set by Instagram. I do this resizing in the Image Sizing box. Set both Width and Height to 1080 pixels per inch. If you want to use any other format than 1:1 aspect ratio, set the Image sizing to Long Side (drop-down menu) 1920.
It’s a good idea to limit the file size to 1600 kb in the file settings window. It will ensure that the rather aggressive Instagram compression algorithm will never touch your image. You should check your export first and see if it looks OK when zoomed in 100%.
Remember that most people will view your image on a smartphone or tablet. There is no need for your image to look tack sharp on an HD, 4K or 5K monitor. If you don’t understand this principle, you can check this yourself. Open one of your exported images and then select fit to screen’. You’ll notice a clear decrease in sharpness. This will never be an issue here on a smartphone or tablet. Your exported image has the correct resolution for those screens.
Lightroom export will fit your image inside these constraints, whatever the width and height of your image are.
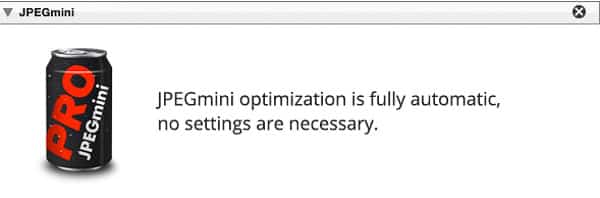
Expert tip: I use a plug-in called JPEGmini that automatically compresses my images to a maximum without quality loss. Most noteworthy, it reduces the image size by up to 80% without compromising quality. There is also a standalone app available. It will automatically optimize your images. You can also do this online for free!
On your smartphone, there are a few apps that do this too. Have a look at Jpeg Optimizer Pro for Android or Photo Compress for iOS.
Adobe Photoshop
In Adobe Photoshop, First of all, you need to go to File – Export – Export as.
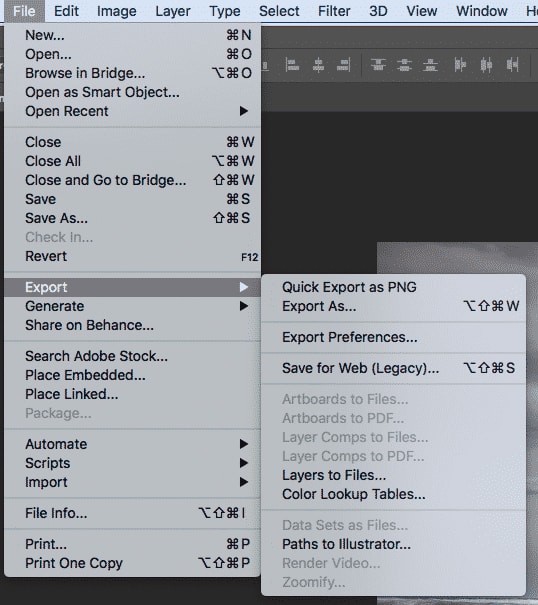
The same principles apply here. The format should be JPG, image size (long end) should be 1920 px. Resolution does not really matter, I always go for 72dpi. Finally, re-sample with Bicubic automatic and select convert to sRGB’. You can experiment with the Quality’ setting. I would say don’t go above 80% for Instagram.
With the preview app (free) on OSX
OS X Preview can resize your images (even in batch) most noticeably without investing in special RAW developing software.
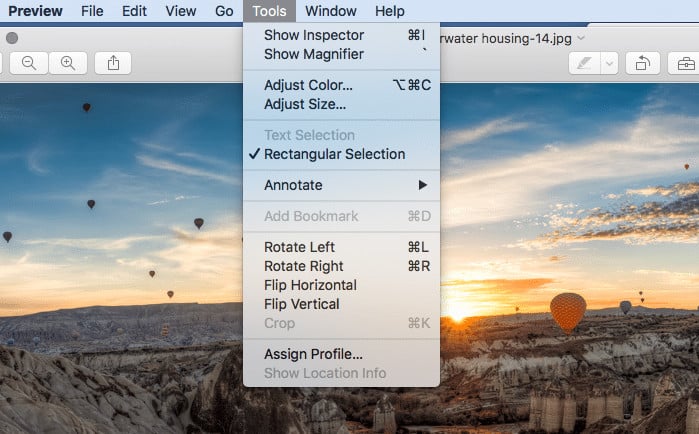
First, go to the Tools tab and select adjust size.
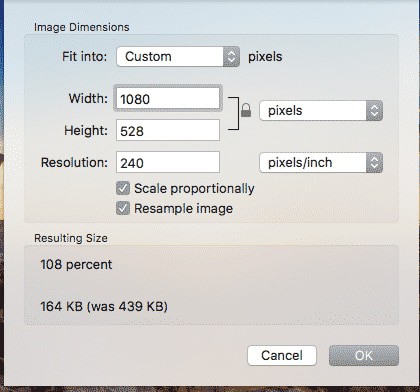
In that tab, make sure that you set the longest side of your image to 1920 pixels (whatever aspect ratio). Resolution is not really important.
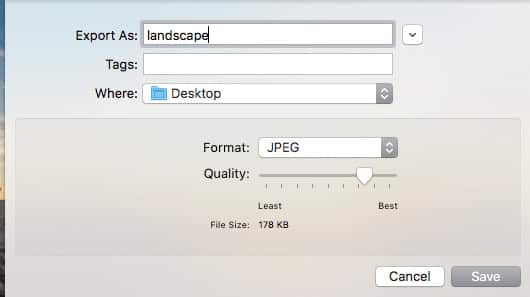
Now we need to go to file: export as. Export at around 80%.
To perform a batch resize, you can either open Preview from the Dock and File > Open your images. All of your images should open in Preview’s left sidebar.
Finally, select all the images by clicking on the Edit menu. Select All, you’ll see that it highlights all your images.
Now follow step 2 and 3 to get all your images Instagram ready!
With Microsoft Windows
There is a good and free app for Windows users. It’s called Image Resizer For Windows.
First, install it. Right-click on one or more selected picture files in File Explorer. Now select Resize pictures.
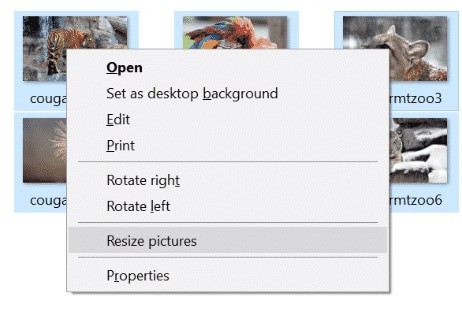
Finally, select the Custom Size to fit 1920 px long side and click the Resize button.
On an Android device
Yes, even with an Android smartphone camera, your images can suffer from the dreaded Instagram compression.
There is an excellent app on the Google Play store called Photo Resizer It allows you to choose a 1024 by 768 aspect ratio resize mode on Android. You can also resize from other photo apps via the share option.
Your exported images are by default saved in the “/photoresizer” folder of your internal storage
On an iPhone
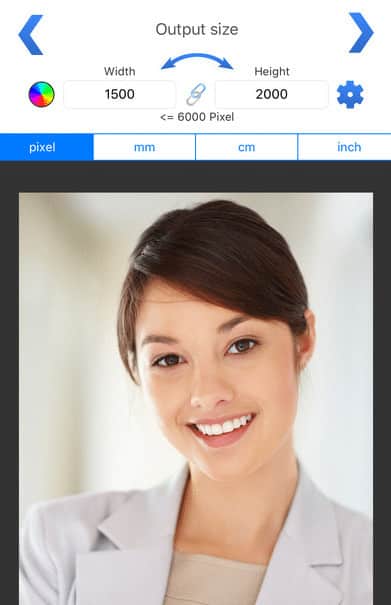
There is an app on iTunes called Image Size. You can use it on iPad and iPhone and it’s free!
You can resize your image in four easy steps:
– First, open an image or take a photo
– Enter 1920 pixel as your max dimension long side of your image.
– Finally, the save button will overwrite the original image.
Squoosh does it for free and in any browser and any device
Google has recently also launched their free compression software called squoosh which enables you to resize (max 1920×1080 for Instagram) and compress using different compression models! Except for resizing, I would leave everything to the standard settings. Squoosh also works on your phone browser, so it’s ideal if you want to prepare your phone pictures for Instagram.
In my testing, squash managed reduce the size of (even already compressed) images by between 50% and 70% without any visible loss in quality. Since it’s free, I would definitely recommend this Squoosh if you need to compress and resize your images in order to evade the dreaded Instagram loss in sharpness phenomenon after upload.
Pro tip: you need a micro landing page
Instagram limits the links on your profile to exactly1. For influencers or anyone who wants to promote their skills, this is not enough. If you have this problem, have a look at Shorby.
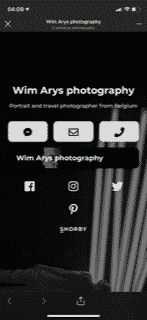
Shorby makes a clickable link for you. This leads to a customisable micro-landing page like this one on my profile with any info you want.
How to edit Instagram posts
These limitations apply to Android and iOS.
- Changing a photo after posting on Instagram is unfortunately not possible at the moment. The only way to do this is to delete the entire post and start over again.
- Changing filters after posting on Instagram is not possible either, unfortunately since the picture is ‘processed’ with the chosen filter and they do not store the original on Instagram.
Adding text later on to an Instagram post is possible:
- click on the “…” icon of the photo (or video)
- choose “Edit” to open the text editing window.
- edit the Instagram photo text, add new info or delete words.
- tap on the “Done” button to confirm the changes.
Legal Instagram automation and auto posting
If you’re looking for a way to plan and automatically post on Instagram, have a look at Socialbee, Later or StoryChief . They all have free plans. For most of these apps, if you want to use the auto post feature, you will need to switch your Instagram to a pro account. This will also give you the benefit of extra stats of visitors, likes and comments.
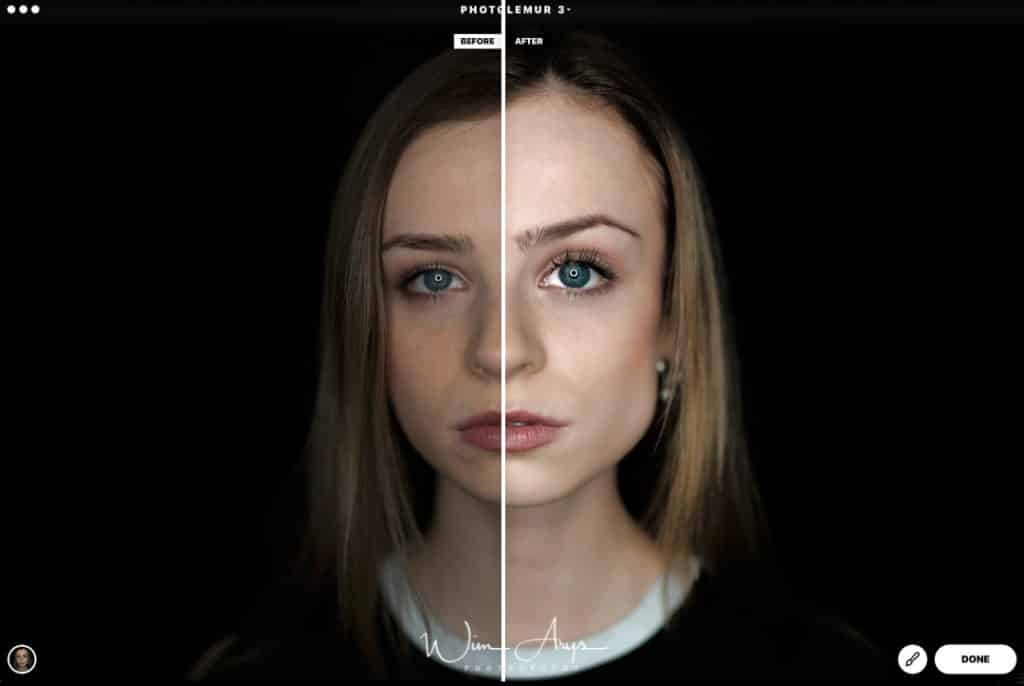
Tip: Auto enhance your images for even better quality
It’s a good idea to try to enhance your images before posting to Instagram. Snapseed is an amazing free image editor available for Android and iOS. What are you using? Leave your reply in the comment section below.
Conclusion
We all know you need to optimize your images for upload to Instagram. On Mac or Windows, we can use Lightroom and Photoshop. If you don’t want to spend any money you can use Preview on Mac and you can use the free app Image Resizer on Windows. If you’re on a tablet or smartphone, the app store has a few free applications available.
It’s important to keep image dimensions at a max op 1920 px because this is the largest size that Instagram will allow without compression. In addition, keep your file as small as possible by setting quality to 80%.
Finally, you can use image compression software like JPEGmini because this can reduce the image size up to 80%. There are some alternatives that are just as effective like Squoosh (drag and drop or upload with any browser, any device) Tinyjpg and Imageoptim.
Finally, I’m on Instagram too: wim_arys_photography. Talk to me and follow me if you like, I’ll definitely follow back.


Great Info – this will help with my posts on Instagram!
Thank you man! That’s a great article
No problem, happy to help Jane.
Nice point to mention about the size not exceeding 1600kb, never read that advice before. And good SEO work 😉
As a photog, I’m concerned about ig users stealing my pics for unauthorized use. After trying several easy and challenging methods, I’m convinced it’s just not secure. So I haven’t put my pics on there. Other than annoying watermarks, lowering the resolution might work for me. How low of a resolution can u go and pics still look nice on a phone? Thx!
Hi Robby, online image theft is indeed a real thing and it’s something photographers should be aware of. You have some (free) services like Pixsy that actually scan the web continuously for any site that might have illegally copied your photos. But your proposed method is of course also a possible way of protecting yourself against image theft.
I would go no lower than Standard Definition quality if I was you, which is 640 x 480, or 640 pixels long side if you’re not posting in 3:2.
I find no difference between Instagram compression and Lightroom export settings. Why is there a big fuss around this?
Thanks !
Hi Wim, I followed your advice about resizing the image, but when I upload from the browser, it doesn’t help. The images still appear blurry in the feed. What else do you think I can do?
Have you tried using something like JpegMini or Optimage in other to further reduce the file size? Instagram probably compresses images from desktop harder than from mobile.
This is very informative and useful post. Thanks for sharing!