bokeh full body
Achieving Bokeh in a full body portrait
Introduction
Before we get into how to get bokeh in a full body portrait, let’s have a look at what this actually means. What the Japanese call “bokeh” is basically the quality of the out of focus part of the image. This includes how round the specular highlights are in that part of the image (the bokeh balls) as well as how blurry the background is and the smoothness of the transition between the sharp subject and blurry background.
Much depends of course on personal preference when it comes to bokeh, but in general the trend is the more ‘creamy’ the background the better. And it’s currently considered that the more shallow the depth of field is, the more eye pleasing your image will be.
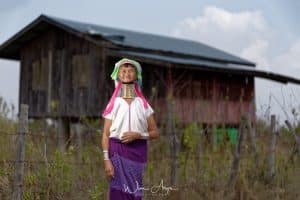
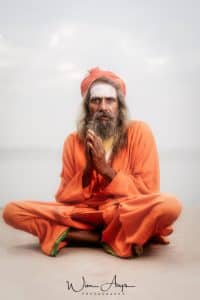
Achieving a beautiful bokeh with headshots is relatively easy, you have to make sure that the eyes are in focus. But for a nice bokeh effect in a full body portrait, there are a few more things to consider. We’ll have a look at what is needed to achieve this much sought after look.

Best Aperture for Bokeh in a full body portrait
One of the most important settings in order to achieve Bokeh in a full body portrait will be Aperture. The general rule is the faster your aperture, the more blurry the background will be. Aperture relates to size of the opening of the lens. If you have a look inside your lens, you’ll most likely see tiny little aperture blades. These can be opened or closed using the aperture ring (or through your camera). Most lenses have an aperture of a range between f/1.4 to f/22. Counterintuitively, the lower the number, the more open your lens will be, and the more light will hit the sensor. So f/4 is a larger opening that f/16 for instance.
This is great for low light shooting, as the more light hits the sensor, the shorter the time will be to achieve a good exposure. Due to lens design and the laws of physics, this also means that the in-focus area will be smaller with a large aperture than with a small aperture. And this is exactly what we want to achieve in this case.
If you’ve ever tried shooting face portraits at f/1.4, you’ll probably have had problems with achieving an image that looks in focus. This is because the closer your subject is to the lens, the more this shallow depth of field effect is boosted or exaggerated. If you’ve ever tried your hand at macro photography, you’ll also have noticed that the in focus part is extremely thin. Hence many macro photographers use a system called focus stacking, where you take several shots with a different focus point and stitch these together afterward.
The good news is that for full body portraits, this is not really a problem. Because you’ll be further away from the subject, you’ll be able to shoot at f/1.4 or f/1.8 without any problem whilst still having the full body in focus. You will need a lens that is quite sharp at this large aperture though, and these generally cost quite a bit of money.
Best Focal length for Bokeh in a full body portrait
When choosing the right lens for a nice Bokeh in a full body portrait, you need to be aware of a phenomenon called lens compression. When you use a longer focal length you’ll be further away from your subject. This gives the impression that distant objects are larger than they are in real life and it appears that the background has pulled closer to the subject. This optical phenomenon together with that shallow depth of field I was talking about gives you the best Bokeh for a full body portrait.

Besides this maximum separation between subject and background, the large aperture will give you the roundest ‘Bokeh balls’ with specular highlights too. This is because the iris mechanism (those little iris blades that are in the lens) are at their most open and hence most round setting.
Another advantage for full body portraits is that using lens compression you’ll be able to ‘crop’ a lot of distracting elements like houses, cars, other people, etc out of your frame.
A disadvantage is that you’ll need some room to move backwards in order to get your subject in the frame from head to toe.
The longer your lens is, the more this effect will occur, but there is a sweet spot focal length that differers per camera system. Besides this fact, faster (large aperture) lenses are generally speaking already quite expensive and fast telephoto lenses are extremely expensive.
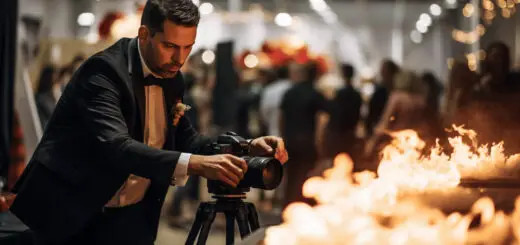
You’ll always prefer a prime over a zoom lens for bokeh in full body portraits. This is because generally speaking, prime lenses are faster and we need this for that separation between subject and background. But there are exceptions, for instance Sigma make an excellent 50-100 mm f/1.8 zoom for APS-C system that is ideal for this type of portraiture. Also, many wedding photographers use a 70-200mm f/2.8 zoom lens for their couple shoots. This because you won’t notice too much difference between f/1.8 and f/2.8 at 160 mm. And it’s convenient to have a zoom during a full day of shooting of course.
I prefer a prime lens for shooting full body portraits because it will give you the maximum separation between subject and background with a creamy out of focus area and nice, round specular highlights. The right focal length starts at around 50mm in full frame format. This is a good starting point if you can find an f/1.4 in your camera system that is sharp enough at this aperture like the Zeiss Plannar T 50mm f/1.4.
A better focal length is however around 80mm, you can get away with a somewhat slower lens here like a Tamron 85mm f/1.8. A lens that offers great value and excellent optical quality.
The best marriage between convenience (i.e. how far back you have to step to get your full body shot), large aperture and focal length is around 100mm/ Sigma offers an excellent 105mm f/1.4 for Nikon, Canon, Sigma and Sony mounts that is well worth the investment.
The next traditional focal lights is 135 mm/ This is considered the holy grail Bokeh focal length with a perfect marriage between separation, compression and bokeh. You’ll need to find an f1/8 pithing your mount system like the fabulous Zeiss 135mm f.18 or Sigma again now make a cross platform 135mm fast aperture lens too.

You’ll off course find equivalent lenses from Olympus, Fuji Canon and Nikon too. Remember that you generally get what you payed for. And if budget is no issue, you could go for a 6000 dollar 200mm f/2.
Conclusion
Now that you’ve learned about large aperture lenses, the effect of compression with tele lenses and the right focal lengths for great Bokeh in full body portraits., you’re ready to go out and make your own. Remember that any current camera system can achieve excellent results as long as you have the right lens and technique. Once you’ve mastered this, why not mix it up in the future and add a flash for some high sync daytime photography? Or use the Brenizer method where you stitch together multiple images from a full body portrait scene for the ultimate medium format bokeh look? The possibilities are endless, as long as you enjoy yourself and stay creative.


super poradniki i instrukcje