
Sony A7 IV advanced manual
Introduction
The Sony A7 IV uses a 33MP Stacked CMOS sensor with 30fps burst mode, improved AF with animal and human eye tracking and Dual UHS-II / CFexpress Type A card slots. The A7IV is a great all round camera thatch produce sharp images with prime lenses as well as zooms thanks to the 5;5-stop image stabilization. Sony FE cameras are used for everything from environmental portraits to landscape shooting with a wide range of lenses available ranging from telephoto lenses to wide-angle lenses. I like the range of G-master prime portrait lenses for ultimate image quality with beautiful bokeh.
Photographers now also get a 30fps burst mode, improved AF with animal and human eye tracking and Dual UHS-II / CFexpress Type A card slots.
If you’re coming from an older A7 series camera, you’ll notice that the menu system has received a major overhaul. We’ll have a page-by-page look at the menus in this post. If you’re looking for a particular feature, I would suggest that you use the search function in your preferred browser, as this post is quite long.
Sony A7 IV Menu overview
Well go over the entire menu in this guide. The Sony A7 IV menu system can be confusing, because there are slight variations for different regions, and what Mode your camera is set to (for instance stills or movie mode). If you are looking for a specific page, don’t go by the page number as these differ, go by the menu name (like “Shooting”, “Exposure/colour”, or “Playback) and the chapter number (like the 1 before “My Menu Setting” below).
My Menu – page 1 of 51
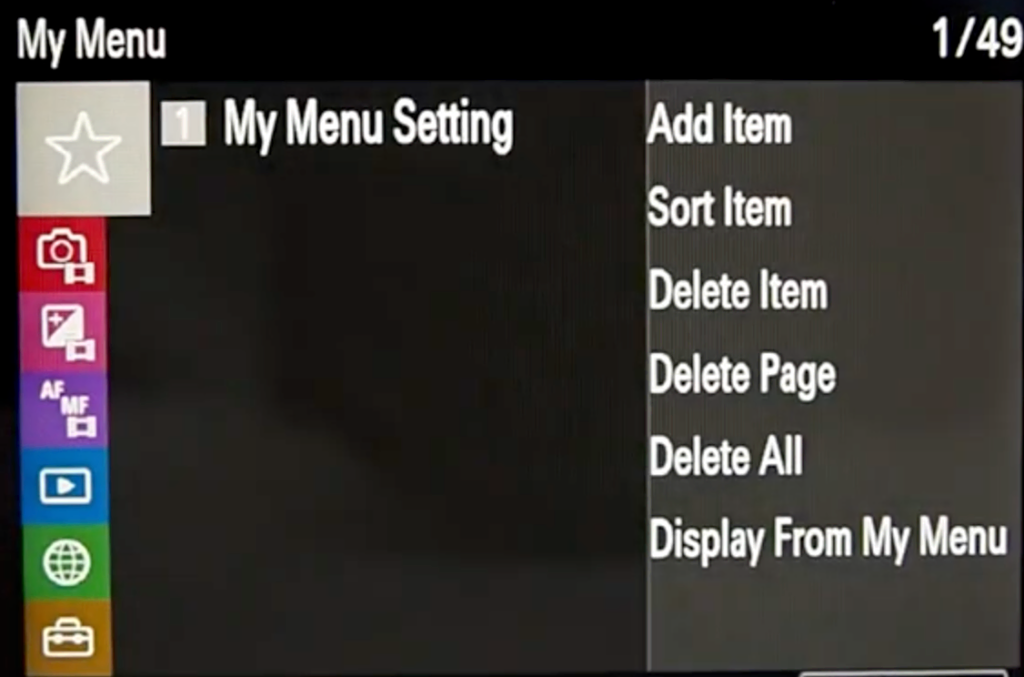
The idea of the my menu page is that you add your most used functions to your own menu.
This way, all you need is easily accessible. You can add any of the menu functions you wish to this Menu.
Shooting Menu 1a
JPEG/HEIF Switch:
Switches the file format (JPEG / HEIF) of the still image to be recorded.
The JPEG format has general compatibility. You can view and edit JPEG files in various environments. The HEIF format has high compression efficiency. The Sony A7 IV can record with stunning image quality and small file sizes in the HEIF format. Depending on the computer or software, you may not view or edit HEIF files. In addition, a HEIF-compatible environment is required to play back still images in the HEIF format. You can enjoy high-quality still images by connecting the Sony A7 IV and the TV via HDMI.
- JPEG: Performs digital processing on the RAW file and records it in the JPEG format. This setting gives priority to compatibility.
- HEIF(4:2:0):Performs digital processing on the RAW file and records it in the HEIF (4:2:0) format. This setting gives priority to image quality and compression efficiency.
- HEIF(4:2:2):Performs digital processing on the RAW file and records it in the HEIF (4:2:2) format. This setting gives priority to the ultimate image quality.
Image quality settings:
Sony FE cameras has grouped all image quality settings for the Sony A7 IV here. You can choose to shoot in JPEG or HEIF, RAW, RAW+JPEG, or RAW+HEIF. For each of these formats, you can also select quality between low, medium and high. For RAW files, you have the option to enable (lossless) compression.
JPEG/HEIF Quality: Standard, fine and extra fine are selectable. Extra fine will give you the best possible quality JPEG. This includes noise reduction and sharpening from the on-board JPEG engine.
JPEG Image size: Large, medium or small is selectable.
When [Aspect Ratio] is set to 3:2
| Setting values | Pixel number (horizontal×vertical) |
|---|---|
| L: 33M | 7008×4672 pixels |
| M: 14M | 4608×3072 pixels |
| S: 8.2M | 3504×2336 pixels |
When [Aspect Ratio] is set to 4:3
| Setting values | Pixel number (horizontal×vertical) |
|---|---|
| L: 29M | 6224×4672 pixels |
| M: 13M | 4096×3072 pixels |
| S: 7.3M | 3120×2336 pixels |
When [Aspect Ratio] is set to 16:9
| Setting values | Pixel number (horizontal×vertical) |
|---|---|
| L: 28M | 7008×3944 pixels |
| M: 12M | 4608×2592 pixels |
| S: 6.9M | 3504×1968 pixels |
When [Aspect Ratio] is set to 1:1
| Setting values | Pixel number (horizontal×vertical) |
|---|---|
| L: 22M | 4672×4672 pixels |
| M: 9.4M | 3072×3072 pixels |
| S: 5.5M | 2336×2336 pixels |
Hack: enable lossless compression for faster write-to card times without any loss in quality.

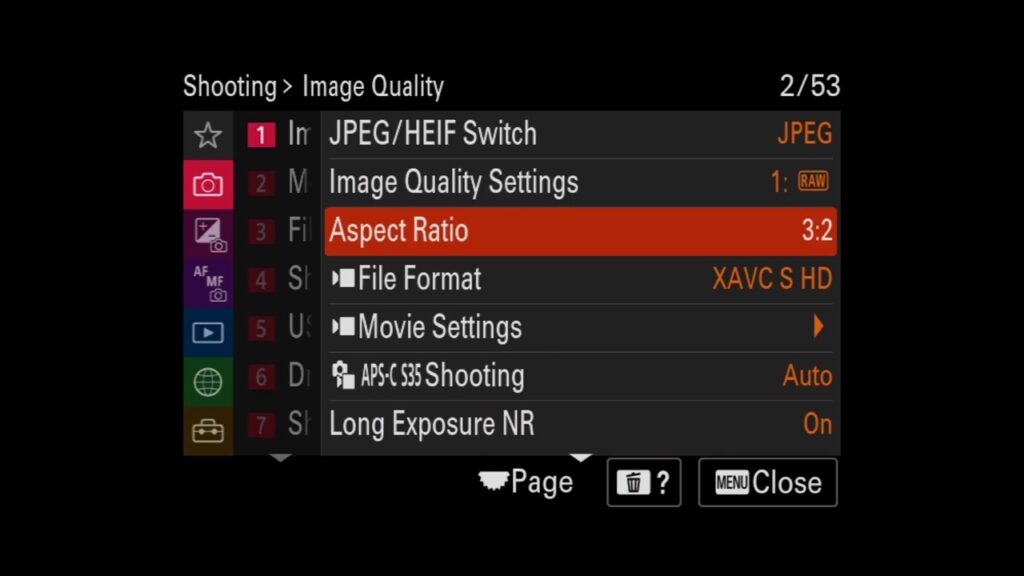
Aspect ratio:
You can choose 3:2 (which uses the full sensor surface), 4:3; 1:1 or 16:9 (crop but a more broad view).
Fike Format (movie):
| XAVC HS 4K | Records 4K movies in the XAVC HS format.
The XAVC HS format uses the HEVC codec, which has high compression efficiency. The camera can record movies with higher image quality than XAVC S movies but the same data volume. Long GOP compression is used for movies. |
| XAVC S 4K | Records movies in 4K resolution (3840×2160). Long GOP compression is used for movies. |
| XAVC S HD | Records movies in HD resolution (1920×1080). Long GOP compression is used for movies. |
| XAVC S-I 4K | Records movies in the XAVC S-I format.
The XAVC S-I format uses Intra compression for movies. This format is more suitable for editing than Long GOP compression. |
| XAVC S-I HD | Records movies in the XAVC S-I format.
The XAVC S-I format uses Intra compression for movies. This format is more suitable for editing than Long GOP compression. |
Movie settings:
Sets the frame rate, bit rate, color information, and some other settings.
Menu item details
When File Format is set to XAVC HS 4K:
When [ File Format] is set to [XAVC HS 4K]
| Rec Frame Rate | Record Setting | Size | Movie compression format |
|---|---|---|---|
| 60p/50p | 200M 4:2:2 10bit | 3840×2160 | Long GOP |
| 60p/50p | 150M 4:2:0 10bit | 3840×2160 | Long GOP |
| 60p/50p | 100M 4:2:2 10bit | 3840×2160 | Long GOP |
| 60p/50p | 75M 4:2:0 10bit | 3840×2160 | Long GOP |
| 60p/50p | 45M 4:2:0 10bit | 3840×2160 | Long GOP |
| 24p* | 100M 4:2:2 10bit | 3840×2160 | Long GOP |
| 24p* | 100M 4:2:0 10bit | 3840×2160 | Long GOP |
| 24p* | 50M 4:2:2 10bit | 3840×2160 | Long GOP |
| 24p* | 50M 4:2:0 10bit | 3840×2160 | Long GOP |
| 24p* | 30M 4:2:0 10bit | 3840×2160 | Long GOP |
*Only when [NTSC/PAL Selector] is set to NTSC.
When [File Format] is set to [XAVC S 4K]
| Rec Frame Rate | Record Setting | Size | Movie compression format |
|---|---|---|---|
| 60p/50p | 200M 4:2:2 10bit | 3840×2160 | Long GOP |
| 60p/50p | 150M 4:2:0 8bit | 3840×2160 | Long GOP |
| 30p/25p | 140M 4:2:2 10bit | 3840×2160 | Long GOP |
| 30p/25p | 100M 4:2:0 8bit | 3840×2160 | Long GOP |
| 30p/25p | 60M 4:2:0 8bit | 3840×2160 | Long GOP |
| 24p* | 100M 4:2:2 10bit | 3840×2160 | Long GOP |
| 24p* | 100M 4:2:0 8bit | 3840×2160 | Long GOP |
| 24p* | 60M 4:2:0 8bit | 3840×2160 | Long GOP |
*Only when [NTSC/PAL Selector] is set to NTSC.
When [File Format] is set to [XAVC S HD]
| Rec Frame Rate | Record Setting | Size | Movie compression format |
|---|---|---|---|
| 60p/50p | 50M 4:2:2 10bit | 1920×1080 | Long GOP |
| 60p/50p | 50M 4:2:0 8bit | 1920×1080 | Long GOP |
| 60p/50p | 25M 4:2:0 8bit | 1920×1080 | Long GOP |
| 30p/25p | 50M 4:2:2 10bit | 1920×1080 | Long GOP |
| 30p/25p | 50M 4:2:0 8bit | 1920×1080 | Long GOP |
| 30p/25p | 16M 4:2:0 8bit | 1920×1080 | Long GOP |
| 24p* | 50M 4:2:2 10bit | 1920×1080 | Long GOP |
| 24p* | 50M 4:2:0 8bit | 1920×1080 | Long GOP |
| 120p/100p | 100M 4:2:0 8bit | 1920×1080 | Long GOP |
| 120p/100p | 60M 4:2:0 8bit | 1920×1080 | Long GOP |
*Only when [NTSC/PAL Selector] is set to NTSC.
When [File Format] is set to [XAVC S-I 4K]
| Rec Frame Rate | Record Setting | Size | Movie compression format |
|---|---|---|---|
| 60p/50p | 600M 4:2:2 10bit/500M 4:2:2 10bit | 3840×2160 | Intra |
| 30p/25p | 300M 4:2:2 10bit/250M 4:2:2 10bit | 3840×2160 | Intra |
| 24p* | 240M 4:2:2 10bit | 3840×2160 | Intra |
*Only when [NTSC/PAL Selector] is set to NTSC.
When [File Format] is set to [XAVC S-I HD]
| Rec Frame Rate | Record Setting | Size | Movie compression format |
|---|---|---|---|
| 60p/50p | 222M 4:2:2 10bit/185M 4:2:2 10bit | 1920×1080 | Intra |
| 30p/25p | 111M 4:2:2 10bit/93M 4:2:2 10bit | 1920×1080 | Intra |
| 24p* | 89M 4:2:2 10bit | 1920×1080 | Intra |
*
*Only when the NTSC/PAL Selector is set to NTSC.
APS-C/Super 35mm shooting:
This setting tells the Sony A7IV what to do when you’ve attached an APS-C lens to this full-frame camera. An APS-C lens won’t cover the full surface of the sensor, or you’ll notice heavy vignetting towards the edges of the frame. When recording movies, this crop is called Super 35mm. The principle here is that you use any a part of the surface of the sensor. If you want to do this, don’t worry too much about image quality as this is a high megapixel Sony A7 IV leaving you with a usable 15MP in APS-C mode.
- On: Records in either APS-C-equivalent size or Super 35mm-equivalent size.
- Auto: Automatically sets the capture range depending on the zoom or prime lenses.
- Off: Always captures 35mm full-size image sensor pictures.
Long Exposure NR:
Set if you want the processing engine to apply noise reduction for images captured with a long exposure time. Leave it ON as there is no way of duplicating this process in post, except to take a black frame of the same length in the same atmospheric conditions.
Shooting Menu 1b

High ISO NR:
Here you can select the amount of noise reduction applied to images with high ISO settings (when quality is set to jpeg). As Sony FE cameras has rather aggressive noise reduction, I would change it to Low. (if not, you run the risk of getting paint-like, smeared images at higher ISO values).
HLG Still image:
By using gamma characteristics equivalent to HLG (Hybrid Log-Gamma: standard for HDR images), you can shoot still images with a wide dynamic range and a wide color gamut compatible with BT.2020.
Remember that HLG Still Image can only be set when shooting in the HEIF format.
Color Space:
You can choose between Standard and Adobe (extended color range) RGB. This is only important if you shoot JPEG and not RAW. Adobe RGB would be preferable if you print many images because of the extended color range.
Hack: I’ll go against the grain here and advise you to set it to standard. This will avoid compatibility issues while editing.
Lens Compensation:
The Sony A7 IV allows you to select whether you would like to apply various lens compensations (shading, chromatic aberration, distortion) even when shooting in RAW. I leave this ON, but you might get a conflict with RAW files and using a lens profile in programs like Lightroom where you’ll see a reverse vignette for instance.
Shooting Menu 2
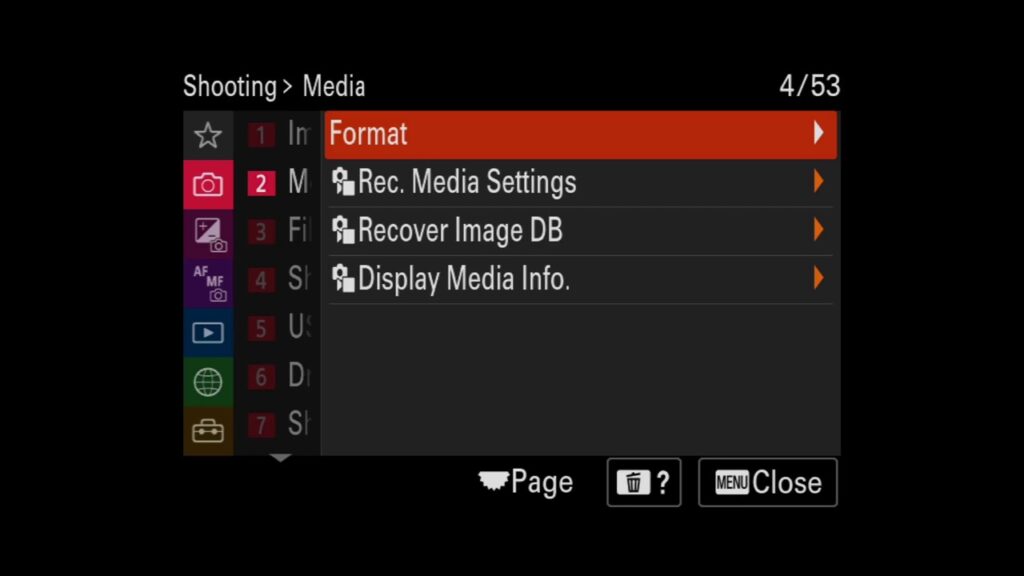
Format:
When you use a memory card with this Sony A7 IV for the first time, we recommend that you format the card using the Sony A7 IV for stable performance of the memory card. Note that formatting permanently erases all data on the memory card, and is unrecoverable. Save valuable data on a computer, etc.
Rec. Media Settings:
Selects the memory card slot on which to record. Slot 1 is the default setting. If you do not intend to change the settings and will only use one memory card, use the slot 1.
You can select the method for recording an image, such as recording the same image simultaneously to two memory cards or recording different types of images to two memory cards.
List of storage locations by recording mode:
| Recording Mode | Memory card slot selected in Prioritize Rec. Media | Another memory card slot |
|---|---|---|
| Standard | still image/movie |  |
Simult. ( ) ) |
still image/movie | still image |
Simult. ( ) ) |
still image/movie | movie |
| Simult. (/) |
still image/movie | still image/movie |
| Sort(RAW/JPEG) | still image (RAW)/movie | still image (JPEG) |
| Sort (RAW/HEIF) | still image (RAW)/movie | still image (HEIF) |
| Sort(JPEG/RAW) | still image (JPEG)/movie | still image (RAW) |
| Sort (HEIF/RAW) | still image (HEIF)/movie | still image (RAW) |
| Sort(/) |
still image | movie |
If a memory card in use becomes full or you have forgotten to insert a memory card into a slot, you can record images to the other memory card.
- On: The Sony A7 IV automatically starts recording on the other memory card when a memory card in use becomes full or if you have forgotten to insert a memory card.
- Off: The Sony A7 IV does not perform Auto Switch Media.
Recover Image DB:
If image files were processed on a computer, problems may occur in the image database file. In such cases, it will not play the images on the memory card back on the A1. If these problems happen, repair the file using Recover Image DB. By the way, Images recorded on the memory card are not deleted by Recover Image DB.
Display media info:
Displays the recordable number of still images and the remaining recording time for movies on the memory card.
Shooting 3

File/Folder Settings:
- Configure settings related to the folder and filename of the still image to be shot.
- File Number: You can set how to assign file numbers to still images.Series: Does not reset file numbers for each folder.Reset: Resets file numbers for each folder.
- Set File Name: You can specify the first three characters of the file name.
- Folder Name: You can set how folder names are assigned.
File Settings:
- File Number: You can set how to assign file numbers to movies. Series: Does not reset file numbers even if the memory card is changed.Reset: Resets the file number when the memory card is changed.
- Series Counter Reset: Resets the series counter used when File Number is set to Series.
- File Name Format: You can set the format for movie file names.
- Title Name Settings: You can set the title when File Name Format is set to Title, Date + Title, or Title + Date.
Select REC Folder:
If Folder Name under File/Folder Settings is set to Standard Form and there are 2 folders or more, you can select the folder on the memory card to which images are to be recorded.
Create New Folder:
Creates a new folder on the memory card for recording still images. A new folder is created with a folder number one greater than the largest folder number currently used. Images are recorded in the newly created folder.
Up to 4,000 images in total can be stored in one folder. When the folder capacity is exceeded, a new folder may be automatically created.
IPTC information:
You can write IPTC information when recording still images. Create and edit IPTC information using the IPTC Metadata Preset and write the information to a memory card beforehand.
- Write IPTC Info: Sets whether to write IPTC information to still images.
- Register IPTC Info :Registers IPTC information from a memory card to the camera. Select Slot 1 or Slot 2 as the memory card from which to read out IPTC information.
Copyright info:
- Write Copyright Info: Sets whether to write copyright information. If you select On, a Copyright icon will appear on the shooting screen.
- Set Photographer: Sets the photographer’s name.
- Set Copyright: Sets the copyright holder name.
- Disp. Copyright Info: Displays the current copyright information.
Write Serial Number:
Writes the camera’s serial number to the Exif data when shooting still images.
Shooting 4
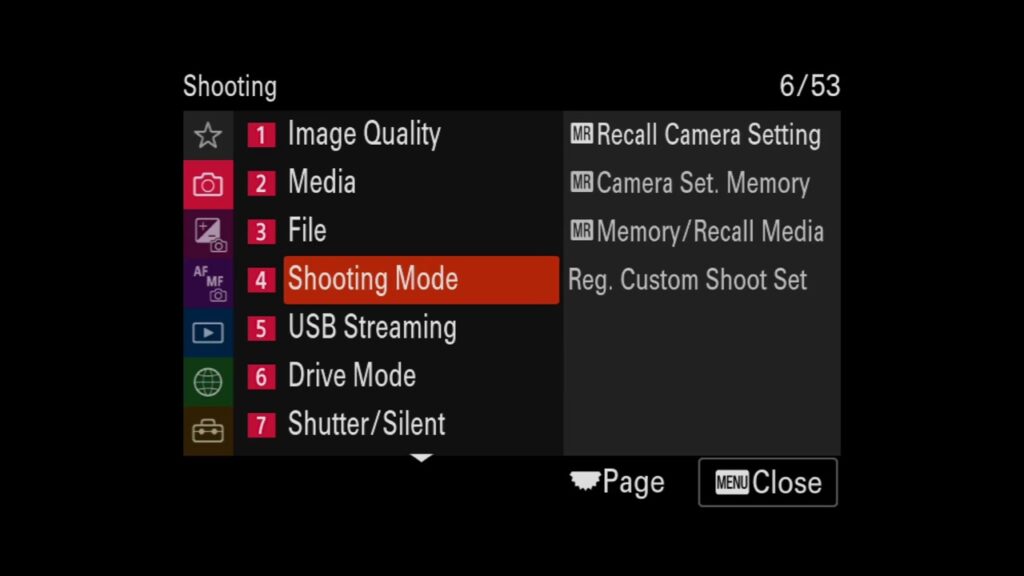
Recall camera Setting:
Allows you to shoot an image after recalling your preferred shooting settings registered with MR settings on the Mode dial or select them here.
In order to save a Sony A7 IV Setting:
-
Set the mode dial to 1, 2, or 3 (Recall Sony A7 IV Setting).
-
Press the center of the control wheel to confirm.
Camera Set. Memory:
Allows you to register up to 3 often-used modes or Sony A7 IV settings to the Sony A7 IV and up to 4 (M1 through M4) to the memory card. You can recall the settings using just the mode dial.
-
Set the Sony A7 IV to the setting you want to register.
-
MENU – Shooting – Shooting Mode – Sony A7 IV Set. Memory – desired number.
-
Press the center of the control wheel to confirm.
Memory/Recall Media:
Selects the memory card slot from which settings are recalled or to which settings are registered for M1 through M4.
Reg. Custom Shoot Set:
You can register shooting settings (such as exposure, focus setting, drive mode, etc.) to a custom key in advance and temporarily recall them while holding down the key. Simply press the custom key to switch the settings quickly and release the key to go back to the original settings. This function is useful when recording active scenes such as sports.
-
MENU – Shooting – Shooting Mode – Reg. Custom Shoot Set – Select a registration number from Recall Custom hold 1 to Recall Custom hold 3.The setting screen for the selected number will be displayed.
-
Using the top/bottom/left/right side of the control wheel, select the check boxes for the functions that you want to recall with one of the registration numbers and press the center to check each box.
A check mark will be displayed in the boxes for the functions.
- To cancel a selection, press the center again.
-
Select the function that you want to adjust using the top/bottom/left/right side of the control wheel, and press the center to adjust the function to the desired setting.
- Select Import Current Setting to register the current settings of the Sony A7 IV to the registration number that you chose.
-
Select Register.
Shooting5 5
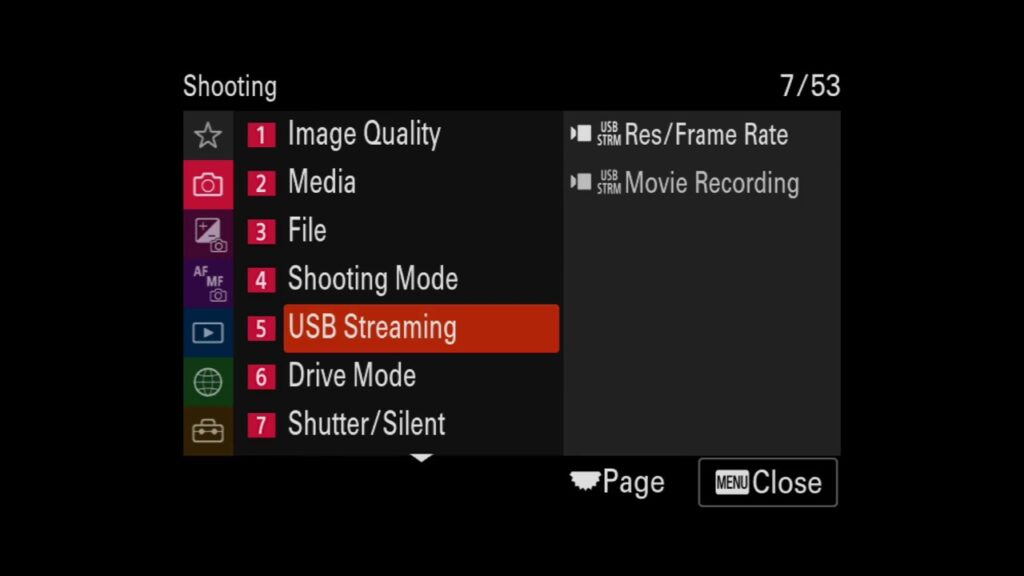
You can connect a computer, etc. to the camera and use the camera video and audio for livestreaming or web-conferencing services. Select MENU →  (Setup) → [USB] → [USB Connection Mode] → [Sel. When Connect]or [USB Streaming] beforehand.
-
MENU →
 (Shooting) → [USB Streaming] and select the desired settings for [
  Res/Frame Rate] and [ Movie Recording].
 -
Connect the camera to a computer or other device with a USB cable.
[USB Streaming:Standby] will appear on the camera screen, and the camera will switch to the streaming standby state.
- If [USB Connection Mode] is set to [Sel. When Connect], select [Live Stream(USB Streaming)] on the selection screen for the USB connection mode.
- Use a cable or adapter that matches the terminal on the device to be connected.
-
Start streaming from your livestreaming/web-conferencing service.
[USB Streaming:Output] will appear on the camera screen.
- To exit [USB Streaming], turn off the power of the camera or disconnect the USB cable.
Res/Frame Rate:
Sets the resolution and the frame rate of the video. ([4K(2160p) 15p]/[4K(2160p)12.5p]/[HD(1080p) 60p]/[HD(1080p) 50p]/[HD(1080p) 30p]/[HD(1080p) 25p]/[HD(720p) 30p]/[HD(720p) 25p])
Movie Recording:
Sets whether or not to enable recording of the video to the recording media during streaming. ([Enable]/[Disable])
Shooting Menu 6
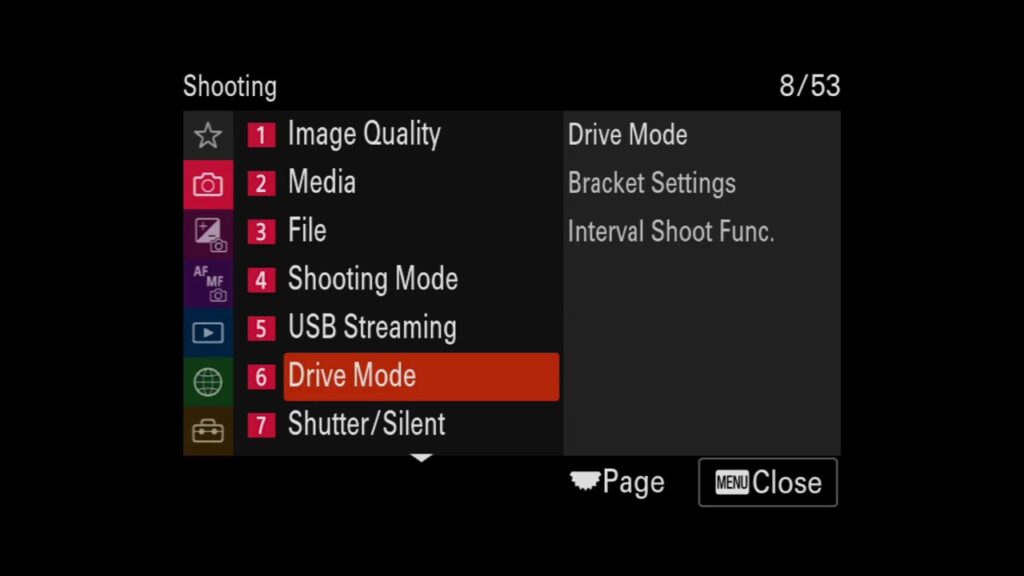
Drive Mode:
Select the appropriate mode for the subject, such as single shooting, continuous shooting or bracketing shooting.
Menu item details:
-
 Single Shooting:
 - Normal shooting mode.
-
 Cont. Shooting:
 - Shoots images continuously while you press and hold down the shutter button.
-
 Self-timer(Single) :
 - Shoots an image using the self-timer after a designated number of seconds have elapsed since the shutter button was pressed.
-
 Self-timer(Cont):
 - Shoots a designated number of images using the self-timer after a designated number of seconds have elapsed since the shutter button was pressed.
-
 Cont. Bracket:
 - Shoots images while holding the shutter button down, each with different degrees of exposure.
-
 Single Bracket:
 - Shoots a specified number of images, one by one, each with a different degrees of exposure.
-
 WB bracket:
 - Shoots a total of three images, each with different color tones according to the selected settings for white balance, color temperature and color filter.
-
 DRO Bracket:
 - Shoots a total of three images, each at a different degree of D-Range Optimizer.
- Number of still images recordable with continuous shooting
- The following table shows estimated numbers of recordable still images with [Drive Mode] set to [Continuous Shooting: Hi+]. The numbers may vary depending on the shooting conditions and the memory card.
Image Size:[L: 33M]
 File Format
Number of images when JPEG is selected Number of images when HEIF is selected JPEG/HEIF (Fine) Approx. 1 000 images or more Approx. 1 000 images or more RAW (Compressed RAW) Approx. 1 000 images or more Approx. 1 000 images or more RAW & JPEG/RAW & HEIF(Compressed RAW)* Approx. 1 000 images or more Approx. 1 000 images or more RAW (Uncompressed RAW) Approx. 1 000 images or more Approx. 1 000 images or more RAW & JPEG/RAW & HEIF(Uncompressed RAW)* Approx. 828 images Approx. 1 000 images or more RAW (Lossless compression RAW) Approx. 1 000 images or more Approx. 1 000 images or more RAW & JPEG/RAW & HEIF (Lossless compression RAW)* Approx. 1 000 images or more Approx. 1 000 images or more Hack: To continuously adjust the focus and exposure during continuous shooting, set as follows:
-
[
 Focus Mode]: [Continuous AF]
-
[
Self-timer(Single):
Shoots an image using the self-timer after a designated number of seconds have elapsed since the shutter button was pressed. Use the 5-second/10-second self-timer when you are going to be in the picture, and use the 2-second self-timer to reduce camera-shake caused by pressing the shutter button.
Self-timer(Cont)
Shoots a designated number of images using the self-timer after a designated number of seconds have elapsed since the shutter button was pressed. You can choose the best from multiple shots.
For example, three images are shot when 10 seconds have elapsed after the shutter button is pressed when [Self-timer(Cont.): 10 Sec. 3 Img.] is selected.
-
 Self-timer(Cont.): 10 Sec. 3 Img.
-
 Self-timer(Cont.): 10 Sec. 5 Img.
-
 Self-timer(Cont.): 5 Sec. 3 Img.
-
 Self-timer(Cont.): 5 Sec. 5 Img.
-
 Self-timer(Cont.): 2 Sec. 3 Img.
-
 Self-timer(Cont.): 2 Sec. 5 Img.
Bracket Settings:
You can set the self-timer in bracket shooting mode, and the shooting order for exposure bracketing and white balance bracketing.
- Self-timer during Brkt: Sets whether to use the self-timer during bracket shooting. Also, sets the number of seconds until the shutter is released if using the self-timer. (OFF/2 Sec/5 Sec/10 Sec)
- Bracket order: Sets the order of exposure bracketing and white balance bracketing.
Cont. Bracket: Shoots multiple images while automatically shifting the exposure from base to darker and then to lighter. You can select an image that suits your purpose after recording.
Single bracket: Shoots multiple images while automatically shifting the exposure from base to darker and then to lighter. You can select the image that suits your purpose after recording.
Since a single picture is taken each time you press the shutter button, you can adjust the focus or the composition for each shot.
WB Bracket: Shoots a total of three images, each with different color tones according to the selected settings for white balance, color temperature and color filter.
DRO Bracket: You can record a total of three images, each at a different degree of D-Range Optimizer value.
Interval Shoot Func.:
You can automatically shoot a series of still images with the shooting interval and number of shots that you set in advance (Interval shooting). On this camera, you cannot create a movie from still images produced by interval shooting.
-
MENU – Shooting – Drive Mode – Interval Shoot Func. – interval Shooting – On.
-
MENU – Shooting Drive Mode – Interval Shoot Func. – Select an item to set, and then select the desired setting.
-
Press the shutter button.
When the time set for Shooting Start Time has elapsed, shooting will start.
- When the number of shots set for Number of Shots is completed, the Sony A7 IV will return to the standby screen for interval shooting.
Menu item details:
- Interval Shooting: Sets whether to perform interval shooting.
- Shooting Start Time: Sets the time from when you press the shutter button to when interval shooting starts. (1 second to 99 minutes 59 seconds)
- Shooting Interval: Sets the shooting interval (time from when one exposure starts to when the exposure for the next shot starts). (1 second to 60 seconds)
- Number of Shots: Sets the number of shots for interval shooting. (1 shot to 9999 shots)
- AE Tracking Sensitivity: Sets the tracking sensitivity of the auto exposure against the change in luminance during interval shooting. If you select Low, exposure changes during interval shooting will be smoother. (High, Mid or Low)
- Shutter Type in Interval: Sets the shutter type during interval shooting. (Mechanical Shutter/Electronic Shutter)
- Shoot Interval Priority: Sets whether to prioritize the shooting interval when the exposure mode is Program Auto or Aperture Priority and the shutter speed becomes longer than the time set for .Shooting Interval.
Shooting 7
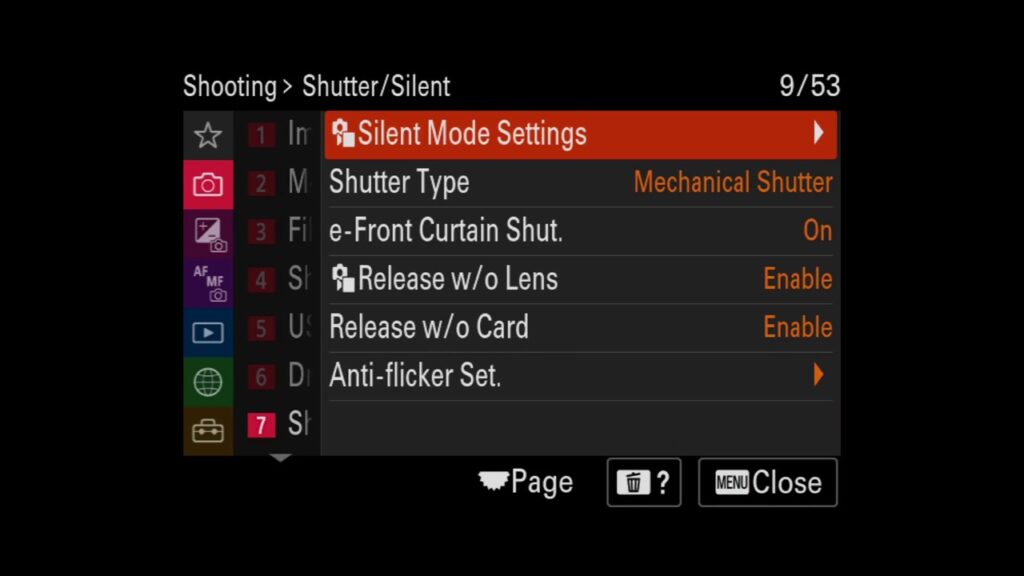
Silent Mode Settings:
You can configure settings related to the silent mode, which allows you to shoot without shutter sounds or electronic sounds. You can also set whether to change the settings for other functions that emit sounds from the Sony A7 IV when the Sony A7 IV is set to the silent mode.
- Silent Mode: Sets whether to shoot without shutter sounds or electronic sounds. When set to On, Shutter Type and Shutter Type in Interval become locked to Electronic Shutter, and Audio signals become locked to Off.
- Target Function Settings: Sets whether to simultaneously change the settings for other functions that emit sounds from the Sony A7 IV when the Sony A7 IV is set to the silent mode.
Shutter Type:
You can set whether to shoot with a mechanical shutter, electronic shutter or use the electronic shutter for the first curtain. Always select mechanical shutter when using flash.
Hack: remember that the newly designed Sony FE mechanical shutter can sync with your flash up to 1/400 second. This means you won’t have to rely on HSS all the time when shooting in daylight. (HSS is great, but you get less power output from your flash)
e-Front Curtain Shut.
The electronic front curtain shutter function shortens the time lag between when the shutter button is pressed and the shutter is released.
Release w/o Lens:
Sets whether the shutter can be released when no lens is attached.
Release w/o Card:
Sets whether the shutter can be released when no memory card has been inserted.
Anti-flicker Set:
Detects flickering/blinking from artificial light sources such as fluorescent lighting and times the shooting of images to moments when flickering will have less of an impact.
This function reduces differences in the exposure and color tone caused by flickering between the upper area and the lower area of an image shot with fast shutter speed and during continuous shooting.
Shooting 8

Image stabilization settings: steadyshot
Sets whether to use the SteadyShot function.
For Movies, there is an extra setting:
- Active: Provides a more powerful SteadyShot effect.
- Standard: Reduces Sony A7IV shake under stable movie shooting conditions.
- Off: Does not use SteadyShot.
Steadyshot Adjust:
You can shoot with an appropriate SteadyShot setting for the attached lens.
- Auto: Performs the SteadyShot function automatically according to the information obtained from the attached lens.
- Manual: Performs the SteadyShot function according to the focal-length set using the next item in the menu, Focal Length.
Focal Length:
Sets the focal length information to be used for the built-in SteadyShot function when SteadyShot Adjust is set to Manual. Range between 8 and 1000 mm.
Shooting 9
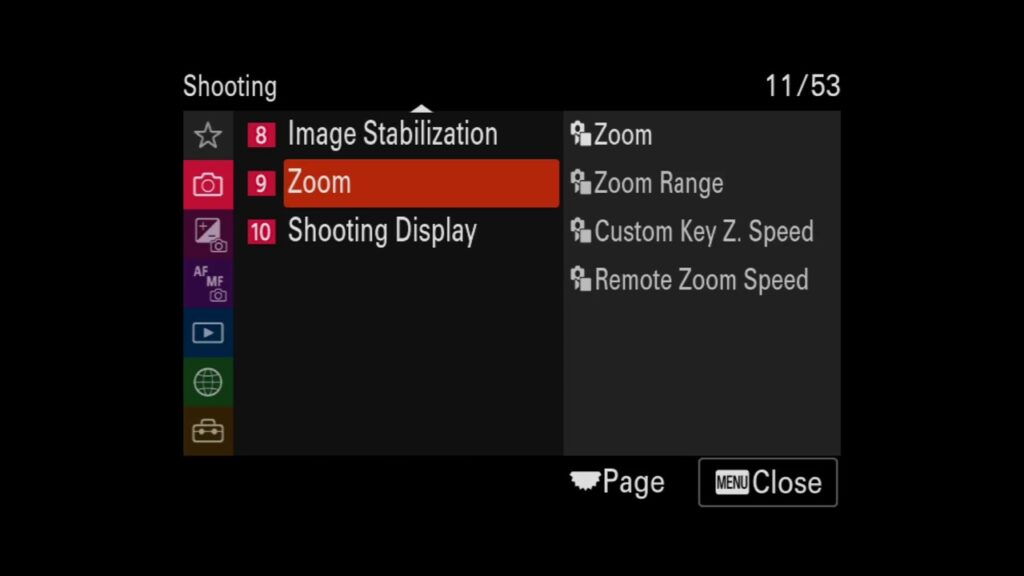
Zoom:
The zoom feature of the A7 IV provides a higher magnification zoom by combining various zoom features. The icon displayed on the screen changes, according to the selected zoom feature.
Optical zoom range: Zoom images in the zoom range of a lens. When a power zoom lens is mounted, the zoom bar of the optical zoom range is displayed. When a lens other than a power zoom lens is mounted, the zoom slider becomes locked at the left end of the zoom bar while the zoom position is in the optical zoom range. The magnification is displayed as “×1.0.” If Zoom Range is set to Optical zoom only the zoom slider will not be displayed.
- Smart Zoom range: Zoom images without causing the original quality to deteriorate by partially cropping an image (only when JPEG Image Size or HEIF Image Size is set to M or S).
- Clear Image Zoom range: Zoom images using an image process with less deterioration. When you set Zoom Range to Clear Image Zoom or Digital Zoom, you can use this zoom function.
- Digital Zoom range.You can magnify images using an image process. When you set Zoom Range to Digital Zoom, you can use this zoom function.
Zoom Range:
- Optical zoom only: Limits the zoom range to the optical zoom. You can use the Smart Zoom function if you set JPEG Image Size or HEIF mage Size to M or S.
- Clear Image Zoom : Select this setting to use Clear Image Zoom. Even if the zoom range exceeds the optical zoom, the Sony A7 IV magnifies images using an image process with less deterioration.
- Digital Zoom : When the zoom range of the Clear Image Zoom is exceeded, the Sony A7 IV magnifies images to the largest scale. However, the image quality will deteriorate.
Zoom Speed:
Sets the zoom speed when using the custom key to which Zoom Operation (T) / Zoom Operation (W) is assigned. This can be set separately for shooting standby and movie recording.
- Fixed Speed STBY: Sets the zoom speed during shooting standby. (1 (Slow) to 8 (Fast))
- Fixed Speed: REC Sets the zoom speed during movie recording. (1 (Slow) to 8 (Fast))
Remote Zoom Speed:
Sets the zoom speed when performing zoom operations using the remote commander or Ctrl w/ Smartphone. This can be set separately for shooting standby and movie recording.
- Remote speed Type: Sets whether to lock the zoom speed.
- Remote Fixed Speed STBY: Sets the zoom speed during shooting standby when remote Speed Type is set to Fix.
- Remote Fixed Speed REC: Sets the zoom speed during movie recording when remote Speed Type is set to Fix.
Shooting Menu 10
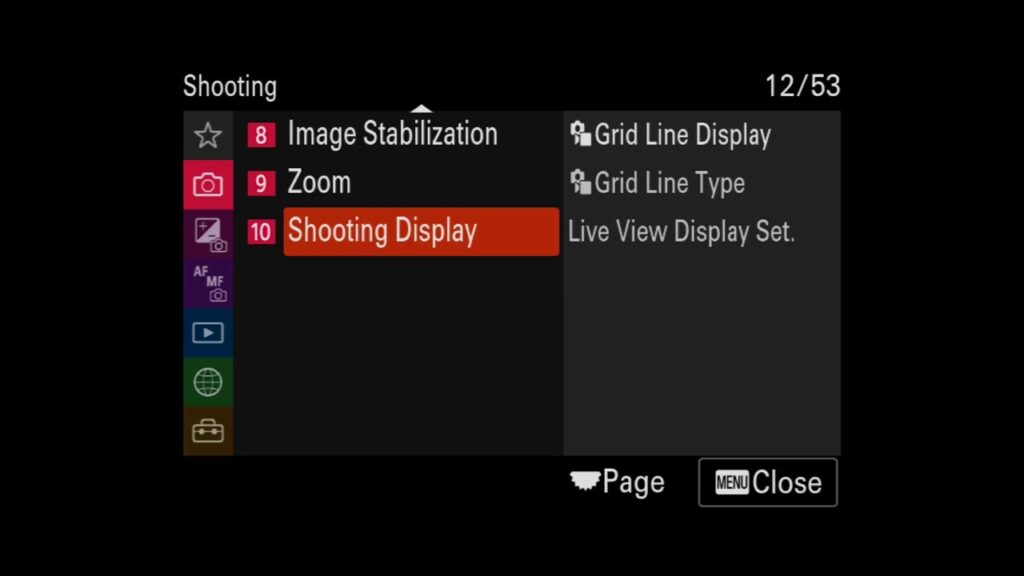
Grid Line Display:
Sets whether the grid line is displayed or not during shooting. The grid line will help you to adjust the composition of images.
Grid Line Type:
Sets the displayed type of grid line. The grid line will help you to adjust the composition of images.
- Rule of 3rds Grid: Place principal subjects close to one of the grid lines that divide the image into thirds for a well-balanced composition.
- Square Grid: Square grids make it easier to confirm the horizontal level of your composition. This is useful for assessing the composition when shooting landscapes, closeups, or when performing Sony A7 IV scanning.
- Diag. + Square Grid: Place a subject on the diagonal line to express an uplifting and powerful feeling.
Live View Display Set:
Sets whether to show images altered with effects of the exposure compensation, white balance, Creative Look, etc. on the screen.
- Live View Display: Sets whether to reflect all the shooting settings on the monitor and display the Live View in conditions close to what your picture will look like once the settings are applied, or to display the Live View without reflecting the settings.
- Exposure Effect: Sets whether to display the Live View with automatic correction by reflecting the exposure from the flash when Live View Display is set to Setting Effect ON.
- Frame Rate Low Limit: Sets whether to keep the frame rate of the Live View from becoming too slow.
Exposure/Color 1
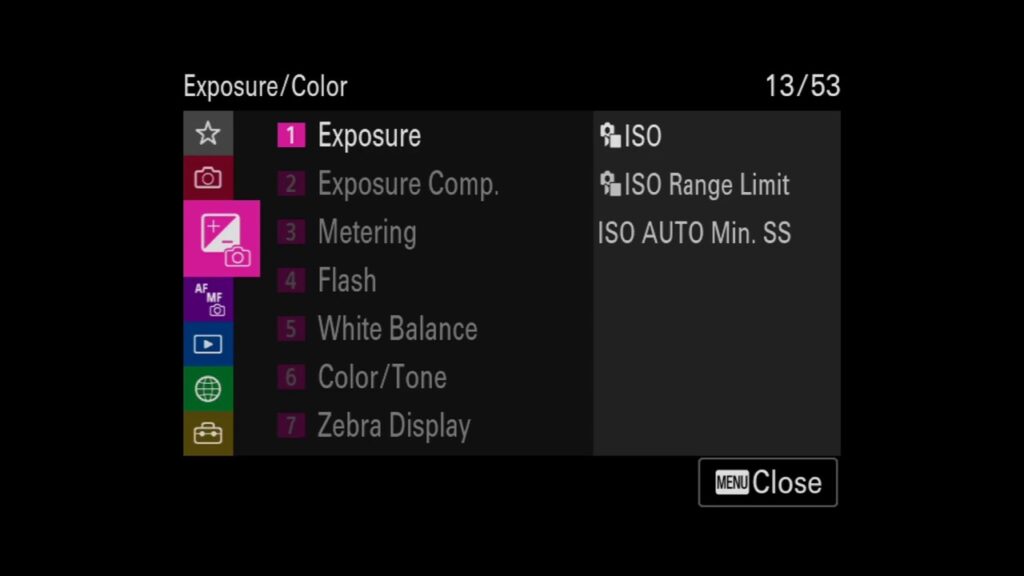
ISO:
Sensitivity to light is expressed by the ISO number (recommended exposure index). The larger the number, the higher the sensitivity. You can change the range of ISO sensitivity that is set automatically in ISO AUTO mode. Select ISO AUTO and press the right side of the control wheel and set the desired values for ISO AUTO Maximum and ISO AUTO Minimum.
ISO AUTO: Sets the ISO sensitivity automatically.
ISO 40 – ISO 409600: Sets the ISO sensitivity manually. Selecting a larger number increases the ISO sensitivity.
Hack: Modern sensors are good at shooting at higher ISO levels, but for the best quality, use the base ISO 100 if the shutter time allows this without blur.
ISO Range limit:
ou can limit the range of ISO sensitivity when the ISO sensitivity is set manually.
ISO Auto Min. SS:
If you select ISO AUTO when the shooting mode is P (Program Auto) or A (Aperture Priority), you can set the shutter speed at which the ISO sensitivity changes.
This function is effective for shooting moving subjects. You can minimize subject blurring while also preventing Sony A7 IV shake.
- SLOWER (Slower)/SLOW (Slow): The ISO sensitivity will change at shutter speeds slower than Standard, so you can shoot images with less noise.
- STD (Standard): The Sony A7 IV automatically sets the shutter speed based on the focal length of the lens.
- FAST (Fast)/FASTER (Faster):The ISO sensitivity will change at shutter speeds faster than Standard, so you can prevent Sony A7 IV shake and subject blurring.
- 1/8000 ― 30″: The ISO sensitivity changes at the shutter speed you have set.
Exposure/Color 2
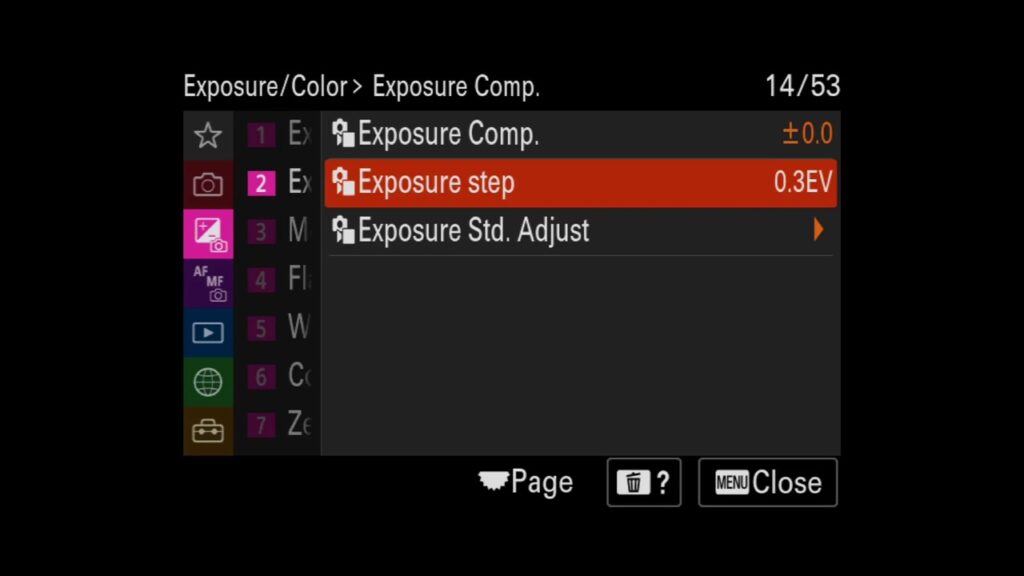
Exposure Comp.:
Normally, exposure is set automatically (auto exposure). Based on the exposure value set by auto exposure, you can make the entire image brighter or darker if you adjust Exposure Comp. to the plus side or minus side, respectively (exposure compensation).
Exposure Step:
You can adjust the setting increment for the shutter speed, aperture, and exposure compensation values.
Exposure Std. Adjust:
Adjusts this camera’s standard for the correct exposure value for each metering mode. You can set a value from -1 EV to +1 EV in 1/6 EV increments.
Exposure/Color 3
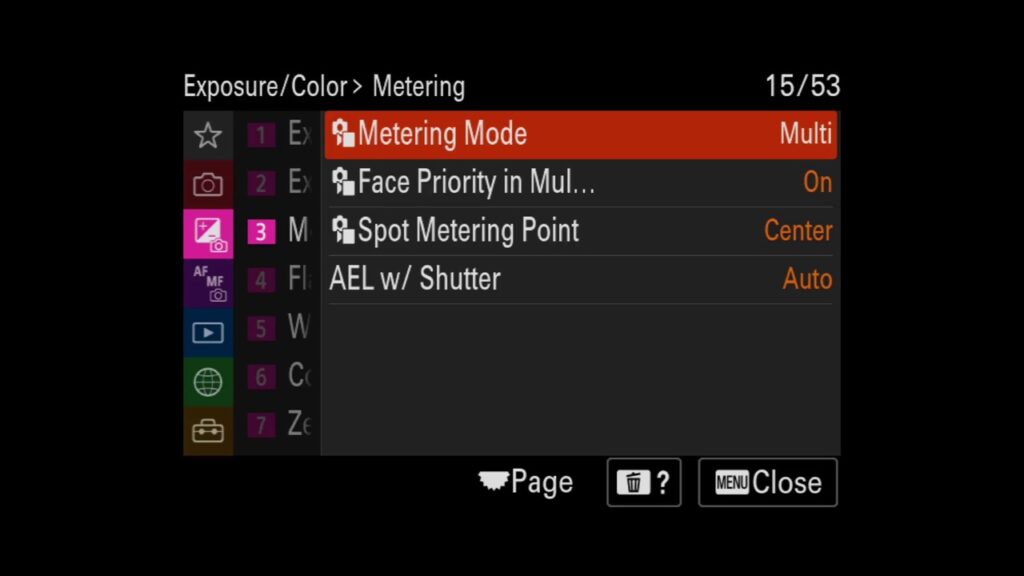
Metering Mode:
Selects the metering mode that sets which part of the screen to measure for determining the exposure.
- Multi: Measures light on each area after dividing the total area into multiple areas and determines the proper exposure of the entire screen (Multi-pattern metering).
- Center: Measures the average brightness of the entire screen, while emphasizing the central area of the screen (Center-weighted metering).
- Spot: Measures only inside the metering circle. This mode is suitable for measuring light on a specified part of the entire screen. The size of the metering circle can be selected from Spot: Standard and Spot: Large. The position of the metering circle depends the setting for Spot Metering Point.
- Entire Screen Avg.: Measures the average brightness of the entire screen. The exposure will be stable, even if the composition or the position of the subject changes.
- Highlight: Measures the brightness while emphasizing the highlighted area on the screen. This mode is suitable for shooting the subject while avoiding overexposure.
Face Priority in Mul…:
Sets whether the Sony A7 IV measures brightness based on detected faces when Metering Mode is set to Multi.
Spot Metering Point:
Sets whether to coordinate the spot metering position with the focus area when Focus Area is set to the following parameters:
- Spot: S/Spot: M/Spot: L
- Expand Spot
- Tracking: Spot S/Tracking: Spot M/Tracking: Spot L
- Tracking: Expand Spot
Menu items:
- Center: The spot metering position does not coordinate with the focus area, but always meters brightness at the center.
- Focus Point Link: The spot metering position coordinates with the focus area.
AEL w/ Shutter:
Sets whether to fix the exposure when you press the shutter button halfway down. Select Off to adjust the focus and the exposure separately.
- Auto: Fixes the exposure after adjusting the focus automatically when you press the shutter button halfway down when Focus Mode is set to Single-shot AF. When Focus Mode is set to Automatic AF, and the Sony A7 IV determines that the subject is moving, or you shoot burst images, the fixed exposure is cancelled.
- On: Fixes the exposure when you press the shutter button halfway down.
- Off: Does not fix the exposure when you press the shutter button halfway down. Use this mode when you want to adjust focus and exposure separately. The A7 IV keeps adjusting the exposure while shooting in Cont. Shooting mode.
Exposure/Color 4
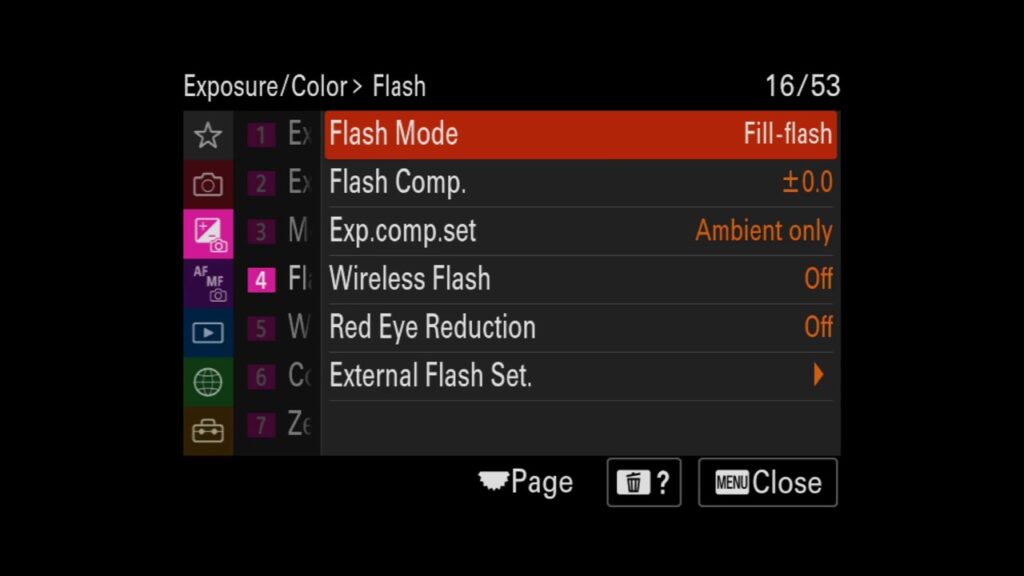
Flash Mode:
You can choose between five flash modes:
- Flash Off: The flash does not operate.
- Autoflash: The flash works in dark environments or when shooting towards bright light.
- Fill-flash: The flash works every time you trigger the shutter.
- Slow Sync.:The flash works every time you trigger the shutter. Slow sync shooting allows you to shoot a clear image of both the subject and the background by slowing the shutter speed.
- Rear Sync.:The flash works right before the exposure is completed every time you trigger the shutter. Rear sync shooting allows you to shoot a natural image of the trail of a moving subject such as a moving car or a walking person.
Flash Comp:
Adjusts the amount of flash light in a range of –3.0 EV to +3.0 EV. Flash compensation changes the amount of flash light only. Exposure compensation changes the amount of flash light along with the change of the shutter speed and aperture.
Exp. Comp. Set:
Sets whether to apply the exposure compensation value to control both flash light and ambient light, or just ambient light.
Hack: I like to control only exposure with the exposure compensation dial and Flash output on the flash remote or flash itself.
Wireless Flash:
For Sony FE branded wireless flashes: There are two methods for wireless flash shooting: light-signal flash shooting that uses the light of the flash attached to the Sony A7 IV as a signal light, and radio-signal flash shooting that uses wireless communication. To perform radio-signal flash shooting, use a compatible flash or the Wireless Radio Commander. For details on how to set each method, refer to the instruction manual of the flash or the Wireless Radio Commander.
Red Eye Reduction:
When using the flash, it is fired two or more times before shooting to reduce the red-eye phenomenon.
External Flash Set.:
You can configure the settings of a Sony FE branded flash attached to the Sony A7 IV using the monitor and control wheel of the camera.
- Ext. Flash Firing Set.: Allows you to configure settings related to the firing of the flash, such as the flash mode, flash level, etc.
- Ext. Flash Cust. Set.: Allows you to configure other flash settings, wireless settings, and flash unit settings.
Exposure/Color 5
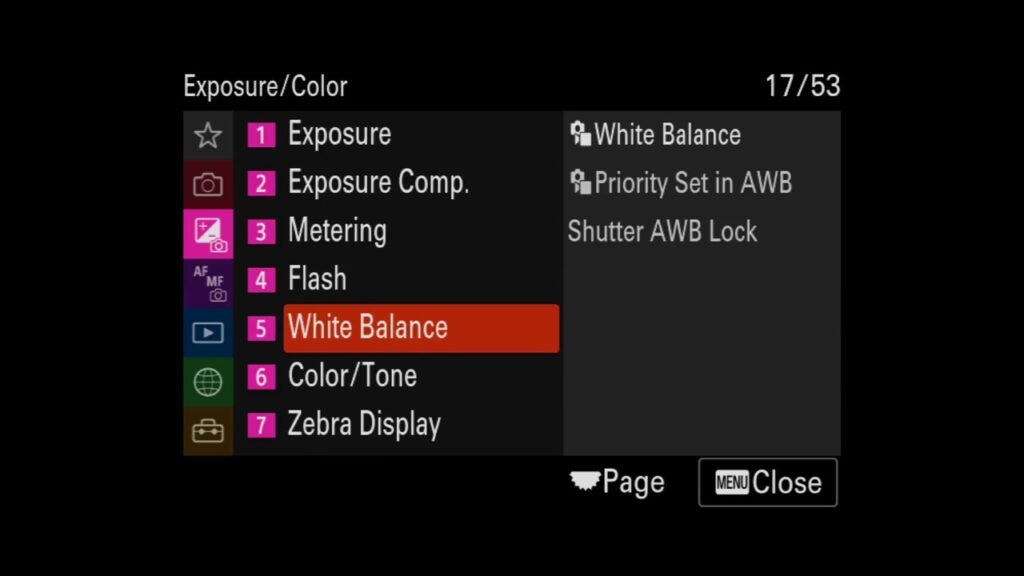
White Balance:
Corrects the tone effect of the ambient light condition to record a neutral white subject in white. Use this function when the color tones of the image did not come out as you expected, or when you want to change the color tones on purpose for photographic expression.
Priority Set in AWB:
Selects which tone to prioritize when shooting under lighting conditions such as incandescent light when White Balance is set to Auto.
Standard: Shoots with standard auto white balance. The Sony A7 IV automatically adjusts the color tones.
Ambience: Prioritizes the color tone of the light source. This is suitable when you want to produce a warm atmosphere.
White: Prioritizes white color when the color temperature of the light source is low.
Shutter AWB Lock:
You can set whether or not to lock the white balance while the shutter button is pressed when White Balance is set to Auto or Underwater Auto.
This function prevents unintentional changes to the white balance during continuous shooting or when shooting with the shutter button pressed halfway down.
- Shutter Half Press: Locks the white balance while the shutter button is pressed halfway down, even in the auto white balance mode. The white balance is also locked during continuous shooting.
- Cont. Shooting: Locks the white balance to the setting in the first shot during continuous shooting, even in the auto white balance mode.
- Off: Operates with the normal auto white balance.
Exposure/Color 6
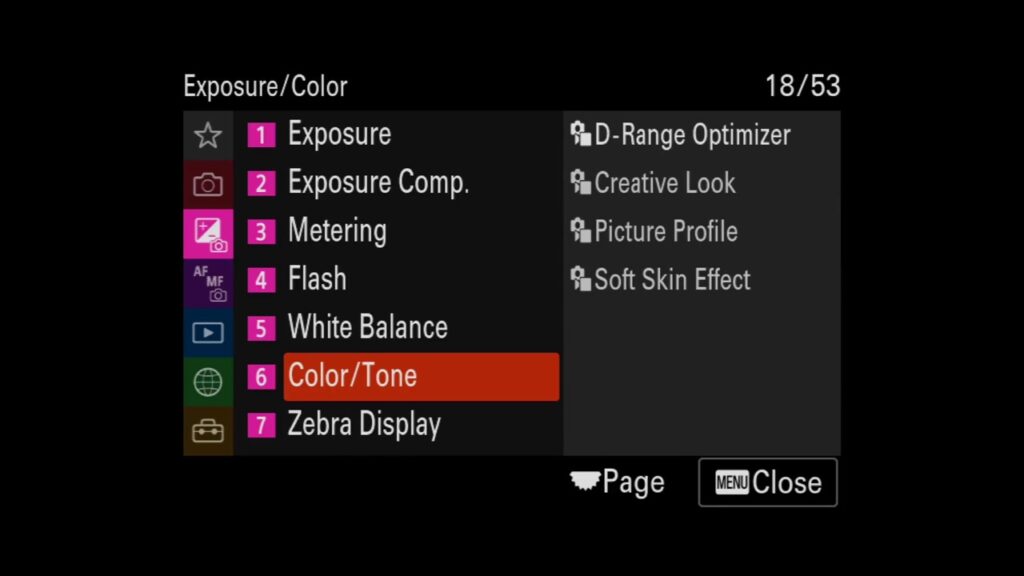
D-Range Optimizer:
By dividing the image into small areas, the Sony A7 IV analyzes the contrast of light and shadow between the subject and the background, and creates an image with the optimal brightness and gradation
If you select D-Range Optimizer: Auto, the Sony A7 IV will automatically adjust the brightness and gradation. To optimize the gradation of a recorded image by individual areas, select an optimization level from D-Range Optimizer: Lv1 (weak) to D-Range Optimizer: Lv5 (strong).
Creative Look:
Creative Looks are presets for image creation pre-installed on the camera.
With this function, you can choose the finish of the image by selecting a “Look.” In addition, you can fine-tune the contrast, highlights, shadows, fade, saturation, sharpness, sharpness range, and clarity for each Look.
Menu items:
- ST: Standard finish for a wide range of subjects and scenes.
- PT: For capturing skin in a soft tone, ideally suited for shooting portraits.
- NT: The saturation and sharpness are lowered for shooting images in subdued tones. This is also suitable for capturing image material to be modified with a computer.
- VV: It heightens the saturation and contrast for shooting striking images of colorful scenes and subjects such as flowers, spring greenery, blue sky, or ocean views.
- VV2: Creates an image with bright and vivid colors with rich clarity.
- FL: Creates an image with moody finish by applying sharp contrast to the calm coloring as well as the impressive sky and colors of the greens.
- IN: Creates an image with matte textures by suppressing the contrast and saturation.
- SH: Creates an image with bright, transparent, soft, and vivid mood.
- BW: For shooting images in black and white monotone.
- SE: For shooting images in sepia monotone.
- Registering preferred settings (Custom Look): Select the six custom look (the boxes with numbers on the left side) to register preferred settings. Then select the desired settings using the right button. You can recall the same “Look” presets with slightly different settings.
Each look can also be further customised:
- Contrast: The higher the value selected, the more the difference of light and shadow is accentuated, and the bigger the effect on the image. (-9 to +9)
- Highlights: Adjusts the brightness of the bright areas. When a higher value is selected, the image becomes brighter. (-9 to +9)
- Shadows: Adjusts the darkness of the dark areas. When a higher value is selected, the image becomes brighter. (-9 to +9)
- Fade: Adjusts fade. A larger value makes the effect greater. (0 to 9)
- Saturation: The higher the value selected, the more vivid the color. When a lower value is selected, the color of the image is restrained and subdued. (-9 to +9)
- Sharpness: Adjusts the sharpness. The higher the value selected, the more the contours are accentuated, and the lower the value selected, the more the contours are softened. (0 to 9)
- Sharpness Range: Adjust the range where the sharpness effect is applied. A larger value makes the sharpness effect apply to finer outlines. (1 to 5)
- Clarity: Adjusts clarity. A larger value makes the effect greater. (0 to 9)
Picture Profile:
You can customize the picture quality by adjusting picture profile items such as Gamma and Detail. When setting these parameters, connect the Sony A7 IV to a TV or monitor, and adjust them while observing the picture on the screen.
Available picture profiles:
- PP1: Example setting using Movie gamma.
- PP2: Example setting using Still gamma.
- PP3: Example setting of natural color tone using the ITU709 gamma.
- PP4: Example setting of a color tone faithful to the ITU709 standard.
- PP5: Example setting using Cine1 gamma.
- PP6: Example setting using Cine2 gamma.
- PP7: Example setting using S-Log2 gamma.
- PP8: Example setting using the S-Log3 gamma and the S-Gamut3.Cine under Color Mode.
- PP9: Example setting using the S-Log3 gamma and the S-Gamut3under Color Mode.
- PP10: Example setting for recording HDR movies using HLG2 gamma.
HDR movie recording
The Sony A7IV can record HDR movies when a gamma from HLG, HLG1 to HLG3 is selected in the picture profile. Picture profile preset PP10 provides an example setting for HDR recording. Movies recorded using PP10 can be viewed with a wider range of brightness than usual when played back on a TV supporting Hybrid Log-Gamma (HLG). This way, even scenes with a wide range of brightness can be recorded and displayed faithfully, without looking under or over-exposed. HLG is used in HDR TV program Sony A7 IV on, as defined in the international standard Recommendation ITU-R BT.2100.
The following settings are available:
-
Black Level: Sets the black level. (–15 to +15)
Gamma: Selects a gamma curve
- Movie: Standard gamma curve for movies
- Still: Standard gamma curve for still images
- Cine1: Softens the contrast in dark parts and emphasizes gradation in bright parts to produce a relaxed color movie. (equivalent to HG4609G33)
- Cine2: Similar to Cine1 but optimized for editing with up to 100% video signal. (equivalent to HG4600G30)
- Cine3: Intensifies the contrast in light and shade more than Cine1 and strengthens gradation in black.
- Cine4: Strengthens the contrast in dark parts more than Cine3.
- ITU709: Gamma curve that corresponds to ITU709.
- ITU709(800%): Gamma curve for confirming scenes on the assumption of shooting using S-Log2 or S-Log3.
- S-Log2: Gamma curve for S-Log2. This setting is based on the assumption that the picture will be processed after shooting.
- S-Log3: Gamma curve for S-Log3 with more similar features to film. This setting is based on the assumption that the picture will be processed after shooting.
- HLG: Gamma curve for HDR recording. Equivalent to the HDR standard Hybrid Log-Gamma, ITU-R BT.2100.
- HLG1: Gamma curve for HDR recording. Emphasizes noise reduction. However, shooting is restricted to a narrower dynamic range than with HLG2 or HLG3.
- HLG2: Gamma curve for HDR recording. Provides a balance of dynamic range and noise reduction.
- HLG3: Gamma curve for HDR recording. Wider dynamic range than HLG2. However, noise may increase.
Black Gamma: Corrects gamma in low intensity areas.
- Black Gamma is fixed at “0” and cannot be adjusted when Gamma is set to HLG, HLG1, HLG2, or HLG3.
- Range: Selects the correcting range. (Wide / Middle / Narrow)
- Level: Sets the correcting level. (-7 (maximum black compression) to +7 (maximum black stretch))
Knee: Sets knee point and slope for video signal compression to prevent over-exposure by limiting signals in high-intensity areas of the subject to the dynamic range of your camera.
Knee is disabled if Mode is set to Auto when Gamma is set to Still, Cine1, Cine2, Cine3, Cine4, ITU709(800%), S-Log2, S-Log3, HLG, HLG1, HLG2, or HLG3. To enable Knee, set Mode to Manual.
Mode: Selects auto/manual settings.
- Auto: The knee point and slope are set automatically.
- Manual: The knee point and slope are set manually.
Auto Set: Settings when Auto is selected for Mode.
- Max Point: Sets the maximum point of the knee point. (90% to 100%)
- Sensitivity: Sets the sensitivity. (High / Mid / Low)
Manual Set: Settings when Manual is selected for Mode.
- Point: Sets the knee point. (75% to 105%)
- Slope: Sets the knee slope. (-5 (gentle) to +5 (ste
Color Mode
Sets type and level of colors. In Color Mode, only BT.2020 and 709 are available when Gamma is set to HLG, HLG1, HLG2, or HLG3.
- Movie: Suitable colors when Gamma is set to Movie.
- Still: Suitable colors when Gamma is set to Still.
- Cinema: Suitable colors when Gamma is set to Cine1 or Cine2.
- Pro: Similar color tones to the standard image quality of Sony FE professional cameras (when combined with ITU709 gamma)
- ITU709 Matrix: Colors corresponding to ITU709 standard (when combined with ITU709 gamma)
- Black & White: Sets the saturation to zero for shooting in black and white.
- S-Gamut: Setting based on the assumption that the pictures will be processed after shooting. Used when Gammais set to S-Log2.
- S-Gamut3.Cine: Setting based on the assumption that the pictures will be processed after shooting. Used when Gamma is set to S-Log3. This setting allows you to shoot in a color space that can easily be converted for digital cinema.
- S-Gamut3: Setting based on the assumption that the pictures will be processed after shooting. Used when Gamma is set to S-Log3. This setting allows you to shoot in a wide color space.
- BT.2020: Standard color tone when Gamma is set to HLG, HLG1, HLG2, or HLG3.
- 709: Color tone when Gamma is set to HLG, HLG1, HLG2, or HLG3 and movies are recorded with HDTV color (BT.709).
-
Saturation
- Sets the color saturation. (-32 to +32)
Color Phase: Sets the color phase. (-7 to +7)
Color Depth: Sets the color depth for each color phase.
This function is more effective for chromatic colors and less effective for achromatic colors. The color looks deeper as you increase the setting value towards the positive side, and lighter as you decrease the value towards the negative side. This function is effective even if you set Color Mode to Black & White.
- R -7 (light red) to +7 (deep red)
- G -7 (light green) to +7 (deep green)
- B -7 (light blue) to +7 (deep blue)
- C -7 (light cyan) to +7 (deep cyan)
- M -7 (light magenta) to +7 (deep magenta)
- Y -7 (light yellow) to +7 (deep yellow)
Detail
Sets items for Detail.
- Level: Sets the Detail level. (-7 to +7)
- Adjust: The following parameters can be selected manually.
- Mode: Selects auto/manual setting. (Auto (automatic optimization) / Manual (The details are set manually.))
- V/H Balance: Sets the vertical (V) and horizontal (H) balance of DETAIL. (-2 (off to the vertical (V) side) to +2 (off to the horizontal (H) side))
- B/W Balance: Selects the balance of the lower DETAIL (B) and the upper DETAIL (W). (Type1 (off to the lower DETAIL (B) side) to Type5 (off to the upper DETAIL (W) side))
- Limit: Sets the limit level of Detail. (0 (Low limit level: likely to be limited) to 7 (High limit level: unlikely to be limited))
- Crispning: Sets the crispening level. (0 (shallow crispening level) to 7 (deep crispening level))
- Hi-Light Detail: Sets the Detail level in the high intensity areas. (0 to 4)
Soft skin effect
Sets the effect used for shooting the skin smoothly in the Face Detection function.
Exposure/Color 7
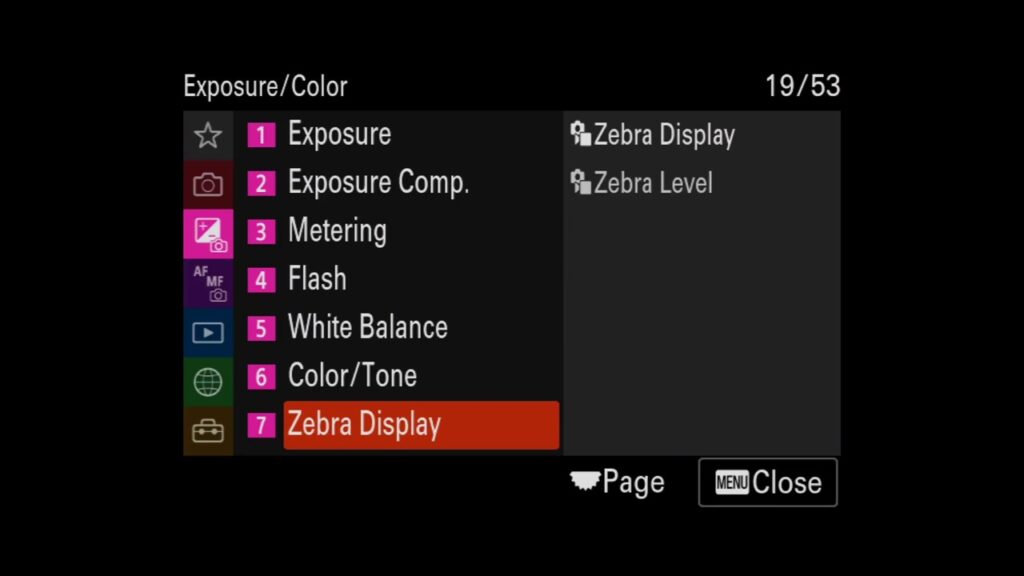
Zebra Display:
Sets a zebra pattern, which appears over part of an image if the brightness level of that part meets the IRE level that you have set. Use this zebra pattern as a guide to adjust the brightness.
Zebra Level:
You can adjust the brightness level of the zebra pattern.
Focus 1 a
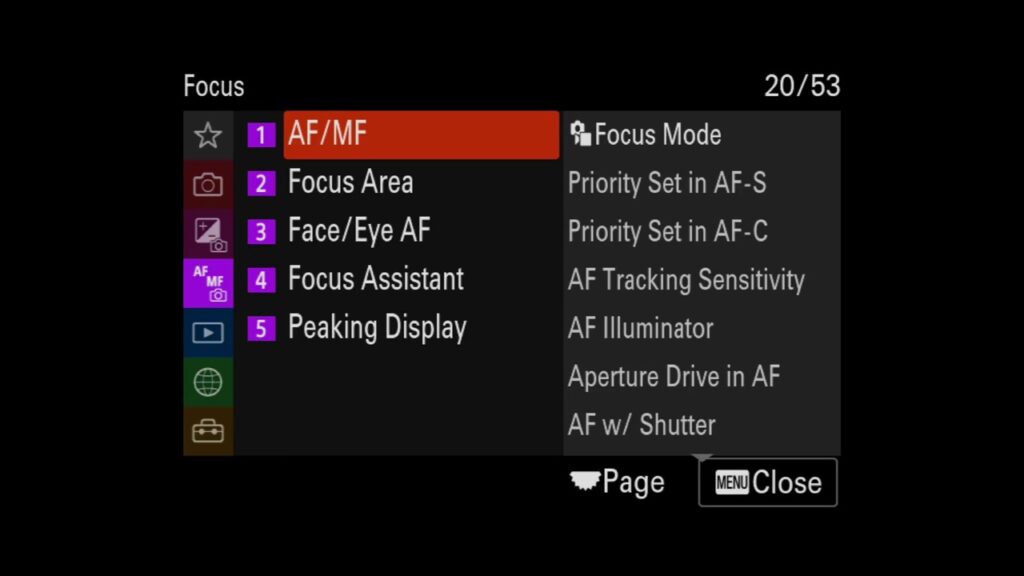
Focus Mode:
Selects the focus method to suit the movement of the subject.
Menu item details
-
 Single-shot AF:
 - The product locks the focus once focusing is complete. Use this when the subject is motionless.
-
 Automatic AF:
 - [Single-shot AF] and [Continuous AF] are switched according to the movement of the subject. When the shutter button is pressed halfway down, the product locks the focus when it determines that the subject is motionless, or continues to focus when the subject is in motion. During continuous shooting, the product automatically shoots with [Continuous AF] from the second shot.
-
 Continuous AF:
 - The product continues to focus while the shutter button is pressed and held halfway down. Use this when the subject is in motion. In [Continuous AF] mode, there is no beep when the camera focuses.
-
 DMF:
DMF: - You can make fine adjustments manually after performing auto focusing, letting you focus on a subject more quickly than when using [Manual Focus] from the beginning. This is convenient in situations such as macro shooting.
-
 Manual Focus:
 - Adjusts the focus manually. If you cannot focus on the intended subject using auto focus, use [Manual Focus].
Priority Set in AF-S:
Sets whether to release the shutter even if the subject is not in focus when Focus Mode is set to Single-shot AF, DMF or Automatic AF and the subject is still.
Options are:
- AF: Prioritizes focusing. The shutter will not be released until the subject is in focus.
- Release: Prioritizes the shutter’s release. The shutter will be released even if the subject is out of focus.
Priority Set in AF-C:
Sets whether to release the shutter even if the subject is not in focus when the continuous AF is activated and the subject is in motion. Balanced works great for any type of photography.
Choose between:
- AF: Prioritizes focusing. The shutter will not be released until the subject is in focus.
- Release: Prioritizes the shutter’s release. The shutter will be released even if the subject is out of focus.
- Balanced Emphasis: Shoots with a balanced emphasis on both focusing and shutter release.
AF Tracking Sensitivity:
You can select the AF track sensitivity when the subject goes out of focus in still image mode. Choose between responsive, standard or Locked-On.
Hack: Locked-ON helps to keep the focus on a specific subject when other things are crossing in front of the subject.
AF Illuminator:
The AF illuminator supplies fill light to focus more easily on a subject in dark surroundings. In the time between pressing the shutter button halfway down and locking the focus, the AF illuminator lights up to allow the Sony A7 IV to focus easily.
If a flash with an AF illuminator function is attached to the Multi Interface Shoe, when the flash is turned on, the AF illuminator of the flash will turn on as well.
Aperture Drive in AF:
Changes the aperture drive system to prioritize the auto-focusing tracking performance or to prioritize silence.
- Focus Priority: Changes the aperture drive system to prioritize auto-focusing performance.
- Standard: Uses the standard aperture drive system.
- Silent Priority: Changes the aperture drive system to prioritize silence so that the sound from the aperture drive is quieter than in Standard.
AF w/ Shutter:
Sets whether to fix the exposure when you press the shutter button halfway down. Select Off to adjust the focus and the exposure separately.
Auto: Fixes the exposure after adjusting the focus automatically when you press the shutter button halfway down when Focus Mode is set to Single-shot AF. When Focus Mode is set to Automatic AF, and the Sony A7 IV determines that the subject is moving, or you shoot burst images, the fixed exposure is cancelled.
- On: Fixes the exposure when you press the shutter button halfway down.
- Off: Does not fix the exposure when you press the shutter button halfway down. Use this mode when you want to adjust focus and exposure separately.
- The Sony A7 IV keeps adjusting the exposure while shooting in Cont. Shooting mode.
Focus 1 b
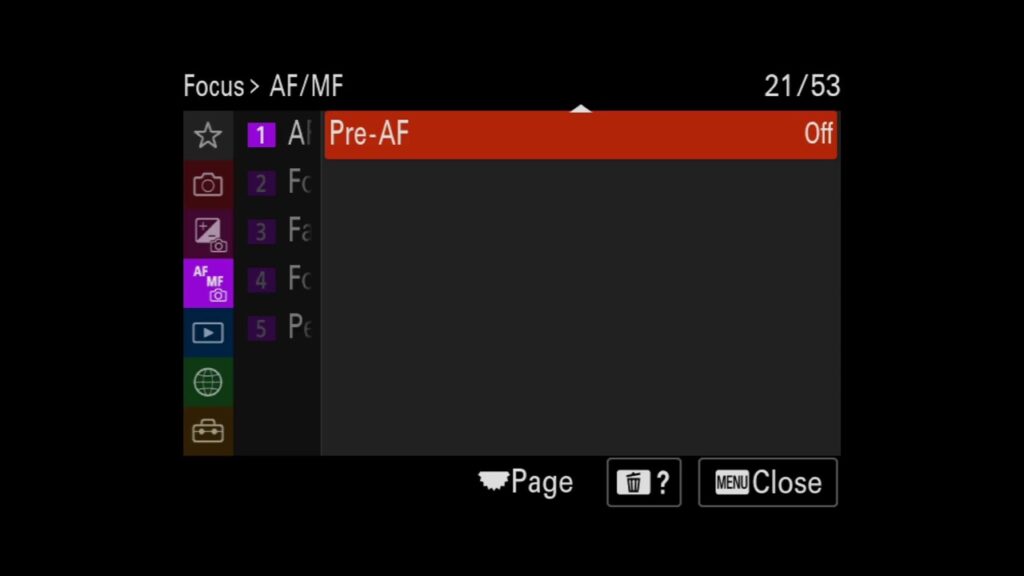
Pre-AF
The camera automatically adjusts focus before you press the shutter button halfway down.
Focus 2 a
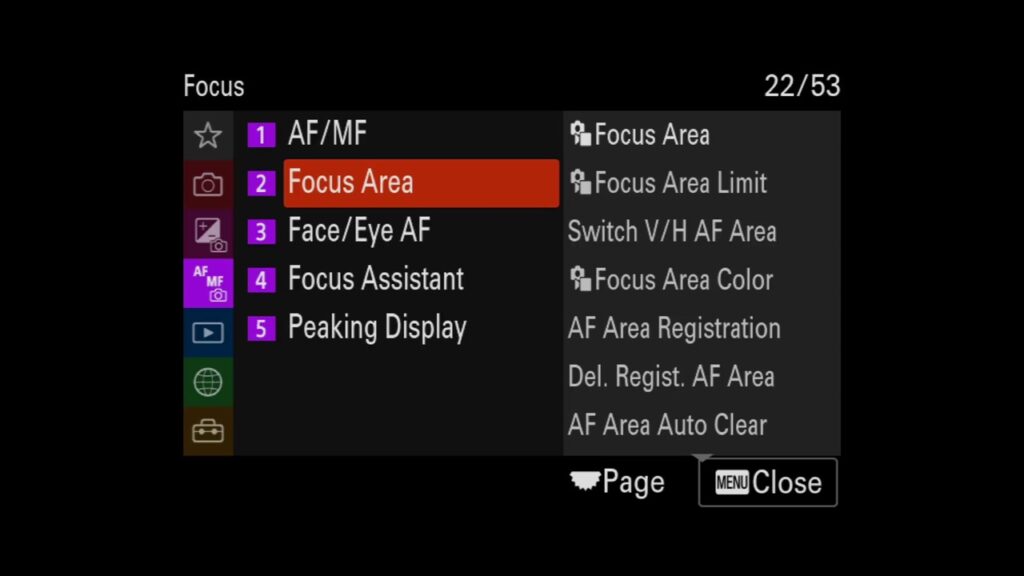
Focus Area:
Set the type of focusing frame when shooting with the auto focus. Select the mode according to the subject.
- Wide: Focuses on a subject covering the whole range of the screen automatically. When you press the shutter button halfway down in the still image shooting mode, a green frame is displayed around the area that is in focus.
- Zone: Select a zone on the monitor on which to focus, and the Sony A7IV will automatically select a focus area.Center Fix:Focuses automatically on a subject in the center of the image. Use together with the focus-lock function to create the composition you want.
- Spot: S/Spot: M/Spot: L:Allows you to move the focusing frame to a desired point on the screen and focus on an extremely small subject in a narrow area.
- Expand Spot: If the Sony A7 IV cannot focus on a single selected point, it uses focus points around the Spot as a secondary priority area for focusing.
- Tracking: This setting is available only when the Focus Mode is set to Continuous AF. When the shutter button is pressed and held halfway down, the Sony A7 IV tracks the subject within the selected autofocus area. Point the cursor at Tracking on the Focus Area setting screen, and then select the desired area to start tracking using the left/right sides of the control wheel. You can also move the tracking start area to the desired point by designating the area as a Tracking: Zone, Tracking: Spot S/Tracking: Spot M/Tracking: Spot L or Tracking: Expand Spot.
Hack: In the default settings, Focus Area is assigned to the C2 button.
Focus Area Limit:
By limiting the types of available focus area settings in advance, you can more quickly select settings for Focus Area.
Switch V/H AF Area:
You can set whether to switch the Focus Area and the position of the focusing frame according to the orientation of the Sony A7IV (horizontal/vertical). This function is useful when shooting scenes for which you have to change the Sony A7 IV position frequently, such as portraits or sports scenes.
- Off: Does not switch the Focus Area and the position of the focusing frame according to the orientation of the Sony A7 IV (horizontal/vertical).
- AF Point Only: Switches the position of the focusing frame according to the orientation of the Sony A7 IV (horizontal/vertical). The Focus Area is fixed.
- AF Point + AF Area: Switches both the Focus Area and the position of the focusing frame according to the orientation of the Sony A7 IV (horizontal/vertical).
Focus Area Color:
You can specify the color of the frame indicating the focusing area. If the frame is difficult to see because of the subject, make it more visible by changing its color.
Hack: Set it to Red instead of white, it’s easier to see where the focus is.
AF area Registration.:
Allows you to register the focus area by long pressing the Fn button. This registered area can then be recalled by using a custom key.
Del. Regist. AF Area:
Deletes the focusing frame position that was registered using AF Area Registration.
AF Area Auto Clear:
Sets whether the focus area should be displayed all the time or should disappear automatically shortly after focus is achieved.
Focus 2 b
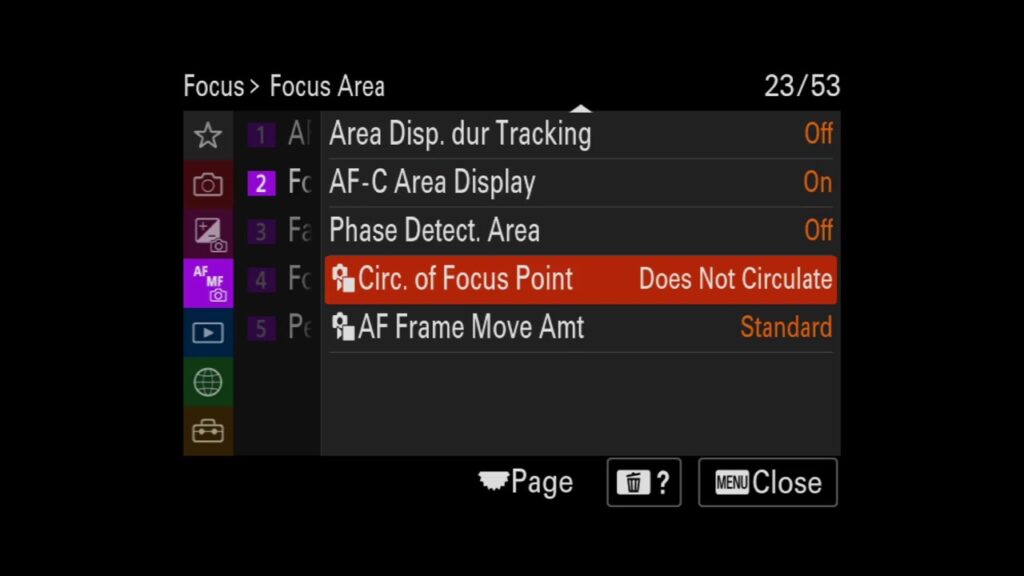
Area Disp. dur Tracking
Sets whether or not to display the frame for the focusing area on your screen or EVF when ‘Focus area’ is set to Trecking.
AF-C Area Display
You can set whether or not to display the area that is in focus when ‘Focus Area’ is set to Wide or Zone in ‘Continuous AF’ Mode.
Phase Detect. Area
Sets whether or not to display the Phase Detection AF area on your screen. Phase Detection AF is available only with compatible lenses.
Circ. of focus Point
Sets whether to allow the focusing frame to jump from one end to the other when you move the focusing frame. This function is useful when you want to move the focusing frame from one end to the other quickly.
The function can be used when the following settings are selected for Focus Area:
- Zone
- Spot: S/Spot: M/Spot: L
- Expand Spot
- Tracking: Zone
- Tracking: Spot S/Tracking: Spot M/Tracking: Spot L
- Tracking: Expand Spot
AF Frame Move Amt
Sets the distance by which the focusing frame is moved when Focus Area is set to Spot, etc. You can quickly move the focusing frame by increasing the distance, such as in situations where the subject is moving a lot.
- Standard: The focusing frame moves by the standard distance.
- Large: The focusing frame moves over a greater distance at a time than with Standard.
Focus 3
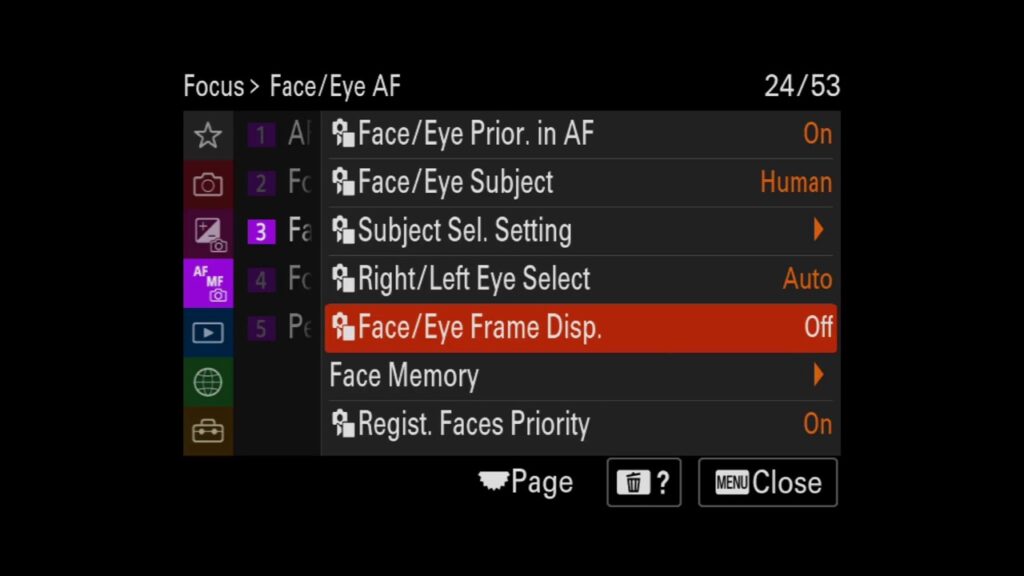
Face/Eye Prior. in AF:
Sets whether the Sony A7 IV detects faces or eyes inside the focus area while performing autofocus and then focuses on the eyes automatically (Eye AF).
- On: Focuses on the faces or eyes with priority if there are faces or eyes inside or around the designated focus area.
- Off: Does not prioritize faces or eyes when performing auto-focusing.
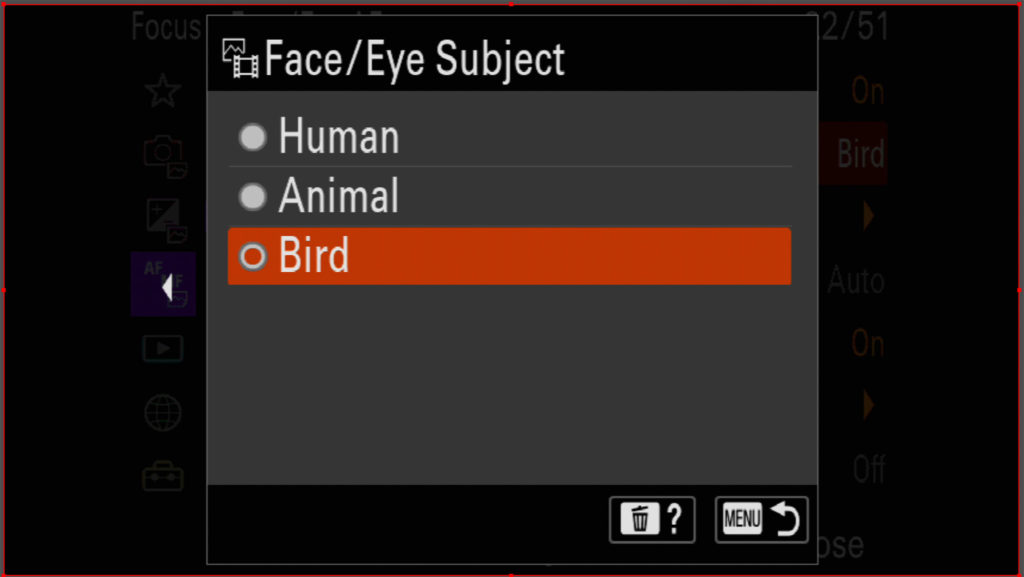
Face/Eye Subject:
Selects the target to be detected with the Face/Eye AF function.
- Human: Detects human faces/eyes.
- Animal: Detects animal eyes.
- Bird
Subject Sel. Setting:
Sets the types of detection targets that are available when using the custom key to which ‘Swt Face’ and ‘Eye Sbjc Dtc’ is assigned.
Right/Left Eye Select:
Sets whether to focus on the left eye or right eye when Face/Eye Subject is set to Human. Either auto; left or right.
Hack: set to auto and learn to get the best angle in your composition for shallow depth of field portraiture or full body bokeh.
Face/Eye Frame Disp.:
Sets whether or not to display the face/eye detection frame when a face or eyes are detected.
Face Memory:
Sets personal face data. If you register faces in advance, the Sony A7 IV can focus on the registered face as a priority.
Up to eight faces can be registered.
Options:
- New Registration: Shoots and registers faces.
- Order Exchanging: When multiple faces are registered, the order of priority for the registered face data can be changed.
- Delete: Deletes registered faces one by one.Delete
- All: Deletes all registered faces at once.
Regist. Faces Priority:
Sets whether to focus with higher priority on faces registered using Face Memory.
Focus 4

Auto Magnifier in MF:
Enlarges the image on the screen automatically to make manual focusing easier. This works in Manual Focus or Direct Manual Focus shooting.
Focus Magnifier:
You can check the focus by enlarging the image before shooting.
Unlike with Auto Magnifier in MF, you can magnify the image without operating the focus ring.
Focus Magnif. Time:
Set the duration for which an image is to be magnified using the Auto Magnifier in MF or Focus Magnifier function.
- 2 Sec: Magnifies the images for 2 seconds.
- 5 Sec: Magnifies the images for 5 seconds.
- No Limit: Magnifies the images until you press the shutter button.
Initial Focus Mag.:
Sets the initial magnification scale when using Focus Magnifier. Select a setting that will help you frame your shot.
- x1.0: Displays the image with the same magnification as the shooting screen.
- x2.1: Displays a 2.1-times enlarged image.
APS-C/Super 35mm size shooting:
- x1.0: Displays the image with the same magnification as the shooting screen.
- x1.5: Displays a 1.5-times enlarged image.
AF in Focus Mag.:
You can focus on the subject more accurately using auto-focus by magnifying the area where you want to focus. … While the magnified image is displayed, you can focus on a smaller area than the flexible spot.
Focus 5
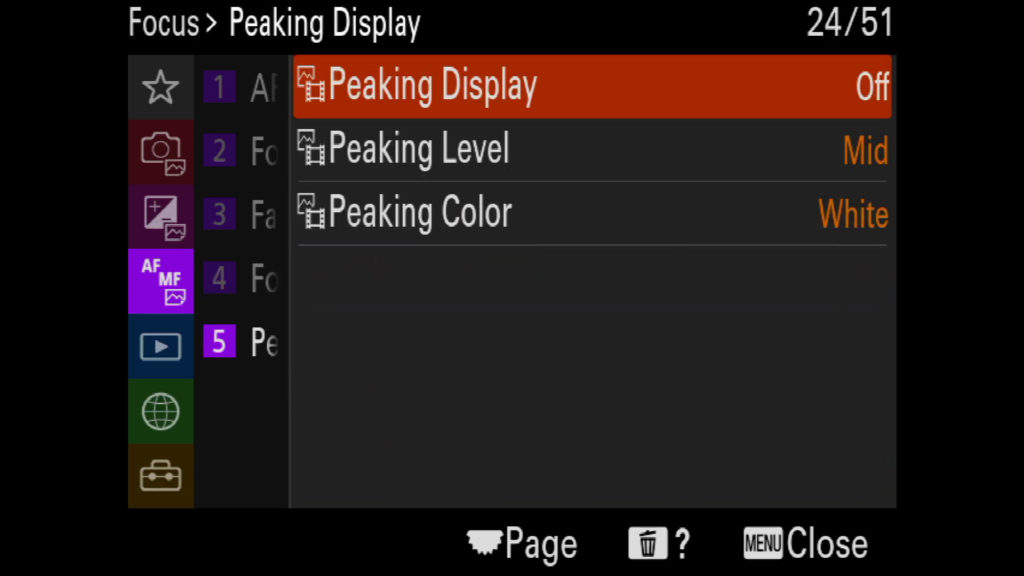
Peaking Display:
Sets the peaking function, which enhances the outline of in-focus areas during shooting with Manual Focus or Direct Manual Focus.
Peaking level:
Sets the level of enhancement of in-focus areas. Either High, Mid or Low.
Peaking Color:
Sets the color used to enhance in-focus areas. Choose between Red, Yellow, Blue or White.
Playback 1
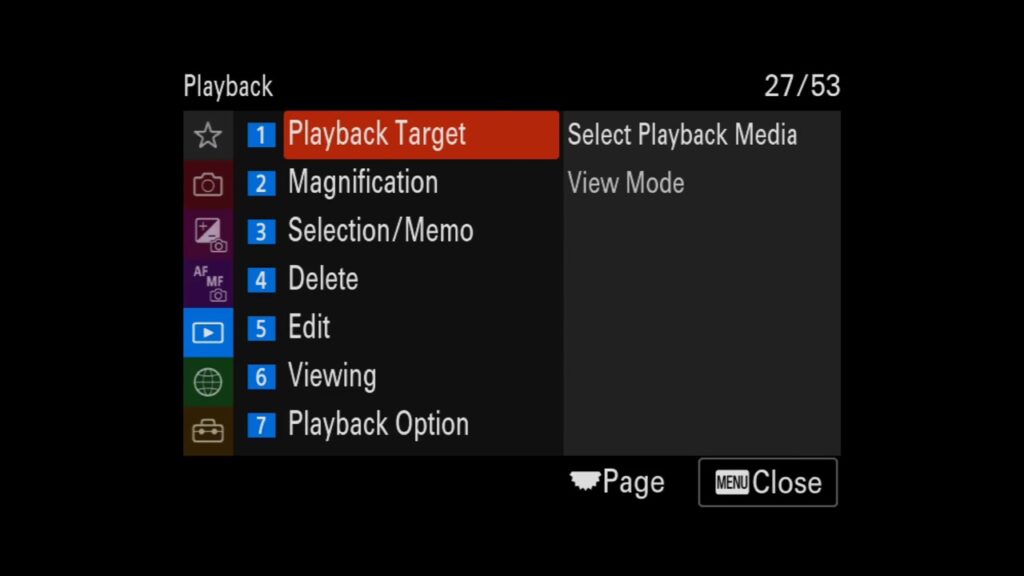
Select Playback Media:
Selects a slot that contains a memory card.
View Mode:
Select how the Sony A7 IV will arrange captured pictures in the viewing browser.
Playback 2
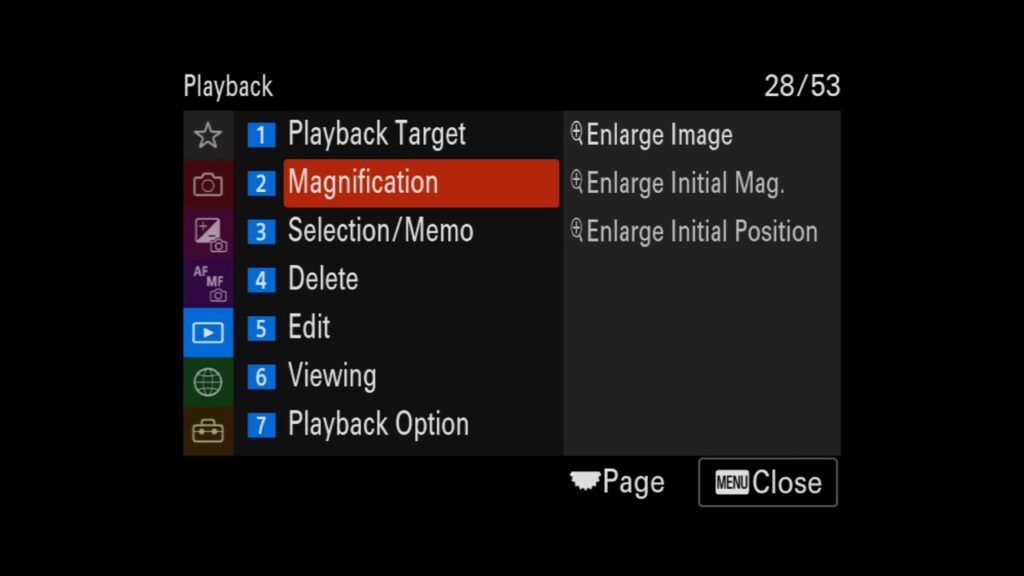
Enlarge Image:
Select an image and expand a portion of that picture. Useful for checking details and focus.
Enlarge Init. Mag.:
Sets the initial magnification scale when playing back enlarged images.
Enlarge Initial Pos.:
Sets the initial position when enlarging an image in playback. You can select either image center or the focus position.
Playback 3
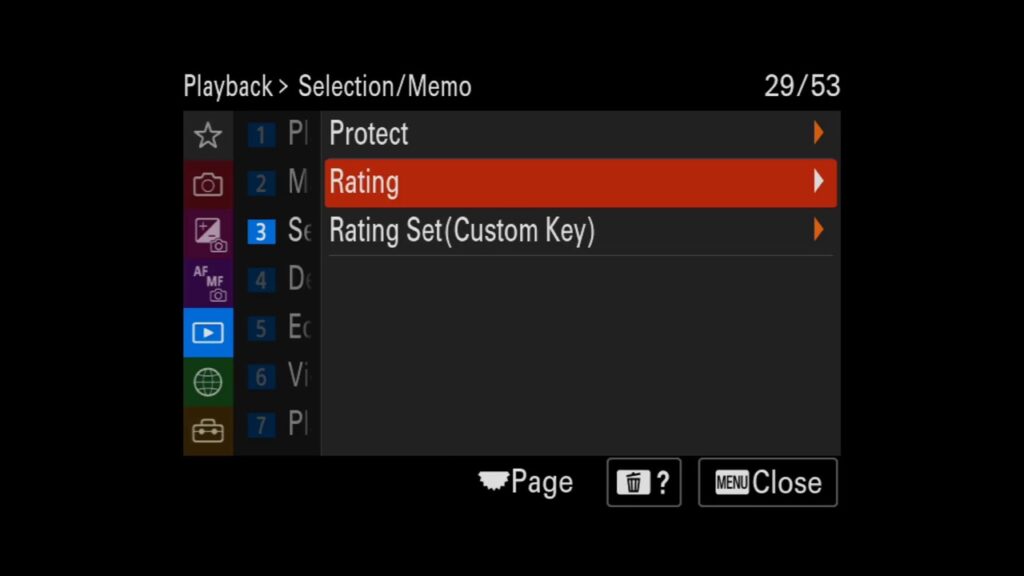
Protect:
Set your Sony A7IV to not shoot images without inserting an SD card.
Rating:
Rate your images in-Sony A7 IV for easy culling in Lightroom afterward.
Rating Set (Cust Key):
Set a custom key for easy rating.
Playback 4
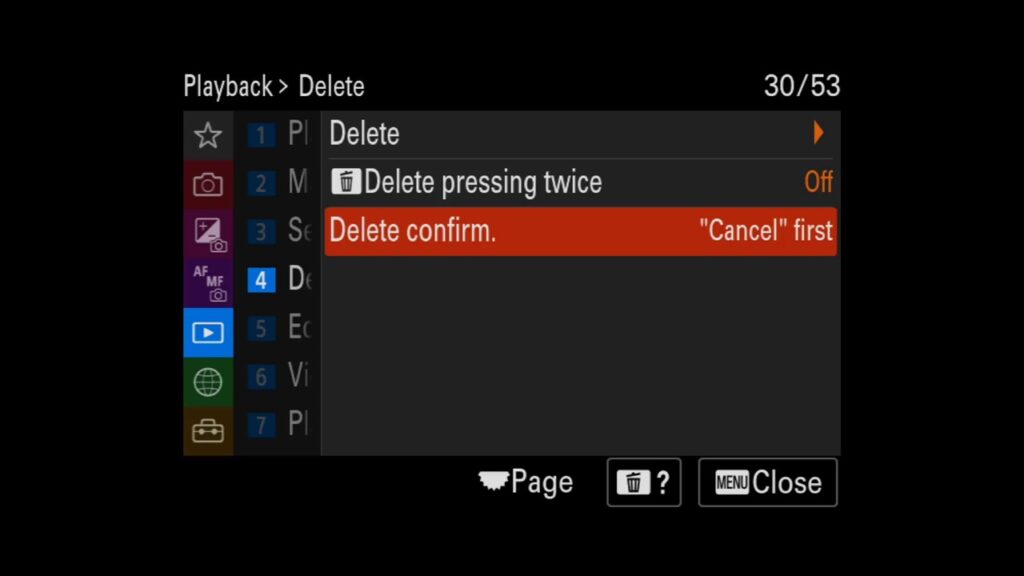
Delete:
You can delete multiple selected images. Once you have deleted an image, you cannot restore it. Confirm the image to be deleted beforehand.
Delete pressing twice:
Rate your images in-Sony A7 IV for easy culling in Lightroom afterward.
Delete confirm:
Sets whether or not you can delete the image currently being played back by pressing the Delete button twice in sequence.
Playback 5
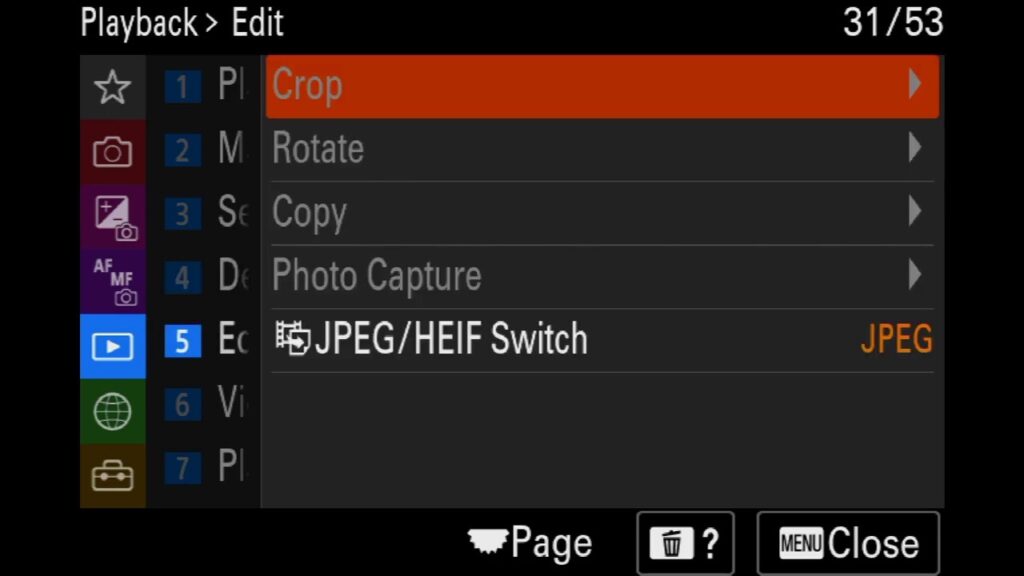
Crop:
Use this feature the crop your images in-camera.
Rotate:
Change the orientation of images in-camera.
Copy:
You can copy images from a memory card in a slot that is selected using Select PB Media to a memory card in another slot.
Photo Capture:
Captures a chosen scene in a movie to save as a still image. First shoot a movie, then pause the movie during playback to capture decisive moments that tend to be missed when shooting still images, and save them as still images.
JPEG/HEIF Switch:
Switches the file format (JPEG / HEIF) for still images captured with Photo Capture.
You can view and edit JPEG files in various environments. The HEIF format has high compression efficiency. The Sony A7 IV can record with high image quality and small file sizes in the HEIF format. Depending on the computer or software, you may not be able to view or edit HEIF files. In addition, a HEIF-compatible environment is required to play back still images in the HEIF format. You can enjoy high-quality still images by connecting the Sony A7 IV and the TV via HDMI.
Playback 6

Cont. Play For Interval:
Continuously plays back images shot using interval shooting.
Play Speed For Interval:
Sets the playback speed for still images during Cont. Play for interval.
Slide Show:
Select whether you want the Sony A7IV to repeat slideshows when all pictures are viewed or not, and choose the interval between slides.
Playback 7
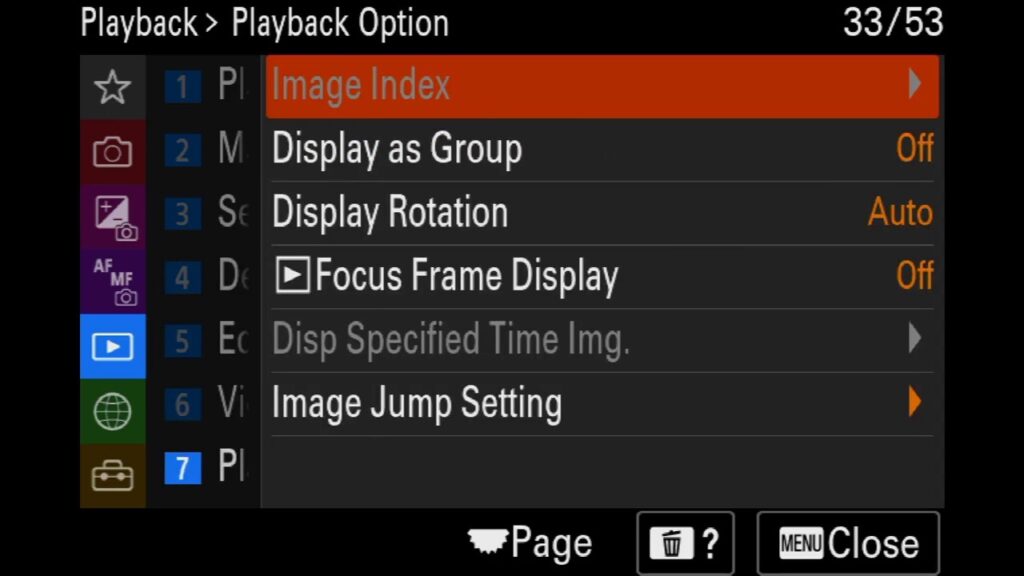
Image Index:
Choose whether you want the image browser to display 12 (larger) or 30 (smaller) images per page.
Display As Group:
You can select to display burst images in groups or display all images during playback.
Display Rotation:
Selects the orientation when playing back recorded images.
Focus Frame Display:
Sets whether to display a focus frame around the area where the Sony A7 IV focused when you play back a still image.
Select Image Jump Dial:
You can jump between images during playback. This function is useful when you want to find one of many recorded images. You can also quickly find protected images or images set with a particular rating. Assign this function to either the front dial or rear dial.
Image Jump Method:
Sets the method for jumping between images during playback by operating a dial.
- One by one: Plays back images one by one.
- By 10 images: Jumps in units of 10 images.
- By 100 images: Jumps in units of 100 images.
- Protect Only: Plays back only protected images.
- Rating Only: Plays back all rated images.
Network 1
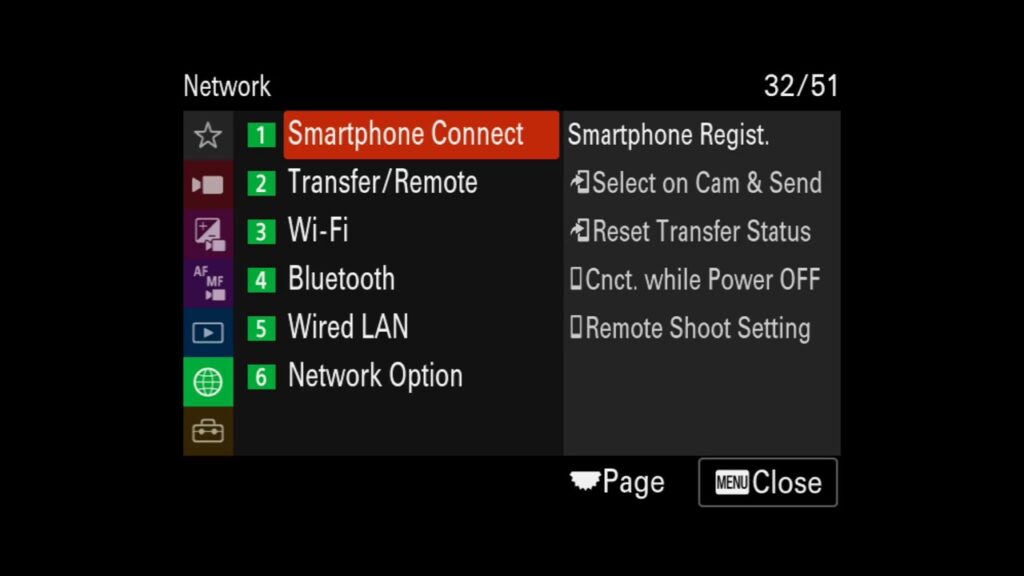
Smartphone connection:
Sets whether to connect the Sony A7 IV to your smartphone.
Connection:
Displays the QR Code or SSID used to connect the camera to a smartphone.
Select on Cam & Send:
You can transfer images to a smartphone by selecting images on the camera.
The following is the procedure for transferring the image currently displayed on the camera.
Cnct. while Power Off:
Sets whether to accept Bluetooth connections from a smartphone while the Sony A7 IV is turned off. When Cnct. during Power OFF is set to On, you can browse images on the camera’s memory card and transfer images from the Sony A7 IV to a smartphone by operating the smartphone.
Remote Shoot Setting:
Configures settings for images saved when performing remote shooting using a smartphone.
- Still Img. Save Dest.:Sets whether or not to save still images to both the camera and the smartphone during remote shooting.
- Save Image Size:Selects the file size for images to be transferred to the smartphone when ‘Still Img. Save Dest.’ is set to ‘Smartphone+Cam.’. The original-sized JPEG/HEIF file or a 2M-equivalent JPEG/HEIF file can be transferred.
- RAW+J Save Image:Selects the file type for images to be transferred to the smartphone when ‘Still Img. Save Dest.’ is set to Smartphone+Cam.
- RAW+H Save Image:Selects the file type for images to be transferred to the smartphone when ‘Still Img. Save Dest.’ is set to Smartphone+Cam.
- Save JPEG Size/ Save HEIF Size:Selects the image size to be saved on the smartphone when ‘Still Img. Save Dest.’ is set to Smartphone+Cam.
Always Connected:
Sets whether to always connect the Sony A7 IV and a smartphone that has previously been connected.
Network 2
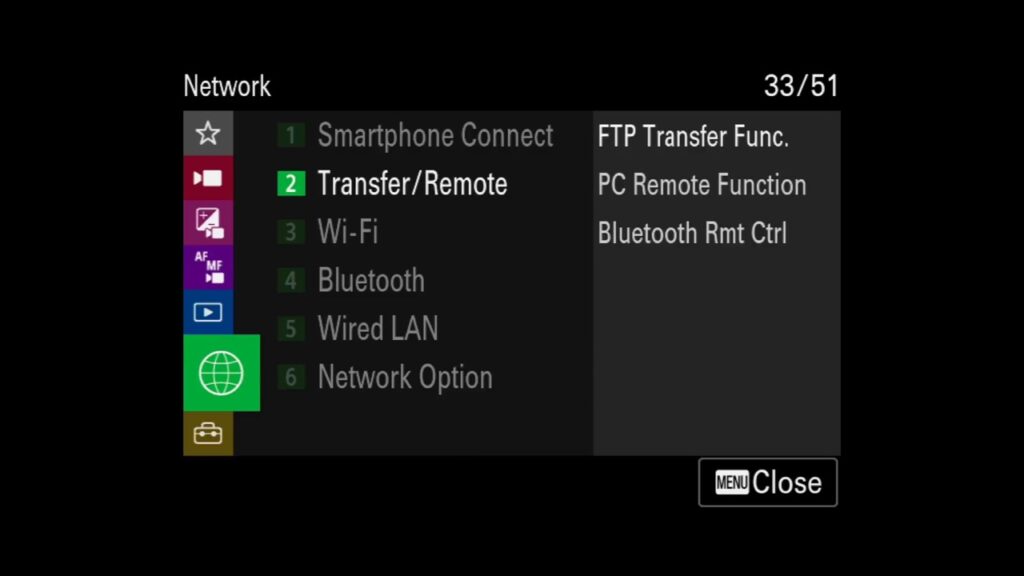
FTP Transfer Funct.:
You can set up image transferring using an FTP server or transfer images to the FTP server. It requires basic knowledge of FTP servers.
PC Remote Function:
Sets whether to save still images stored in both the Sony A7 IV and the computer during PC Remote shooting (Tethering). This setting is useful when you want to check recorded images on the Sony A7 IV without leaving the camera.
Bluetooth Rmt Ctrl:
You can operate the Sony A7 IV using a Bluetooth remote commander (sold separately). For details on compatible remote commander, visit the Sony web site in your area, or consult your Sony FE dealer or local authorized Sony FE service facility.
Network 4
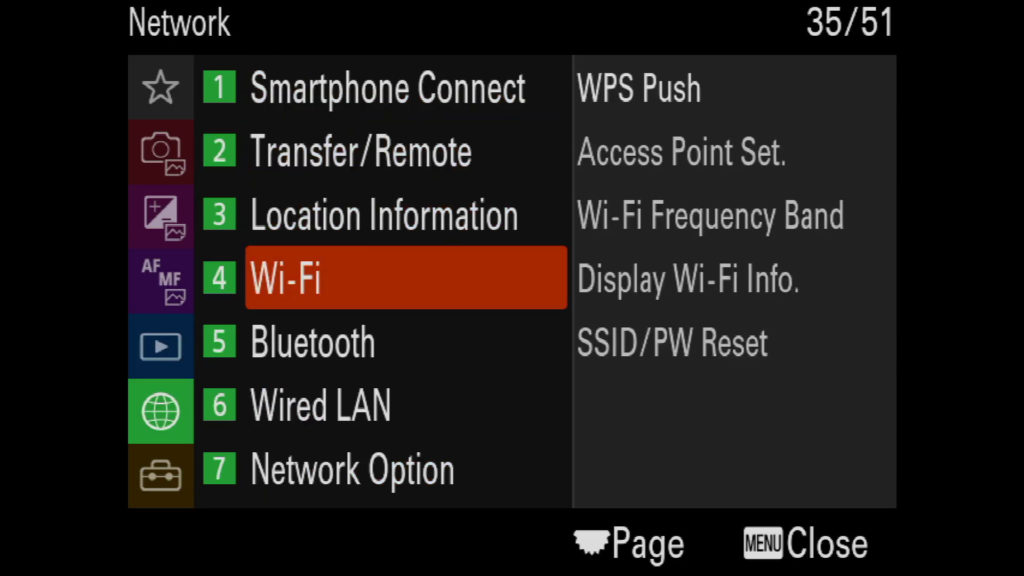
WPS Push:
If your access point has the Wi-Fi Protected Setup (WPS) button, you can register the access point to this Sony A7 IV easily by pushing the Wi-Fi Protected Setup (WPS) button.
Access Point Set.:
You can register your access point manually. Before starting the procedure, check the SSID name of the access point, security system, and password. The password may be preset in some devices. For details, see the access point operating instructions, or consult the access point administrator.
Wi-Fi Frequency Band:
Sets the frequency band for Wi-Fi communications. 5GHz has faster communication speeds and more stable data transfers than 2.4GHz. The Wi-Fi Frequency Band setting applies to smartphone transfers, remote operations using a smartphone, and the PC remote function via Wi-Fi Direct connection.
Display Wi-Fi Info:
Displays Wi-Fi information for the Sony A7 IV such as the MAC address, IP address, etc.
SSID/PW Reset:
This Sony A7 IV shares connection information with devices that have permission to connect when connecting to a smartphone or establishing a Wi-Fi Direct connection with a computer. If you want to change which devices have permission to connect, reset the connection information.
Network 5
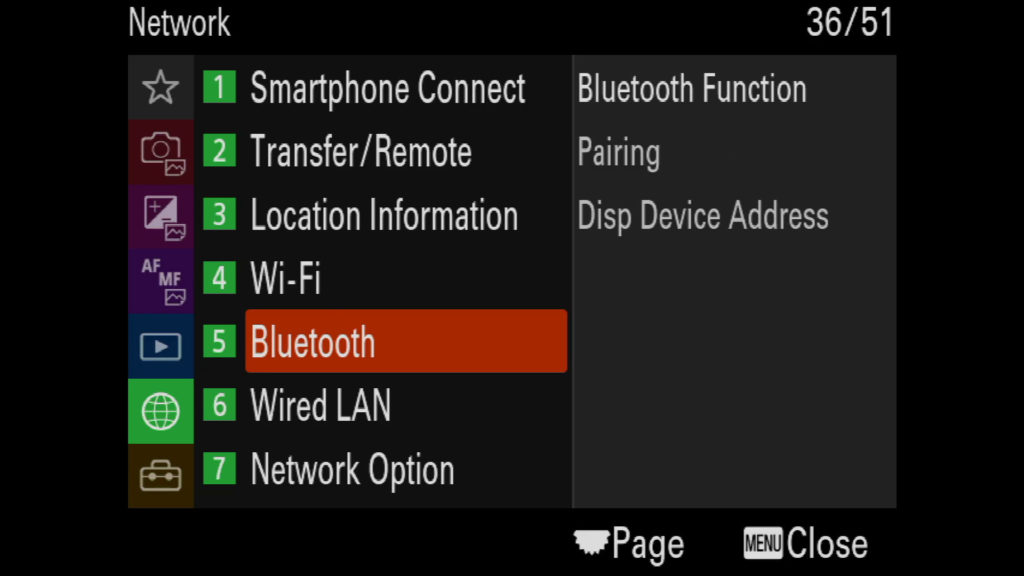
Bluetooth function:
Controls the settings for connecting the camera to a smartphone or Bluetooth remote commander via a Bluetooth connection.
Pairing:
Displays the screen for pairing the camera and smartphone or Bluetooth remote commander.
Disp Device Address:
Displays the BD address of the camera.
Network 6
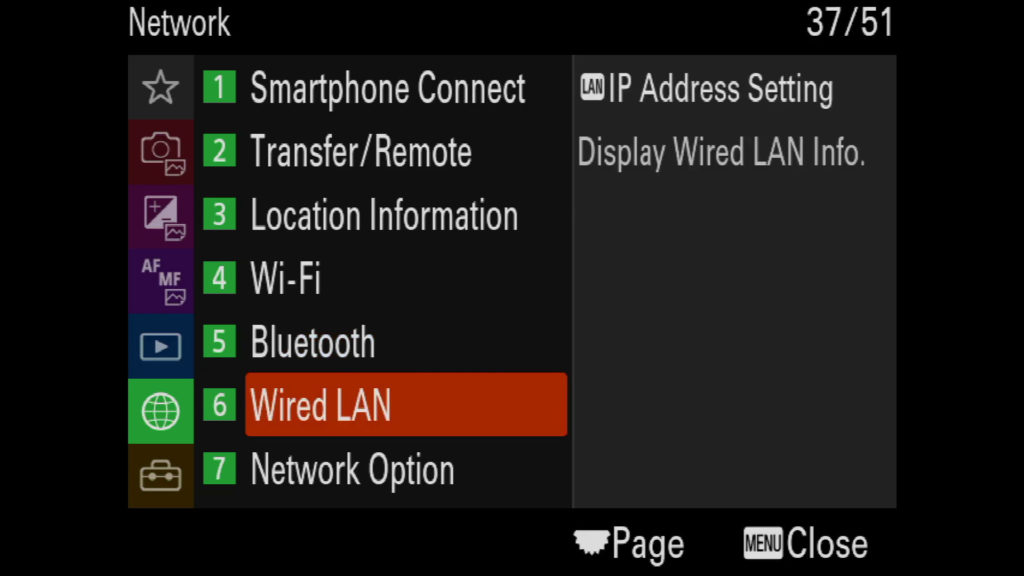
IP Address Setting:
Sets whether to configure the IP address for the wired LAN automatically or manually.
Display Wired LAN Info.:
Displays wired LAN information for this product such as the MAC address or IP address.
Network 7
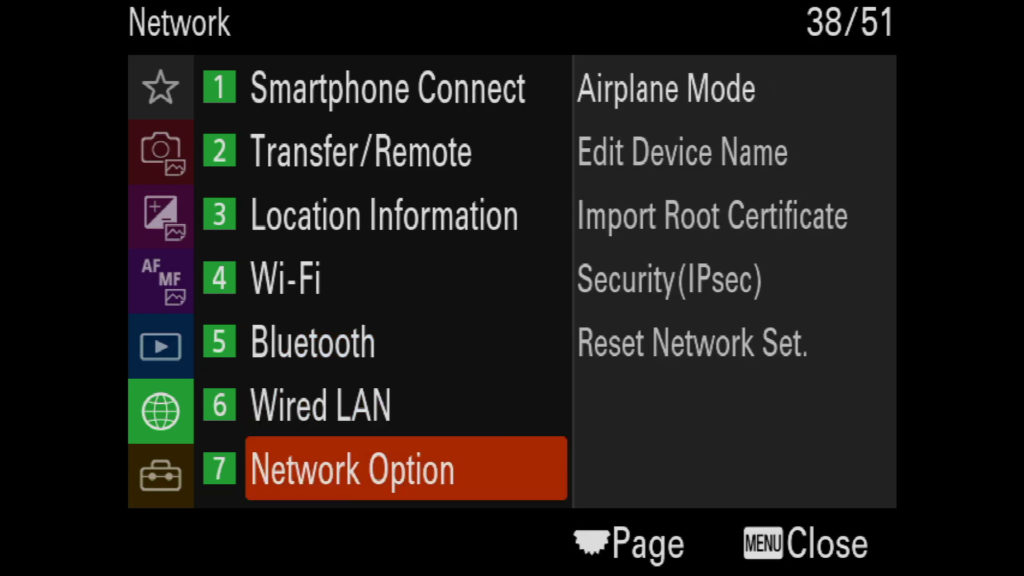
Airplane Mode:
When you board an airplane, etc., you can temporarily disable all the wireless-related functions including Wi-Fi.
Edit Device Name:
You can change the Sony A7 IV name for Wi-Fi Direct, PC Remote or Bluetooth connections.
Import Root Certificate:
Imports a root certificate needed to verify a server from a memory card. Use this function for encrypted communications during FTP transfer.
Security(IPsec):
Encrypts data when the camera and a computer communicate via a wired LAN or Wi-Fi connection.
- IPsec: Sets whether or not the Security(IPsec) function is used. (On/Off)
- Dest. IP Address: Sets the IP address of the Sony A7 IV to connect using the Security(IPsec) function.
- Shared Key: Sets the shared key used by the Security(IPsec) function.
Reset Network Set.:
Resets all the network settings to default settings.
Setup Menu 1
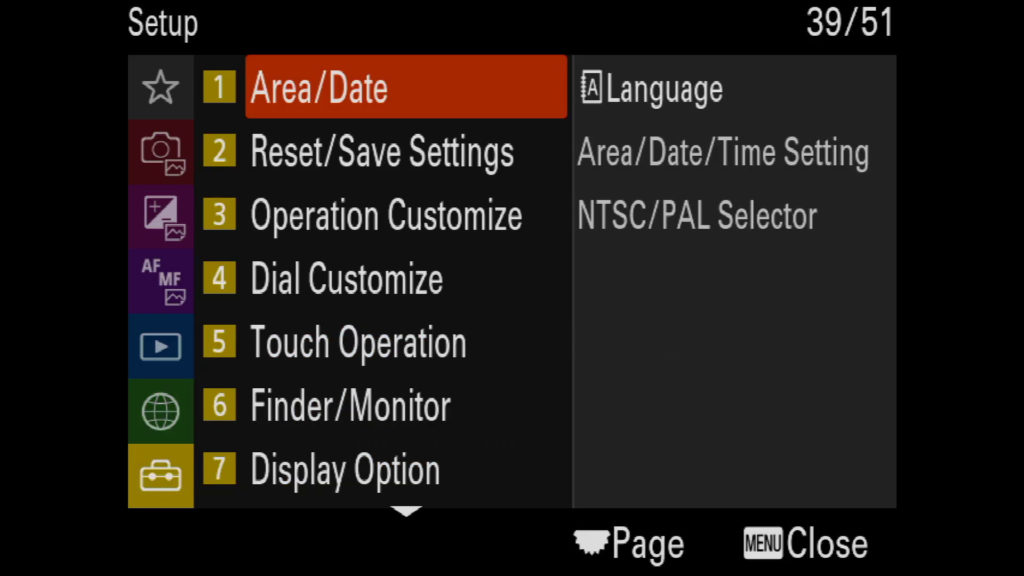
Language:
Selects the language to be used in the menu items, warnings, and messages.
Area/Date/Time Setting:
You can set the area (where you are using the camera), daylight savings (On/Off), the date display format, and the date and time.
The Area/Date/Time Setting screen is displayed automatically when you turn on the product for the first time or when the internal rechargeable backup battery has fully discharged. Select this menu when setting the date and time after the first time.
NTSC/PAL Selector:
Plays back movies recorded with the product on a NTSC/PAL system TV.
Setup Menu 2

Setting Reset:
Resets the product to the default settings. Even if you perform Setting Reset, the recorded images are retained.
Save/Load Settings:
You can save/load camera settings to/from a memory card. You can also load settings from another camera of the same model.
Setup Menu 3
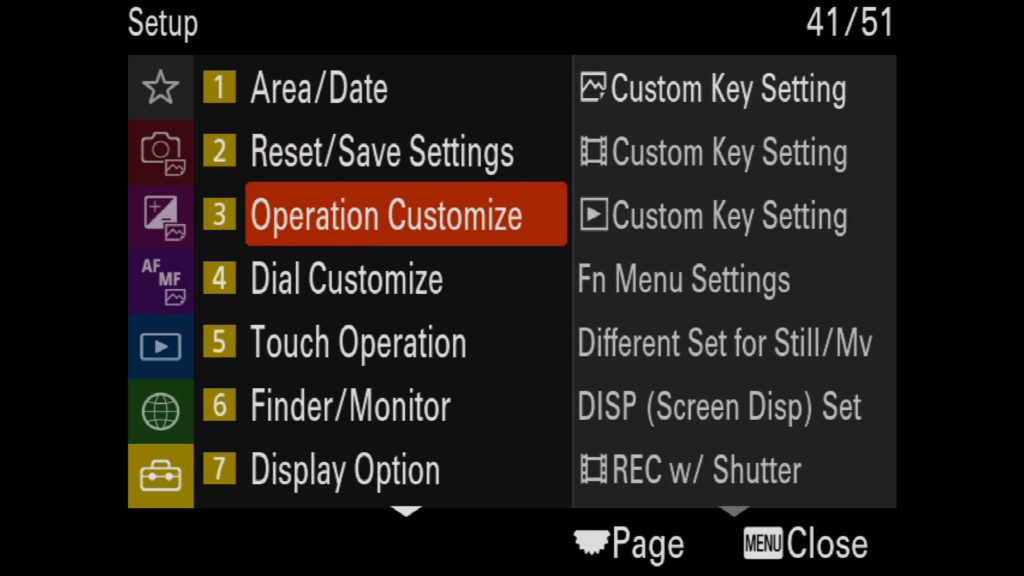
Custom Key Setting(Shoot.)/Custom Key Setting(PB)/Custom Key Setting(Movie):
You can assign the desired function to the desired key. Some functions are available only when they are assigned to a custom key. For example, I assign Eye AF to AF-ON for Custom Key(Shoot.) because it’s more conveniently placed. You can easily recall Eye AF simply by pressing the AF-ON button. Learn how to do this here:
The keys that can be assigned functions are different for Custom Key(Shoot.) and Custom Key(PB).
You can assign the desired functions to the following keys. You can also assign a shooting function to the focus hold button on the lens. However, some lenses do not have a focus hold button.2 1.
- Custom Button 1
- Custom Button2
- AF/MF Button/AEL Button
- Fn/ Button
- Control Wheel (Center Button/Down Button/Left Button/Right Button)
- Custom Button 3
Function Menu Settings:
You can assign the functions to be called up when you press the Fn (Function) button.
Different Set for Still/Mv:
For each item in still image shooting and movie recording, you can select whether to use a common setting or separate settings.
You can set the following items separately for still image shooting and movie recording.
- Aperture
- Shutter Speed
- ISO
- Exposure Comp.
- Metering Mode
- White Balance
- Picture Profile
- Focus Mode
DISP (Screen DiSP) Set:
Allows you to set the screen display modes that can be selected using DISP (Display Setting) in shooting mode.
- Display All Info.: Shows recording information.
- No Disp. Info.: Does not show recording information.
- Histogram: Displays the luminance distribution graphically.
- Level: Indicates whether the product is level in both the front-back (A) and horizontal (B) directions. When the product is level in either direction, the indicator turns to green.S
Setup Menu 4
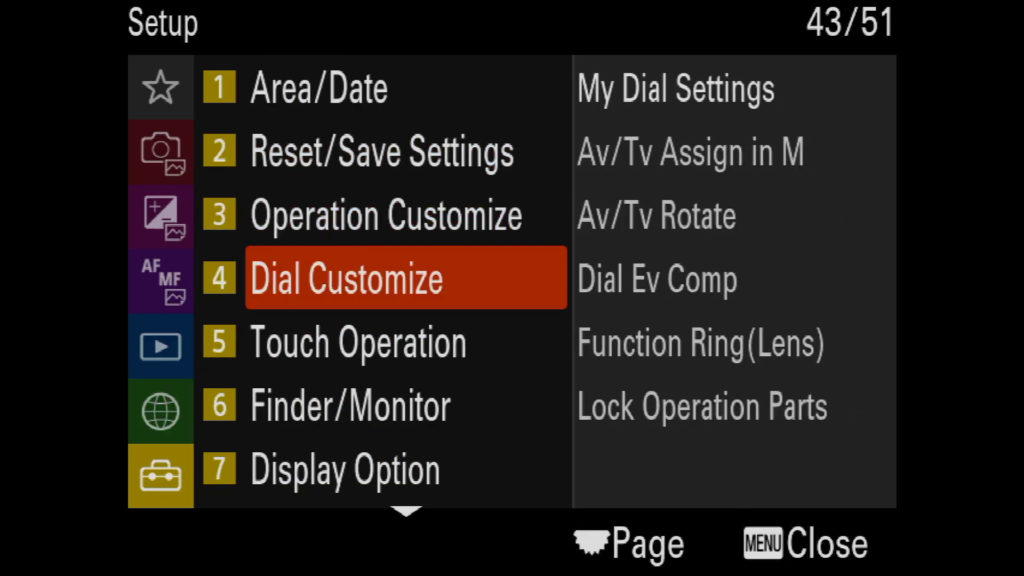
My Dial Settings:
You can assign the desired functions to the front dial, rear dial, and control wheel, and register up to three combinations of settings as “My Dial” settings. You can quickly recall or switch registered “My Dial” settings by pressing the custom key you assigned in advance.
Registering functions to “My Dial”
Register the functions that you want to assign to the front dial, the rear dial, and the control wheel as My Dial 1through My Dial 3.
- MENU – (Setup) – Dial Customize – My Dial Settings.
- Select a dial or wheel for (My Dial 1), and press the center of the control wheel.
- Select the desired function to assign using the top/bottom/left/right sides of the control wheel, and then press the center of the control wheel.
- Select “–” (Not set) for a dial or wheel to which you do not want to assign any function.
- After you select functions for all of the dials and the wheel in (My Dial 1) by repeating Steps 2 and 3, select OK.The settings for (My Dial 1) will be registered.
- If you want to register (My Dial 2) and (My Dial 3), follow the same procedure as described above.
Assigning a key to recall “My Dial”
Assign a custom key to recall the registered “My Dial” settings.
- MENU – (Setup) – Operation Customize – Custom Key Setting or Custom Key Setting – Select the key that you want to use to recall “My Dial.”
- Select the number of the “My Dial” setting that you want to recall or the pattern for switching “My Dial.”
Menu options:
- My Dial 1 during Hold /My Dial 2 during Hold/My Dial 3 during Hold: While you hold down the key, the functions that you registered in My Dial Settings are assigned to the dial/wheel.
- My Dial 1-2-3 : Each time you press the key, the function changes in the following sequence: “Normal function – Function of My Dial 1 – Function of My Dial 2 – Function of My Dial 3 – Normal function.”
- Toggle My Dial 1 /Toggle My Dial 2/Toggle My Dial 3: The function registered using My Dial Settings is maintained even if you do not hold down the key. Press the key again to return to the normal function.
Shooting while switching “My Dial”
During shooting, you can recall “My Dial” using the custom key, and shoot as you change the shooting setting by turning the front dial, the rear dial, and the control wheel.
In the following example, the functions listed below are registered to “My Dial,” and My Dial 1-2-3 is assigned to the C1 (Custom 1) button.
| Operation part | My Dial 1 | My Dial 2 | My Dial 3 |
|---|---|---|---|
| Control wheel | ISO | White Balance | Not set |
| Front dial | Av | Creative Look | Move AF Frame : Std |
| Rear dial | Tv | Exposure Comp. | Move AF Frame : Std |
-
- The icons for the functions registered to My Dial 1 are displayed in the lower part of the screen.Press the C1 (Custom1) button.The functions registered to My Dial 1 will be assigned to the control wheel, the front dial, and the rear dial.
- Turn the control wheel to set the ISO value, turn the front dial to set the aperture value, and turn the rear dial to set the shutter speed.
- Press the C1 button again. The functions registered to My Dial 2 will be assigned to the control wheel, the front dial, and the rear dial.
- Turn the control wheel to set White Balance, turn the front dial to set Creative Look, and turn the rear dial to set Exposure Comp..
- Press the C1 button again, and change the setting values for the functions registered to My Dial 3.
- Press the shutter button to shoot.
Dial Setup:
You can switch the functions of the front/rear dial between shutter speed and aperture.
AV/TV Rotate:
Sets the direction of rotation for the front dial, rear dial, or control wheel when changing the aperture value or shutter speed.
Dial EV Comp:
You can compensate the exposure using the front or rear dial. You can adjust the exposure in a range of -5.0 EV to 5.0 EV.
Function Ring (lens):
You can choose which of the following functions to assign to the function ring on the lens: power-assisted focusing (power focus), or switching the angle of view between full frame and APS-C/Super 35 mm (available only with compatible lenses).
Lock Operation Parts:
You can set whether the dials will be locked by pressing and holding the Fn (Function) button. You can release the lock by holding the Fn (Function) button down again.
Lock: Locks the front and rear dials when you press and hold the Fn button.
Unlock: The front or rear dials are not locked, even if you press and hold the Fn (Function) button.
Setup Menu 5
Touch operation:
Sets whether or not to activate touch operations on the monitor. Touch operations when shooting with the monitor are referred to as “touch panel operations,” and touch operations when shooting with the viewfinder are referred to as “touchpad operations.”
Touch Panel Pad: Activates both the touch panel operations when shooting with the monitor and touchpad operations when shooting with the viewfinder.
Touch Panel Only: Activates only the touch panel operations when shooting with the monitor.
Touch Pad Only: Activates only the touch pad operations when shooting with the viewfinder. Off: Deactivates all touch operations.
Off: Deactivates all touch operations.
Touch Panel/Pad:
Touch operations when shooting with the monitor are referred to as “touch panel operations,” and touch operations when shooting with the viewfinder are referred to as “touch pad operations.” You can select whether to activate touch panel operations or touch pad operations.
- Both Valid: Activates both the touch panel operations when shooting with the monitor and touch pad operations when shooting with the viewfinder.
- Touch panel Only: Activates only the touch panel operations when shooting with the monitor.
- Touch Pad Only: Activates only the touch pad operations when shooting with the viewfinder.
Touch Pad Settings:
You can adjust settings related to touch pad operations during viewfinder shooting.
- Operation In Vertical Orientation: Sets whether to enable touch pad operations during vertically oriented viewfinder shooting. You can prevent erroneous operations during vertically oriented shooting caused by your nose, etc. touching the monitor.
- Touch Position Mode: Sets whether to move the focusing frame to the position touched on the screen (Absolute Position), or move the focusing frame to the desired position based on the direction of dragging and the amount of movement (Relative Position).
- Operation Area: Sets the area to be used for touch pad operations. Restricting the operational area can prevent erroneous operations caused by your nose, etc. touching the monitor.
Touch Func. In Shooting:
Touch Focus allows you to specify a position where you want to focus using touch operations.
This function is available when Focus Area is set to one of following parameters:
- Wide
- Zone
- Center Fix
- Tracking: Wide
- Tracking: Zone
- Tracking: Center Fix
When performing auto-focusing, you can specify the position where you want to focus using touch operations. After touching the monitor and specifying a position, press the shutter button halfway down to focus.
- Touch the monitor.
- When shooting with the monitor, touch the position where you want to focus.
- When shooting with the viewfinder, you can move the position of the focus by touching and dragging on the monitor while looking through the viewfinder.
- To cancel focusing with touch operations, touch (Touch focus release) icon or press the center of the control wheel if shooting with the monitor, and press the center of the control wheel if shooting with the viewfinder.
- Press the shutter button halfway down to focus.
Press the shutter button all the way down to shoot images.
Specifying the position where you want to focus in the movie recording mode
The camera will focus on the touched subject. Touch the subject on which you want to focus before or during recording.
When Focus Mode is set to Continuous AF, the focus mode temporarily switches to manual focus, and the focus can be adjusted using the focus ring (spot focus). Spot focus is not available when shooting with the viewfinder.
To cancel spot focus, touch (Touch focus release) icon or press the center of the control wheel.
When Focus Mode is set to Manual Focus, the focus mode temporarily switches to Continuous AF. When the touched area is in focus, the focus mode returns to manual focus.
Setup Menu 6
Screen Reader
Sets the function for reading aloud information such as text on the screen.
This function is available only when the menu language is set to English on models sold in North America. (As of the release date)
Setup Menu 7
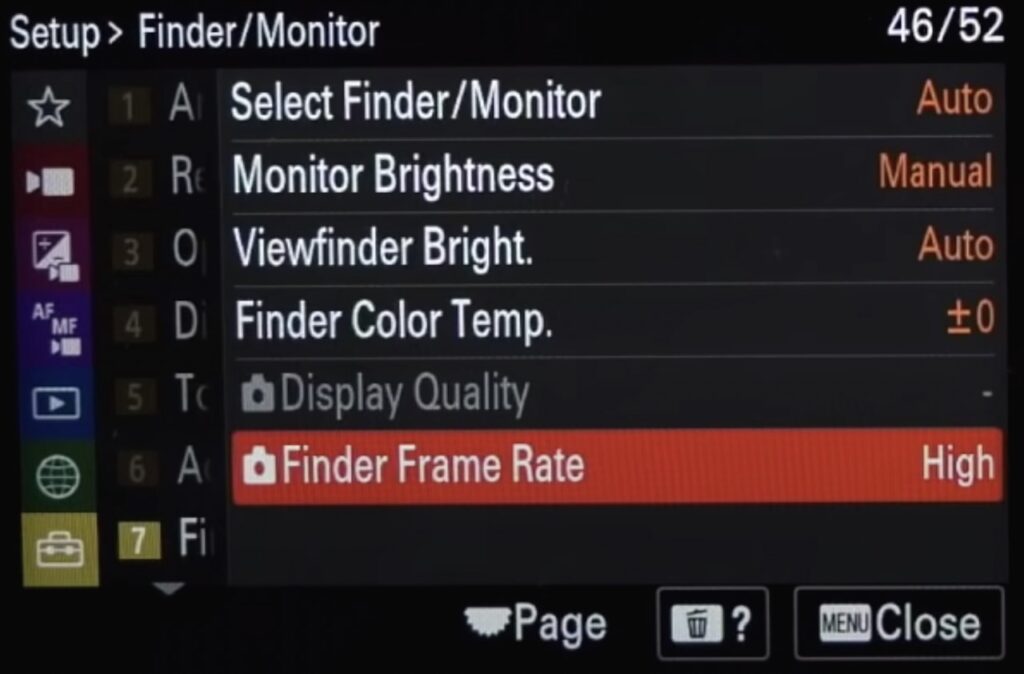
Select Finder/Monitor:
Sets the method for switching the display between the viewfinder and the monitor.
- Auto: When you look into the viewfinder, the eye sensor reacts and the display is switched to the viewfinder automatically.
- VF(Manual): The monitor is turned off and the image is displayed only in the viewfinder.
- Monitor(Manual): The viewfinder is turned off and the image is always displayed on the monitor.
Monitor Brightness:
Adjust the brightness of the screen.
- Manual: Adjusts the brightness within the range of –2 to +2.
- Sunny Weather: Sets the brightness appropriately for shooting outdoors.
Viewfinder Bright:
When using the viewfinder, this product adjusts the brightness of the viewfinder according to the surrounding environment. Either auto or manual.
Finder Color Temp:
Adjusts the color temperature of the viewfinder.
ViewFinder Magnifi.:
Sets the display magnification of the viewfinder. If you select Zoom Out, the viewing angle will become narrower. You can easily check the overall composition even when wearing glasses.
Display Quality:
You can change the display quality.
Hack: Set Display Quality to standard in order to save battery life.
Finder Frame Rate:
Display the subject’s movements more smoothly by adjusting the frame rate of the viewfinder during still image shooting. This function is convenient when shooting a fast-moving subject.
Hack: Set Finder Frame Rate to standard in order to save battery life.
Setup Menu 8
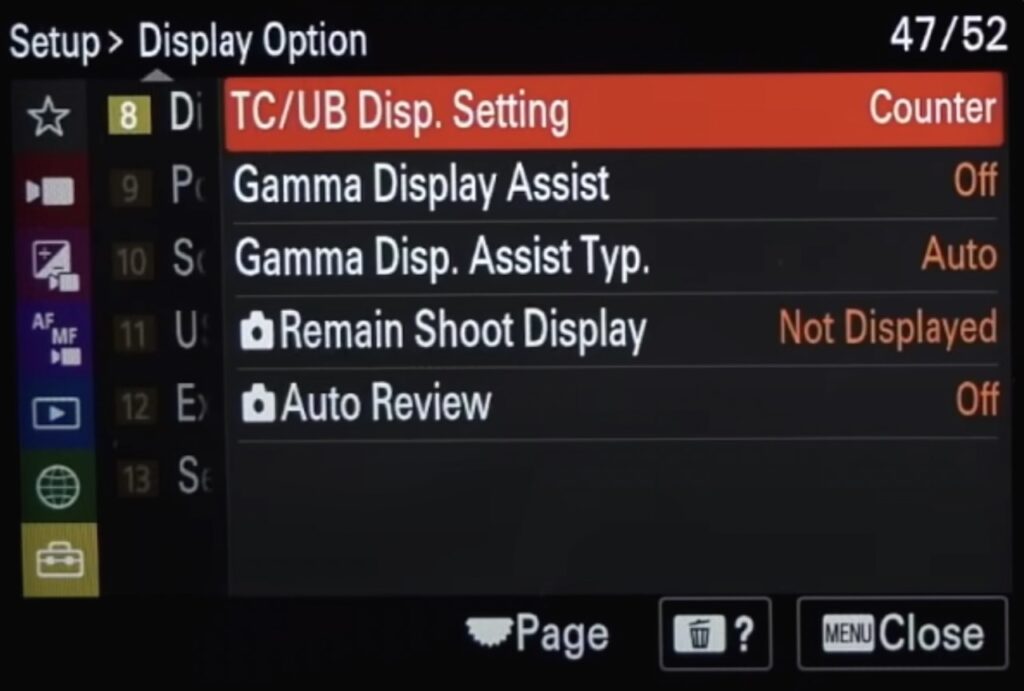
TC/UB Disp. Setting:
Sets the display for the counter, time code, and user bit.
- Counter: Displays the time counter of movie recording.
- TC: Displays the time code.
- U-Bit: Displays the user bit.
Gamma Display Assist:
Movies with S-Log gamma are assumed to be processed after shooting in order to make use of the wide dynamic range. Images with the HLG gamma are assumed to be displayed on HDR-compatible monitors. They are therefore displayed in low contrast during shooting, and may be difficult to monitor. However, you can use the Gamma Display Assist function to reproduce contrast equivalent to that of normal gamma. In addition, Gamma Display Assist can also be applied when playing back movies on the camera’s monitor/viewfinder.
Gamma Disp. Assist Typ.:
Selects the conversion type for Gamma Display Assist.
- Auto:
-
- Displays images with effects as follows according to the gamma or color mode set in Picture Profile.
- When the gamma is set to S-Log2: S-Log2→709(800%)
- When the gamma is set to S-Log3: S-Log3→709(800%)
- When the gamma is set to HLG, HLG1, HLG2, or HLG3, and the color mode is set to BT.2020: HLG(BT.2020)
- When the gamma is set to HLG, HLG1, HLG2, or HLG3, and the color mode is set to 709: HLG(709)
- Displays images with an HLG(BT.2020) effect when shooting HLG still images with HLG Still Image set to On.
- Displays images with an S-Log3→709(800%) effect when outputting RAW movies to another Sony A7 IV connected via HDMI during movie shooting.
- Displays images with effects as follows according to the gamma or color mode set in Picture Profile.
- S-Log2→709(800%):
- Displays images with an S-Log2 gamma reproducing contrast equivalent to ITU709 (800%).
- S-Log3→709(800%):
- Displays images with an S-Log3 gamma reproducing contrast equivalent to ITU709 (800%).
- HLG(BT.2020):
- Displays images after adjusting the image quality of the monitor or viewfinder to a quality that is almost the same as when images are displayed on an HLG(BT.2020) compatible monitor. HLG(709):
- Displays images after adjusting the image quality of the monitor or viewfinder to a quality that is almost the same as when images are displayed on an HLG(709) compatible monitor.
Remain Shoot Display:
Sets whether or not to display an indicator of the remaining number of still images that can be continuously shot at the same shooting speed.
- Always Display: Always displays the indicator when shooting still images.
- Shoot-Only Fisplay: During shooting, the remaining number of images that can be shot is always displayed. When you press the shutter button halfway down, the remaining number of images is displayed.
- Not Displayed: Does not display the indicator.
Auto Review:
You can check the recorded image on the screen right after the shooting. You can also set the display time for Auto Review. (10-5-2 seconds)
Setup Menu 9
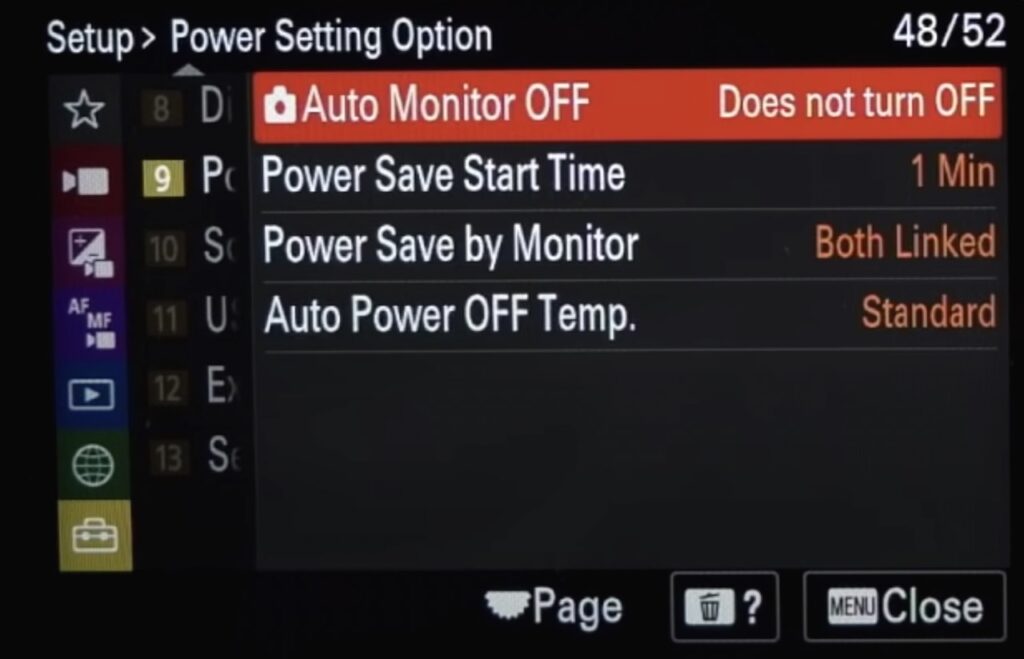
Auto Monitor OFF:
Sets whether or not to turn the monitor off automatically in shooting modes for still images.
Power Save Start Time:
Sets time intervals to automatically switch to power save mode when you are not performing operations to prevent wearing down the battery pack. To return to shooting mode, perform an operation such as pressing the shutter button halfway down. (30, 5, 2 or 1 minutes, 10 seconds)
Auto Power OFF temp.:
Sets the temperature of the camera at which the camera turns off automatically during shooting. When it is set to High, you can continue shooting even when the temperature of the camera gets hotter than normal.
Setup Menu 10
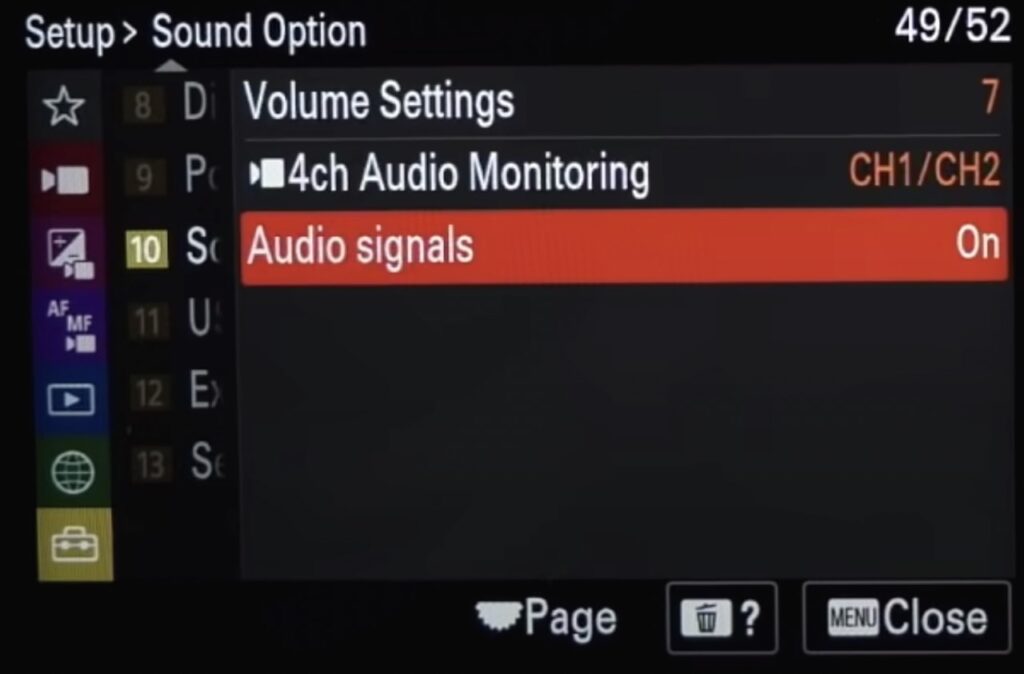
Volume Settings:
Sets the sound volume for movie playback. During playback, press the bottom side of the control wheel while playing back movies to display the operation panel, then adjust the volume. You can adjust the volume while listening to the actual sound.
4ch Audio monitoring:
Sets the audio to be monitored by the Sony A7 IV connected to the (headphone) terminal of the camera when you record movie audio in 4 channels or when playing back a movie recorded in 4 channels.
- CH1/CH2: Outputs audio from channel 1 to the L (left) side and from channel 2 to the R (right) side.
- CH3/CH4: Outputs audio from channel 3 to the L (left) side and from channel 4 to the R (right) side.
- VH1+3/CH2+4: Outputs the mixed audio of channel 1 and channel 3 to the L (left) side and the mixed audio of channel 2 and channel 4 to the R (right) side.
- CH1/CH1: Outputs audio from channel 1 to the L (left) side and R (right) side.
- CH2/CH2: Outputs audio from channel 2 to the L (left) side and R (right) side.
Audio Signals:
Selects whether the product produces a sound or not.
Setup Menu 10
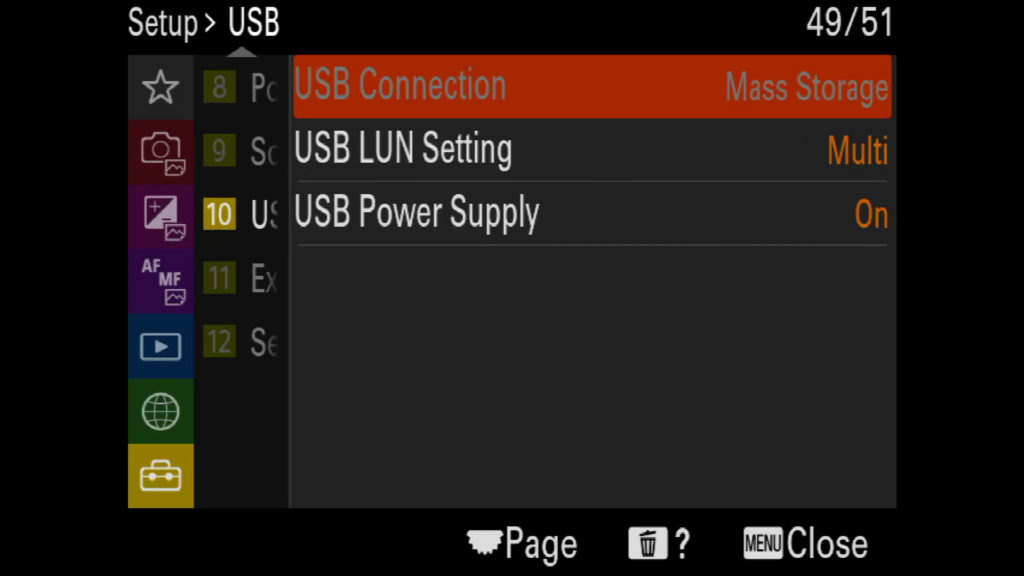
USB Connection:
Selects the USB connection method when this product is connected to a computer, etc.
- Auto: Establishes a Mass Storage or MTP connection automatically, depending on the computer or other USB devices to be connected.
- Mass Storage: Establishes a Mass Storage connection between this product, a computer, and other USB devices.
- MTP: Establishes an MTP connection between this product, a computer, and other USB devices.
USB LUN Setting:
Enhances compatibility by limiting of USB connection functions.
USB Power Supply:
Sets whether to supply power via the USB cable when the product is connected to a computer or an USB device.
Setup Menu 11
HDMI Resolution:
When you connect the camera to a TV or monitor device using an HDMI cable (sold separately), you can select the resolution to be output from the HDMI terminal of the camera during still image shooting or playback.
- Auto: The camera automatically recognizes the resolution of the connected TV or output device and sets the output resolution accordingly.
- 2160p: Outputs signals in 2160p.
- 1080p: Outputs signals in HD picture quality.
- 1080i: Outputs signals in HD picture quality.
HDMI Output Settings:
Sets the video and audio to be output to an external recorder/player connected via HDMI when shooting a movie.
Use a Premium High Speed HDMI Cable (sold separately) to output 4K movies or RAW movies.
- Rec. Media dur HDMI Output: Sets whether or not to record movies on the memory card of the camera during HDMI output.
- On: Records movies on the memory card of the camera, and outputs the movies to the HDMI-connected device at the same time. The color depth for the output movie is based on Record Setting under Movie Settings.
- Off(HDMI Only): Does not record movies on the memory card of the camera, and outputs movies only to devices connected via HDMI.
- Output Resolution: Sets the resolution of the image that will be output to another device connected via HDMI when Rec. Media dur HDMI Output is set to On and RAW Output is set to Off. (Auto / 2160p / 1080p / 1080i)
- 4K Output Set.(HDMI Only): Sets the frame rate and color depth of 4K movie output to another device connected via HDMI when Rec. Media dur HDMI Output is set to Off(HDMI Only) and RAW Output is set to Off. (60p 10bit / 50p 10bit / 30p 10bit / 25p 10bit / 24p 10bit)
- RAW Output: Sets whether to output RAW movies to another RAW-compatible device connected via HDMI. (On / Off)
- RAW Output Setting: Sets the frame rate when outputting RAW movies to another RAW-compatible device connected via HDMI. (60p / 50p / 30p / 25p / 24p)Color Gamut for RAW Output:Sets the color gamut when outputting RAW movies to another RAW-compatible device connected via HDMI.
- Time Code Output: Sets whether to output the time code and user bit to another device connected via HDMI. (On / Off)Time code information is transmitted as digital data, not as an image displayed on the screen. The connected device can then refer to the digital data in order to recognize the time data.
- REC Control: Sets whether to start or stop recording on the external recorder/player remotely by operating the camera when the camera is connected to an external recorder/player. (On / Off)
- 4ch Audio Output: When recording audio in 4 channels, set the combination of audio channels that will be output to other devices connected via HDMI.
HDMI Info. Display:
Selects whether to display shooting information on a TV or a monitor device when the camera and TV, etc. are connected via an HDMI cable.
CTRL FOR HDMI:
When connecting this product to a “BRAVIA” Sync-compatible TV using an HDMI cable, you can operate this product by aiming the TV remote control at the TV.
Setup Menu 12
Video Light Mode:
Sets the illumination setting for the HVL-LBPC LED light
- Power Link: The video light turns on/off in sync with the ON/OFF operation of this camera.
- REC Link: The video light turns on/off in sync with movie recording start/stop.
- REC Link&STBY: The video light turns on when movie recording starts and dims when not recording (STBY).
- Auto: The video light automatically turns on when it is dark.
IR Remote Ctrl:
You can operate the camera using a Sony FE Infrared Remote Commander.
Sensor Cleaning:
If dust or debris gets inside the camera and adheres to the surface of the image sensor (the part that converts the light to an electric signal), it may appear as dark spots on the image, depending on the shooting environment. If this happens, clean the image sensor quickly by following the steps below.
Auto Pixel Mapping:
Sets whether or not to automatically optimize the image sensor (pixel mapping). Normally, set this function to On.
Pixel Mapping:
You can manually optimize the image sensor pixel mapping. If Auto Pixel Mapping is set to Off, perform Pixel Mapping regularly according to the following procedure.
Hack: Sony recommends that you perform the operation once every three days!
Version:
Displays the version of this camera’s software. Check the version when updates for this product’s software are released, etc.
Also displays the version of the lens if a lens compatible with firmware updates is attached.
They display the version of the Mount Adaptor in the lens area if a Mount Adaptor compatible with firmware updates is attached.
Conclusion
That’s a wrap, we’ve gone through the entire Sony A7 IV menu system in this guide. If you have any questions that this advanced manual walkthrough did not answer, please leave it in the comments. Mor another visitor might be able to help you there.
Questions
Jpeg vs RAW: which one to choose on your A7 IV
There is no official RAW vs. JPG rule. Some people prefer RAW over JPG, but others favour JPG over RAW. JPG’s are smaller in size but contain less information, so if you’re interested in post production, RAW should be selected.
Uncompressed or compressed, which RAW file type for your Sony A7 Mark 4?
Shooting RAW files is important if you want to process images later on. You’ll see the difference when you edit them. In my tests, I see no differences in Compressed vs uncompressed RAW files in the Sony A7 IV, so I use compressed.

Wim, I found this helpful. My a7iv arrived yesterday, Dec 24. After 8 Sony bodies over 10 years a completely different menu system must be learned.
Has “Cleaning Mode” been dropped and if not where is it found?
Thanks.
It took me a while to find it. It’s buried deep in the toolbox under “setup option/anti-dust function/sensor cleaning”
It’s stupid they changed the menu system. I was happy with a7iii.
Your post says this camera has pixel-shift multi shoot but it isn’t there in the menu. Is there a way to get to it or is this an error? Thanks!
Error Chris, working on updating. Thanks for your patience
extremely helpful
just received my Sony A7IV. Need help setting my new camera. Wanting to purchase instruction book, but it won’t go through. Whats’s up?
Hi Matthew, don’t really know, it’s a new system in place, but other pdf payments have gone through. Can you tell me what happened?
Wim, I am trying to find the locked-on tracking in the video mode without having to touch the rear screen. It does it in stills but not video mode; any ideas?
As far as I know, it’s only available with the touch screen Chris, maybe someone else reading this might be able to help.
Does Sony a7iv have IR remote control as in Sony a7iii?
sure, same remote should work Sam
Just bought an A7IV. Your work here has been an immense help in getting set up.
Many many thanks for your efforts
Very welcome Ian!