RX100VII setup guide with tips and tricks
Sony RX100 VII settings, tips, and tricks
Introduction
Welcome to my Sony RX100 VII advanced manual with tips and tricks. This guide starts from your Menu settings and goes through all aspects of this nice little compact camera. I know it is a lot of information, but you’ll get the hang of it soon, I promise.
If you’re coming from earlier versions, the latest Sony RX100 VII has a few added features and you’ll see a few new features in the menus too. This new SonyRX compact camera is packed full of technologies that were previously only available in our a9 full-frame camera and allows creators to achieve new levels of performance using a compact camera for both stills and movie shooting.
By the way, I have different guides with tips and settings for the other RX100 series cameras too:
- The original Sony RX100: You can find them here.
- The RX100 II: click here
- The Sony RX100 III here.
- The RX100 IV here.
- The RX100 V here
- The RX100 VI here
Since the Sony RX100 VII has the same menu layout as recently released Sony Alpha cameras, you’ll quickly find your way around if you already own one of those.
I’ll be going over the entire Menu structure in this post, and giving you tips, pointers, and tricks along the way. If you’re a bit impatient, there is a more abbreviated “best settings” chapter before my conclusion.
Diving into the Sony RX100 VII MENU system
When you switch on your Sony RX100 VII, you’ll be asked to enter a date, time and timezone. This setting is necessary, as all images captured will have a timestamp, making it easy to find your favorite pictures in the future.
After this is setup, press the MENU button. You’ll see a range of icons and pages.
We’ll start at page 1 of the camera Icon (camera settings)
MENU – Camera Settings – page 1 of 14 (Quality settings and image size page 1)
![]()
File Format
Do you edit your pictures on your desktop? If so, set to RAW or RAW+jpeg. A RAW file saves all information the Sony RX100 VII pixels register during shooting and will make for better quality images if you want to edit in something like Adobe Lightroom.
A jpeg is a compressed imagewhich takes up less space on your SD card but is less suited for editing afterward. Jpeg images will also have in-camera noise reduction applied, something you might or might not want to take care of yourself later, depending on your style and preference.
Jpeg Quality
Jpeg is available in EXTRA FINE (best Quality) FINE (medium Quality) and STANDARD (smaller, less quality).
Jpeg Image size
The larger the image size, the more detail will be reproduced when the image is printed on large-format paper. The smaller the image size, the more images can be recorded.
Image size when the aspect ratio is 3:2:
- L: 20M 5472×3648 pixels
- M: 10M 3888×2592 pixels
- S: 5.0M 2736×1824 pixels
Image size when the aspect ratio is 4:3:
- L: 18M 4864×3648 pixels
- M: 10M 3648×2736 pixels
- S: 5.0M 2592×1944 pixels VGA 640×480 pixels
Image size when Aspect Ratio is 16:9
- L: 17M 5472×3080 pixels
- M: 7.5M 3648×2056 pixels
- S: 4.2M 2720×1528 pixels
Image size when Aspect Ratio is 1:1
- L: 13M 3648×3648 pixels
- M: 6.5M 2544×2544 pixels
- S: 3.7M 1920×1920 pixels
Note that when Quality is set to RAW or RAW & JPEG, the image size for RAW images is automatically set to L for optimal quality.
If SD card space is an issue, you can set it to Small.
Aspect ratio:
You can choose 3:2 (which uses the full sensor surface), 4:3, 1:1 or 16:9 (crop but a more broad view). Leave as is at 3:2, you can always crop your pictures later.
Panorama Size:
(when in panorama shooting mode) Size is selectable between standard and wide. Wide means your picture will cover a larger area. Set it to standard, having to scan an even broader area when making panoramas will take some experience with the Sony RX100 VII to do efficiently.
Panorama direction
A panorama picture (only available in jpeg) is a composite of several images stitched together. When in this mode, you’ll see an arrow that guides you in what direction and speed you should pan the Sony RX100 VII to take the sequential images that will be stitched together. You can choose the path in this menu (either, up, down, left or right).
MENU – Camera Settings – page 2 of 14 (Quality settings and image size page 2)
![]()
Long Exposure NR
Set if you want the processing engine to apply noise reduction for images captured with a long exposure time. Leave it ON as there is no way of duplicating this process in post production, except to take a black frame of the same length in the same atmospheric conditions.
High ISO NR
Here you can select the amount of noise reduction applied to images with high ISO settings (when quality is set to jpeg). As Sony has rather aggressive noise reduction, I would change it to Low. (if not, you run the risk of getting paint-like, smeared images at higher ISO values).
Color Space
You can choose between Standard and Adobe (extended color range) RGB. This is only important if you shoot JPEG and not RAW. Adobe RGB would be preferable if you print many images because of the extended color range.
MENU – Camera Settings – page 3 (Shoot mode and drive settings)
![]()
Auto Mode
Switch the auto mode between Intelligent Auto and Superior Auto.
Intelligent Auto:
This mode automatically detects the type of scene you’re shooting and adjusts the scene automatically. You’ll see the icon for the recognized scene appears on the top right hand of the screen.
These scenes are the same ones which can be selected individually in SCENE mode.
The Sony RX100 VII will also use the most appropriate FOCUS AREA, and ISO value (the ISO range cannot be changed in iAuto though).
Drive Mode (single shooting, continuous shooting Lo-Mid-Hi), Self-timer and Self-timer cont (multiple images with the self-timer) can be changed by using the Fn button.
Works for both RAW and JPEG shooting.
Disadvantage: ISO range is fixed to 50-6400 (you can’t change the range).
Superior Auto:
Superior Auto is similar to iAuto, as it also detects scenes automatically, except it uses more complex processing.
This includes composite layering (layering different shots on top of each other for HDR style pictures) and automatically choosing what it thinks is the best image.
Disadvantage: ISO range is (like in iAuto) fixed range and only useable for jpeg shooting.
Scene Selection
You can select the presets for different scenes (like sports or portrait) from here
Drive Mode
You can set the drive mode, such as continuous or self-timer shooting.
- Single Shooting (default setting): Shoots one still image. Normal shooting mode.
- Cont. Shooting: Shoots images continuously while you press and hold down the shutter button. Hi: takes about six images per second, Lo about 3
- Self-timer: Shoots an image after 10 or 2 seconds. (selectable in sub menu) You can change the angle of the LCD screen and shoot images while monitoring the image on the screen.
- Self-timer(Cont): Shoots a specified number of images continuously after 10 seconds or 2 seconds (selectable in the sub menu).
- Cont. Bracket: Shoots images while holding the shutter button down, each with different degrees of brightness. (from 3 to 5 images with between .3 and 3 EV difference, selectable in the sub menu.) For processing as HDR on your PC.
- Single Bracket: Shoots a specified number of images, one by one, each with a different degree of brightness. (from 3 to 5 images with between .3 and 3 EV difference, selectable in the sub menu) For processing as HDR on your PC.
- WB bracket: Shoots a total of three images, each with a different color tone according to the selected settings for white balance, color temperature, and the color filter. (3 images with either LO small changes or Hi large changes)
- DRO Bracket: Shoots a total of three images, each at a different degree of D-Range Optimizer.
Bracket Settings
You can set the self-timer in bracket shooting mode, and the shooting order for exposure bracketing and white balance bracketing.
- Selftimer during Brkt: Sets whether to use the self-timer during bracket shooting. Also sets the number of seconds until the shutter is released if using the self-timer. (OFF/2 Sec/5 Sec/10 Sec)
- Bracket order: Sets the order of exposure bracketing and white balance bracketing.
interval shoot Func.
The Interval Shooting Function is a built in Intervalometer that can be setup up to take images at a regular intervals. Using Sony’s ‘Imaging Edge’ edit application these still images can be used to create a Time Lapse movie. On the second page of options you will see that there is an option for Silent Shooting which will save the wear and tear on your camera when shooting thousands of images. If you would prefer the camera to make a movie so that you don’t have to process the files you can use the new S&Q feature.
Menu item details
Interval Shooting: Sets whether to perform interval shooting. (On or Off)
- Shooting Start Time: Sets the time from when you press the shutter button to when interval shooting starts. (1 second to 99 minutes 59 seconds)
- Shooting Interval: Sets the shooting interval (time from when one exposure starts to when the exposure for the next shot starts). (1 second to 60 seconds)
- Number of Shots: Sets the number of shots for interval shooting. (1 shot to 9999 shots)
- AE Tracking Sensitivity: Sets the tracking sensitivity of the auto exposure against the change in luminance during interval shooting. If you select Low, exposure changes during interval shooting will be smoother. (High, Mid or Low)
- Silent Shoot. in Interval: Sets whether or not to perform silent shooting during interval shooting. (On or Off)
- Shoot Interval Priority: Sets whether or not to prioritise the shooting interval when the exposure mode is Program Auto or Aperture Priority and the shutter speed becomes longer than the time set for Shooting Interval.(On or Off)
MENU – Camera Settings – page 4 of 14 (Shoot Mode and Drive settings page 2)
![]()
Recall (Camera Settings1/Camera Settings2)
This functionality allows you to shoot an image after recalling often-used modes or camera settings registered with the Mode Dial memory positions in advance. It is now also possible to save your camera settings to a memory card and recall them later (or on a different camera). This is done by using the ‘select Rec. media’ function inside this menu.
Memory (Camera Settings1/Camera Settings2)
This setting allows you to register up to 3 often-used modes or product settings to the product and up to 4 (M1 through M4) to the memory card. You can recall the settings using just the mode dial. You can register various functions for shooting. The items that you can register are displayed on the menu of the Sony A6100. Aperture and Shutter speed are always available. You’ll need to select your SD card first using the ‘select Rec. media’ function inside the prior menu.
MENU – Camera Settings – page 5 of 14 (Autofocus settings page 1)
![]()
Focus Mode:
Here, you can select how the autofocus engine will behave when you half-press the shutter button. Novice users should set into AF-A. This functionality is partly dependent on what focus area you select (see next)
- AF-S: With a half-press of the shutter button, the RX will focus only once. Suitable for capturing stills.
- AF-A: AF Automatic intelligently switches between S and C, depending on whether the camera detects movement or not. This is the standard setting and the easiest to use.
- AF-C: The Sony RX100 VII will continuously focus on any movement when you half-press the shutter button.
- DMF: The RX100 VII focuses on your subject and allows you to fine-tune your focus area further using the manual focus ring on the lens.
- MF: No autofocus is used, and you focus manually using the focus ring on the lens.
You can see a focus indicator on screen or EVF. When it is lit, the subject is in Focus and focus is locked.
Tip: It’s also possible to assign a button for what is called ‘Focus Hold’. With Focus Hold, you can freeze your focus point when you press this button. This is often used by photographers to allow for a greater flexibility in composition.
Another important fact is that in Movie mode, only Continuous AF and MF are available.
Focus area
You might think it is best to leave it on the factory ‘wide’ setting (as this uses all AF points), but for certain scenes, it is often better to use a zone or flexible spot to get it to focus on what you want.
Wide:
Wide focus area uses all focus points on the sensor. Ideal for action scenes where there is a lot of movement going on in your frame.
Center:
Focusses on whatever is centered in your images. A fail-proof way of getting the Sony RX100 VII to focus on what you want. If you have any problems using the autofocus and are in a situation where you don’t want to miss any shots, revert to Center and just make sure you have your subject centered.
Flexible spot:
Flexible spot area selects a spot anywhere on the screen where the camera should focus. (similar to Center spot, except not.. in the center) You can set it to small, medium or large. If you want to use this focus area, set it to medium or large, as the camera will struggle to find focus when set to small (except perhaps for close-up portraits where you’d want to focus on the iris of the eye)
Expandable flexible spot
If the RX100 M7 cannot focus on a single selected point, it uses focus points around the flexible spot as a secondary priority area for focusing
Tracking
When the shutter button is pressed and held halfway down, the RX100 M7 tracks the subject within the selected autofocus area. This setting is available only when the focus mode is set to Continuous AF. Point the cursor at Tracking on the Focus Area setting screen, and then select the desired area to start tracking using the left/right sides of the control wheel. You can also move the tracking start area to the desired point by designating the area as a zone, flexible spot or expand flexible spot. On the Flexible Spot shooting screen, you can change the size of the focusing frame by turning the control wheel.
Moving the focus area:
- When Focus Area is set to Zone, Flexible Spot or Expand Flexible Spot, if pressing the button to which Focus Standard is assigned, you can shoot while moving the focusing frame using the top/bottom/left/right sides of the control wheel. To return the focusing frame to the center of the monitor, press the button while moving the frame. To change the shooting settings using the control wheel, press the button to which Focus Standard is assigned.
- You can move the focusing frame quickly by touching and dragging it on the monitor. Set Touch Operation to On and set Func. of Touch Operation to Touch Focus beforehand.
To track the subject temporarily (Tracking On): You can temporarily change the setting for Focus Area to Tracking while you press and hold down the custom key to which you have assigned Tracking On in advance. The Focus Area setting before you activated Tracking On will switch to the equivalent Tracking setting.
Focus area limit
It is now possible to limit the choice of focus areas you have to cycle through to find the one you are looking for. I typically use the Expand Flexible Spot in preference to the Small, Medium and Large Flexible Spots and the Center AF area. I have unselected these options. This is useful on the RX100 M7 because it is possible to assign a custom button to cycle through the ones that remain.
Swt. V/H AF Area
This is called Orientation linked AF points in Canon language. Switch AF point/AF Area to align with your subject in landscape mode (horizontal) if you change the camera orientation to Portrait (vertical) mode.
Off: disable this feature
AF Point Only: If you switch to portrait mode, the RX100 VII will automatically move the AF point in use up to align with your subject.
AF Point AF Area: If you switch to portrait mode, the RX100 VII will automatically move the AF point and AF area in use up.
It may not be immediately obvious what functionality this menu items provides. The full unabbreviated name is Switch Vertical /Horizontal AF Area and it allows you to create one position for the AF point when the camera is held horizontally and a different AF position for the AF point if the camera is held vertically. This means that if you place the AF point in the top right-hand corner it won’t move to the top left or bottom right-hand corners when the camera is turned.
AF Illuminator:
The AF illuminator is a little red light allowing the Sony RX100 VII to focus more easily when the shutter button is pressed halfway. It automatically is switched off when you fully press the shutter. Leave it on.
Face/Eye AF Set.
This function is used to determine whether or not the camera will focus with priority on human faces or eyes.
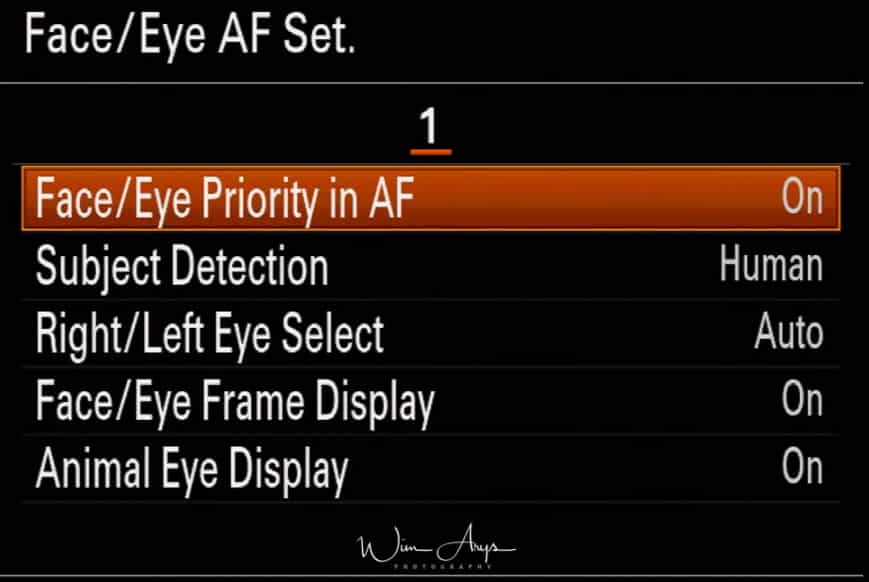
Eye AF Settings:
- Face Priority in AF: Sets whether or not to detect faces inside the focusing area and focus on the eyes Eye AF when autofocus is activated. (On or Off)
- Subject detection: either human or animal for animal eye AF
- Right/Left Eye Select: Specifies the eye to be detected. If Right Eye or Left Eye is selected, only the selected eye is detected. Auto : The camera detects eyes automatically. Right Eye : The right eye of the subject (the eye on the left side from the photographer’s perspective) is detected. Left Eye : The left eye of the subject (the eye on the right side from the photographer’s perspective) is detected.
- Face Detect. Frame Disp.:Sets whether or not to display the face detection frame when Face Priority in AF is set to On. (On or Off)
- Animal Eye Display: this will show a square around the eye of the animal , indicating focus.
Switch Right/Left Eye by custom key
When Right/Left Eye Select is set to Right Eye or Left Eye, you can switch the eye to be detected by pressing the custom key to which you have assigned the Switch Right/Left Eye function.
When Right/Left Eye Select is set to Auto, you can temporarily switch the eye to be detected by pressing the custom key to which you have assigned the Switch Right/Left Eye function.
The temporary left/right selection is cancelled when you perform the following operations, etc. The camera returns to automatic eye detection.
MENU – Camera Settings – page 6 of 14 (Autofocus settings page 2)
![]()
- Pre-AF
Select if the Sony RX100 VII will automatically adjust focus before you press the shutter button halfway down. This can be a useful feature when taking selfies but can cause issues in Continuous AF (AF-C) with an AF Tracking Area selected. The camera is likely to latch on to a subject before you have identified which subject you would like to track. I recommend switching this to OFF if you are more interesting in shooting action/sports rather than selfies.
AF Area regist.
You can move the focusing frame to a preassigned position temporarily using a custom key. This function is useful when shooting scenes in which the subject’s movements are predictable; for example, sports scenes. With this function, you can switch the focus area quickly according to the situation.
How to register focus area
- MENU – Camera Settings1 – AF Area Registration – On.
- Set the focus area to the desired position and then hold down the Fn (Function) button.
How to call up the registered focus area
- MENU – Camera Settings2 – Custom Key – desired key, then select Regist. AF Area hold.
- Set the camera to the shooting mode, hold down the key to which Regist. AF Area hold has been assigned and then press the shutter button to shoot images.
Del. Reg. AF Area
Deletes the focusing frame position that was registered using AF Area regist.
Focus Frame Color
You can specify the color of the frame indicating the focusing area. If the frame is difficult to see because of the subject, make it more visible by changing its color. Either white or red.
AF Area Auto Clear
Sets whether the focus area should be displayed all the time or should disappear automatically shortly after focus is achieved. On Or Off.
Disp cont. AF area
You can set whether or not to display the area that is in focus when Focus Area is set to Wide or Zone, in Continuous AF mode.
MENU – Camera Settings – page 7 of 14 (Autofocus settings page 3)
![]()
Phase Detect. Area
Sets whether or not to display the Phase Detection AF area.
Circ. of Focus Point
This is a new feature that, when set to ‘Circulate’, will allows the photographer to move a spot or zone AF point over the edge of the frame and have it reappear on the other side of the frame.
Sets whether to allow the focusing frame to jump from one end to the other when you move the focusing frame with Focus Area set to Zone, Flexible Spot, or Expand Flexible Spot. This function is useful when you want to move the focusing frame from one end to the other quickly.
- Does Not Circulate :The cursor does not move when you try to move the focusing frame past the end.
- Circulate :The cursor jumps to the opposite end when you try to move the focusing frame past the end.
MENU – Camera Settings – page 8 of 14 (Exposure settings page 1)
![]()
Exposure Comp
(Also available in the Quick Menu, accessed by pressing the Fn button):
If you find that your image is overexposed (for instance when you are shooting at large apertures for a shallow depth-of-field in bright daylight), you can tweak the exposure compensation here in a plus or minus 5 (exact EV dependent on next step) range.
ISO settings
ISO
Sensitivity to light is expressed by the ISO number (recommended exposure index). The larger the number, the higher the sensitivity.
- Multi Frame NR:Combines continuous shots to create an image with less noise. Press the right side to display the setting screen, then select a desired value using the top/bottom sides of the control wheel. Select the desired ISO number from ISO AUTO or ISO 100 – ISO 25600.
- ISO AUTO: Sets the ISO sensitivity automatically.
- ISO 64 – ISO 12800:Sets the ISO sensitivity manually. Selecting a larger number increases the ISO sensitivity.
ISO Range Limit: Adjust the range of ISO sensitivity that is automatically set in the ISO AUTO mode. Shooting at lower ISO will result in a better quality picture. An upper limit of 1600 will ensure that your images won’t have too much noise.
Iso Auto Min SS.
This is a useful and exciting setting. If you select ISO AUTO you are in P (Program Auto) or A (Aperture Priority) mode; you can set the shutter speed at which the ISO sensitivity starts changing. The difference in shutter speed at which ISO sensitivity starts to change between Faster, Fast, Standard, Slow, and Slower is 1 EV.
You have three possibilities here:
- FASTER (Faster)/FAST (Fast): The ISO sensitivity will start to change at shutter speeds faster than the Standard (normal). This will help you prevent getting blurred images when shooting action or sports. This at the cost of raising the ISO and noise in your images. Remember this is linked to your Auto ISO settings, so it won’t go any higher than your upper limit, even if the Sony RX100 VII is capable of doing so.
- STD (Standard): The camera automatically sets the shutter speed based on the focal length of the lens.
- SLOW (Slow)/SLOWER (Slower): The ISO sensitivity will start to change at shutter speeds slower than the Standard setting. This enables you to shoot images with less noise. Never to be used if you want to shoot action, but can be useful if you are a landscape or architecture photographer who likes to walk around without a tripod yet takes some time to frame and shoot images carefully.
- 1/8000 ― 30″: The ISO sensitivity starts to change at the shutter speed you have set.
Metering Mode
Metering mode refers to the way the Sony RX100VII reads the light and sets the exposure.
In multi, it considers the whole frame and sets exposure according to internal algorithms programmed in camera.
In spot or center, the Sony RX100 VII only considers what is in that spot or the center (per example, if your subject is completely black, the camera will try to compensate by overexposing the image).
- Multi: Measures light on each area after dividing the total area into multiple areas and determines the proper exposure of the entire screen (Multi-pattern metering).
- Center: Measures the average brightness of the entire screen, while emphasizing the central area of the screen (Center-weighted metering).
- Spot: Measures only the central area (Spot metering). This mode is suitable for measuring light on a specified part of the entire screen. The size of the metering circle can be selected from Spot: Standard and Spot: Large. The position of the metering circle depends on the setting for Spot Metering Point.
- Entire Screen Avg.: Measures the average brightness of the entire screen. The exposure will be stable even if the composition or the position of the subject changes.
- Highlight: Measures the brightness while emphasizing the highlighted area on the screen. This mode is suitable for shooting the subject while avoiding overexposure.
Tip: When Spot is selected and Focus Area is set to either Flexible Spot or Expand Flexible Spot while Spot Metering Point is set to Focus Point Link, the spot metering point can be coordinated with the focus area.
Face Priority in Multi Metering Mode
A very interesting addition to the metering possibilities. When Metering mode is set to multi, this function allows you to set the priority of the light metering to detected faces for a better exposure. great for portraits.
Spot Metering Point
Sets whether to coordinate the spot metering position with the focus area when Focus Area is set to Flexible Spot or Expand Flexible Spot.
- Center: The spot metering position does not coordinate with the focus area, but always meters brightness at the center.
- Focus Point Link: The spot metering position coordinates with the focus area.
AEL w shutter
Sets whether to fix the exposure when you press the shutter button halfway down. Select Off to adjust the focus and the exposure separately.
- Auto (default setting): Fixes the exposure after adjusting the focus automatically when you press the shutter button halfway down when Focus Mode is set to Single-shot AF.
- On: Fixes the exposure when you press the shutter button halfway down.
- Off: Does not adjust the exposure when you press the shutter button halfway down. Use this mode when you want to change focus and exposure separately.
The Sony RX100 VII keeps adjusting the exposure while shooting in Cont. Shooting or Spd Priority Cont. mode. Operation using the AEL button is prioritized over the AEL w/ shutter settings.
MENU – Camera Settings – page 9 of 14 (Exposure settings page 2)
![]()
Exposure Std. Adjust
Adjusts this camera’s standard for the correct exposure value for each metering mode. You can set a value from -1 EV to +1 EV in 1/6 EV increments.
MENU – Camera Settings – page 10 of 14 (Flash settings)
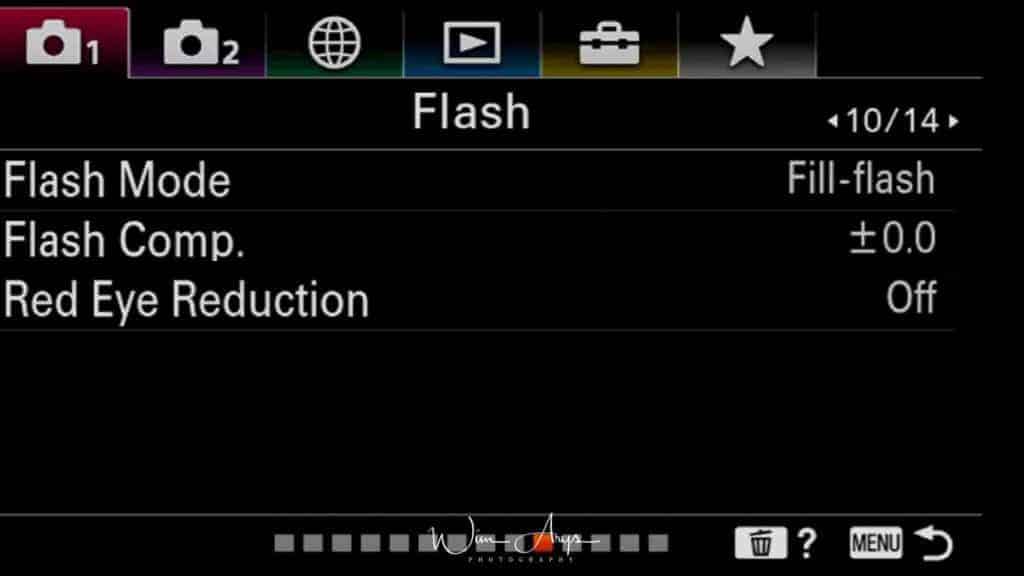
Flash Mode
- Flash Off: The flash does not operate.
- Autoflash: The flash works in dark environments or when shooting towards bright light.
- fill flash: A fill flash is useful even in daylight to fill the shadows with light (like a person in the shade).
- Slow sync: Tells the camera to use a longer shutter speed along with a flash, and thus is better for night shots. In manual and shutter priority modes, there is no difference in flash power. But when using aperture priority, program, or auto, choosing slow sync tells the Sony RX100 VII to use a longer shutter speed than it would ordinarily pick.What the slow sync flash mode does is a first fire the flash for the subject exposure, then allow for a longer shutter speed that will allow for more ambient light to be captured by the sensor.
- Rear Sync: Capturing an image involves two shutter actions: one when the capture starts and on when it stops. Rear Sync tells the flash to fire right before the shutter closes. Moving objects will show a streak where they came from and a sharp image where they were at the end of the exposure. This conveys a sense of speed with moving objects. Rear Sync is a creative technique, if you’d like to know more about this type of photography, I’d suggest doing a Google search on ‘Rear Sync Flash Photography.’
Flash comp or Flash compensation:
Especially when using Slow Sync or Rear Sync Flash modes, you might have to lower the power of the Flash to get a decently exposed image. (Also available in the Quick Menu accessed by pressing the FN button).
Red Eye Reduction:
This anti-Red Eye setting quickly fires the flash before your image capture starts, reducing the red-eye effect often seen when using a flash.
MENU – Camera Settings – page 11 of 14 (Color, White Balance, and Image processing settings page 1)
![]()
White Balance
You can either set the white balance to Auto, where the camera tries to guess what the neutral grey value is, or use one of the preset white balance settings for different lighting conditions or customize the white balance according to your preference or using a grey card.
Priority Set in AWB
Selects which tone to prioritize when shooting under lighting conditions such as incandescent light when White Balance is set to Auto.
- Standard: Shoots with standard auto white balance. The camera automatically adjusts the color tones.
- Ambience: Prioritizes the color tone of the light source. This is suitable when you want to produce a warm atmosphere.
- White: Prioritizes a reproduction of white color when the color temperature of the light source is low.
DRO/Auto HDR
DRO:
This stands for Dynamic range optimise and analyses the contrast of your scene in real-time. It produces an image with optimal brightness and recovered shadow detail. You can use this function even while the subject is moving or during the continuous shooting.
Auto HDR:
(not available for RAW captures) this feature Shoots three images with different exposures and then overlays the bright area of the underexposed image and the dark area of the overexposed image to create a picture with an extended range from highlight to shadow.
The highlight detail in auto HDR is better than that in DRO and with reduced noise. The shutter is released three times, so using this function for moving subjects is not recommended.
Creative Style
The Sony creative styles can best be explained as being film emulations (the same way as do some other camera manufacturers implements this). There is a range of styles available from vivid colour to black and white. If you’re shooting RAW, these styles are embedded, but can always be zeroed after importing them to you RAW editor of choice. Jpegs are saved with this styling applied. It is always useful to try some of these, and can be a real boost for your creativity, as you will notice that you make different images in say black-and-white as opposed to colour.
- Standard: For shooting various scenes with rich gradation and beautiful colors.
- Vivid: The saturation and contrast are heightened for shooting striking images of colorful scenes and subjects such as flowers, spring greenery, blue sky, or ocean views.
- Neutral: The saturation and sharpness are lowered for shooting images in subdued tones. This is also suitable for capturing image material to be modified with a computer.
- Clear: For shooting images in clear tones with limpid colors in highlight, suitable for capturing radiant light.
- Deep: For shooting images with deep and dense colors, suitable for capturing the solid presence of the subject.
- Light: For shooting images with bright and simple colors, suitable for capturing a refreshingly light ambience.
- Portrait: For capturing skin in a soft tone, ideally suited for shooting portraits.
- Landscape: The saturation, contrast, and sharpness are heightened for shooting vivid and crisp scenery. Distant landscapes also stand out more. Sunset: For shooting the beautiful red of the setting sun.
- Night Scene: The contrast is lowered for reproducing night scenes.
- Autumn leaves: For shooting autumn scenes, vividly highlighting the reds and yellows of changing leaves.
- Black & White: For shooting images in black and white monotone.
- Sepia: For shooting images in sepia monotone.
- You can edit these different styles and save your own creative style if you want.
- This functionality can be changed:
- Contrast: The higher the value selected, the more the difference of light and shadow is accentuated, and the bigger the effect on the image.
- Saturation: The higher the value selected, the more vivid the color. When a lower value is selected, the color of the image is restrained and subdued.
- Sharpness: Adjusts the sharpness. The higher the value selected, the more the contours are accentuated, and the lower the value selected, the more the contours are softened.
Picture Effect
Think of this menu as an Instagram app right in your Sony RX100 VII, with all kinds of retro filters and effects. These are only available when quality is set to Jpeg (Not in RAW).
- Off: Disables the Picture Effect function.
- Toy Camera: Creates a soft image with shaded corners and reduced sharpness.
- Pop Color: Creates a vivid look by emphasising color tones.
- Posterization: Creates a high contrast, abstract look by heavily emphasizing primary colors, or in black and white.
- Retro Photo: Creates the look of an aged photo with sepia color tones and faded contrast.
- Soft High-key: Creates an image with the indicated atmosphere: bright, transparent, ethereal, tender, soft.
- Partial Color: Creates an image which retains a specific color, but converts others to black and white.
- High Contrast Mono.: Creates a high-contrast image in black and white.
- Rich-tone Mono.: Creates an image in black and white with rich gradation and reproduction of details.
Picture Profile
Allows you to change the settings for the color, gradation, etc.
The default settings PP1 through PP10 for movies have been set in advance in the camera based on various shooting conditions.
- PP1: Example setting using Movie gamma.
- PP2: Example setting using Still gamma.
- PP3: Example setting of natural color tone using the ITU709 gamma.
- PP4: Example setting of a color tone faithful to the ITU709 standard.
- PP5: Example setting using Cine1 gamma.
- PP6: Example setting using Cine2 gamma.
- PP7: Example setting using S-Log2 gamma.
- P8: Example setting using the S-Log3:gamma and the under Color Mode.
- PP9: Example setting using the S-Log3gamma and the under Color Mode.
- PP10: Example setting for recording HDR movies using HLG2 gamma.
HDR movie recording
The camera can record HDR movies when a gamma from HLG, HLG1 to HLG3 is selected in the picture profile. Picture profile preset PP10 provides an example setting for HDR recording. Movies recorded using PP10can be viewed with a wider range of brightness than usual when played back on a TV supporting Hybrid Log-Gamma (HLG). This way, even scenes with a wide range of brightness can be recorded and displayed faithfully, without looking under or over-exposed. HLG is used in HDR TV program production, as defined in the international standard Recommendation ITU-R BT.2100.
The basic contrast and coloring are defined by the combination of Gamma (gamma curve) and Color Mode (color characteristics) settings.
Items of the picture profile
-
Black Level:
- sets the black level. (–15 to +15)
Gamma:
- Movie: Standard gamma curve for movies
- Still: Standard gamma curve for still images
- Cine1: Softens the contrast in dark parts and emphasizes gradation in bright parts to produce a relaxed color movie. (equivalent to HG4609G33)
- Cine2: Similar to Cine1 but optimized for editing with up to 100% video signal. (equivalent to HG4600G30)
- ITU709: Gamma curve that corresponds to ITU709.
- ITU709(800%): Gamma curve for confirming scenes on the assumption of shooting using S-Log2 or S-Log3.
- S-Log2: Gamma curve for S-Log2. This setting is based on the assumption that the picture will be processed after shooting.
- S-Log3: Gamma curve for S-Log3 with more similar features to film. This setting is based on the assumption that the picture will be processed after shooting.
- HLG: Gamma curve for HDR recording. Equivalent to the HDR standard Hybrid Log-Gamma, ITU-R BT.2100.
- HLG1: Gamma curve for HDR recording. Emphasizes noise reduction. However, shooting is restricted to a narrower dynamic range than with HLG2 or HLG3.
- HLG2: Gamma curve for HDR recording. Provides a balance of dynamic range and noise reduction.
- HLG3: Gamma curve for HDR recording. Wider dynamic range than HLG2. However, noise may increase.
-
- HLG1, HLG2, and HLG3 all apply a gamma curve with the same characteristics, but each offers a different balance between dynamic range and noise reduction. Each has a different maximum video output level, as follows: HLG1: approx. 87%, HLG2: approx. 95%, HLG3: approx. 100%.
-
Black Gamma:
Corrects gamma in low intensity areas.
Black Gamma is fixed at “0” and cannot be adjusted when Gamma is set to HLG, HLG1, HLG2, or HLG3.
- Range: Selects the correcting range. (Wide / Middle / Narrow)
- Level: Sets the correcting level. (-7 (maximum black compression) to +7 (maximum black stretch))
Color Mode:
-
- Movie Color tones for Movie gamma curve (standard color reproduction for movies when Picture Profile is not used)
- Still Color tones for Still gamma curve (standard color reproduction for still images when Picture Profile is not used)
- Cinema Color tones for Cine1 and Cine2 gamma curve
- Pro Color tones similar to standard Sony broadcast camera image quality (used in combination with ITU709 gamma curve)
- ITU709 Matrix ITU709 color tones (used in combination with ITU709 gamma curve)
- Black & White Sets the saturation to 0 for recording in black and white
S-Gamut Setting based on the assumption that some grading work will be performed after recording. Used when Gamma is set to S-Log2. - S-Gamut3.Cine Setting based on the assumption that some grading work will be performed after recording. Used when Gamma is set to S-Log3.
- This setting is easier to use than S-Gamut3, because it limits the color space to a more practical range than that of S-Gamut3. It is recommended in cases where S-Gamut3, a wide color space, is not required.
- S-Gammut3 Setting based on the assumption that some grading work will be performed after recording. Used when Gamma is set to S-Log3.
This setting has a wider color space than that of S-Gamut3.Cine. It is suited for converting images to a format with a wide color space like BT.2020.
Depending on the type of camera, the entire S-Gamut3 color space may not be supported.
Black Level:
This function adjusts the black level of the image -15 to +15. As an image effect, you can emphasize the color black to create an image that gives a powerful impression, or you can weaken black to give the image a soft impression.
Shifting Black Level in the minus direction emphasizes the black color in the image, while changing the level in the plus direction weakens the black color.
If you want to simulate an old film, or capture winter morning fog, the black level value should be increased. If you decrease the value, gradations in dark areas will be smoothed out, making the areas appear in crisp black. When using multiple fixed cameras to shoot the same subject from different angles, the balance between subject and background often varies. This balance variation may cause the black color in the subject to appear different when cameras are switched. However, this is an optical illusion. If it occurs, you can correct it by adjusting Black Level to make the black color look the same.
When using multiple fixed cameras to shoot the same subject from different angles, the balance between subject and background often varies.
This balance variation may cause the black color in the subject to appear different when cameras are switched. However, this is an optical illusion. If it occurs, you can correct it by adjusting Black Level to make the black color look the same.
Black Gamma:
This function lets you alter the shape of the selected gamma curve and adjust gradations in dark image areas. Range available between Wide, Middle or Narrow. Leven between -7 and +7.
Range controls the luminance range that Black Gamma influences. The Narrow setting keeps the range close to black, while the Wide setting extends the range to gray. Range should be set narrower when you want to control the quality of dark areas. If you want to adjust the overall image tone, Range should be set wider. At first, it may be a good idea to start from the Narrow setting.
Increasing the Level value brightens the image, whereas decreasing the value makes the image darker. For example, if you set Range to Narrow and decrease the Level value, you can create an image with dark areas that are similar to the ones seen in films. Unlike Black Level, Black Gamma Level adjusts luminance subtly.
Knee
Sets knee point and slope for video signal compression to prevent over-exposure by limiting signals in high intensity areas of the subject to the dynamic range of your camera.
Knee is disabled if Mode is set to Auto when Gamma is set to Still, Cine1, Cine2, ITU709(800%), S-Log2, S-Log3, HLG, HLG1, HLG2, or HLG3. To enable Knee, set Mode to Manual.
Mode: Selects auto/manual settings.
- Auto: The knee point and slope are set automatically.
- Manual: The knee point and slope are set manually.
Auto Set: Settings when Auto is selected for Mode .
- Max Point: Sets the maximum point of the knee point. (90% to 100%)
- Sensitivity: Sets the sensitivity. (High / Mid / Low)
Manual Set: Settings when Manual is selected for Mode.
- Point: Sets the knee point. (75% to 105%)
- Slope: Sets the knee slope. (-5 (gentle) to +5 (steep))
Color Mode
Sets type and level of colors.
In Color Mode, only BT.2020 and 709 are available when Gamma is set to HLG, HLG1, HLG2, or HLG3.
- Movie: Suitable colors when Gamma is set to Movie.
- Still: Suitable colors when Gamma is set to Still.
- Cinema: Suitable colors when Gamma is set to Cine1 or Cine2.
- Pro: Similar color tones to the standard image quality of Sony professional cameras (when combined with ITU709 gamma)
- ITU709 Matrix: Colors corresponding to ITU709 standard (when combined with ITU709 gamma)
- Black & White: Sets the saturation to zero for shooting in black and white.
- S-Gamut: Setting based on the assumption that the pictures will be processed after shooting. Used when Gammais set to S-Log2.
- S-Gamut3.Cine: Setting based on the assumption that the pictures will be processed after shooting. Used when Gamma is set to S-Log3. This setting allows you to shoot in a color space that can easily be converted for digital cinema.
- S-Gamut3: Setting based on the assumption that the pictures will be processed after shooting. Used when Gamma is set to S-Log3. This setting allows you to shoot in a wide color space.
- BT.2020: Standard color tone when Gamma is set to HLG, HLG1, HLG2, or HLG3.
- 709: Color tone when Gamma is set to HLG, HLG1, HLG2, or HLG3 and movies are recorded with HDTV color (BT.709).
Saturation
Sets the color saturation. (-32 to +32)
Color Phase
Sets the color phase. (-7 to +7)
Color Depth
Sets the color depth for each color phase. This function is more effective for chromatic colors and less effective for achromatic colors. The color looks deeper as you increase the setting value towards the positive side, and lighter as you decrease the value towards the negative side. This function is effective even if you set Color Mode to Black & White.
- R -7 (light red) to +7 (deep red)
- G -7 (light green) to +7 (deep green)
- B -7 (light blue) to +7 (deep blue)
- C -7 (light cyan) to +7 (deep cyan)
- M -7 (light magenta) to +7 (deep magenta)
- Y -7 (light yellow) to +7 (deep yellow)
Detail
Sets items for Detail.
Level: Sets the Detail level. (-7 to +7)
Adjust: The following parameters can be selected manually.
- Mode: Selects auto/manual setting. (Auto (automatic optimization) / Manual (The details are set manually.))
- V/H Balance: Sets the vertical (V) and horizontal (H) balance of DETAIL. (-2 (off to the vertical (V) side) to +2 (off to the horizontal (H) side))
- B/W Balance: Selects the balance of the lower DETAIL (B) and the upper DETAIL (W). (Type1 (off to the lower DETAIL (B) side) to Type5 (off to the upper DETAIL (W) side))
- Limit: Sets the limit level of Detail. (0 (Low limit level: likely to be limited) to 7 (High limit level: unlikely to be limited))
- Crispning: Sets the crispening level. (0 (shallow crispening level) to 7 (deep crispening level))
- Hi-Light Detail: Sets the Detail level in the high intensity areas. (0 to 4)
MENU – Camera Settings – page 12 of 14 (Color, White Balance and Image processing settings page 2)
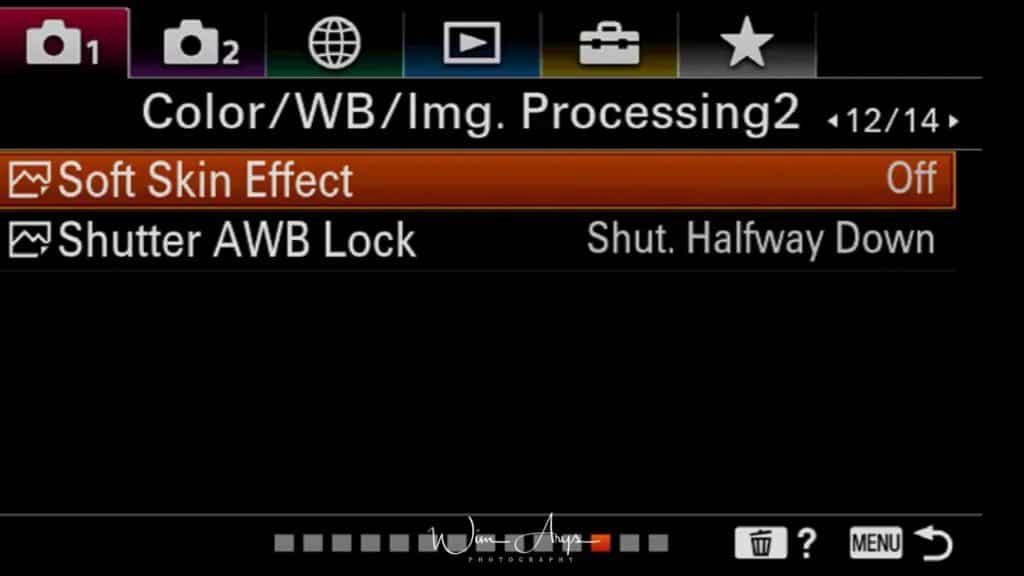
Soft Skin Effect
If you’re using this camera mainly for pics of friends and family, this is an excellent feature, as it will soften and smooth skin tones make you and your beloved ones look their best. (only available when quality is set to Jpeg)
Shutter AWB Lock
You can set whether or not to lock the white balance while the shutter button is pressed when White Balance is set to Auto or Underwater Auto. This function prevents unintentional changes to the white balance during continuous shooting or when shooting with the shutter button pressed halfway down.
MENU – Camera Settings – page 13 of 14 (Focus assist settings)
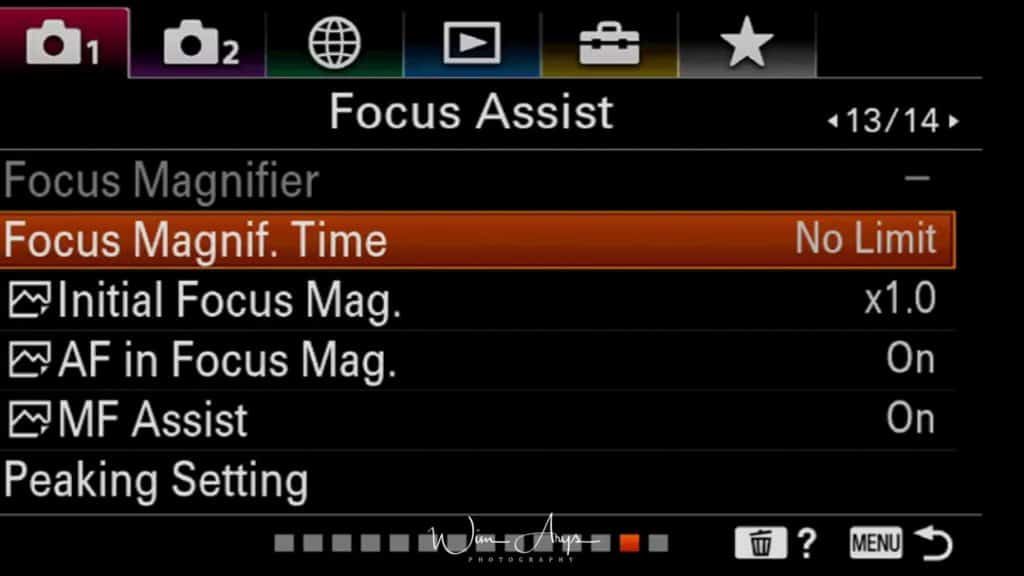
Focus Magnifier
When focussing manually or in DMF mode, you can set the Sony A6400 to magnify a part of the screen so you can check focus. This sub-menu allows you to select the part of the image that will be magnified during shooting.
Focus Magnif Time
You can set how long to hold the magnified area during MF assist. 2 sec, 5 seconds or no limit. 2 seconds is how I have it set up.
AF in Focus Mag.
You can focus on the subject more accurately using auto-focus by magnifying the area where you want to focus. While the magnified image is displayed, you can focus on a smaller area than the flexible spot.
- Magnify the image by pressing the center of the control wheel, and then adjust the position using top/bottom/right/left of the control wheel.
- Press the shutter button halfway down to focus.
- Press the shutter button all the way down to shoot.
MENU – Camera Settings – page 14 of 14 (Face Detection and shoot assist settings)

Face Registration
If you register faces in advance, the product can detect the registered face as a priority when Face Detection is set to On (Regist. Faces). Shoot the face from the front in a brightly lit place. The face may not be registered correctly if it is obscured by a hat, a mask, sunglasses, etc.
- MENU – Camera Settings 1 – Face Registration – New Registration
- Align the guide frame with the face to be registered, and press the shutter button.
- When a confirmation message appears, select Enter.
Regist. Faces Priority
Sets whether to focus with higher priority on faces registered using Face Registration when Face Priority in AFis set to On.
Smile Shutter
Great for selfies as the camera automatically shoots an image when it detects a smiling face. Up to 8 faces of your subjects can be detected.
Auto Object Framing
When enabled, the Sony 6400 will automatically crop your captured image to what it deems best. Meaning it will cut the picture for a nicer composition. Only available for Jpegs, though, a nice feature if you don’t want to bother too much with the technical side of photography.
Self-portrait/ -timer
As you probably know, you can change the angle of the monitor and shoot images while watching the monitor.
Simple turn this setting on, flip the screen and press the shutter button. The camera will start shooting after three seconds.
MENU – Movie settings – page 1 of 10 (movie settings page 1)
![]()
Exposure Mode
You can select the exposure mode for movie shooting here.
Program Auto / Program Auto: Allows you to shoot with the exposure adjusted automatically (both the shutter speed and the aperture value).
Aperture Priority / Aperture Priority: Allows you to shoot after adjusting the aperture value manually.
Shutter Priority / Shutter Priority: Allows you to shoot after adjusting the shutter speed manually.
Manual Exposure / Manual Exposure: Allows you to shoot after adjusting the exposure (both the shutter speed and the aperture value) manually.
HFR Exposure Mode
You can select the exposure mode for high frame rate shooting. You can change the setting and playback speed for slow-motion/quick-motion shooting with HFR Settings later.
Program Auto / Program Auto: Allows you to shoot with the exposure adjusted automatically (both the shutter speed and the aperture value).
Aperture Priority / Aperture Priority: Allows you to shoot after adjusting the aperture value manually.
Shutter Priority / Shutter Priority: Allows you to shoot after adjusting the shutter speed manually.
Manual Exposure / Manual Exposure: Allows you to shoot after adjusting the exposure (both the shutter speed and the aperture value) manually.
File Format (video)
You can choose between XAVC S 4K, XAVC S HD or AVCHD. You’ll need a fast UHS Speed Class U3 SD card to record at 100 Mbps or more.
XAVC S 4K: Records movies in 4K resolution (3840×2160) This format supports a high bit rate.
XAVC S HD: Records movies in crisper quality than AVCHD with larger amounts of data.
AVCHD: The AVCHD format has a high degree of compatibility with storage devices other than computers.
Record Setting (Video):
You can choose the quality of recorded video here. Select the image size, frame rate, and image quality for movie recording. The higher the bit-rate, the higher the picture quality. Frame- and bit-rate differ depending on your movie file format.
When File Format is set to XAVC S 4K you have these options:
- 30p 100M/25p 100M: Records movies in 3840×2160 (30p/25p).
- 30p 60M/25p 60M: Records movies in 3840×2160 (30p/25p).
- 24p 100M: Records movies in 3840×2160 (24p).
- 24p 60M: Records movies in 3840×2160 (24p).
When File Format is set to XAVC S HD you have these options:
- 60p 50M/50p 50M: Records movies in 1920×1080 (60p/50p).
- 60p 25M/50p 25M: Records movies in 1920×1080 (60p/50p).
- 30p 50M/25p 50M: Records movies in 1920×1080 (30p/25p).
- 30p 16M/25p 16M: Records movies in 1920×1080 (30p/25p).
- 24p 50M: Records movies in 1920×1080 (24p).
- 120p 100M/100p 100M: Records high-speed movies in 1920×1080 (120p/100p). You can record movies in 120 fps or 100 fps.
- 120p 60M/100p 60M: Records high-speed movies in 1920×1080 (120p/100p). You can record movies in 120 fps or 100 fps.
When File Format is set to AVCHD you have these options:
- 60i 24M(FX)/50i 24M(FX): Records movies in 1920×1080 (60i/50i).
- 60i 17M(FH)/50i 17M(FH): Records movies in 1920×1080 (60i/50i).
HFR settings
You can do slow-motion recording or record quick-motion recording. The sound will not be recorded. In a slow-motion recording, the shutter speed becomes faster and you may not be able to obtain the proper exposure. If this happens, decrease the aperture value or adjust the ISO sensitivity to a higher value.
The playback speed will vary as below depending on the assigned Frame Rate and Record Setting.
Record Setting
Selects the frame rate of the movie from 60p 50M/50p 50M, 30p 50M/25p 50M, and 24p 50M.
Frame Rate
Selects the shooting frame rate from 240fps/250fps, 480fps/500fps, and 960fps/1000fps.
In super-slow-motion movie shooting, the camera shoots at a faster shutter speed than the number of shooting frames per second. For example, when Frame Rate is set to 960fps, the shutter speed per frame will be faster than approx. 1/1000 second in order to shoot 960 frames per second. To maintain this shutter speed, sufficient ambient light is necessary during shooting. If the ambient light is insufficient, the ISO sensitivity will become higher, resulting in more noise.
Priority Setting
Select from Quality Priority which prioritizes the image quality and Shoot Time Priority which prioritizes the duration of time of the movie.
How to record slow motion movie on the Sony RX100 VII:
- Set the mode dial to (Movie/S&Q Motion).
- Select MENU- (Camera Settings2)-Movie/S&Q Motion- and select the desired setting of slow-motion/quick-motion (S&Q) ( Program Auto, Aperture Priority, Shutter Priority, or Manual Exposure).
- Select MENU- (Camera Settings2)- S&Q Settings and select the desired settings for Record Setting and Frame Rate.
- Press the MOVIE (movie) button to start recording. Press the MOVIE button again to stop recording.
Record Setting: Selects the frame rate of the movie.
Frame Rate: Selects the shooting frame rate.
Playback speed: The playback speed will vary as below depending on the assigned Record Setting and the Frame Rate.
REC Timing
Selects whether to record for a set amount of time after you press the MOVIE button (Start Trigger), or for a set amount of time until you press the MOVIE button (End Trigger/End Trigger Half).
Quality (Dual Rec)
Select either Extra Fine, Fine or Standard.
MENU – Movie settings – page 2 of 10 (movie settings page 2)
![]()
Img. Size(Dual Rec)
Sets the image quality for still images shot when recording a movie.
Auto Dual Rec
Sets the shutter to release automatically when an impressive composition including a person is detected during movie shooting.
Proxy Recording
Proxy movies are recorded in the XAVC S HD format. The frame rate of the proxy movie is the same as that of the original movie.
AF Drive Speed (movie)
You can switch focusing speed when using autofocus in movie mode.
Fast: Sets the AF drive speed to fast. This mode is suitable for shooting active scenes, such as sports.
Normal: Sets the AF drive speed to normal.
Slow: Sets the AF drive speed to slow. With this mode, the focus switches smoothly when the subject to be focused is changed.
AF Track Sens (movie)
You can set the AF sensitivity separately in movie mode.
Responsive: Sets the AF sensitivity to high. This mode is useful when recording movies in which the subject is moving quickly.
Standard: Sets the AF sensitivity to normal.
Locked on: Sets the AF sensitivity to low. You can shoot with a stable focus by ignoring the influence of anything in front of the subject.
Auto Slow Shut. (movie)
Sets whether or not to adjust the shutter speed automatically when recording dark scenes.
On: Uses Auto Slow Shutter. The shutter speed automatically slows when recording in dark locations. You can reduce noise in the movie by using a slow shutter speed when recording in dark locations.
Off: Does not use Auto Slow Shut. The recorded movie will be darker than when On is selected, but you can record movies with smoother motion and less object blur.
MENU – Movie settings – page 3 (movie settings page 3)
![]()
Initial Focus Mag. (movie)
Sets the initial magnification scale for the Focus Magnifier in the movie shooting mode.
- x1.0: Displays the image with the same magnification as the shooting screen.
- x4.0: Displays a 4.0-times enlarged image.
Audio Recording
You can switch off audio recording in movie mode. When you record audio movies with loud volumes, set Audio Rec Level to a lower sound level. Doing so enables you to record more realistic audio. When you record audio movies with lower volumes, set Audio Rec Level to a higher sound level to make the sound easier to hear. Regardless of the Audio Rec Level settings, the limiter always operates.
Audio Rec Level
Selects the audio input level during movie recording.
Audio Level Display
Sets whether to display the audio level on the screen.
Wind Noise Reduction
This helps reduce noise from the wind during video recording.
SteadyShot
Sets which type of steadyshot you want to use.
- Intelligent Active: Provides a more powerful SteadyShot effect than Active.
- Active: Provides a more powerful SteadyShot effect.
- Standard:Reduces camera shake under stable movie shooting conditions.
- Off: turns steadyshot off.
(MENU – Movie settings – page 4)
Movie settings page 4
Marker Display (movie)
Select if you want guidelines (a grid) in movie mode. The markers are displayed on the monitor or viewfinder
Marker Settings (movie)
Sets the markers to be displayed while shooting movies. You can display several markers at the same time.
Center: Sets whether or not to display the center marker in the center of the shooting screen. Off/On.
Aspect: Sets the aspect marker display.
Safety Zone: Sets the safety zone display. This becomes the standard range that can be received by a general household TV. Off/80%/90%
Guideframe: Sets whether or not to display the guide frame. You can verify whether the subject is level or perpendicular to the ground.
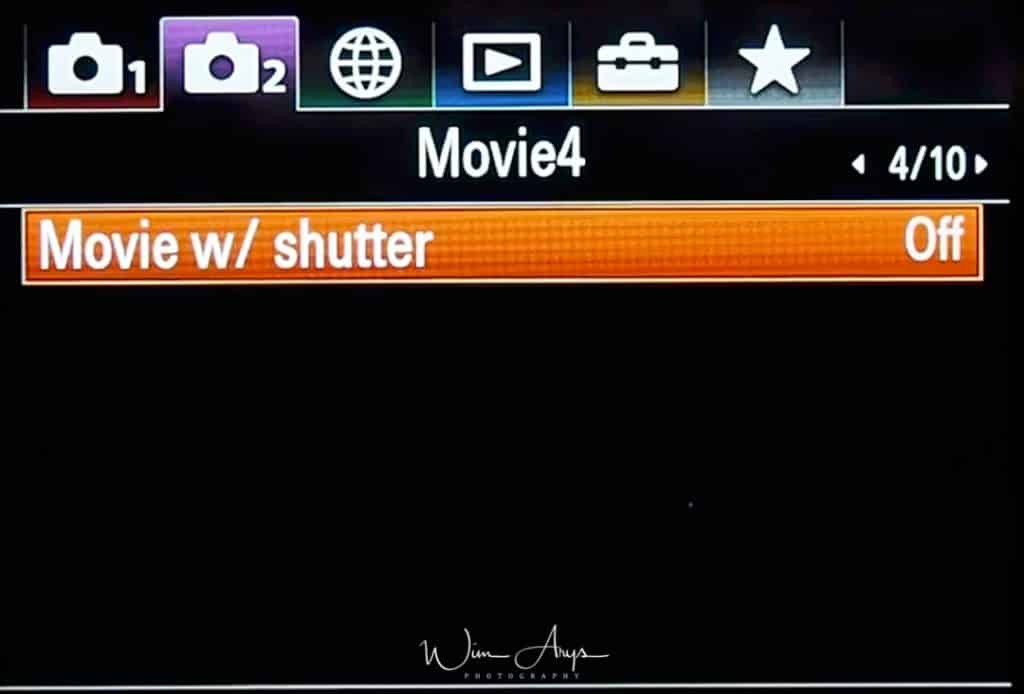
Movie w/ shutter
You can start or stop recording movies by pressing the shutter button, which is bigger and easier to press than the MOVIE (Movie) button.
(MENU – Movie settings – page 5)
Shutter and Steadyshot Settings
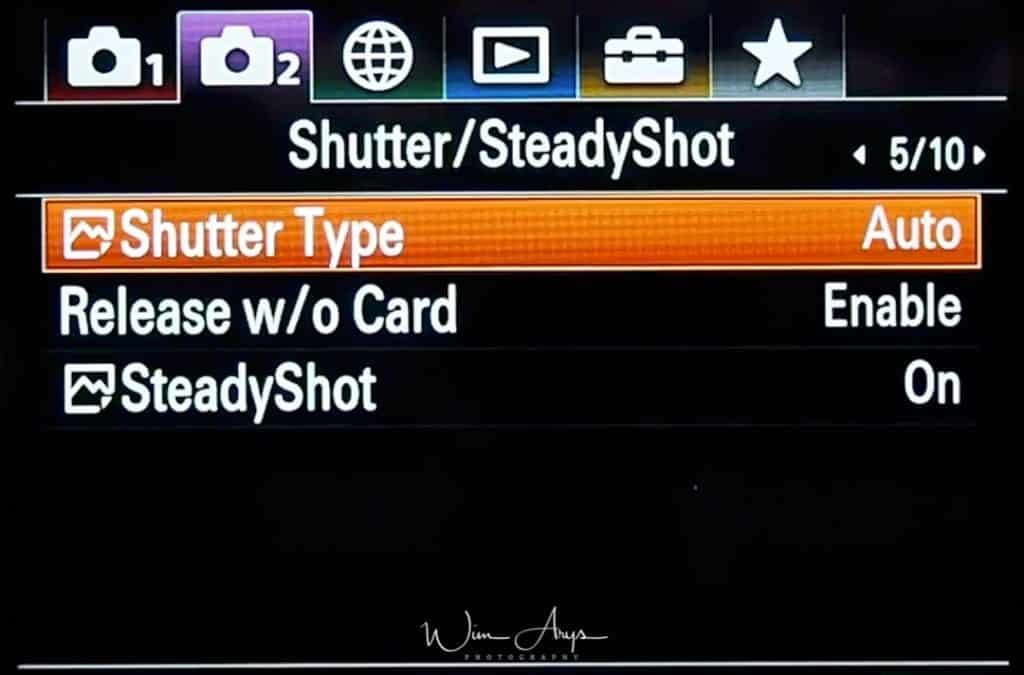
Shutter Type
Select here if you want to use the Electronic or Mechanical shutter. There is also an auto option, that switches from mechanical to electronic shutter if a flash is detected.
Release without card
If set to Off, you won’t be able to engage the shutter when there is no SD card in the slot. This is a useful failsafe to prevent you from shooting images without the ability to save them.
Steadyshot
Turn image stabilisation on or off.
(MENU – Movie settings – page 6)
Video zoom settings
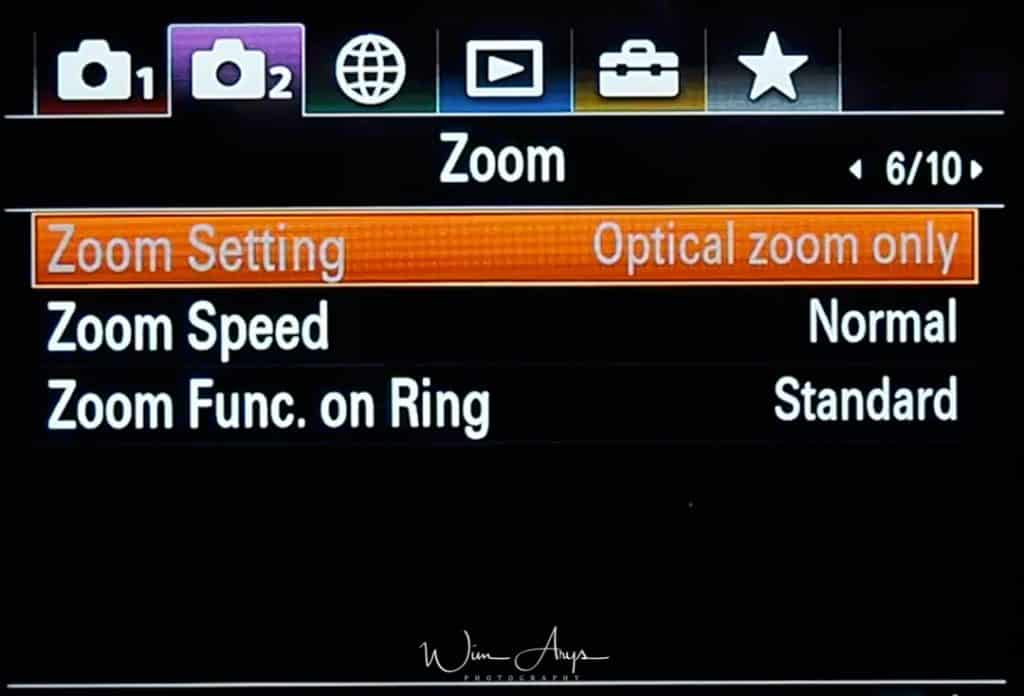
Zoom Setting
Sets whether to use the Clear Image Zoom and Digital Zoom when zooming.
Digital zoom:
Pictures captured by the image sensor of the camera are enlarged using digital signal processing. As the magnification level increases, signals to be also estimated growth and can reduce the picture quality.
Clear Image Zoom:
Zoomed images are captured close to the original quality when shooting a still picture. The camera first zooms to the maximum optical magnification, then uses Clear Image Zoom technology to enlarge the image an additional 2x, producing clear, sharp images despite the increased zoom ratio.
Zoom Speed
Sets the zooming speed when you operate the zoom lever.
Zoom Func. on Ring
Sets the zooming function of the control ring. When you select Quick, the zoom position moves in accordance with the degree of rotation of the control ring. When you select Step, you can move the zoom position to a fixed step of the focal length.
(MENU – Movie settings – page 7)
Display/Auto Review settings
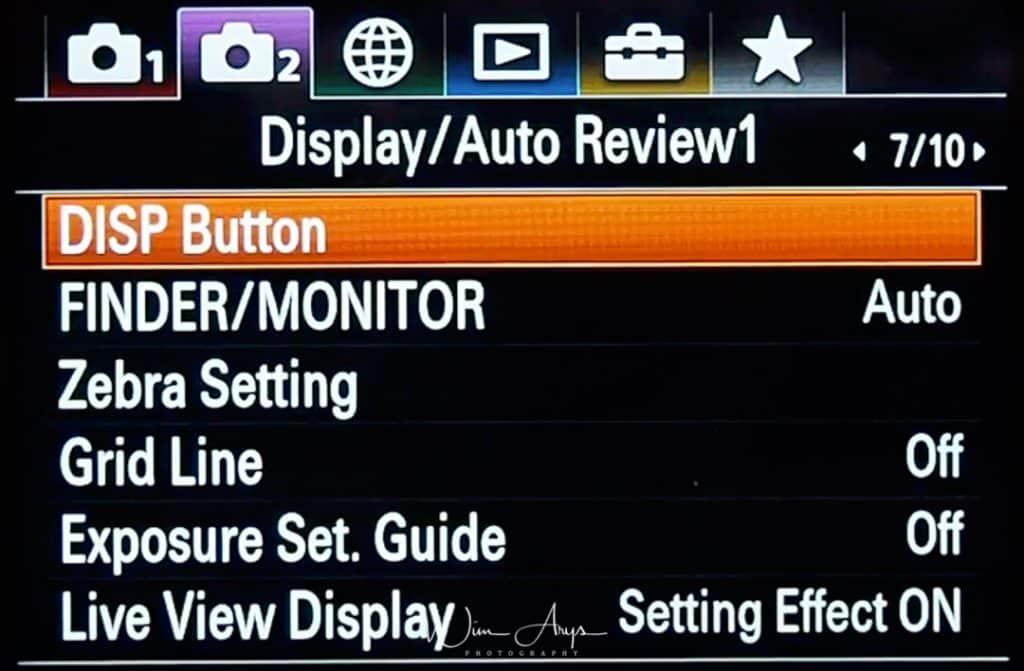
Disp button
Selects the functionality (what is shown) on the screen when you press the DISP button (on the control wheel). You can choose Graphic Display, all info, no disp info, and histogram.
Finder/Monitor
You can set the behaviour of the EVF and screen here. Do you want your screen on all the time, switch between screen and EVF once your eye has been detected near the viewfinder? Or turn the screen off and only use the EVF? It can all be selected here.
Zebra setting
The zebra function shows a zebra pattern on the screen while shooting in any area that is in danger of highlight clipping. You can switch this OFF or anywhere in a range between 70 and 100.The Zebra Pattern is a highlight warning indicator that is common in video cameras. It does not control exposure but just warns you that your highlights are blown out. It is not recorded into the resulting image.I have it set halfway at around 75, and it is a very useful indication of correct exposure of the entire scene.
Grid Line
Sets whether the grid line is displayed or not. The grid line will help you to adjust the composition of images.
Rule of 3rds Grid: Place main subjects close to one of the grid lines that divide the image into thirds for a well-balanced composition.
Square Grid: Square grids make it easier to confirm the horizontal level of your composition. This is suitable to determine the quality of the composition when shooting landscape, close-up, or duplicated images.
Diag. Square Grid: Place a subject on the diagonal line to express an uplifting and powerful feeling.
Off: Does not display the grid line.
Exposure set guide
The exposure set guide is an on-screen scroller that tells you the relation between your chosen aperture and the appropriate shutter speed for the scene you are shooting. I find this quite handy, but you can turn it off if you don’t.
Live view Display
Live view display allows you to see the image you’re going to capture with the settings you have dialed-in like aperture and shutter speed. Some users report easier autofocusing in low light when it’s turned OFF,
(MENU – Movie settings – page 8)
Display/auto review settings page 2
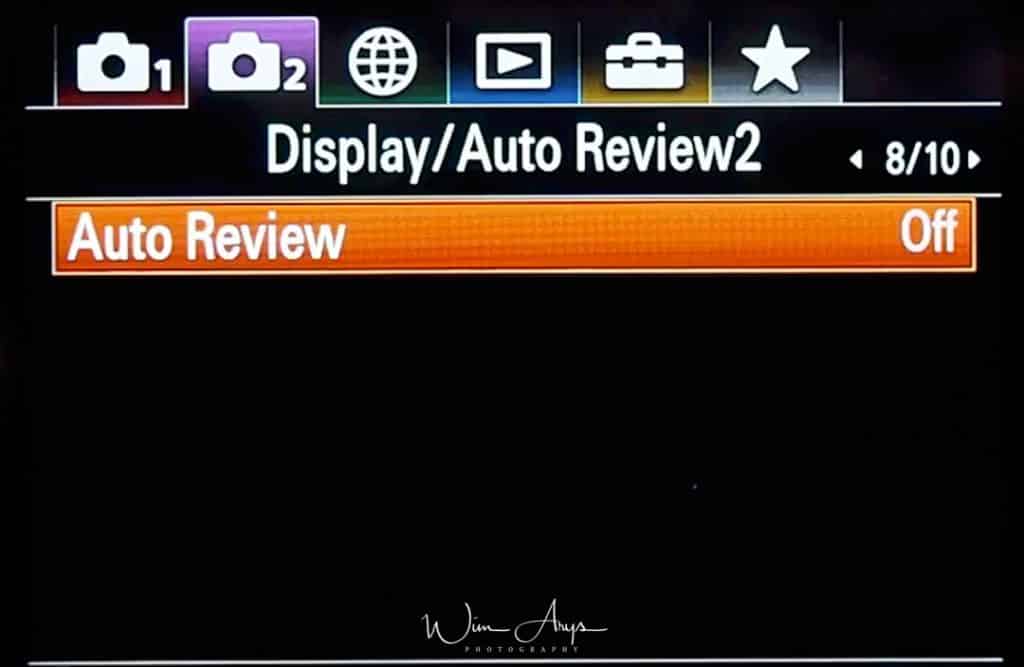
Auto Review
You can check your captured image on the screen directly after shooting. You can select how long the image will stay on the screen (10, 5 or 2 seconds). I find this very annoying, so I turned it off. If you want to review your image, you can simply press play to do so.
(MENU – Movie settings – page 9)
Custom operations buttons page 1
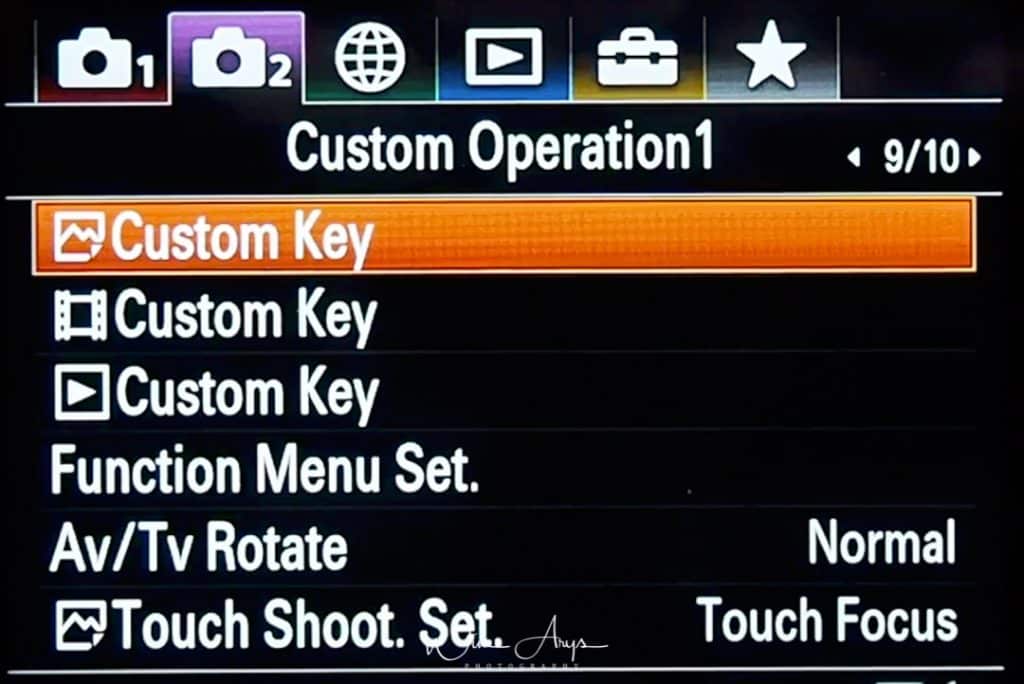
Custom Key(Shoot.)/Custom Key(PB)/Custom Key(Movie)
You can assign the desired function to the desired key. Some functions are available only when they are assigned to a custom key. For example, I assign Eye AF to AF-ON for Custom Key(Shoot.) because it’s more conveniently placed. You can easily recall Eye AF simply by pressing the AF-ON button. Learn how to do this here:
The keys that can be assigned functions are different for Custom Key(Shoot.) and Custom Key(PB).
You can assign the desired functions to the following keys.
- Custom Button 1
- Custom Button2
- AF/MF Button/AEL Button
- Fn/ Button
- Control Wheel (Center Button/Down Button/Left Button/Right Button)
- Custom Button 3
Function Menu Set.
You can assign the functions to be called up when you press the Fn (Function) button.
Av/Tv Rotate
Sets the direction of rotation for the front dial, rear dial, or control wheel when changing the aperture value or shutter speed. Normal or reverse.
Touch Shoot Set
Touch Shutter: When you shoot using the monitor, the camera automatically focuses on the point you touch and shoots a still image.
Touch Focus: You can select a subject on which to focus using touch operations in the still image and movie recording modes.
(MENU – Movie settings – page 10)
Custom operations buttons page 2
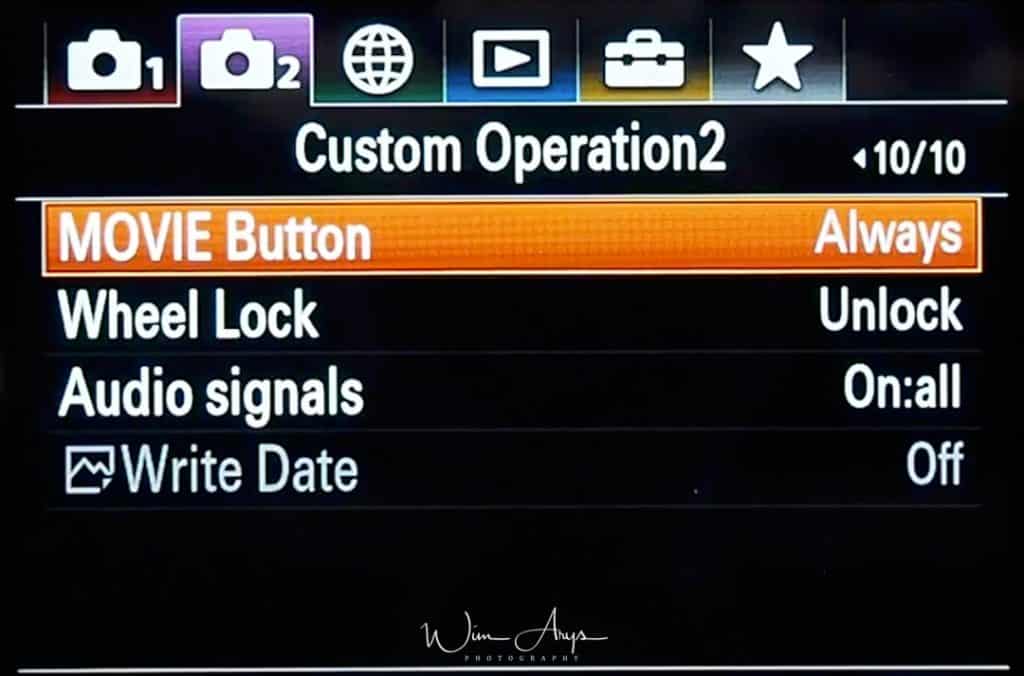
MOVIIE Button
Sets whether or not to activate the MOVIIE (Movie) button.
Always: Starts movie recording when you press the MOVIIE button in any mode.
MoVIIe Mode Only: Starts movie recording when you press the MOVIE button only if the shooting mode is set to Movie/HFR mode.
Wheel Lock
You can set whether or not to lock the control wheel when you press and hold the Fn (Function) button.
Audio Signals
Selects whether the product produces a sound or not.
On: Sounds are produced for example when the focus is achieved by pressing the shutter button halfway down.
Shutter: Only the shutter sound is produced.
Off: Sounds are not produced.
Write Date
Sets whether to record a shooting date on the still image.
MENU – Network settings- page 1
Network settings
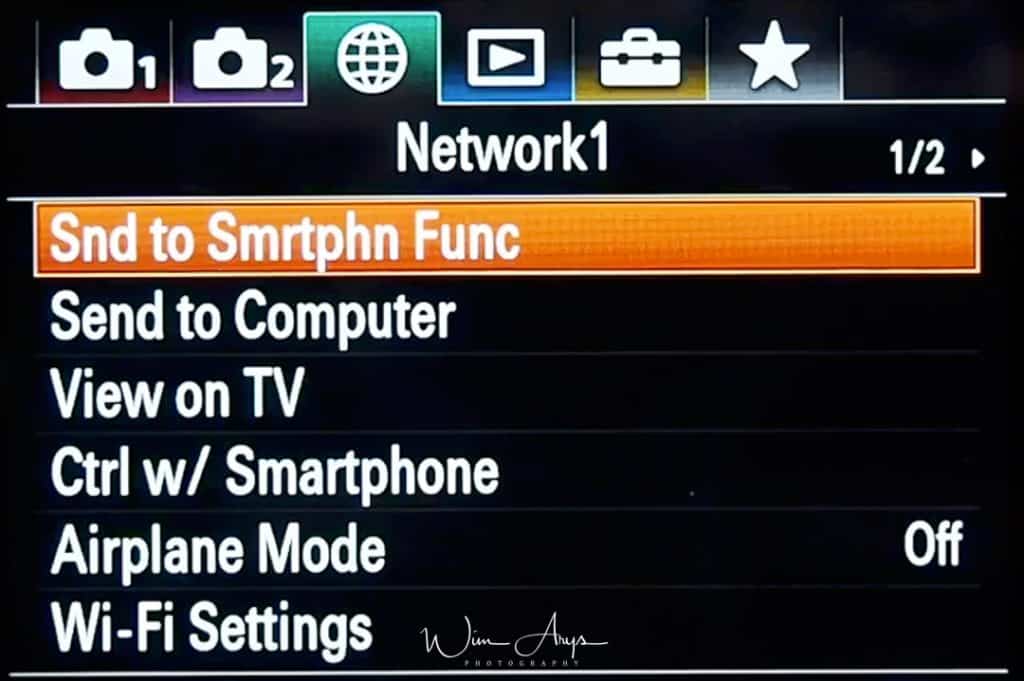
Send To Smartphone
You can send one or several images directly to your wireless device (phone or tablet) by pressing this button.
You can either decide to choose which images you want to transfer on the Sony RX100 mark 6 or the wireless device (via the Sony PlayMemories app, available for free in the apple or android store).
You’ll have to connect the-the camera via Wifi first (it makes a Wifi access point), using the instruction on the screen.
It works just like connecting to any other access point with your phone or tablet.
You should do this as quickly as possible, just to get it out of the way.
When your phone has wirelessly connected to the camera once, and you’ve entered the password, it will remember this, and make it a lot faster to connect later.
Send to Computer
You’ll need to connect the computer physically to the camera using the supplied USB cable, and you can push selected pictures to your Sony PlayMemories desktop software (installed from the CD or downloaded from their website). This can even be set up to continue pushing images after the Sony RX100 VII has turned off.
View On TV
If you have a Wifi-enabled TV, you can see pictures and slideshows directly from your camera through your home wireless network.
Ctrl w/ smartphone
By connecting the Sony RX100 VII to a smartphone using Wi-Fi, you can control the camera and shoot images using the smartphone, and you can transfer images shot with the camera to the smartphone.
Connection Info. displays the QR code or SSID used to connect the Sony RX to a smartphone.
Airplane Mode
Disables all wireless functionality, just like airplane mode does on your phone.
Wi-Fi Settings:
WPS Push
If your access point has the Wi-Fi Protected Setup (WPS) button, you can register the access point to this product easily by pushing the Wi-Fi Protected Setup (WPS) button.
Access Point Set.
You can register your access point manually. Before starting the procedure, check the SSID name of the access point, security system, and password. The password may be preset in some devices. For details, see the access point operating instructions, or consult the access point administrator.
Disp MAC Address
Displays the MAC address of your Sony DSC-RX100M6.
SSID/PW Reset
Your Sony RX100 VII shares the connection information for Send to Smartphone and Connection Info. with a device that has permission to connect. If you want to change the device that is permitted to connect, reset the connection information.
MENU – Network settings- page 2
Network settings page 2
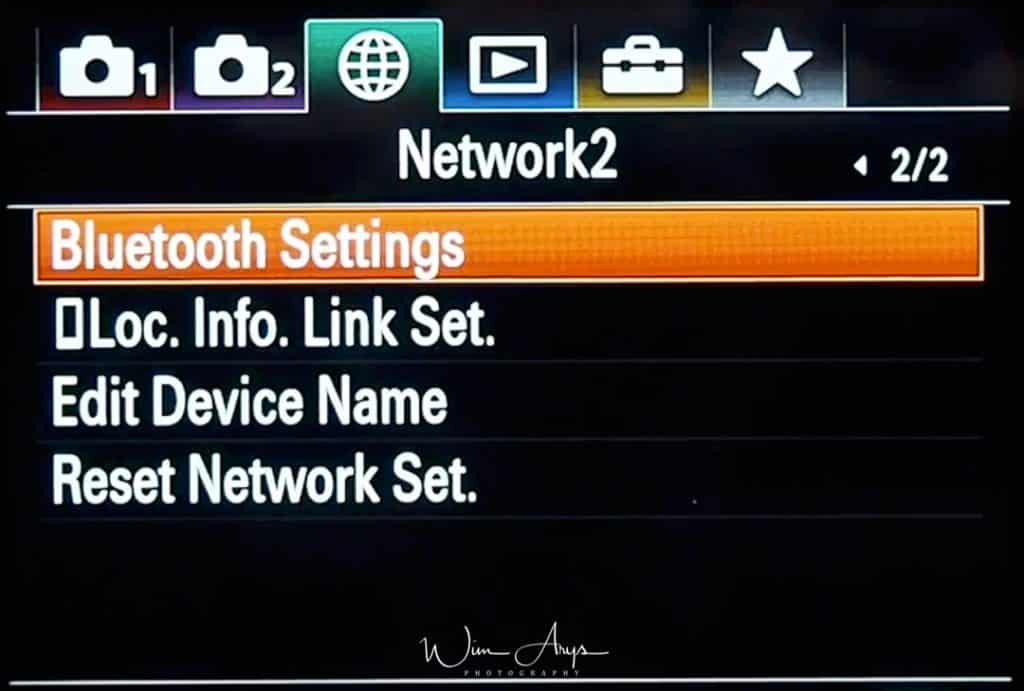
Bluetooth Settings.
Controls the settings for connecting the Sony RX100 VII to a smartphone via a Bluetooth connection. You need to pair the camera and smartphone before using the location information interlocking function. If you want to pair the camera and smartphone in order to use the location information interlocking function, refer to “Loc. Info. Link Set..”
Loc. Info. Link Set
You can use the application PlayMemories Mobile to obtain location information from a smartphone that is connected with your camera using Bluetooth communication. You can record the obtained location information when shooting images.
To use the location information linking function of the Sony RX100 VII, you need the PlayMemories Mobile application on your smartphone and transfer an image to your smartphone to test the connection
Procedure:
Confirm that the Bluetooth function of your smartphone is activated. (Do not perform the Bluetooth pairing operation on the smartphone setting screen!!! In steps 2 to 7, the pairing operation is performed using the camera and the application PlayMemories Mobile. If you accidentally perform the pairing operation on the smartphone setting screen in step 1, cancel the pairing and then perform the pairing operation by following Steps 2 through 7 using the Sony RX and the application PlayMemories Mobile.)
On the camera, select MENU – (Wireless) – Bluetooth Settings – Bluetooth Function – On.
On the camera, select MENU – (Wireless) – Bluetooth Settings – Pairing.
Launch PlayMemories Mobile on your smartphone and tap “Location Information Linkage.”
Activate Location Information Linkage on the Location Information Linkage setting screen of PlayMemories Mobile.
Select OK when a message is displayed on the monitor of the camera. Pairing of the camera and PlayMemories Mobile is complete.
On the camera, select MENU – (Wireless) – Loc. Info. Link Set. – Location Info. Link – On.
(obtaining location information icon) will be displayed on the monitor of the camera. Location information obtained by your smartphone using GPS, etc., will be recorded when shooting images.
Options in this Menu:
Location Info. Link: Sets whether to obtain the location information by linking with a smartphone.
Auto Time Correct.: Sets whether to automatically correct the date setting of the Sony RX100 VII using information from a linked smartphone.
Auto Area Adjust.: Sets whether to automatically correct the area setting of the camera using information from a linked smartphone.
Edit Device name
If you wish, you can change the name of the Device Access point) perhaps to make it easier to identify which RX100 is yours in particular situations.
Reset Network set
Resets all network settings.
If something does not function properly, and you want to start from scratch, can be useful.
MENU – playback options – page 1 of 4
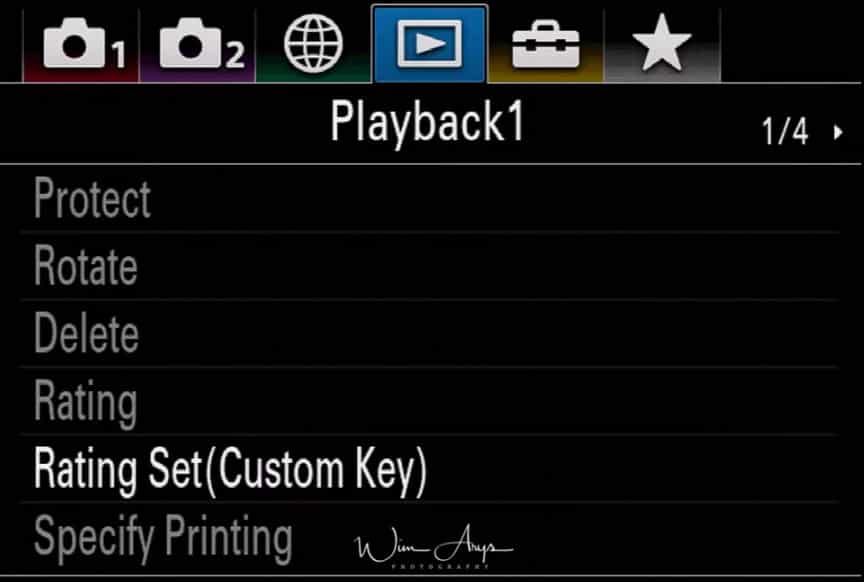
Protect
Set your camera to not shoot images without inserting an SD card.
Rotate
Change the orientation of images in-camera.
Delete
Delete one or multiple images stored on your SD cards.
Rating
Rate your images in-camera for easy culling in Lightroom afterward.
Rating Set (Cust Key)
Set a custom key for easy rating.
Specify Printing
Specify Printing is a feature that allows images to be marked for printing later. Registered images are displayed with the DPOF mark. (DPOF stands for Digital Print Order Format)
MENU – playback options – page 2
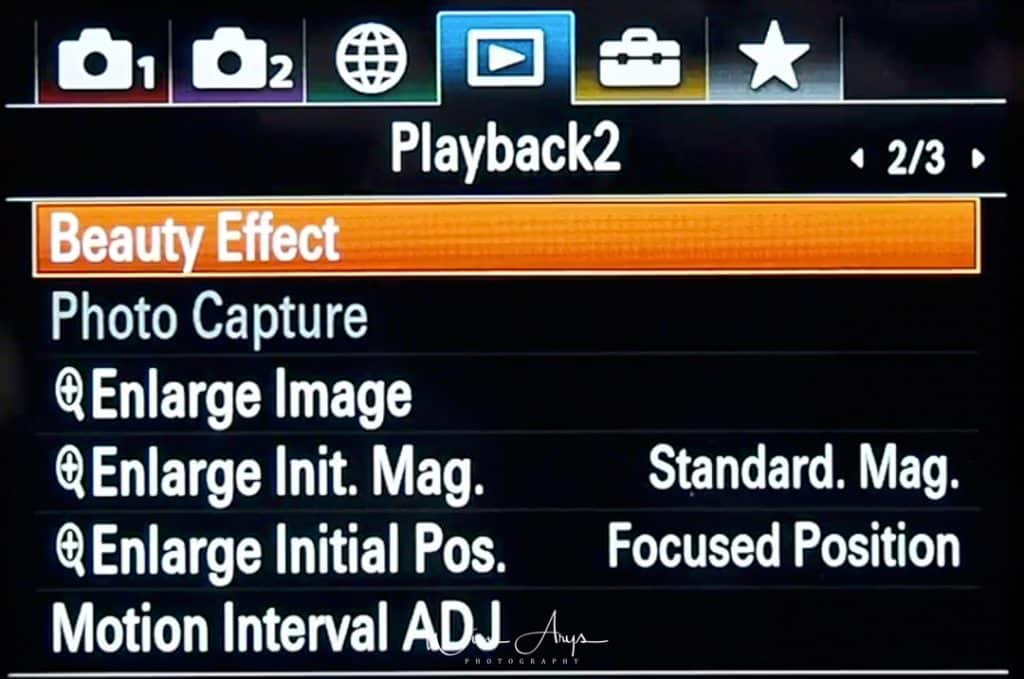
Beauty Effect
Allows you to apply the Beauty Effect to retouch the still image of a person and make it look better, for example, by retouching it for smoother skin, larger eyes, and whiter teeth. You can set the effects from level 1 to level 5. An image on which the Beauty Effect is used is saved as a new file. The original image is retained as it is.
Skin Toning: Adjusts the skin color as you like.
Skin Smoothing: Removes age spots and wrinkles from the skin.
Shine Removal: Reduces the look of oily skin. Adjusts the skin color as you like.
Eye Widening: Enlarges the eyes of the subject. Adjust the size of the eyes using up/down.
Teeth Whitening: Whiten the teeth of the subject. You may not be able to whiten the teeth in some images.
To apply two or more effects consecutively using Beauty Effect, first apply one effect to the image, and then select another effect using left/right.
Photo Capture
Captures a chosen scene in a movie to save as a still image. First shoot a movie, then pause the movie during playback to capture decisive moments that tend to be missed when shooting still images, and save them as still images.
-
Display the movie that you want to capture as a still image.
-
MENU – (Playback) – Photo Capture.
-
Play back the movie and pause it.
-
Find the desired scene using forward slow playback, reverse slow playback, displays the next frame, and displays the previous frame, and then stop the movie.
-
Press (Photo Capture) to capture the chosen scene.
Enlarge Image
Select an image and expand a portion of that picture. Useful for checking details and focus.
Enlarge Init. Mag.
Sets the initial magnification scale when playing back enlarged images.
Enlarge Initial Pos.
Sets the initial position when enlarging an image in playback. You can select either image center or the focus position.
Motion Interval ADJ
You can adjust the interval of the tracking of the subject’s motion.
MENU – playback options – page 3
Playback menu page 3
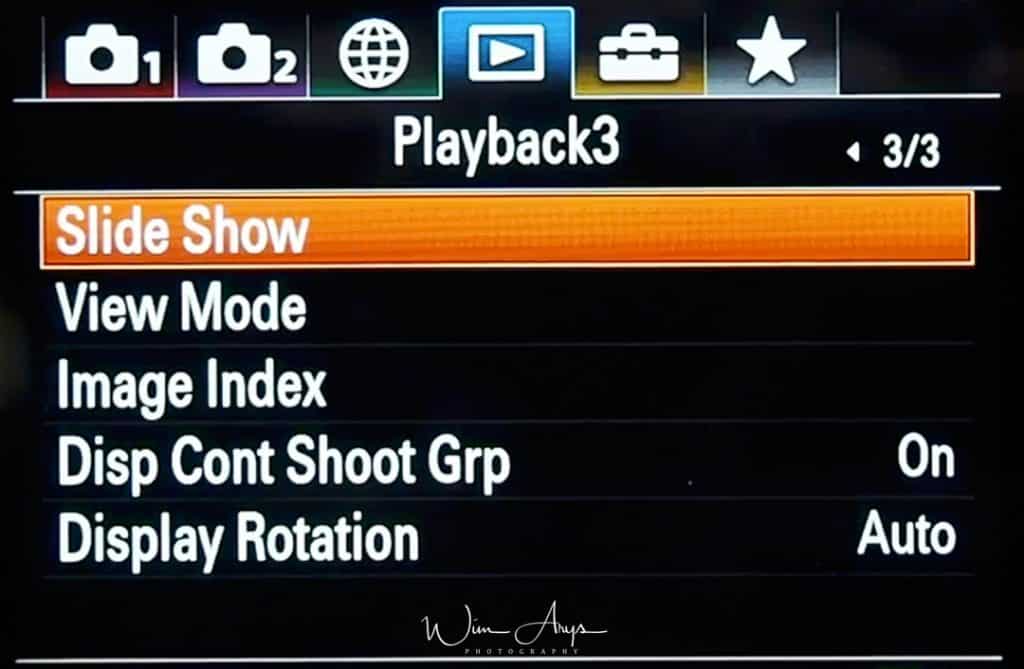
Slide Show
Select whether you want the Sony RX100 VII to repeat slideshows when all pictures are viewed or not, and choose the interval between slides.
VIIew Mode
select how the camera will arrange captured pictures in the viewing browser.
Image Index
Choose whether you want the image browser to display 12 (larger) or 30 (smaller) images per page.
Display Cont. Shooting Group.
You can select to display burst images in groups or display all images during playback.
Display rotation
Select whether you want the camera to rotate images automatically when you rotate the camera or not.
MENU – Camera Setup – page 1 of 7

Monitor Brightness
Manually set the Monitor brightness (recommended leave to zero) or change to a brighter setting for Sunny Weather.
Viewfinder Brightness
Set to Auto, which adapts to the lighting circumstances or manually changes to your preferred setting.
Finder Color Temp
Change the color temperature of the Viewfinder (colder-warmer) to you liking. I don’t make any adjustments here.
Gamma Disp. Assist
Movies with S-Log gamma are assumed to be processed after shooting in order to make use of the wide dynamic range. They are therefore displayed in low contrast during shooting and may be difficult to monitor, using Gamma Disp. Assist, contrast equivalent to that of normal gamma can be reproduced. In addition, Gamma Disp. Assist can also be applied when playing back movies on the camera’s monitor/VIIewfinder.
Volume settings
Modify the playback volume for recorded video or demos.
Tile Menu
elects whether to always display the first screen of the menu when you press the MENU button.
MENU – Camera Setup – page 2 of 7
Mode Dial Guide
You can display the description of a shooting mode when you turn the mode dial and change the settings available for that shooting mode.
Delete confirm.
You can set whether Delete or Cancel is selected as the default setting on the delete confirmation screen.
Display Quality
You can change the display quality to High or Standard. When High is selected, battery consumption will be higher, and your camera will also heat up faster.
Auto monitor Off
The camera automatically switches to the power-saving mode if you do not operate the camera for a certain period of time in the still-image shooting mode. This function is useful for reducing the power consumption.
Pwr Save Start time
Sets time intervals to automatically switch to power save mode when you are not performing operations to prevent wearing down the battery pack. To return to shooting mode, perform an operation such as pressing the shutter button halfway down. I have it set to 5 minutes, a good balance between usability and battery life.
Function for VF close
Sets whether to turn the power off when the viewfinder is stowed.
MENU – Camera Setup – page 3 of 7
Auto Power OFF Temp
Sets the temperature of the camera at which the camera turns off automatically during shooting. When it is set to High, you can continue shooting even when the temperature of the camera gets hotter than normal.
- Standard: Sets the standard temperature for the camera to turn off.
- High: Sets the temperature at which the camera turns off to higher than Standard.
If you want to make longer videos (longer recording time), set this to high. Your camera will get a little hot, but you’ll have the longest recording time of all Sony’s mirrorless cameras!
NTSC/PAL Selector
Plays back movies recorded with the product on an NTSC/PAL system TV.
Touch Operation
Sets whether or not to activate touch operations on the monitor.
Touch Panel/Pad
- Touch Panel+Pad: Activates both the touch panel operations when shooting with the monitor and touch pad operations when shooting with the VIIewfinder.
- Touch Panel Only: Activates only the touch panel operations when shooting with the monitor.
- Touch Pad Only: Activates only the touch pad operations when shooting with the viewfinder.
Touch Pad Settings
You can adjust settings related to touch pad operations during viewfinder shooting.
Operation in V Orien.:
Sets whether to enable touch pad operations during vertically oriented viewfinder shooting. You can prevent erroneous operations during vertically oriented shooting caused by your nose, etc. touching the monitor.
Touch Pos. Mode:
Sets whether to move the focusing frame to the position touched on the screen (Absolute Position), or move the focusing frame to the desired position based on the direction of dragging and the amount of movement (Relative Position).
Operation Area:
Sets the area to be used for touch pad operations. Restricting the operational area can prevent erroneous operations caused by your nose, etc. touching the monitor.
Demo Mode
The Demo Mode function displays the movies recorded on the memory card automatically (demonstration) when the Sony RX100 VII has not been used for a certain time. Normally select Off.
TC/UB settings
Timecode (TC) and the user bit (UB) information can be recorded as data attached to movies. This is used for synchronisation of video in post production. The time code can be set between the following range: 00:00:00:00 to 23:59:59:29.
- TC/UB Disp. Setting: Sets the display for the counter, time code, and user bit.
- TC Preset: Sets the time code.
- UB Preset: Sets the user bit.
- TC Format: Sets the recording method for the time code. (Only when NTSC/PAL Selector is set to NTSC.)
- TC Run: Sets the count up format for the time code.
- TC Make: Sets the recording format for the time code on the recording medium.
- UB Time Rec: Sets whether or not to record the time as a user bit.
MENU – Camera Setup – page 4
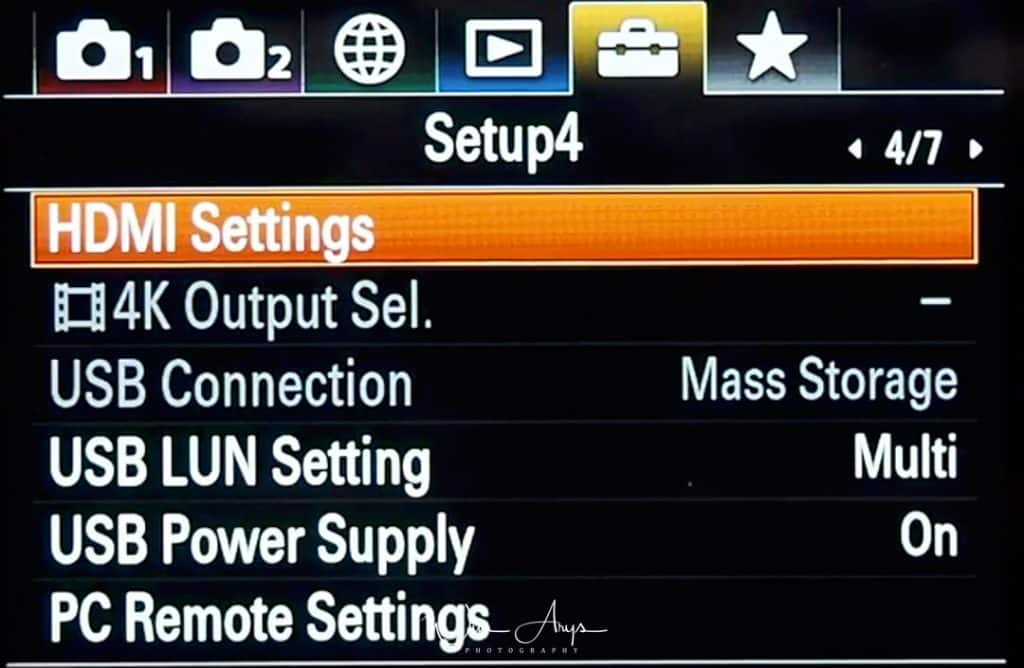
General camera setup page 4
HDMI Settings
When you connect the product to a High Definition (HD) TV with HDMI terminals using an HDMI cable (sold separately), you can select HDMI Resolution to output images to the TV.
- Auto: The product automatically recognizes an HD TV and sets the output resolution.
- 2160p/1080p: Outputs signals in 2160p/1080p.
- 1080p: Outputs signals in HD picture quality (1080p).
- 1080i: Outputs signals in HD picture quality (1080i).
4K Output Sel.
Outputs still image in 4K resolution to an HDMI-connected TV that supports 4K.
- Memory Card HDMI: Simultaneously outputs to the external recording/playback device and records on the camera’s memory card.
- HDMI Only(30p): Outputs a 4K movie in 30p to the external recording/playback device without recording on the Sony RX100 VII memory card.
- HDMI Only(24p): Outputs a 4K movie in 24p to the external recording/playback device without recording on the camera’s memory card.
- HDMI Only(25p)* : Outputs a 4K movie in 25p to the external recording/playback device without recording on the camera’s memory card.
USB connection
Selects what will happen when you connect your SonyRX100 Mark 69 to your PC or MAC.
- Auto: Establishes a Mass Storage or MTP connection automatically, depending on the computer or other USB devices to be connected. Windows 7 or Windows 8 computers are connected in MTP, and their unique functions are enabled for use.
- Mass Storage: Establishes a Mass Storage connection between this product, a computer, and other USB devices.
- MTP: Establishes an MTP connection between this product, a computer, and other USB devices. Windows 7 or Windows 8 computers are connected in MTP, and their unique functions are enabled for use.
- PC Remote: Uses “Remote Camera Control” to control this product from the computer, including such functions as shooting and storing images on the computer
USB LUN Setting
Improves compatibility with external devices by limiting the functions of the USB connection.
Older devices that are not able to connect to the Sony RX100 VII might work when set to single. Otherwise, use Multi.
USB Power Supply
You can extend battery life by providing a power supply over USB.
PC Remote settings
Sets whether to save still images stored in both the Sony RX100 6 and the computer during PC Remote shooting. This setting is useful when you want to check recorded images on the Sony without leaving the camera.
MENU – Camera Setup – page 5
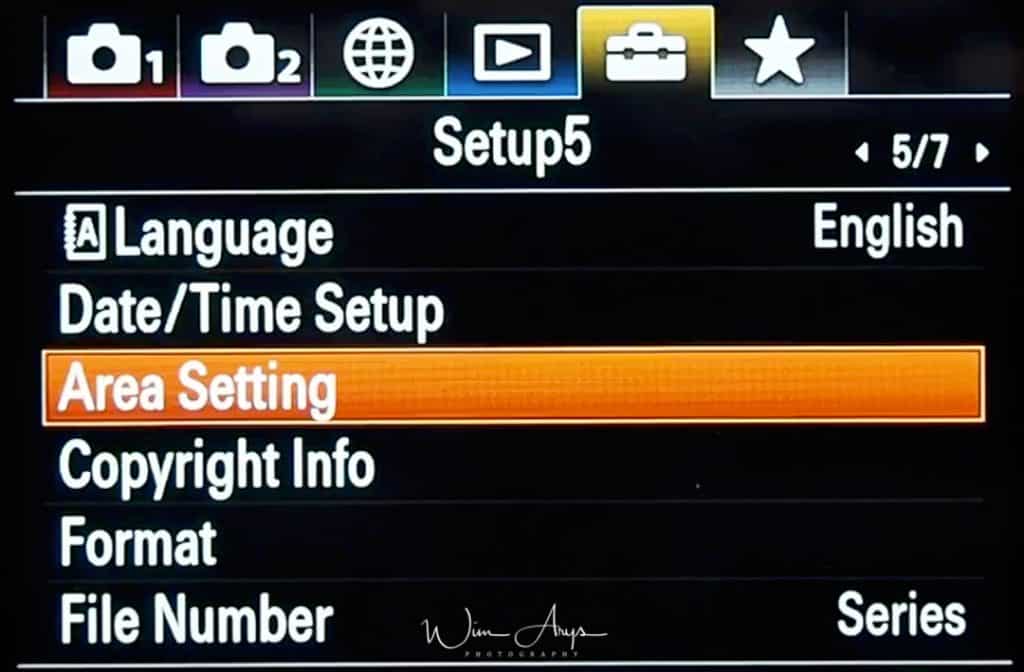
General camera setup page 5
Language
Selects the language to be used in the menu items, warnings, and messages.
Date/Time Setup
The Clock Set screen is displayed automatically when you turn on your RX camera for the first time.
Area Setting
Sets where in the world where you are using your Sony RX100 M6.
Copyright info
Writes copyright information onto the still images like your name or business.
Format
When you use a memory card with this camera for the first time, we recommend that you format the card using the Sony for stable performance of the memory card. Note that formatting permanently erases all data on the memory card, and is unrecoverable.
File Number
Name your files according to some shots or reset it to start from 1.
MENU – Camera Setup – page 6
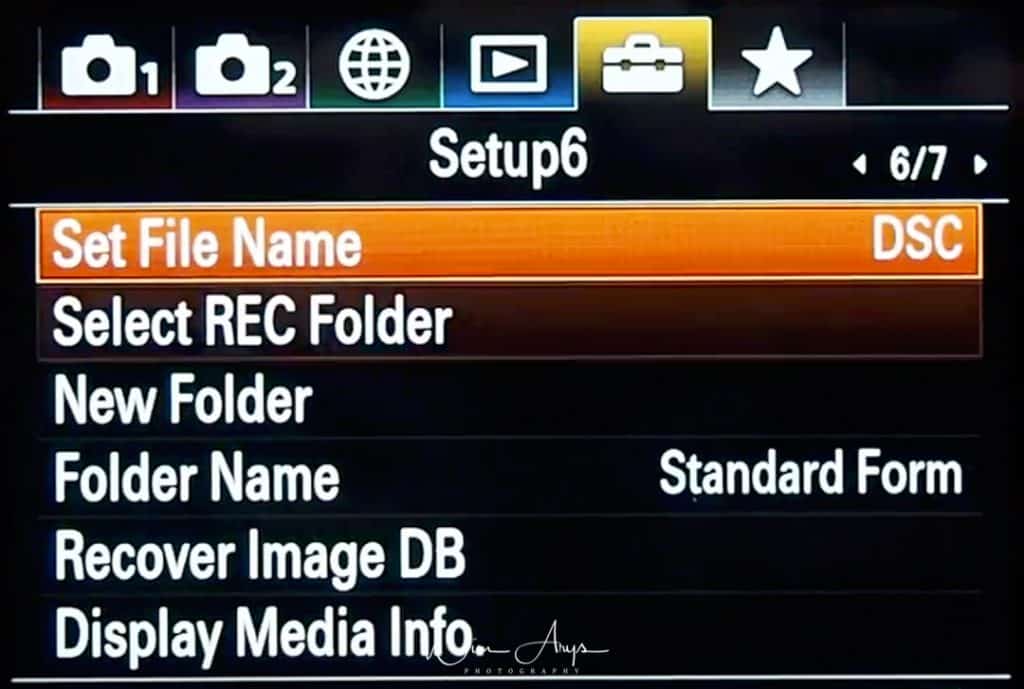
General camera setup page 6
Set File Name
Use the standard file naming system or a customisable one.
Select REC folder
If Folder Name is set to Standard Form and there are 2 folders or more, you can select the folder on the memory card to which images are to be recorded.
New Folder
Make a new folder for quickly organizing events and locations.
Folder name
Choose whether to have folder names in standard form (DSC) or create a new one by date. Setting folders by date will make organizing your images easier.
Recover Image DB
If you have a storage card error, you can try to rebuild the database to retrieve lost images possibly.
Display media info
You can check how much space is left on your SD card (have pictures in your desired quality and how many minutes of video).
MENU – Camera Setup – page 7
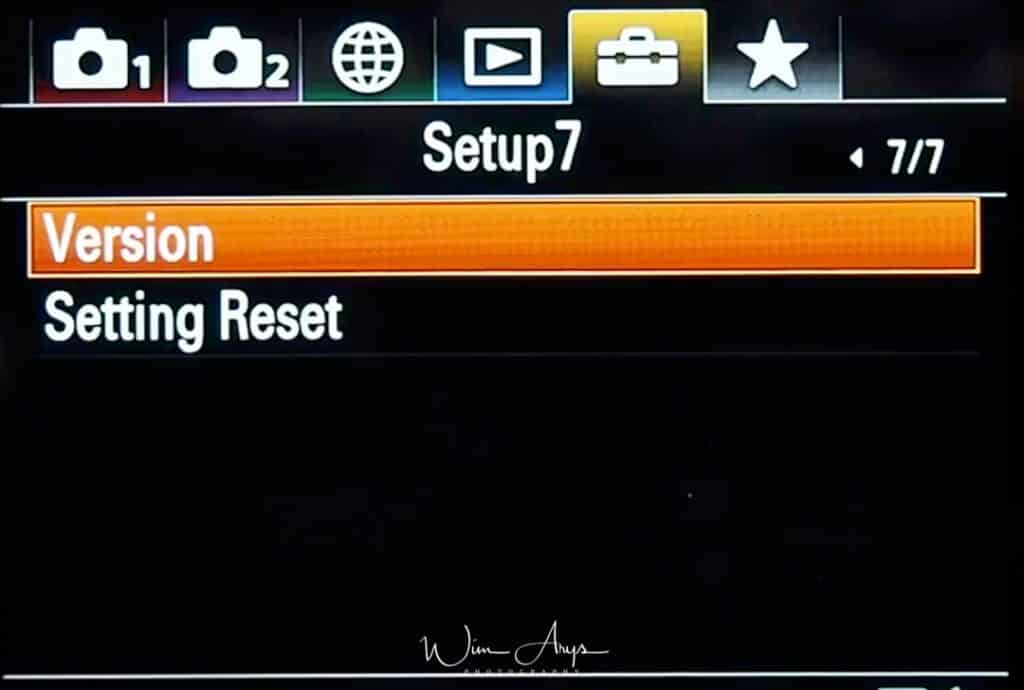
General camera setup page 7
Version
Check what version of the operating system your Sony RX100 VII and the lens is running. Sony sporadically releases updates with new features, so it might be worth checking if any new firmware versions are available.
Setting Reset
Fully resets the Sony camera to factory settings.
MENU – My menu setting

This is a new functionality not preVviously seen on many Sony camera.s It allows you to build a custom menu. Say you often change Raw file type from compressed to uncompressed, or maybe you don’t want to spend your time scrolling through the entire menu system looking for the SteadyShot settings. Well, now you can basically build your own Menu here with your most often used settings.
Add Item
You’ll see a list of all Menu options here and you can simply select your desired options and add them to your custom built menu page.
Sort Item
This setting basically changes the order of your ‘My Menu’ selected function.
Delete Item
Deletes functions in your ‘My Menu’.
Delete Page
Deletes entire pages of your ‘My Menu’ selection.
Delete All
Deletes all previously added functions of your ‘My Menu’.
In the next chapter, I’ll go over all the functionality that I find most useful
Mode dial functions: what’s the difference between intelligent and superior auto?
Intelligent Auto
- This mode lets the camera detect what kind of scene you are photographing. It switches to the scene setting it finds most appropriate, including aperture, shutter speed, ISO, and AF mode.
- These different scene settings are the same you’ll find manually selectable in SCN mode.
- All Sony cameras do a good job at detecting scenes, although the advanced photographer will prefer to shoot in Aperture, Shutter priority or fully manual mode in order to have more control over things like depth-of-field, movement, and focusing area.
Superior Auto
- Does the same scene recognition and (when theSony RX100 VII decides it is appropriate) adds hand-held twilight, anti-motion blur, and backlight correction HDR in order to optimize dynamic range, movement, and exposure.
- This is only for jpeg shooters, as it uses multiple images shot in close succession at high quality and combines them into one jpeg. Works well on stills but should not be used for movement.
Zebra highlight clipping aide
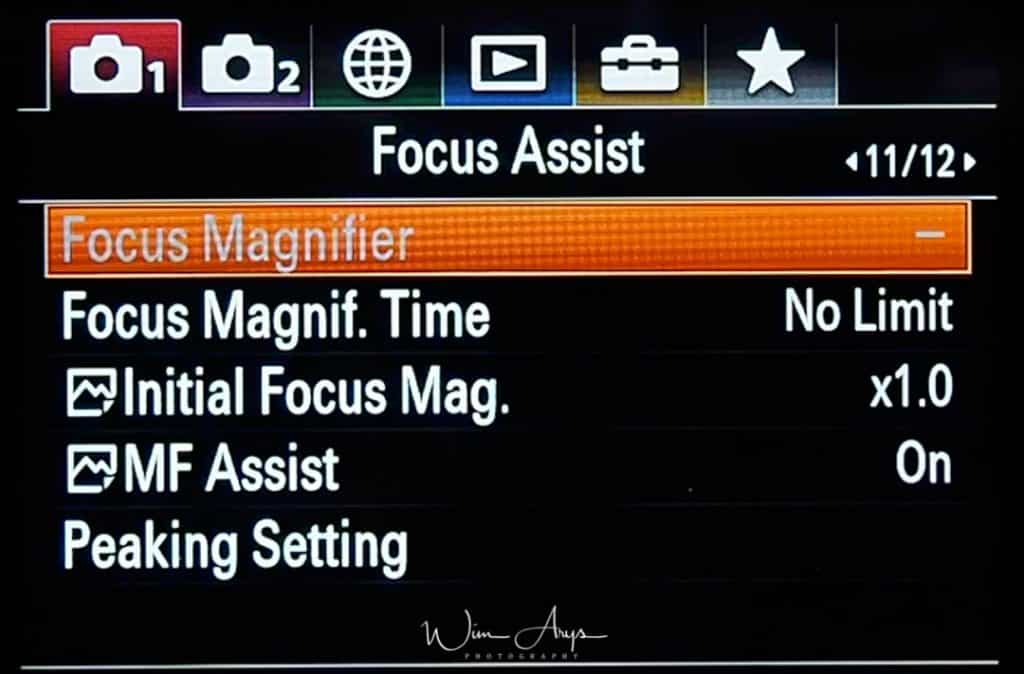
Focus Assist settings
- Zebra will show zebra pattern lines on blown highlights.
- The clipping detection threshold is selectable from 70 to 100 . Lower values indicate possible highlight clipping sooner than higher.
- Setting it somewhere around 90 will give you a good indication of whether you’re in danger of unrecoverable clipping without having the screen cluttered with stripes all the time.
Manual Focus Assist and Focus Peaking
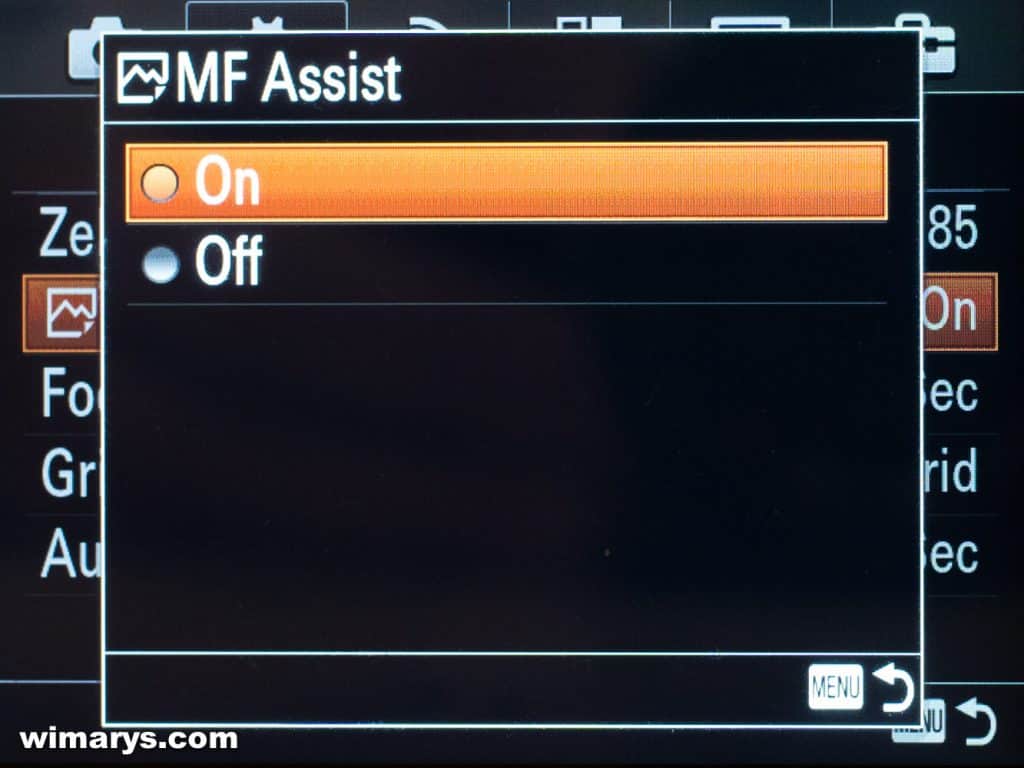
There are two manual focusing assist functions:
MF assist
- When set to ON, Magnification will automatically magnify a selectable (through the menu) part of you image when in Manual Focus Mode (MF).
- MENU – (Custom Settings) – MF Assist – On.
- The duration of the magnification can also be set to either 2 sec, 5 sec or no limit in the menu Focus Magnification Time. (MENU – (Custom Settings) – Focus Magnif. Time – desired setting.)
- You can check the focus by enlarging the image before shooting.
- MENU – (Camera Settings) – Focus Magnifier.
- Press on the center of the control wheel to enlarge the image and select the position you want to enlarge using up/down/left/right side of the control wheel.
- You can change the magnifier scaling in two steps by pressing in the center, and close the focus magnifier mode and return to the normal shooting display by pressing three times.
- Confirm the focus.
- Press the shutter button fully down to shoot the image.
Peaking
- This works in MF and DMF focusing modes
- MENU – (Custom Settings) – Peaking Level – desired setting.
- It displays a color selectable noise in the regions where the focus is on.
- A low setting is recommended in enough light on the Sony RX100 IV.
- In dim light, you might need to go to medium to get a good idea of where the focus is at.
Center Lock-on AF
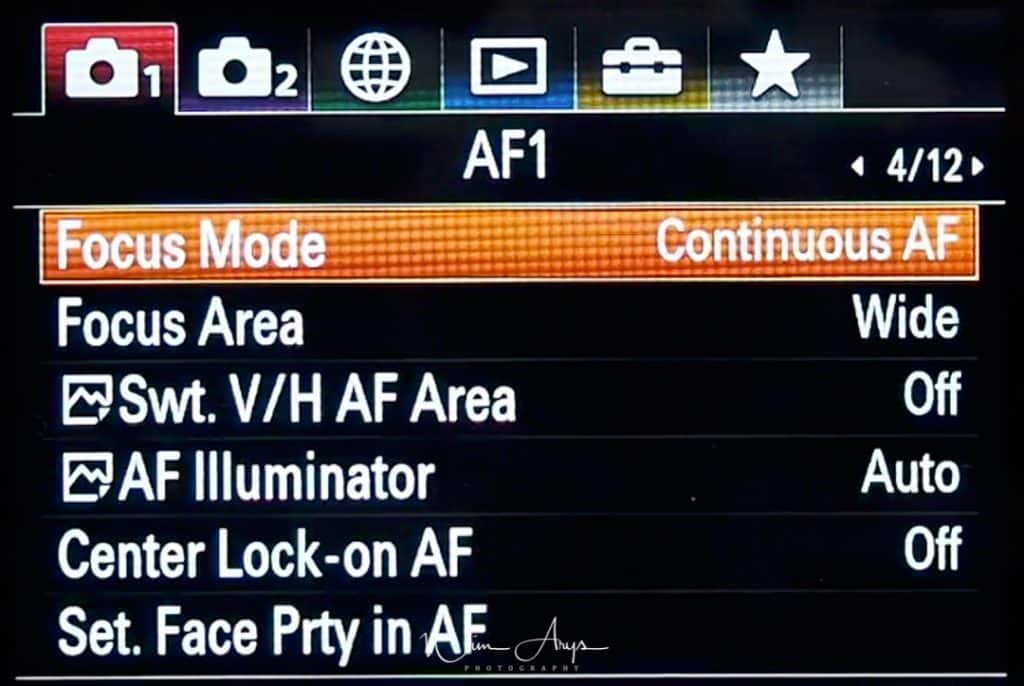
Autofocus settings
Center Lock-on AF
Depending on the options selected in Focus Area or Center Lock-on AF, the available functions varies when pressing the key. When you press the key when the Focus Area is set to Wide or Center and Center Lock-on AF is On, Center Lock-on AF will activate. The Sony RX100 VII will automatically focus while pressing the key when the Focus Area is Wide or Center, Focus Mode is set to other than Manual Focus, and Center Lock on AF is set to Off.
- When you press the center button, the camera detects the subject positioned in the center of the screen and continues to track the subject.
- MENU – (Camera Settings) – Center Lock-on AF – On
- Align the target frame (A) over the subject and press in the center of the control wheel. Press again to stop tracking.
- If the camera loses track of the subject, it can detect when the subject reappears on the monitor and resume tracking.
- Press the shutter button fully down to shoot the image.
Smile/face detect
When set to On, The Sony RX100 IV will automatically detect and focus on faces. This is a very powerful feature and can even be made faster by registering faces beforehand. You can even prioritize any of the 8 registered faces according to importance. Ideal for a wedding or family reunion when you know the persons who you are going to photograph.
- Go to MENU – (Camera Settings) – Smile/Face Detect. and select either
- On (Regist. Faces): Detects the registered face with higher priority using Face Registration.
- On: Detects a face without giving higher priority to the registered face.
How to register faces:
- MENU – (Custom Settings) – Face Registration – New Registration.
- Align the guide frame with the face to be registered, and press the shutter button.
- When a confirmation message appears, select Enter.
Eye AF
Eye AF is great for portraiture and large apertures. With a shallow depth of field, it is at times difficult to get the appearance of a well-focussed face. The AF system could wonder to an ear or a chin when you finally get that exact shot that you’re looking for.
Eye EF eliminates this problem by detecting your subject’s eyes and placing the focus point there. It tracks them too. You’ll need to assign a button of your choice in order to make this work.
- MENU – (Custom Settings) – Custom Key Settings – assign the Eye AF function to the desired button.
- Point the Sony RX100 VII at a person’s face, and press the button to which you have assigned the Eye AF function.
- Press the shutter button while pressing the button.
Exposure aides
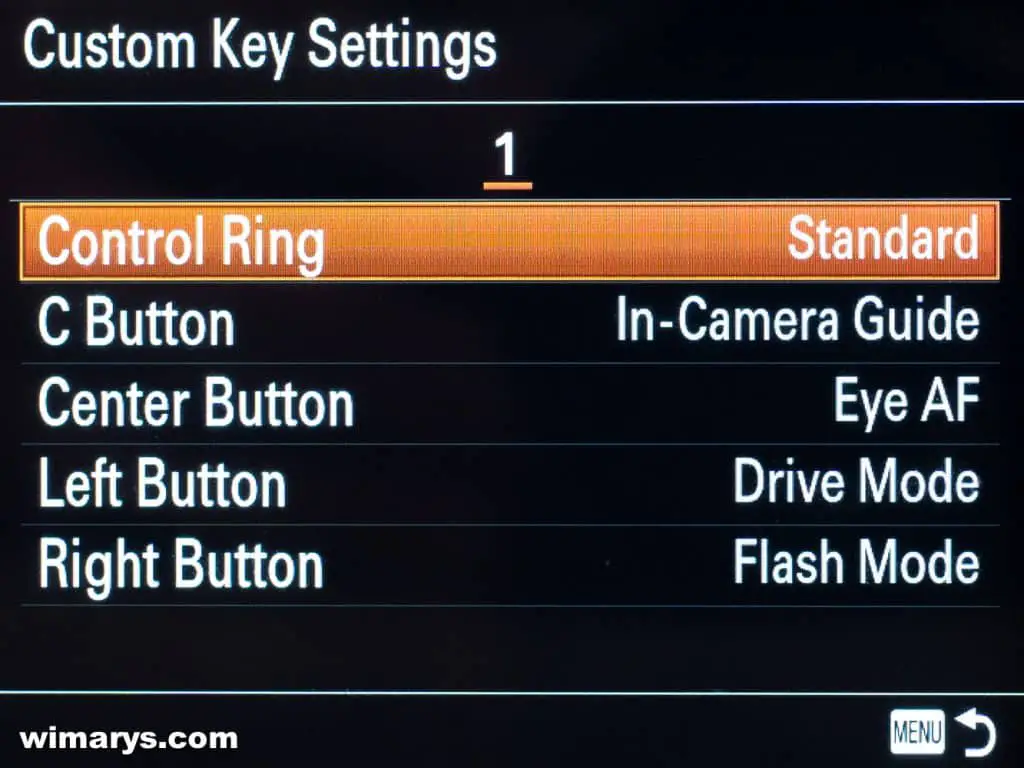
AE lock
- When contrast between the subject and background is high, meter the light at a spot where the subject appears to have the appropriate brightness and shut the exposure before shooting.
- You’ll need to assign a button to this function to do this in Menu – Custom Settings – Custom Key Setting and then assign the AEL toggle to the desired key.
Then:
- Center the spot at which the exposure is to your liking
- Press the button to which the AEL toggle function is assigned
- exposure will be locked, and AE lock lights up.
- Focus on your subject and press the shutter button.
- To cancel the exposure lock, press the button to which the AEL toggle function is assigned.
It’s easiest to select the AEL hold function in Custom Key Settings; then you can lock the exposure as long as
you are holding down the AEL button.
Bulb mode
Bulb mode is great for shooting trails of light, such as fireworks, car lights, etc.
It’s best to use a remote or the Sony Playmemories remote app (that is downloadable for free) as you want to eliminate movement.
- Firstly set the mode dial to M.
- Connect your phone to the Sony RX100 VII using WiFi or NFC.
- Then:
- Dial exposure time to Bulb on the app.
- Dial in a suitable Aperture value from F/5.6.
- Press the shutter button on the app to start the exposure.
- Press the shutter button again on the app to stop the exposure.
Conclusion
The Sony RX100 VI brought many new software innovations to the RX line. Besides the ability to record in 4K and make High Frame rate movies, you shouldn’t overlook the many new focusing aides inside the Sony RX100 VII like Eye AF and focus peaking and A9 quality autofocus.
I hope you found my advanced manual for the RX100 VII with tips and tricks useful. If you have any questions, I’d love to hear from you in the comment section below.


Many thanks for the effort you have put into creating this comprehensive description.
Thanks, Steve, I hope it helps!
Hi,
Thank you for an excellent guide to my RX100 Vii. I am having a problem though with HDR. The camera only shoots 2 images (not the supposed 3) when in Auto HDR. What setting am I missing?
Thanks for any advice.
is there a way for the camera to shoot in AUTO mode and have the camera make all the calls on street shots… i shoot photojournalism and dont want to take my NIKON D850 and lens all the time but id like to be able to just turn on the camera and have it ready to shoot. i.e. must i go through all these menus??? thanks so much. GL
Hu Glenn, if you turn to mode dial to Auto, you have this setting.
Love my RX100 VII with one exception. If I’m shooting something indoors, in a room with nice window view, I don’t want the windows glared out by the flash. With other cameras I can set it spot metering pointed out the window then lock the exposure. Then I add he flash and shoot focusing on whatever I’m shooting inside the room. I got the exposure lock figured out but the flash isn’t powerful enough. It won’t let me choose Auto if I’m M, S, A or P, so I can only use Fill. I tried adjusting the flash compensation thing but it doesn’t do anything when the flash is set to fill and the inside is too dark. What am I doing wrong? Is there some way to be able to manually control/adjust the flash?
For indoor you can bounce the flash bij pulling it backwards. Looks great most of the time. That was already possible with the RX100.
Great work, thanks a lot!
Re RX100 vii
I can’t find Zebra listed anywhere in the menus…
I can’t find Custom key setting choices anywhere in the menus…
zebra: MENU → (Camera Settings2) → [Zebra Setting] → desired setting.
Custom Key: MENU → (Camera Settings2) → [Custom Key].
Best, Wim