
Panasonic Lumix G9 settings, tips and tricks
[smartpay_product id=”12″]
Introduction
Welcome to my Panasonic G9 advanced manual with tips and tricks. This guide starts from your Menu settings and goes through all aspects of this interesting camera. I know it is a lot of information, but you’ll get the hang of it soon, I promise.
As opposed the the video centric Panasonic GH5, the G9 is more stills oriented camera, but it can still shoot 4K/60p video and offers both headphone and microphone jacks.
Key Features
- 20.3MP Live MOS sensor with no AA filter (same as GH5)
- 3.68M-dot electronic viewfinder w/ 0.83x equivalent magnification
- 1.04M-dot 3″ articulating touchscreen display
- 5-axis in-body image stabilization with Dual I.S. 2 (CIPA rated 6.5 stops)
- 20 fps burst w/continuous AF using the e-shutter (for ~50 frames)
- 9 fps burst w/continuous AF using mechanical shutter (for 600 frames)
- 80MP Raw and/or JPEG files using High-Resolution mode
- 4K/60p UHD video capture
- Magnesium body designed to be dust/weather-sealed
- Dual UHS-II card slots supporting new high-speed ‘V’-rated cards
- Assortment of 4K and 6K Photo modes and in-camera focus stacking
- USB charge and power capability
- Top plate LCD
- AF joystick
- Wi-Fi Bluetooth
I’ll be going over the entire Menu structure in this post, and giving you tips, pointers, and tricks along the way.
Diving into the MENU system
When you switch on your Panasonic Lumix G9 you’ll be asked to enter a date, time and timezone. This setting is necessary, as all images captured will have a timestamp, making it easy to find your favorite pictures in the future.
After this is setup, press the MENU button. You’ll see a range of icons and pages.
We’ll start at page 1 of the camera Icon (camera settings)
MENU → Camera Icon → page 1 of 5 (also called the Rec menu)
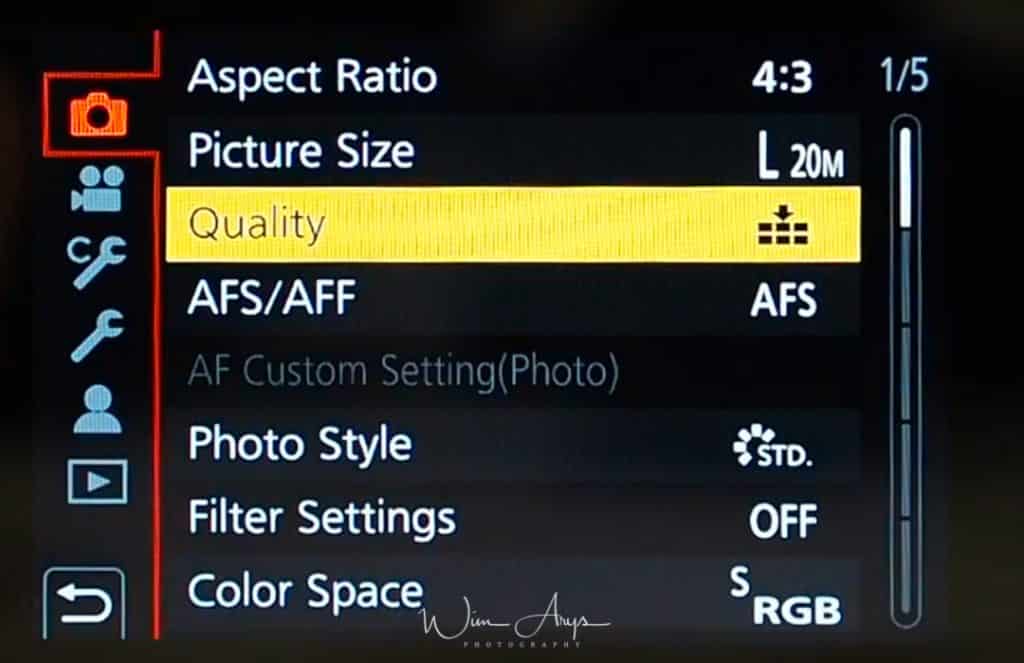
Aspect Ratio
You can change the aspect ratio of your photos here. Changing the aspect ratio can be used as a way to boost your creativity, for instance landscapes often look great with a 16:9 ratio, or for sharing on Instagram, a 1:1 crop might suit you better.
An M43 (Micro Four-thirds) camera has a native aspect ratio of (not surprisingly) 4:3. You should realise that changing the aspect ratio to anything else than this will actually crop the sensor, meaning that you’ll lose pixels. You should look at it as re-framing your image (like you can do in Lightroom or other photo editors) inside the camera. Jpeg’s will be stored with the chosen ratio, but RAW images (although previewed with the chosen ratio), will still have the full information of the 4:3 sensor retained.
These are the aspect ratios available:
- 4:3: native sensor ratio
- 3:2: the ratio used in full frame cameras
- 16:9: for a wider looking view
- 1:1: Square aspect ratio, mostly used for social sharing
Picture Size
Picture Size sets the number of pixels for Jpeg (nor RAW). The higher the numbers of pixels, the more detail your pictures will have.
- When the aspect ratio is set to 4:3, you use all the 20 MP of the sensor for a maximum image size of 5184 x 3888
- When the aspect ratio is 16:9, you only use a wide crop of 14.5 MP of the sensor for a maximum image size of 5184 x 2920.
- When the aspect ratio is 3:2 you use 17 MP of the sensor and have an 5184 x 3456 image size.
- When the aspect ratio is 1:1, you use 14,5 MP of the sensor for an 3888 x 3888 image size.
The Panasonic G9 also has a digital teleconverter option, allowing you to zoom in by a factor of times 2 or times 4. This can be a handy feature if you don’t shoot RAW (see next item for more info). Thanks to in-body digital processing, the resulting Jpegs actually retain a larger image size than what you’d expect of de facto cropping the sensor by a factor 2 or 4. I would however only recommend using this feature if you’re a die hard jpeg shooter, since using RAW files and developing your images in Lightroom or another app will almost always get you better results.
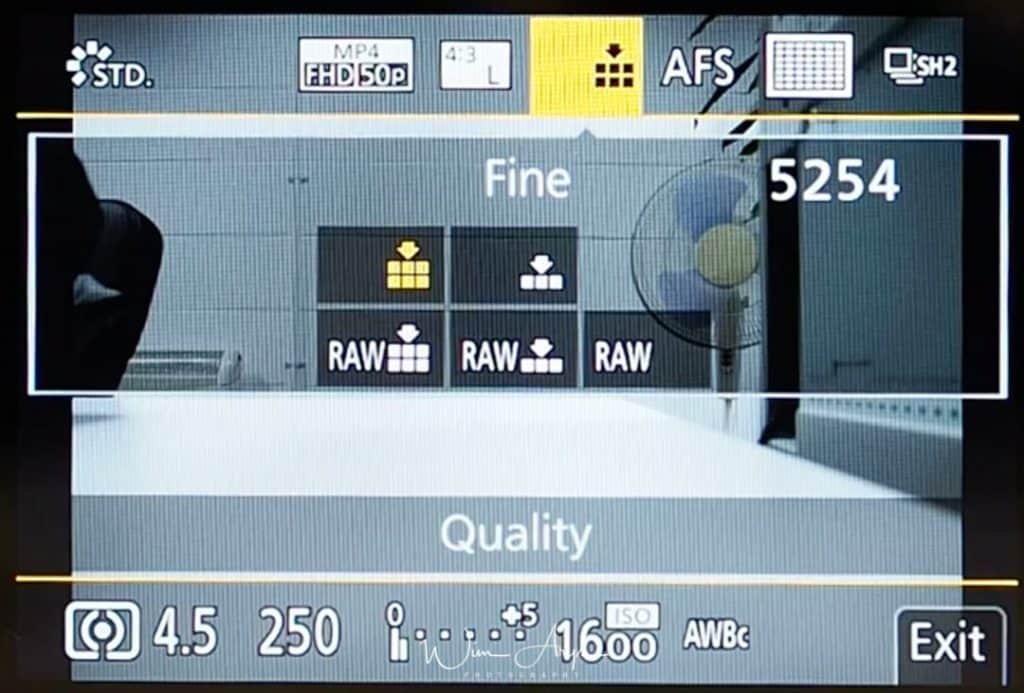
Quality
Probably the most important setting is Quality. You can select either Jpeg, where the RAW data from the sensor is processed by an in-camera algorithm to produce a viewable image, or save your images in this RAW format. RAW retains all the data of the sensor, and is meant to be edited afterwards in a desktop application like Lightroom or Luminar. Saving as RAW means that you have much more creative freedom afterwards to push shadows or pull highlights, sharpen and enhance your image in any way you please. A Jpeg retains only a fraction of this information, according to the algorithm inside the camera which might or might not suit your style and/or needs.
Hence, my recommendation is always to shoot RAW or RAW Jpeg. This does mean larger files, but SD cards are inexpensive compared to your beautiful new Lumix. But some photographers prefer to shoot in Jpeg only because they are for instance not interested in post-processing images. In this case, I would set the Jpeg to the highest quality setting.
If you only shoot in RAW, the image on the rear screen when reviewing the images are of a very low quality. When you import to the computer they are fine but it might be better to shoot both RAW and JPEG.
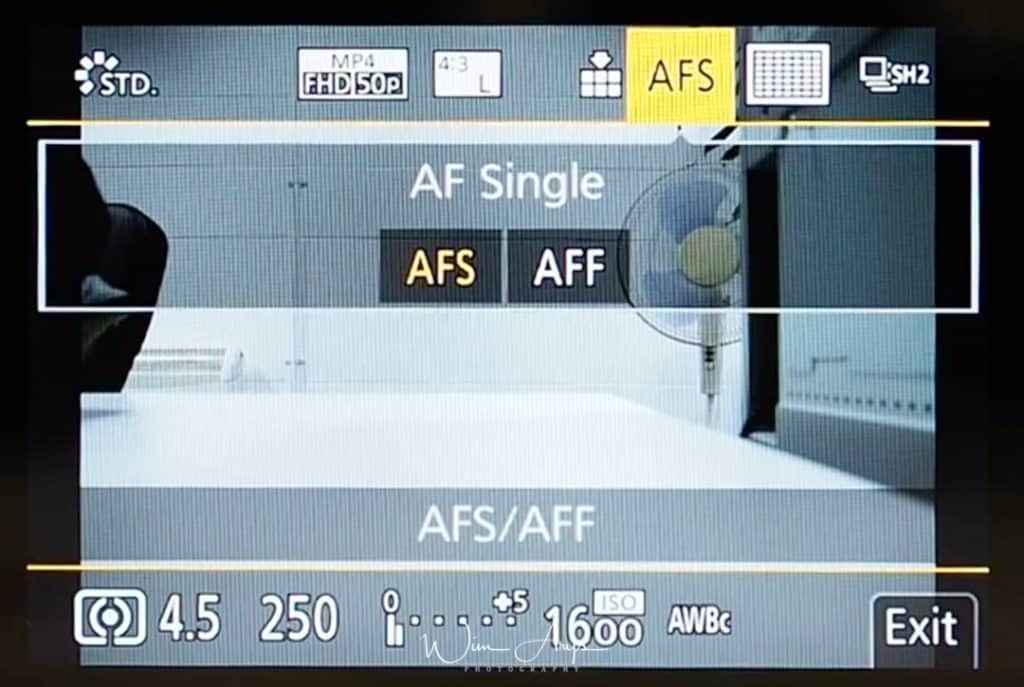
AFS/AFF
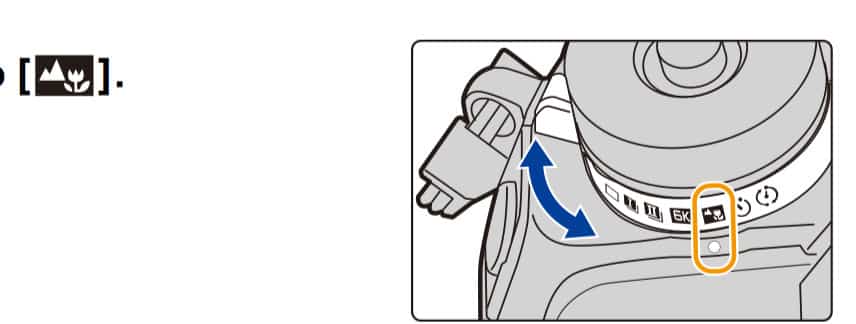
AFS is an abbreviation of Auto Focus Single and AFF is an abbreviation of Auto Focus Flexible. In AFS, the focus stays locked while the shutter button is pressed halfway and in AFF focus is continuously readjusted according to the movement of the subject. See AFF as a function between Single AF and Continuous AF.
This can easily be changed by using the dial on the right of the ECF too:
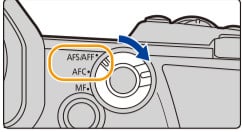
The AFC function below AFS/AFF continuously changes focus according to the movement of your subject.
Some more info on these modes for clarification:
- AFS will find focus and stay focused at that distance until you take a photo or release the shutter button. This is handy if you want to focus and then recompose your shot for instance.
- AFF will do the same unless it detects subject movement, at which time it will temporarily switch to AFC operation in order to re-focus.
- AFC won’t start to seek focus until you half-press the shutter, and will continually evaluate subject movement and change focus as needed.
- With AFS you can can lock focus on a particular point, then swing the camera to get the right framing; with AFC, it will not lock focus, but will keep re-focusing. That’s why Pinpoint focusing can’t be used with AFC.
AF Custom Setting (Photo)
You can customise the operation settings of Auto Focus for stills here. These presets apply only when you’re in AFF or AFC.
There are 4 Sets (or presets) to choose from:
- Set 1: This is a basic general purpose setting.
- Set 2: This is a setting suited for scenes where the subject moves in only one direction at a constant speed.
- Set 3: This is a setting suited for scenes where the subject moves in random directions and obstacles are likely to appear in the image.
- Set 4: This is a setting suited for scenes where the speed of the subject changes significantly.
There are three areas in which these presets can tweaked according to your preferences:
- AF Sensitivity: increase or decrease how sensitive the autofocus readjustment reacts to movement of your subject.
- AF Area Sensitivity: increase or decrease how sensitive the autofocus readjustment reacts to your subject moving out of the selected AF area.
- Moving Object prediction: For still subjects, you can prevent defocusing caused by a sudden movement of the subject.
Photo Style
This applies only to Jpeg images, and the RAW preview. You can select a colour effect here.
- Standard: standard Panasonic colour and contrast rendering.
- Vivid: Brilliant effect with high saturation and contrast.
- Natural: Soft effect with low contrast.
- Monochrome: Monochrome (black and white)effect with no color shades.
- L.Monochrome: Black-and-white effect with rich gradation and crisp black accents.
- Scenery: An effect appropriate for sceneries with vivid blue skies and greens.
- Portrait: An effect appropriate for portraits with a healthy and beautiful skin tone.
- Custom 1-4: Make your own presets for easy recall when needed.
- Cinelike D: Gives priority to the dynamic range by using a gamma curve designed to create film-like images. Suited for editing.
- Cinelike V: Gives priority to the contrast by using a gamma curve designed to create film-like images.
As mentioned earlier, it’s possible to create your own Photo Style or customise the preset styles. This is basically a way of hacking into the Jpeg engine and adjusting it to your own style and preferences. There are 6 areas that you can alter.
- Contrast: add or decrease the difference between the brightness and the darkness in the picture.
- Sharpness: add a degree of sharpness or make your images softer.
- Noise Reduction: add noise reduction for high ISO shooting.
- Saturation: add more vividness to the colours. Or remove some.
- Color Tone: add a blue, orange, red or green filter to your image.
Filter Settings
The filter Settings go a step further than merely a photo style. These include artistic effects like Low Key, Sepia, Cross Process and retro stylings. You can turn them ON or OFF here, select the effect you want to use and change the settings by using the touch screen. You can also set your camera up to shoot one with and one without an image effect simultaneously.
If you’re wondering how you get to Creative Control mode, you need to set the mode dial to the paint palette.
And simply press up and down to select the image effects. You can also display the selection screen by touching the Recording Mode icon in recording screen.
These are all the image effects available:
- Expressive
- High Key
- Monochrome
- Silky Monochrome
- Cross Process
- Bleach Bypass
- Fantasy
- Sunshine: you can select the position and size of the light source here.
- Retro
- Low Key
- Dynamic Monochrome
- Impressive Art
- Toy Effect
- Miniature Effect: you can select the portion of your image that is in focus here (and where the blur effect won’t happen)
- Star Filter
- Old Days
- Sepia
- Rough Monochrome
- High Dynamic
- Toy Pop
- Soft Focus
- One Point Color: you can select the color to leave in here by using a color picker.
Color Space
Select either sRGB or Adobe RGB here. Adobe RGB has a greater range of reproducible colors than sRGB, so it might be worth looking into this color space if you print to paper a lot. But remember that you’ll also need a monitor capable of reproducing the larger color range too. And this can often lead to problems when converting to sRGB or editing your images in external applications. Because of all this, I have it set to sRGB.
MENU → Camera Icon → page 2 of 5 (also called the Rec menu)
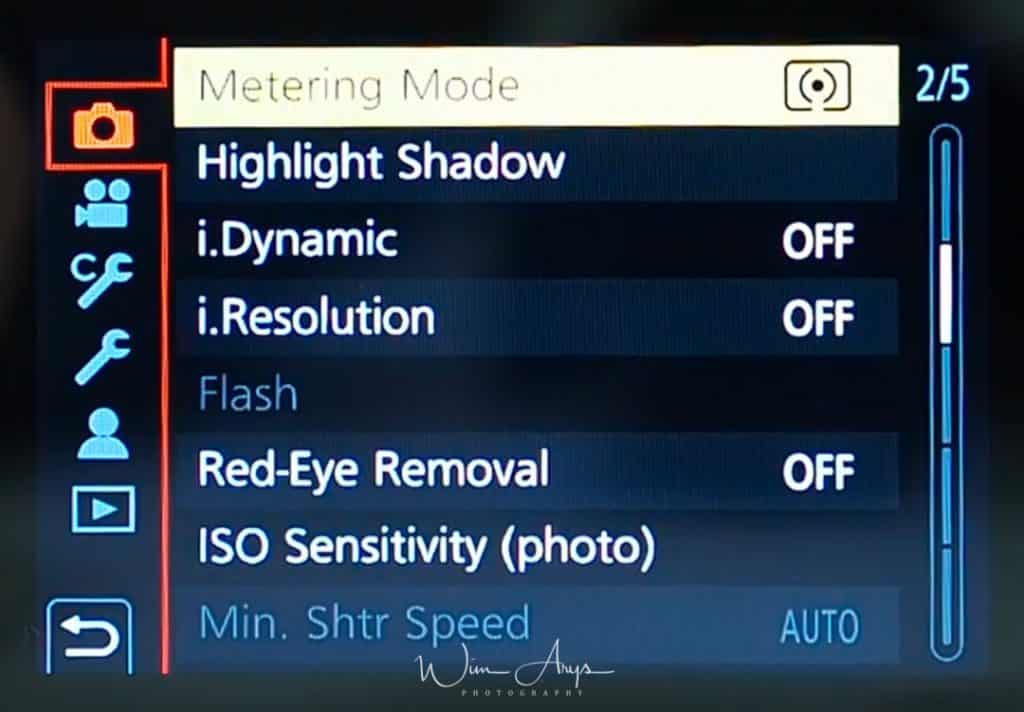
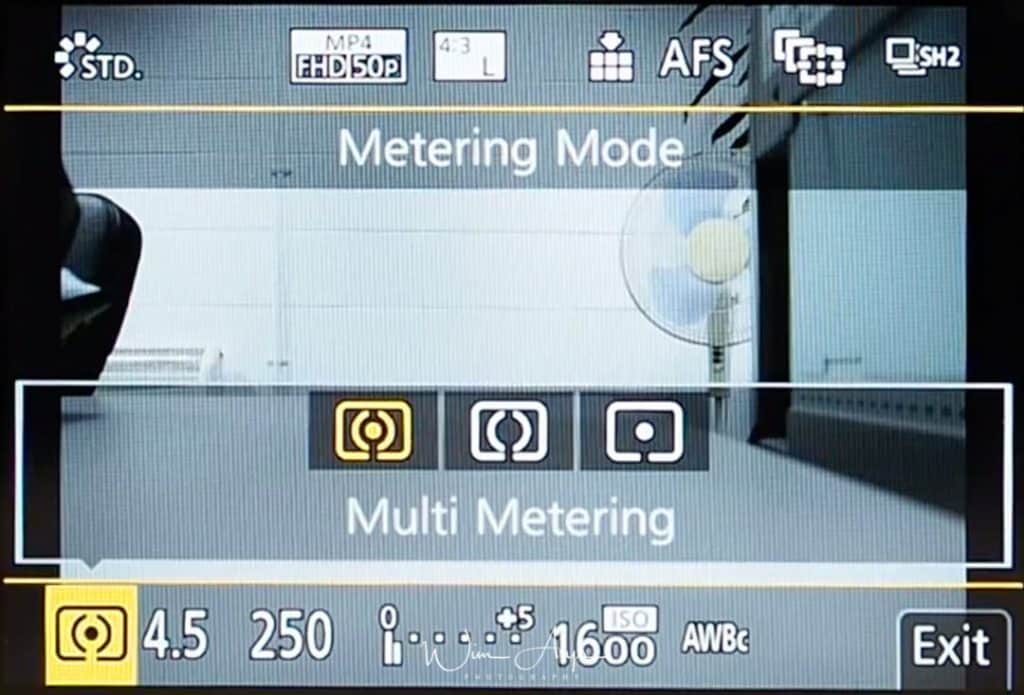
Metering Mode
You can change how the light is metered here, and hence how a correct exposure is calculated by the camera. If you feel that the camera takes over- or underexposed images according to your personal preferences, it might be worth changing the metering mode.
Implementation of this is quite basic in this camera, you have a total of only 3 methods to choose from:
- Multiple: This is the method in which the camera measures the most suitable exposure by judging the allocation of brightness on the whole screen automatically.
- Center weighted: This is the method used to focus on the subject on the center of the screen and measure the whole screen evenly.
- Spot: This is the method to measure the subject in the spot metering target.
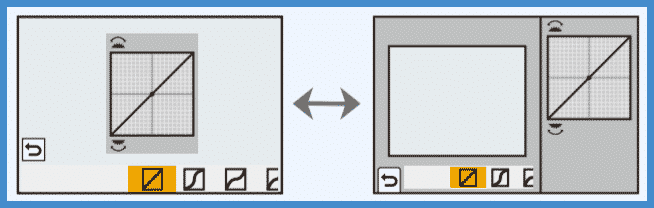
Highlight Shadow
This allows you to lighten the shadows and darkens the highlights in your image (or video). So this is a method of creating balance in your image if you feel like the highlights are too strong or the shadows too dark. You have 4 presets available, and you can also make 3 custom presets yourself:
- Standard: no adjustments is set.
- Raise the contrast: Bright areas are brightened, and dark areas are darkened.
- Lower the contrast: Bright areas are darkened, and dark areas are brightened.
- Brighten dark areas: Dark areas are brightened.
- Custom: make your own preset.
This is how to adjust the parameters for Custom presets:
- Rotate the front/rear dial to adjust the brightness of bright/dark portions.
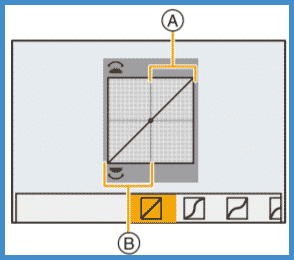 A – Bright portion
B – Dark portion- The rear dial is for adjusting dark areas, and the front dial is for adjusting bright areas.
- To register a preferred setting, press ▲, and select the destination where the custom setting will be registered to [Custom1]/[Custom2]/[Custom3].
- Adjustments can also be made by dragging the graph.
- Press [MENU/SET].
- The screen display can be switched by pressing [DISP.] on the brightness adjustment screen.
- Turning off this unit will return the setting adjusted with
 /
/  /
/  /
/  back to the default setting.
 - When [Photo Style] is set to [Like709] or [V-Log L], setting is fixed to [ ] (Standard).
- The screen display can be switched by pressing [DISP.] on the brightness adjustment screen.
i. Dynamic
This setting will change contrast and exposure when there is a big difference from the darkest area to the brightest are in your image. What really happens is that the camera adjusts the exposure in order to capture more details in the highlights. You can choose between High, Standard, Low or Off.
This naturally causes an under-exposure in the shadow areas. But inside the jpeg engine, the camera will compensate for this by boosting shadows. The downside here is that this will obviously lead to more noise in the boosted regions, but because this is done with data directly coming from the sensor, it can be quite useful if you are a jpeg shooter.
There is also an impact on RAW images, because the exposure will be underexposed.
i. Resolution
Another jpeg only functionality, i-Resolution is a form of sharpening. High, Standard, Low and Off are selectable, and you should see these like the threshold for sharpening in an application like Lightroom. Many photographers discard these intelligent functions, and if you shoot RAW only, it’s not that important for you (except i Dynamic which can change your exposure plus or minus 1/3 stop). But if you shoot jpeg only, you should set it to Low at least, since most of the time RAW files would be sharpened in post processing too.
Red-Eye Removal
If you use a flash when using Red-Eye Reduction, the camera will automatically detect red-eye and corrects the picture.
ISO Sensitivity
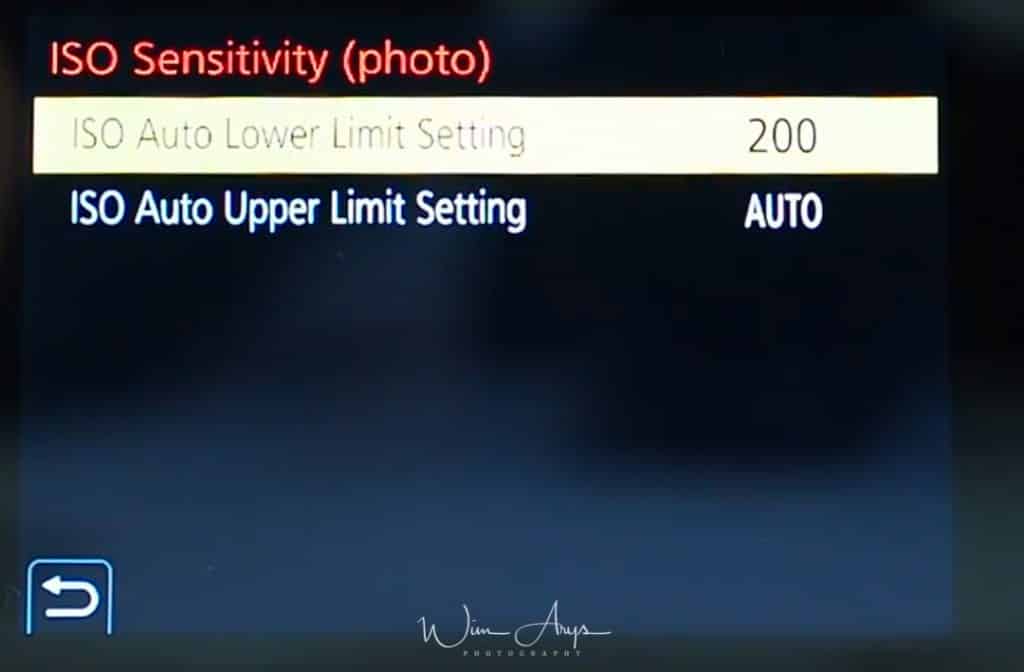
Sets the upper and lower limits of the ISO sensitivity when you use Auto ISO or i ISO. Lower Limit should be set to 200 and upper limit to 3200, this is the range where you’ll get usable images without too much noise.
Min. Shtr Speed
A very important setting if you feel that the Panasonic G9 is producing blurry images for your shooting style. Birds in flight, for instance, will need a faster shutter speed than many other types of photography.
Since most of the time, you’ll need to raise ISO to gain faster shutter speeds, Panasonic (and many other camera producers) have made this option available. You can set it to Auto, or choose a minimum shutter speed up to 1/32000. The latter is a bit high, but as I mentioned, if you shoot action sports or for certain types of nature photography, a minimum shutter speed of 1/1000 or 1/2000 should be set. At these speeds, you can begin to “freeze” action.
MENU → Camera Icon → page 3 of 5 (also called the Rec menu)
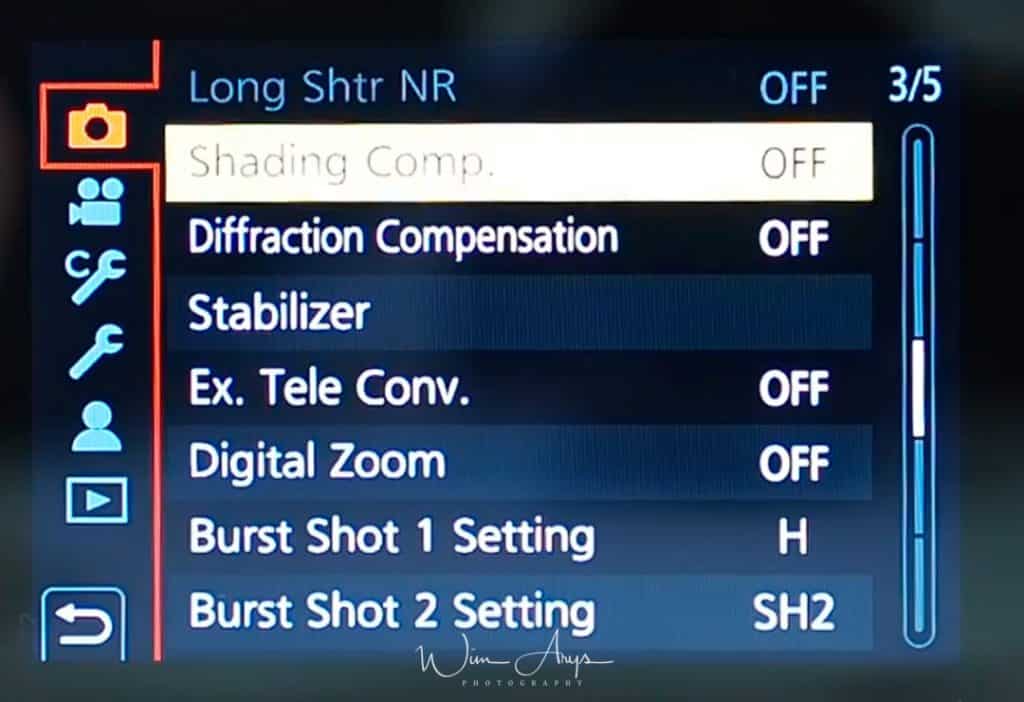
Long Shtr NR
The camera will automatically apply noise reduction to long exposures. This applies to both Jpeg and RAW files. A black frame is taken after your initial shot to measure the noise present. Since many environmental factors (like temperature and location) have an effect on the amount of noise that you’ll see, this is the best way to determine what is noise in your frame. This data is then subtracted from your image for a noise-free (more-or-less) result.
Shading Comp.
All lenses have a lens profile that registers both distortion and shading in the corners at all apertures. These lens profiles can be applied in-camera to counter unwanted vignetting in your images. Especially important for jpeg shooters to turn this on. RAW shooters can apply these corrections later on (and with better results) in a desktop application like DXO optics Pro.
Diffraction Compensation
When you stop down your lens to a smaller aperture (normally from f/11 to f/22), a phenomenon called diffraction causes a loss in sharpness. It happens because light begins to disperse when passing through a small opening. When diffraction compensation is set to ON, the Panasonic G9 will add sharpening to your image to try and counter this phenomenon. You should use it if you shoot jpeg.
Image Stabilizer
The Panasonic Lumix G9 has a stabilised sensor. The sensor inside the camera is suspended on a magnetic field and can compensate for movement like the minute shakes of your hands or any other kind of movement. There are also many lenses available with an optical image stabilisation unit, that physically move glass elements around inside the lens to do the same. Both systems have their pros and cons, and it is generally accepted that a stabilised sensor works better for wide angle lenses (below 40mm) whilst optical lens stabilisation is more efficient for the tele range. It is also possible to use both systems at the same time (called Dual I.S.), where you’ll take advantage of the best of both worlds.
It’s also possible to use the in-body sensor stabilisation with older, manual primes that don’t relay EXIF information (like most importantly focal length in this case). You’ll need to manually set the focal length in the Focal length Set function to get an optimal performance.
Ex. Tele Conv.
You can digitally enlarge pictures without too much quality deterioration with this function. Only for jpeg use, you can extend the range of your lens by times 1.4 or 1.6 using this function.
Digital Zoom
Digital zoom takes this a step further, allowing you to zoom in up to 4 times for jpeg’s. I would not recommend either of these functions, as it is better to shoot RAW in this case and crop in processing for the best possible quality.
Burst Shot 1 Setting
The drive mode dial has two options for burst shooting. Burst shooting means that you’ll shoot continuously when you press the shutter button. You can apply different Burst Mode settings to Burst Shot 1 and and Burst Shot 2 Setting in these menus.
You’ll see SH (for super high burst rates), SH pre (which actually goes back a few seconds in time and saves these images too). These SH modes are only available with the electronic shutter. Version 2 is always faster that version 1.
Then we have High, Medium and Low which work with the Mechanical shutter too. The actual burst rate will be higher if you shoot Jpeg only.
Burst Shot 2 Setting
You can assign any of these presets to 1 or 2 on the mode dial of thePanasonic G9.
MENU → Camera Icon → page 4 of 5 (also called the Rec menu)
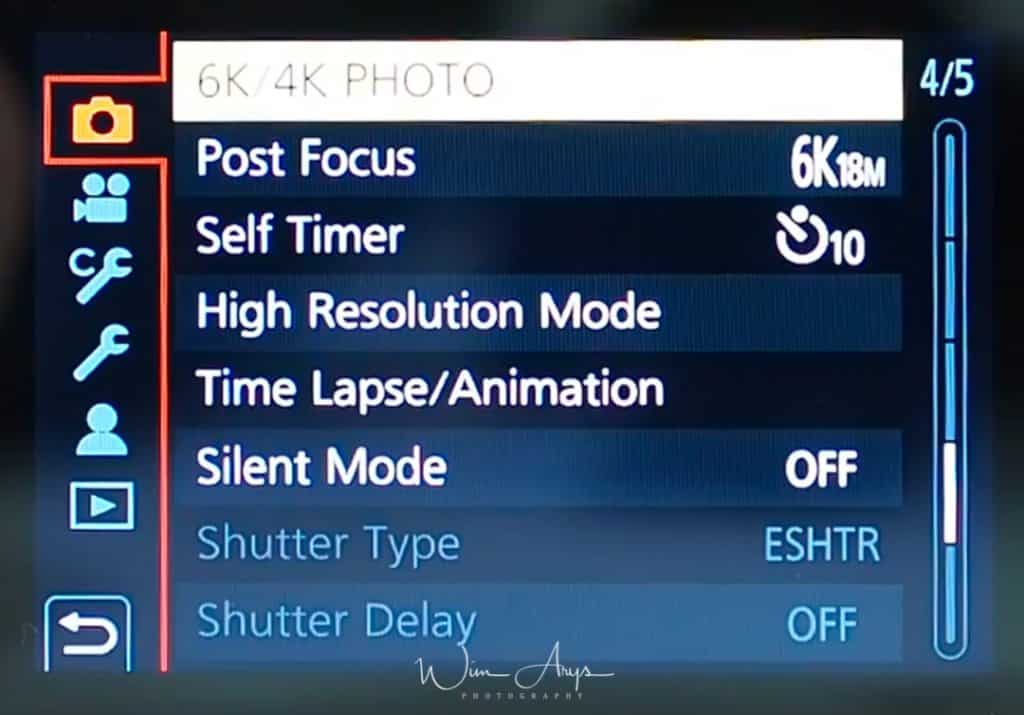
6K/4K Photo
6K/4K photo mode is designed to help you to capture fleeting moments by letting you shoot at an incredible 30fps (60fps for 4K mode). Continuous autofocus mode is automatically activated and it draws on 4K/6K video technology to shoot 18 MP image at this fast frame rate. You’re basically recording video where you can extract the frames in-camera.
There are three 6K Photo Modes, 6K Burst, 6K Burst (S/S) and 6K Pre-Burst. These modes determine at how and when the footage will be recorded.
- In 6K Burst mode the camera shoots 6K footage for as long as you hold down the shutter release button.
- In 6K Burst (S/S), S/S stands for Start/Stop and recording is started and ended with a press of the shutter release.
- 6K Pre-Burst mode is useful for short bursts of action because it only records for 2 seconds. However, the camera starts scanning the moment it’s active and it records the 30 images from the 1 second prior to you pressing the shutter button as well as the 30 from the 1 second after you pressed it.
4K is the same, except it allows you to go up to 60 frames per second.
Extracting 18Mp stills from the GH5’s 6K Photo Mode footage is pretty easy as follows:
- Press the play button to located the files. Clips recorded in 6K Photo Mode are marked with the 6K Photo icon to make the easy to identify.
Once you’ve found the clip you want, either tap the 6K Photo Icon on-screen or the Up navigation key. - If you have a long clip with fleeting moments of action you may like to use the slide bar at the top to quickly scroll to an interesting bit of footage. Alternatively, there’s a playback option (button Fn1) that you can use to play and pause the movie.
- Once you’ve found the area you’re interested in, tap the Frame View Icon to see a scrollable stack of frames, just swipe right and left to locate the best shots.
- When you find an image you like, tap the Menu/Set button or 6K Icon to save the image. Images are saved as jpegs.
it’s possible to save all the frames from 5 second sections of your 6K movie. To do this:
- Tap the Menu button and scroll down to Playback (the 6th tab), then scroll to the second page of options and select 6K/4K PHOTO Bulk Saving.
- Then swipe on the screen until you find the clip that you want to extract stills from.
- Now use the same on-screen movie navigation controls as you used before to find the first frame of the 5 seconds that you want to pull the stills from and tap the 6K Photo icon to save it and the image from the next 5 seconds.
Post Focus
Post focus means controlling your focus point afterwards. This might sound like a scifi concept, but it’s quite simple if you know what is really happening. The Panasonic G9 performs a burst of shots ( same picture quality and system as the fore-mentioned 6K/4K photo recording) while automatically shifting the focus to different areas. After the recording, you can select your desired focus point from the list of 30(6K) or 60(4K) per second captures. It works best with scenes with little to no movement, as having someone move around would of course add another degree of shifting focus points to the mix.
In the same way, focus stacking can be achieved. Focus stacking is a method of making an images that is sharp across the frame. By recording the same scene multiple times with different focus points and later on combining all these images, you can get an image that is sharp across the frame. This is a technique often used in macro photography where your depth of field is very shallow (only a small part, where focus lies, is sharp) because of the nature of shooting at close distances. But it can also be used for other types of photography like landscapes.
It’s recommended to use a very fast SD card in order to achieve these high frame rates by the way.
You’ll need to set your drive mode dial to this setting:
Now press the shutter button halfway so the Lumix can detect the possible focus areas, and then fully press the shooter to record the scene in burst mode (which is actually video as I mentioned earlier).
For post focus:
Select your series of images you just captured, there is an icon that reassures you this is a batch of images to avoid any confusion:
Once selected, all you need to do is use the touch screen to select the focus point you desire. And now touch this icon to save:
The Focus stacking function can be performed in-camera. This methods also starts with selecting the series of images you just captured. Then you press the FN1 button and you’ll be in the focus stacking menu. There are two types of merging, Auto and range. Auto automatically selects the best images to merge into a more sharp composite image, and Range allows you to select a specified focus range with your finger on the touch screen. When you have done this, touch the icon on the bottom right of the screen and the Lumix G9 will save the resulting composite image with the EXIF data from the closest focussed image.
Self Timer
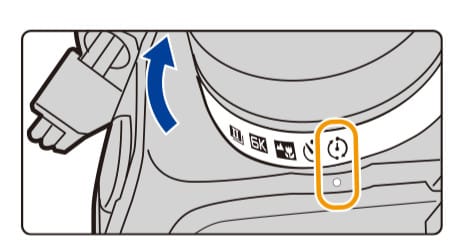
The self timer function is self explanatory. If you actually want to use this function, you’ll need to set the drive mode to:
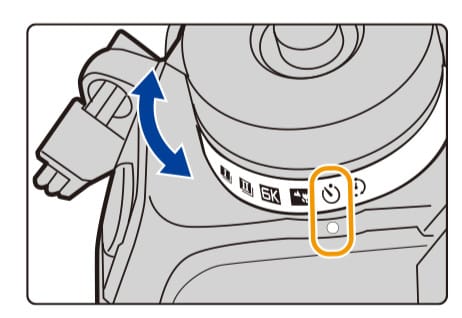
In this menu, you can select what type of self timer you’d like to use: a 10 second delay and one shot, 10 seconds with 3 shots with 2 second intervals or a 2 second delay, all after pressing the shutter.
High Resolution Mode
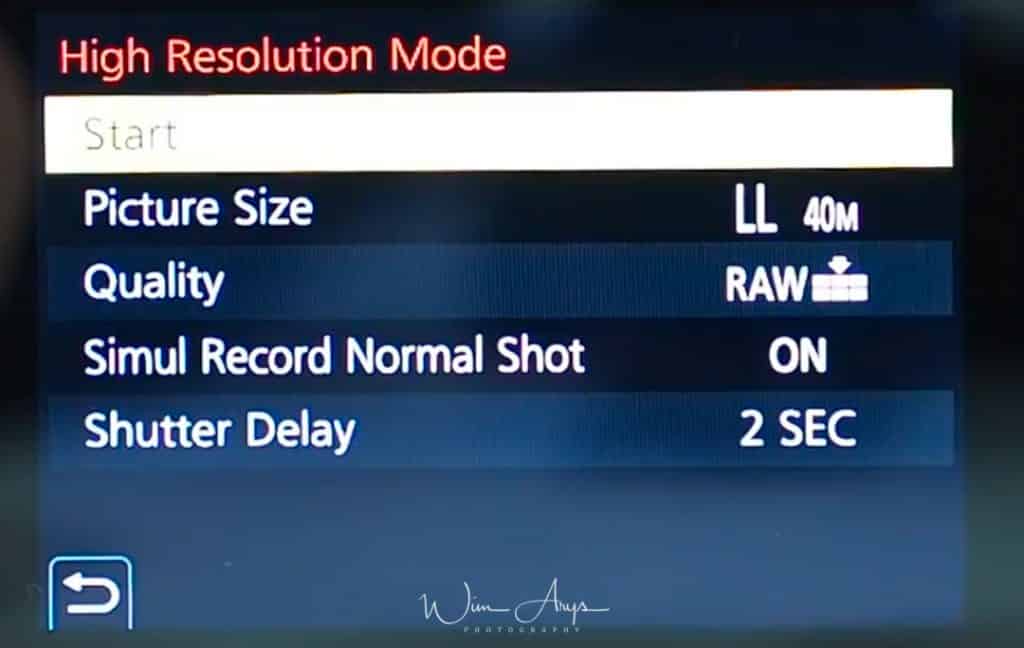
Ah yes, High Resolution Mode. Probably one of the most talked about new camera features of the last few years. You’ll definitely try it once, but you’ll be hard-pressed to find a real use for it in day to day shooting. What happens in High resolution mode is that the camera uses the stabilised sensor to make two exposures of the same scene with a one pixel difference (effectively moving the sensor by a pixel in the second capture). This doubles the resolution of your output file. This will really only work in still scenes where there is absolutely no movement, and it is best to use a tripod to avoid camera shake.
It is a quite simple process:
- Press up/down to select Start, and press MENU/SET. If there is any camera shake, the High-Res Mode icon will flash, telling you it is not possible to make a high res image.
- Decide on the composition, and perform recording. The screen will go dark during recording. The recording state indicator (red) will flash. Do not move the camera while the indicator is flashing. Recording will finish automatically. When the recording has finished, the camera will combine the pictures, so it will not be able to perform the next recording for a while.
- Press Fn2 to end High-Res Mode.
Time Lapse/Animation
You can take a sequential number of images with relatively long delays in between to achieve a time-lapse movie or stop motion/animation. You’ll need to turn the drive mode dial to Time Lapse for this:
You can choose between Time Lapse or Animation in this menu.
Time Lapse:
- Switch to Time Lapse Shot if it is not selected.
- change start time and shooting interval according to your preferences.
- press te shutter half way to exit the menu.
- press the shutter to start your time-lapse.
Stop motion/Animation
- Switch to Stop Motion Animation
- Change auto shooting and shooting interval according to your preferences
- press te shutter half way to exit the menu.
- press the shutter to start your time-lapse.
- move the subject per frame
- press the folder menu to end the recording
Silent Mode
Disables operational sounds and output of light at once for completely silent stealth mode shooting with the Panasonic G9.
Shutter Type
You can use either the mechanical or electronic shutter, or 50/50, or let the Panasonic G9 decide what is most appropriate. The electronic shutter has a maximum speed of 1/32000 sec, the mechanical shutter can go up to 1/8000 second and if you use the Electronic first curtain shutter, you can only go up to 1/2000 second.
- AUTO: Switches the shutter type automatically depending on the recording condition and shutter speed.
- MSHTR: Takes pictures in Mechanical Shutter Mode.
- EFC: Takes pictures in Electronic Front Curtain Mode.
- ESHTR: Takes pictures in Electronic Shutter Mode.
Remember that in artificial light or when using a flash, you best use the mechanical shutter only to avoid artefacts.
Shutter Delay
To reduce the influence of hand shake or shutter vibration, shutter is released after the specified time has passed. 1, 2, 4 or 8 second delay are selectable. Keep your hands steady and don’t use this delay, else you might miss that critical moment.
MENU → Camera Icon → page 5 of 5 (also called the Rec menu)
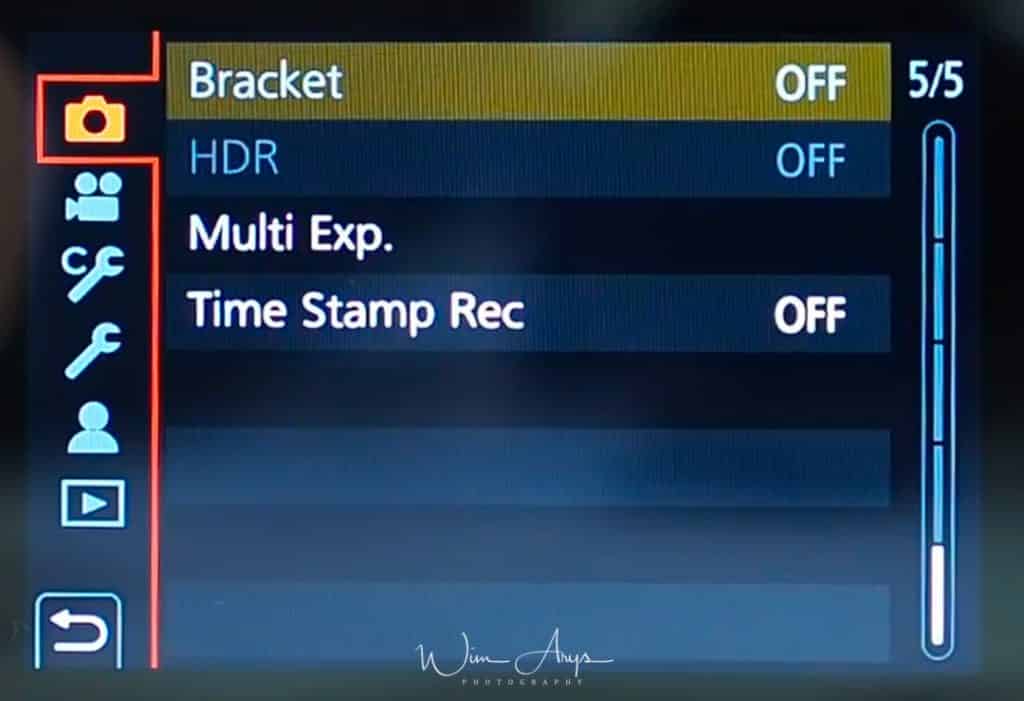 Bracket
The Bracket function allows you to take multiple pictures while automatically adjusting a setting like exposure or aperture by pressing the shutter button.
Possible bracket types:
- Exposure Bracket: Press the shutter button and the Lumix will sequentially take multiple images with different exposures. You can select the number of pictures to be taken and the exposure range (from 1/3 EV to 1 EV stops difference).
- Aperture Bracket: Press the shutter button and the Lumix will sequentially take multiple images at different apertures. Either select all apertures or a number of shots (3-5) within a selected range.
- Focus Bracket:Press the shutter button and the Panasonic G9 will sequentially take multiple images with different focus positions. You can select the distance between focus positions, the number of exposures and the sequence from far to near or the other way around.
- White Balance Bracket: Press the shutter button and the Lumix G9 will take three pictures with different white balance settings automatically
- White Balance Bracket (color temperature): Press the shutter button once to take three pictures with different White Balance Color Temperature values automatically. You can also set the correction range by touching the up/down slider on the screen.
HDR
You can combine 3 image with different levels of exposure into a single picture a high dynamic range. This way, you can minimise the loss of gradations in bright areas and dark areas when, for example, the contrast between the background and the subject is large.
Two setting are available:
- Dynamic range: either select Auto where the camera will decide what range of exposure is suitable, or manually select plus/minus 1,2 or 3 EV.
- Auto Align: Automatically aligns the resulting images to adjust for movement or not.
Multi Exp.
I multiple exposure is basically laying 2 (or more) images on top of each other. This is different to a HDR or composite shot in the sense that these images should be totally different from each other. It’s a technique the comes from the darkroom photography area where 2 negatives where placed on top of each other to create a totally new image with the two images combined.
How to do this:
- Press up/down to select start and then press Menu/Set.
- Decide on the composition and take the first picture. After this first image, press the shutter halfway down to take the next image.
- Shoot a third or fourth exposure. all these images will add up to make a multiple exposure.
- Press the down arrow to exit or press the shutter button fully down.
- You multiple exposure is finished, and you can view it on the screen.
Time Stamp Rec
A time stamp can be printed on your images with the Panasonic G9, the data will include hour and day. If you decide to do this, remember that it cannot be deleted afterwards .
MENU → Film Camera Icon → page 1 of 4 (also called Motion Picture Menu)
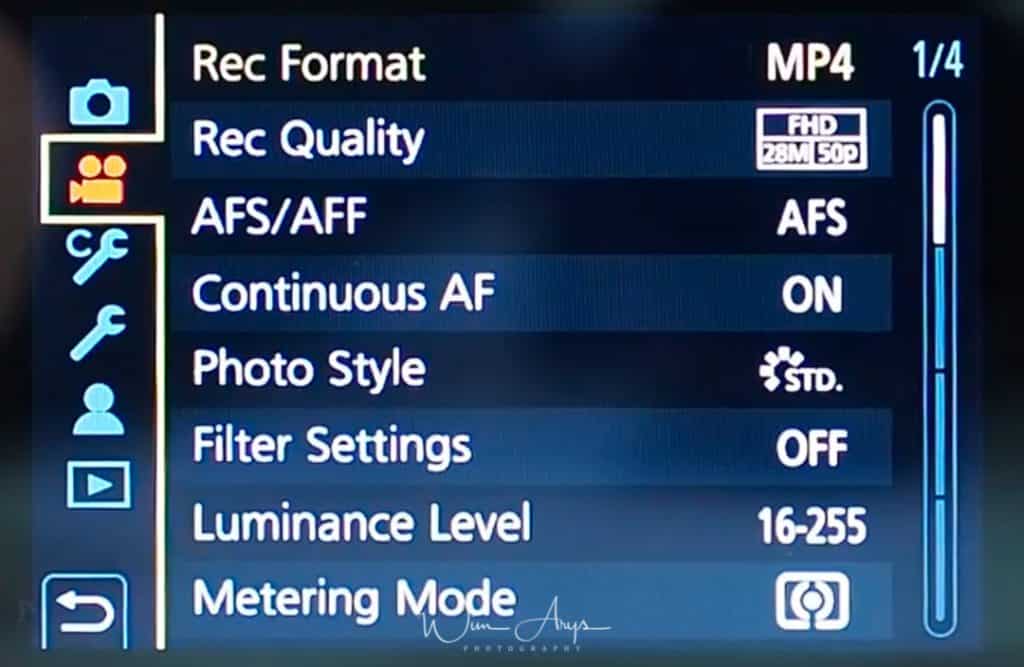
These are all movie related settings, and menu of them are the same as the stills related menu options. YOu can however (obviously) set them up differently for video.
Rec Format
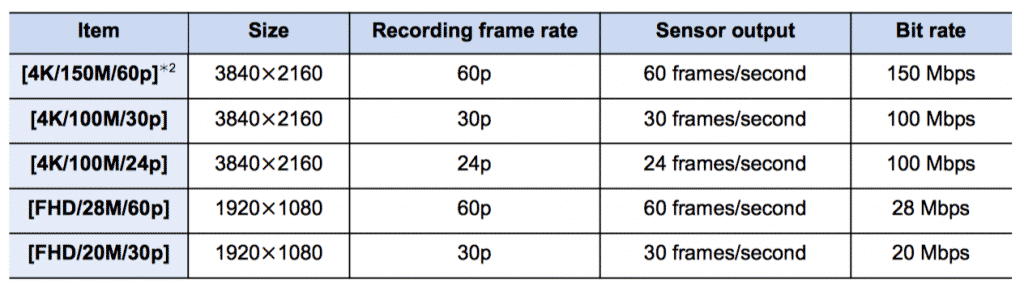
You can either choose to record in AVCHD or MP4 format. The higher the Bit rate value is, the higher the picture quality becomes. Since the camera employs the VBR recording method, the bit rate is changed automatically depending on the subject to record. As a result, the recording time is shortened when a fast-moving subject is recorded. Different frame rates and bitrates are selectable per format in the Rec Quality setting.
Rec Quality
AVCHD
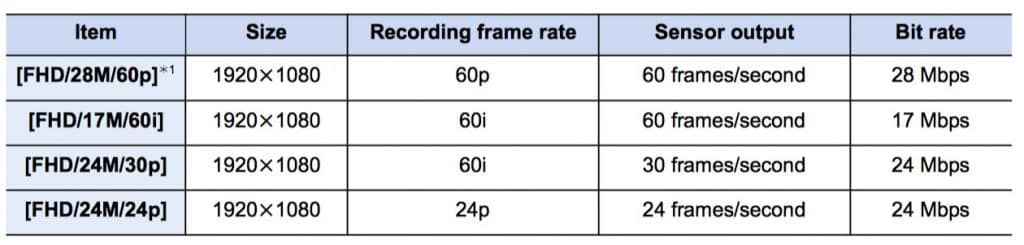
MP4
AFS/AFF
AFS is an abbreviation of Auto Focus Single and AFF is an abbreviation of Auto Focus Flexible. In AFS, the focus stays locked while the shutter button is pressed halfway and in AFF focus is continuously readjusted according to the movement of the subject. See AFF as a function between Single AF and Continuous AF.
This can easily be changed by using the dial on the right of the ECF too:
The AFC function below AFS/AFF continuously changes focus according to the movement of your subject.
Some more info on these modes for clarification:
- AFS will find focus and stay focused at that distance until you take a photo or release the shutter button. This is handy if you want to focus and then recompose your shot for instance.
- AFF will do the same unless it detects subject movement, at which time it will temporarily switch to AFC operation in order to re-focus.
- AFC won’t start to seek focus until you half-press the shutter, and will continually evaluate subject movement and change focus as needed.
- With AFS you can can lock focus on a particular point, then swing the camera to get the right framing; with AFC, it will not lock focus, but will keep re-focusing. That’s why Pinpoint focusing can’t be used with AFC.
Continuous AF
Focusing changes depending on the Focus Mode setting and the Continuous AF setting in this menu.
AFS/AFF/AFC:
- On: The camera automatically keeps focusing on subjects during recording.
- Off: The camera maintains the focus position at the start of recording.
MF
You can use manual focus.
Photo Style
You can select a photo style (like for photography, see above) for video too.
Filter Settings
You can add the image effects (filters) of Creative Control Mode, see the stills info on this above.
Luminance Level
Select the luminance range to match the use of video.
Metering Mode
You can change how the light is metered here, and hence how a correct exposure is calculated by the camera. If you feel that the camera takes over- or underexposed images according to your personal preferences, it might be worth changing the metering mode.
Implementation of this is quite basic in this camera, you have a total of only 3 methods to choose from:
- Multiple: This is the method in which the camera measures the most suitable exposure by judging the allocation of brightness on the whole screen automatically.
- Center weighted: This is the method used to focus on the subject on the center of the screen and measure the whole screen evenly.
- Spot: This is the method to measure the subject in the spot metering target.
MENU → Film Camera Icon → page 2 of 4 (also called Motion Picture Menu)
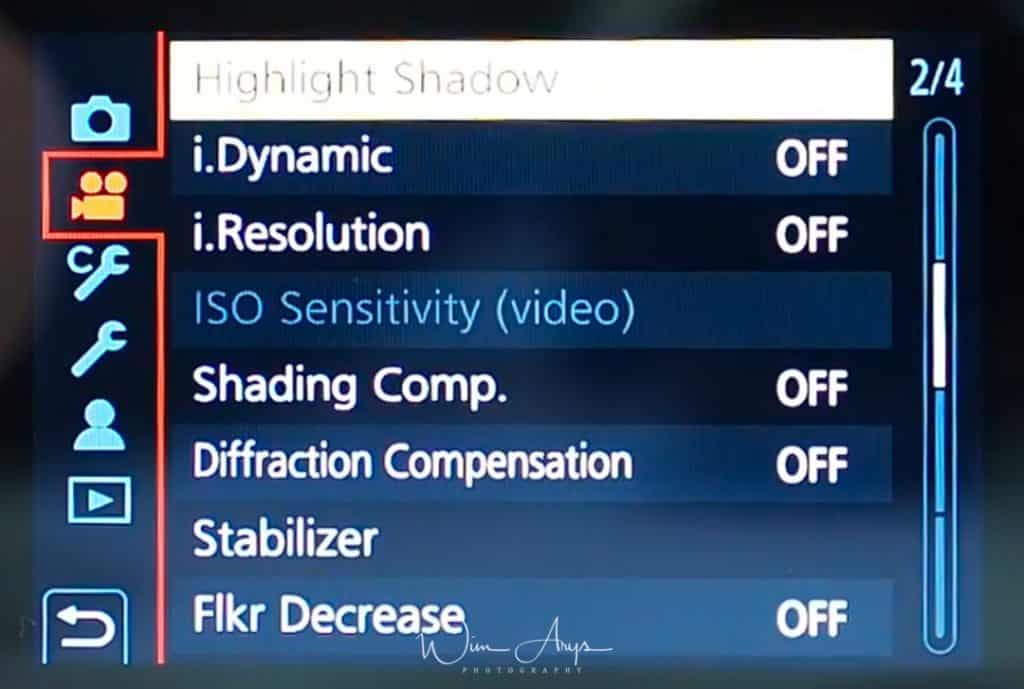
Highlight Shadow
This allows you to lighten the shadows and darkens the highlights in your image (or video). So this is a method of creating balance in your image if you feel like the highlights are too strong or the shadows too dark. You have 4 presets available, and you can also make 3 custom presets yourself:
- Standard: no adjustments is set.
- Raise the contrast: Bright areas are brightened, and dark areas are darkened.
- Lower the contrast: Bright areas are darkened, and dark areas are brightened.
- Brighten dark areas: Dark areas are brightened.
- Custom: make your own preset.
For more info, see the equivalent setting for photos above.
i.Dynamic
This setting will change contrast and exposure when there is a big difference from the darkest area to the brightest are in your image. What really happens is that the camera adjusts the exposure in order to capture more details in the highlights. You can choose between High, Standard, Low or Off.
This naturally causes an under-exposure in the shadow areas. But inside the jpeg engine, the camera will compensate for this by boosting shadows. The downside here is that this will obviously lead to more noise in the boosted regions, but because this is done with data directly coming from the sensor, it can be quite useful.
i.Resolution
i-Resolution is a form of sharpening. High, Standard, Low and Off are selectable, and you should see these like the threshold for sharpening in an application like Lightroom. Many photographers discard these intelligent functions, and if you shoot RAW only, it’s not that important for you (except i Dynamic which can change your exposure plus or minus 1/3 stop).
ISO Sensitivity
Set the upper and lower limits of the ISO sensitivity when it is set to AUTO.
Shading Comp.
All lenses have a lens profile that registers both distortion and shading in the corners at all apertures. These lens profiles can be applied in-camera to counter unwanted vignetting in your images.
Diffraction Compensation
When you stop down your lens to a smaller aperture (normally from f/11 to f/22), a phenomenon called diffraction causes a loss in sharpness. It happens because light begins to disperse when passing through a small opening. When diffraction compensation is set to ON, the Panasonic G9 will add sharpening to your image to try and counter this phenomenon.
Stabilizer
The Panasonic Lumix G9 has a stabilised sensor. The sensor inside the camera is suspended on a magnetic field and can compensate for movement like the minute shakes of your hands or any other kind of movement. There are also many lenses available with an optical image stabilisation unit, that physically move glass elements around inside the lens to do the same. Both systems have their pros and cons, and it is generally accepted that a stabilised sensor works better for wide angle lenses (below 40mm) whilst optical lens stabilisation is more efficient for the tele range. It is also possible to use both systems at the same time (called Dual I.S.), where you’ll take advantage of the best of both worlds.
Flkr Decrease
The shutter speed can be fixed to reduce the flicker or striping in your movies. 1/50,/1/60,1/100 or 1/120 second are available.
MENU → Film Camera Icon → page 3 of 4 (also called Motion Picture Menu)
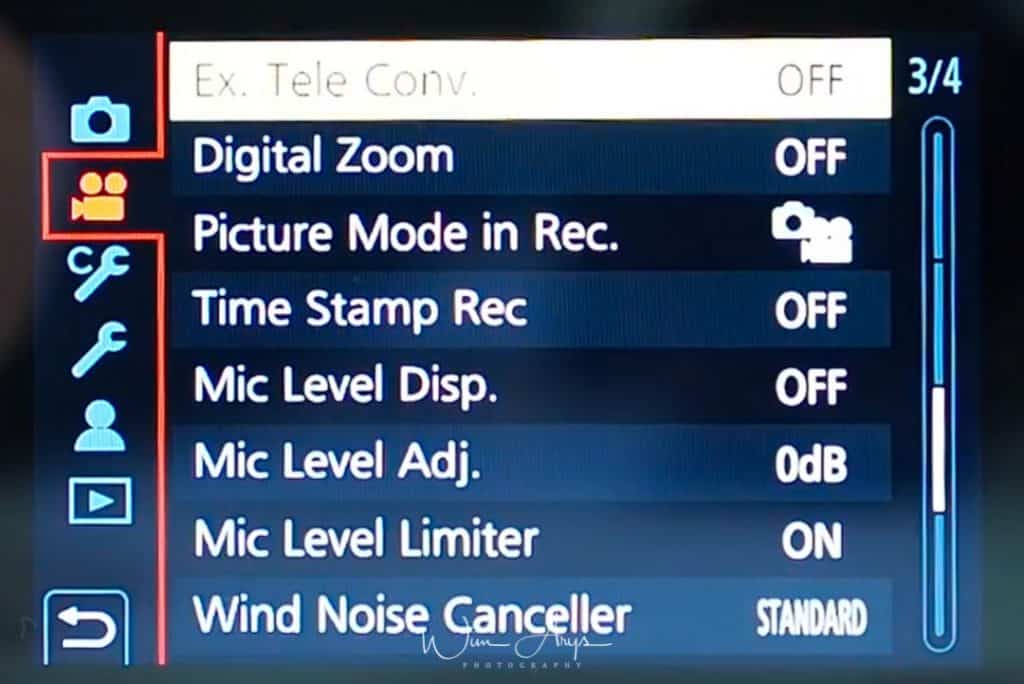
Ex. Tele Conv.
You can digitally enlarge movies without too much quality deterioration with this function. You can extend the range of your lens by times 1.4 or 1.6 using this function.
Digital Zoom
Digital zoom takes this a step further, allowing you to zoom in up to 4 times.
Picture Mode in Rec.
You can record still pictures while recording a movie on the Panasonic G9. During movie recording, press the shutter button fully to record a still picture when turned On. Aspect will always be 16:9.
There are 2 settings available:
Video Priority
- Pictures will be recorded with a picture size determined by the Rec Quality setting for motion pictures.
- Only JPEG images are recorded when Quality is set to Raw (still pictures will be recorded in jpeg)
- Up to 80 still pictures can be recorded during recording of the motion picture. (Up to 20 still pictures during 4K motion picture recording)
Photo Priority
- Pictures will be recorded with the set picture size and quality.
- The screen will go dark while recording pictures. A still picture will be recorded in the motion picture during that period, and audio is not recorded.
- Up to 20 still pictures can be recorded during recording of the motion picture. (Up to 10 still pictures during 4K motion picture recording)
Time Stamp Rec
Puts a time and date stamp on your recorded videos. Once turned on, this cannot be removed afterwards.
Mic Level Disp.
Select if you want to display the microphone level on the recording screen.
Mic Level Adj.
Adjust the sound input level to 19 different levels (-12 dB to +6 dB).
Mic Level Limiter
The Panasonic G9 adjusts the sound input level automatically, minimising sound distortion (clipping noise) when the volume is too high.
Wind Noise Canceller
This will reduce the wind noise coming into the built-in microphone while maintaining sound quality. You can choose either High, Standard or Off. This function works only with the built-in microphone.
MENU → Film Camera Icon → page 4 of 4 (also called Motion Picture Menu)
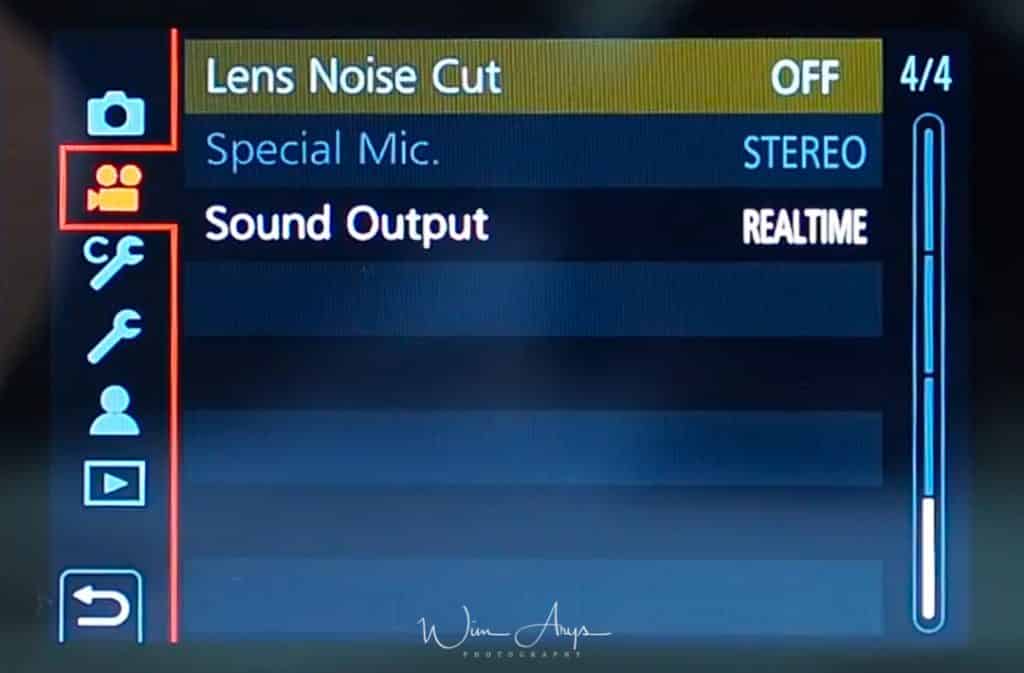
Lens Noise Cut
You can reduce the zoom sound of an interchangeable lens compatible with power zoom that is produced during motion picture recording. This function works only when an interchangeable lens that supports power zoom is used. (All micro-four-third lenses made by Panasonic)
Special Mic.
Only available only when you use an external stereo shotgun microphone like the Panasonic DMW-MS2. You have a few options on how to use a microphone like this:
- Stereo: Allows stereo recording of sound over a wide area.
- Lens Auto: Allows recording within the range that is set automatically according to the angle of view of the lens.
- Shotgun: Allows recording from one direction by shutting out background and surrounding noise.
- S.Shotgun: Allows recording within the range even narrower than that of [SHOTGUN].
- Manual: Allows recording within the range you set manually.
Sound Output
You can record motion pictures while hearing the sounds that are being recorded by connecting a commercially available headphones to this unit.
You can switch the sound output:
- Realtime: Actual sound without time lag. It can be different to the audio recorded in the movie.
- Rec Sound: Sound that is being recorded in motion pictures. The audio may be output slower than the actual audio. If you use the HDMI output during recording, the setting is fixed to this.
MENU → Custom Tool (Custom Menu)
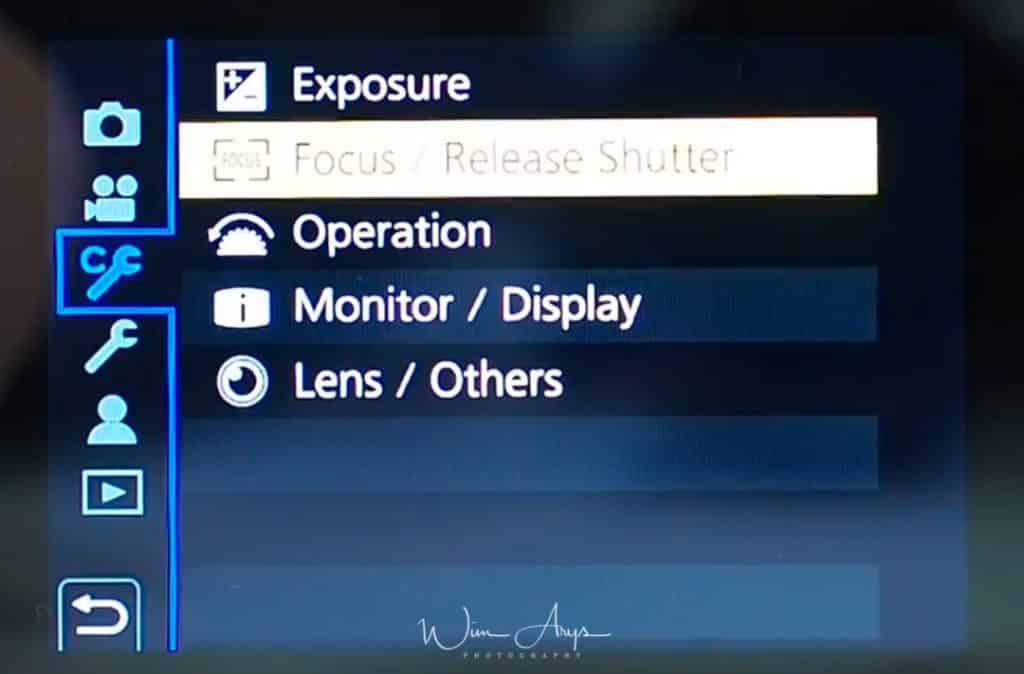
You’ll find all customisable settings of the Panasonic G9 in this Menu.
Exposure Menu page 1 of 6 (Exposure and Shutter button behaviour settings)
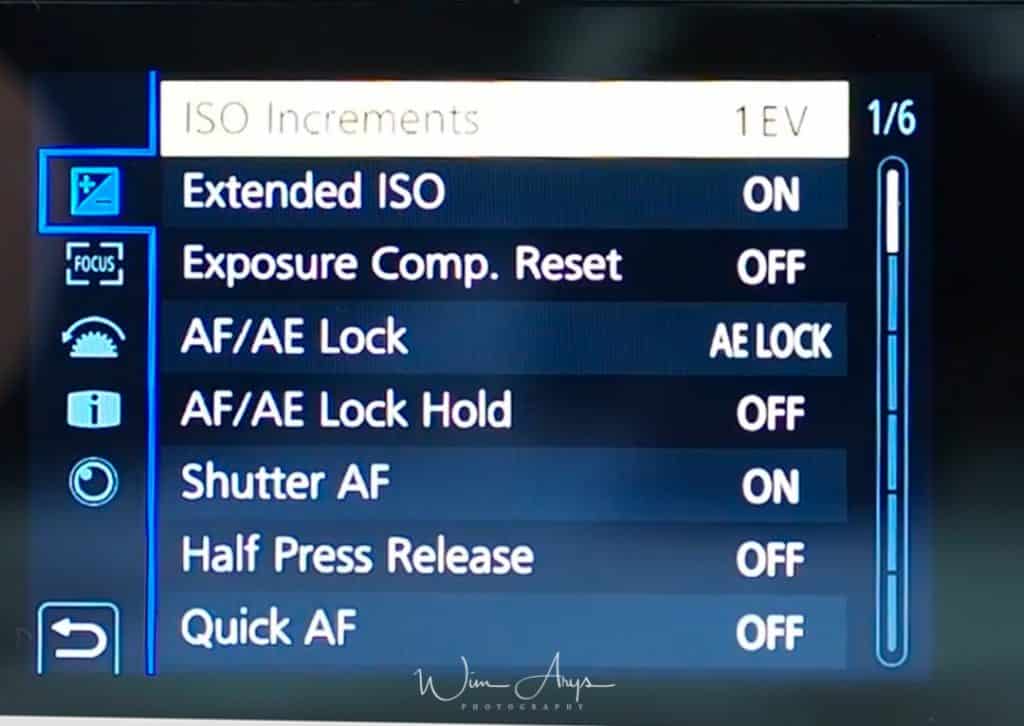
ISO Increments
Choose the increments of exposure changes between 1/3 EV or 1 EV.
Extended ISO
ISO sensitivity can be set up to minimum of ISO 100. Base ISO of the sensor is 200, so this extended ISO basically halves this in software, with a slight decrease in quality.
Exposure Comp. Reset
An exposure value can be reset when the Recording Mode is changed or the camera is turned off.
AF/AE Lock
Lock focus and exposure with AF/AE LOCK. To clear the lock, press AF/AE LOCK again.
AF/AE Lock Hold
When ON is selected, focus and exposure stays locked even if you press and release AF/AE LOCK. To clear the lock, press AF/AE LOCK again.
Shutter AF
Set whether or not the focus is adjusted automatically when the shutter button is pressed halfway.
Half Press Release
The shutter will immediately fire when the shutter button is pressed halfway when this is ON.
Quick AF
As long as the camera is held steady, the camera will automatically adjust the focus and focus adjustment will then be quicker when the shutter is pressed. You’ll get better AF performance at the expense of battery life.
Focus Menu page 2 of 6 (more Focus/Release Shutter settings)
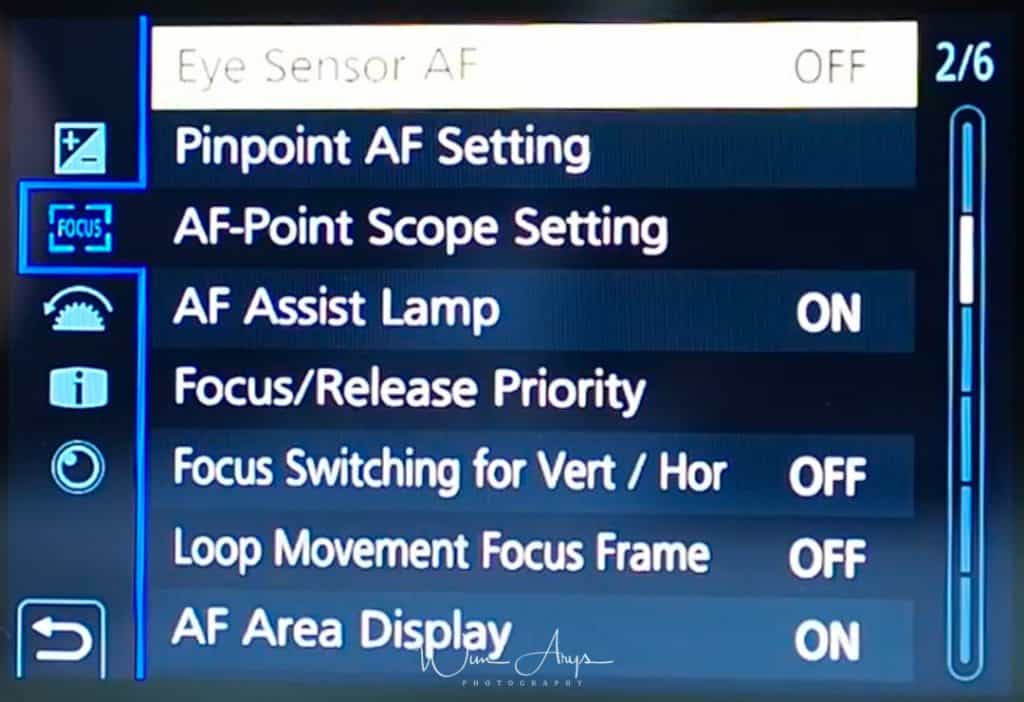
Eye Sensor AF
The Panasonic G9 wil automatically start autofocus when the eye sensor is activated.
Pinpoint AF Setting
The screen will be zoomed in when the shutter is pressed halfway, selectable in full screen or in a window.
AF-point Scope Setting
The methods for displaying the magnification window. View magnification full screen or picture in picture.
AF Assist lamp
AF assist lamp will illuminate the subject when the shutter button is pressed half-way making it easier for the camera to focus when recording in low light conditions. Range is about 1 meter.
Focus/Release Priority
Set whether to give priority to focus or shutter release during Auto Focus. Setting it to Focus priority means you won’t be able to take an image if focus is not acquired. Release will.
Focus Switching for Vert / Hor
Memorises separate positions for horizontal and vertical orientations (two vertical orientations, left and right, are available).
Loop Movement Focus Frame
When setting the AF area position or the MF Assist display position, you can now loop the position from one edge to the other edge of the screen.
AF Area Display
Selects whether you want to see a visual representation of you selected AF area on screen.
Focus Menu page 3 of 6 (more Focus/Release Shutter settings)
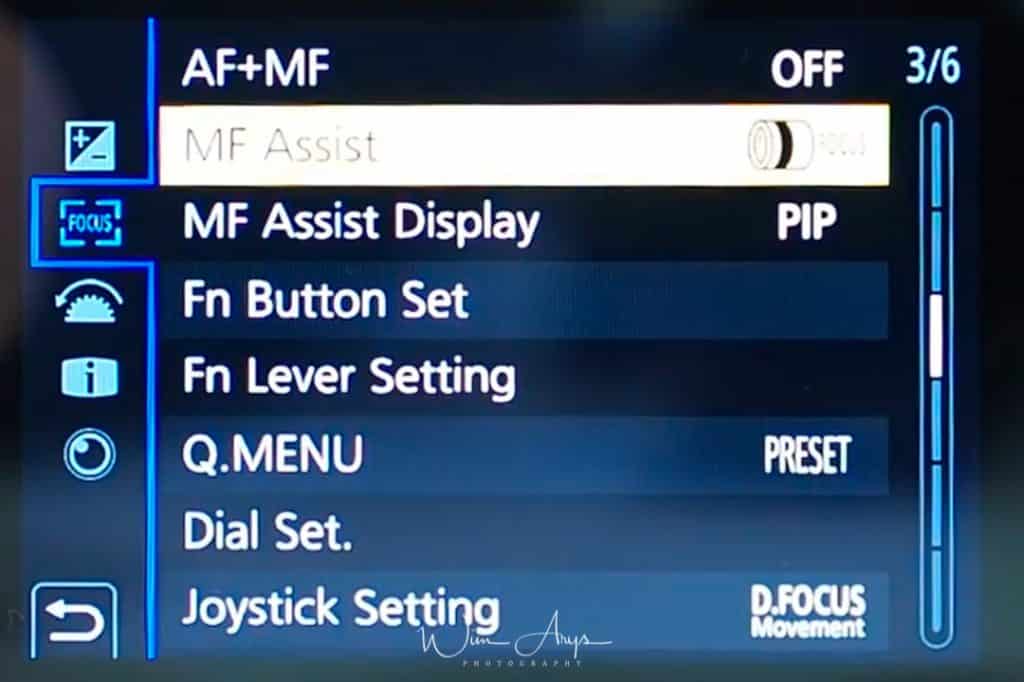
AF+MF
When AF Lock is ON (press the shutter button halfway with the focus mode set to AFS or set AF Lock using AF/AE LOCK), you can make fine adjustments to the focus manually.
MF Assist
Sets the display method of MF Assist (enlarged screen) on the Panasonic G9.

MF Assist Display
Sets whether MF Assist (enlarged screen) will appear in a windowed screen display or in a full screen display.
Fn Button Set
You can assign various features, such as recording functions, to specific buttons and icons as well as the function lever.
- Press up/down to select the function button you want to assign a function to and then press MENU/SET.
- Press up/down to select the function you want to assign and then press [MENU/SET].
FN Lever Setting
You are also free to assign any function to the FN lever using the same method as Fn Button set.
Q.MENU
In Custom operations, you can customise the Q Menu according to your liking.
You can add a maximum of 15 preferred settings to the Quick Menu.
- Press Q.MENU to display the Quick Menu.
- Press down to select the custom tool and then press MENU/SET.
- Press left/right arrow to select the menu item in the top row and then press MENU/SET.
- Press left/right to select the empty space in the bottom row and then press MENU/SET. (You can also set the menu item by dragging it from the top row to the bottom row)
- Press return to switch to the recording screen.
Dial Set.
Assign Dial (F/SS): Assigns the operations of the aperture value and shutter speed in Manual Exposure Mode.
Rotation (F/SS): Changes the rotation direction of the dials for adjusting the aperture value and shutter speed.
Control Dial Assignment: It sets the item to be assigned to the control dial while the recording screen is displayed.
Exposure Comp.: Assigns the Exposure Compensation to the front dial or rear dial so that you can directly adjust it.
Dial Operation Switch Setup: Sets the items to be assigned temporarily to the front/rear dials when you press the function button to which Dial Operation Switch is assigned.
Joystick Setting
The joystick provides the same functions as the cursor buttons MENU/SET button.
Operation Menu page 4 of 6 (dial and buttons operation settings)
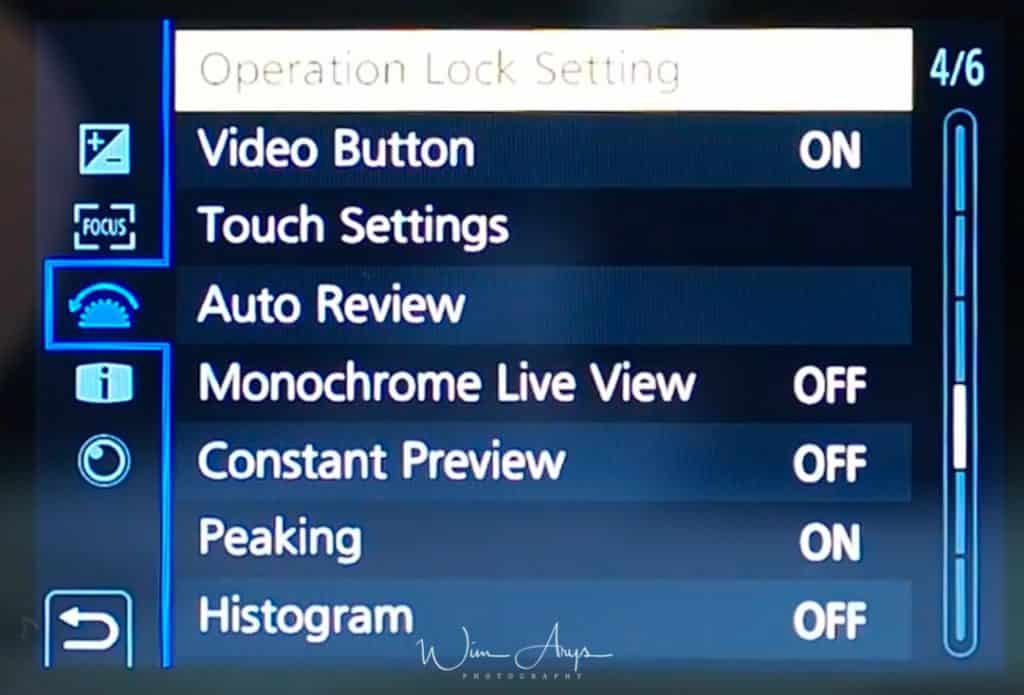
Operation Lock Settings
Sets the control functions on the Panasonic G9 to be disabled with the function button Operation Lock. Cursor, Joystick and Touch screen can be turned off.
Video Button
Enables/disables the motion picture button.
Touch Settings
Enables/disables the Touch operation.
- Touch Screen: All touch operations are turned on.
- Touch Tab: Operations of tabs are enabled.
- Touch AF: Operation to bring the subject you touch into focus AF or adjust the focus and brightness AF+AE are enabled.
- Touch Pad AF: Operation to move the AF area by touching the monitor when the viewfinder is in use.
Auto Review
Displays a picture immediately after it is taken.
Monochrome Live View
You can display the recording screen in black and white. Recorded images will not be affected.
Constant Preview
You can check the effects of the chosen aperture and shutter speed on the recording screen in Manual Exposure Mode. Some camera makers call this Live View.
Peaking
In-focus portions (portions on the screen with clear outlines) are highlighted when focus is being adjusted manually. Great focussing aide for manual focussing. Can be set to High or Low.
Histogram
Display the histogram. A histogram is a graph that displays brightness along the horizontal axis (black to white) and the number of pixels at each brightness level on the vertical axis. It allows you to easily check a picture’s exposure.
Monitor/ Display Menu page 5 of 6 (settings for the display)
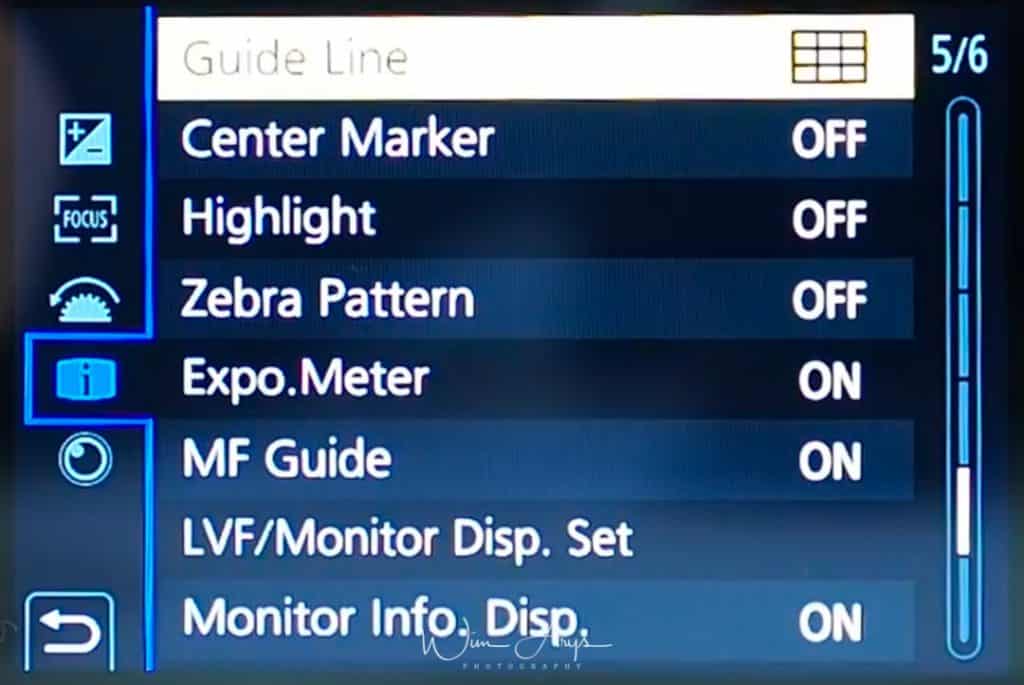
Guide Line
This will set the pattern of guide lines displayed when taking a picture.
Center Marker
The center of the recording screen will be displayed as [+].
Highlight
When the Auto Review function is activated or when playing back, white saturated areas appear blinking in black and white.
Zebra Pattern
Indicates parts that may become white saturated through overexposure in a zebra pattern. You can select a brightness value between 50% and 105%. In Zebra 2, you can select OFF. If you select 100% or 105%, only the areas that are already white saturated are displayed in a zebra pattern. The smaller the value is, the wider the brightness range to be processed as a zebra pattern will be.
Expo.Meter
Display the exposure meter.
- Set to ON to display the Exposure meter when performing Program Shift, setting aperture, and setting shutter speed.
- Unsuitable areas of the range are displayed in red.
- When the Exposure meter is not displayed, switch the display information for screen by pressing DISP.
- If no operations are performed for approximately 4 seconds, the Exposure meter disappears.
MF Guide
When you set the focus manually, an MF guide that allows you to check the direction to achieve focus is displayed.
LVF/Monitor Disp. Set
You can select separate screen display styles for the viewfinder and the monitor.
Monitor Info. Disp.
Display the recording information screen.
Viewfinder style: Scales down images slightly so that you can better review the composition of the images.
Monitor style: Scales images to fill the entire screen so that you can see their details.
Monitor/ Display Menu page 6 of 6 (monitor and lens behaviour settings)
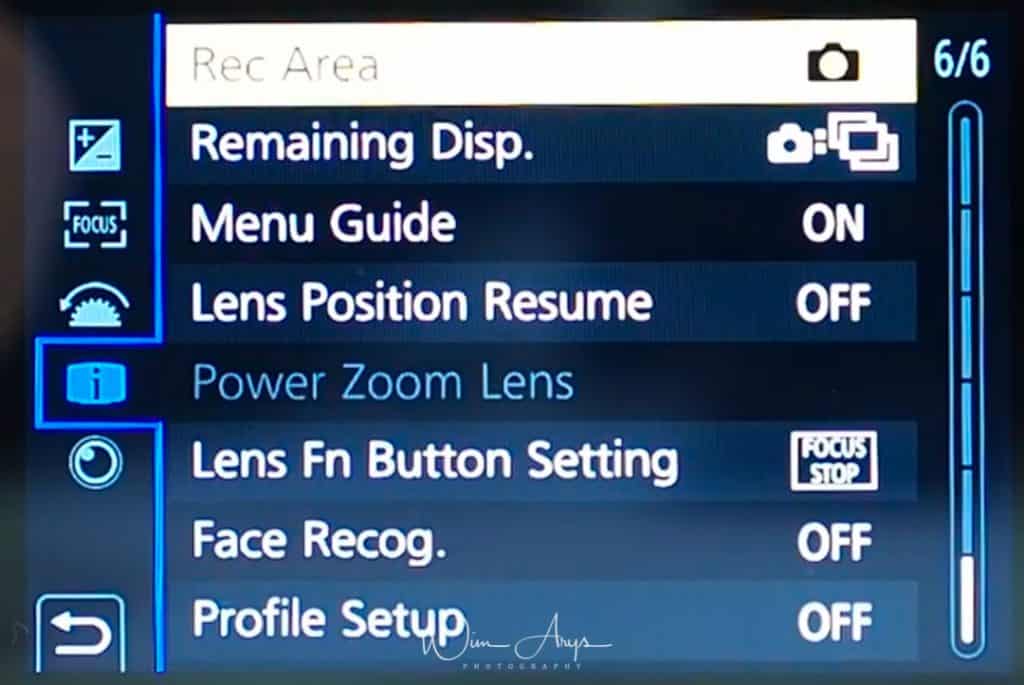
Rec Area
This changes the angle of view during motion picture recording and still picture recording. Displays the recording area according to the angle of view for still picture recording or video.
Remaining Disp.
This will switch display between the number of recordable pictures and available recording time.
Menu Guide
Display a selection screen when you set the mode dial to the paint palette icon.
Lens Position Resule
Saves the focus position when you turn off the camera. When an interchangeable lens that is compatible with power zoom is in use, the zoom position is also saved.
Power Zoom Lens
Change the settings for a power zoom lens. Sets the screen display and lens operations when using an interchangeable lens that is compatible with power zoom.
- Disp Focal Length: When you zoom, the focal distance is displayed and you can confirm the zoom position.
- Step Zoom: When you operate the zoom with this setting [ON], the zoom will stop at positions corresponding to predetermined distances.
- Zoom Speed: You can set the zoom speed for zoom operations for both stills and vide to high, medium or low.
- Zoom Ring: When set to OFF] the operations controlled by the zoom ring are disabled to prevent accidental operation.
Lens Fn Button Setting
Sets the function to be assigned to the focus button of an interchangeable lens. You can call up the assigned function by setting the focus selector switch of a compatible interchangeable lens to Fn and then pressing the focus button of the lens.
Face Recog.
Face Recognition is a function on the Panasonic G9 which finds a face resembling a registered face and priorities focus and exposure automatically. Even if the person is located towards the back or on the end of a line in a group photo, the camera can still take a clear picture.
On will automatically recognise faces, but you can also register up to six faces yourself.
- In this Menu, select an empty frame (or overwrite one).
- Take an picture of the face you want to register.
- Register this face. Note that you can register up to 3 images per face for more accurate results.
Profile Setup
If you set the name and birthday of your baby or pet in advance, you can record their name and age in months and years in the images.
MENU → Setup Menu → page 1 of 5 (General Camera Setup)
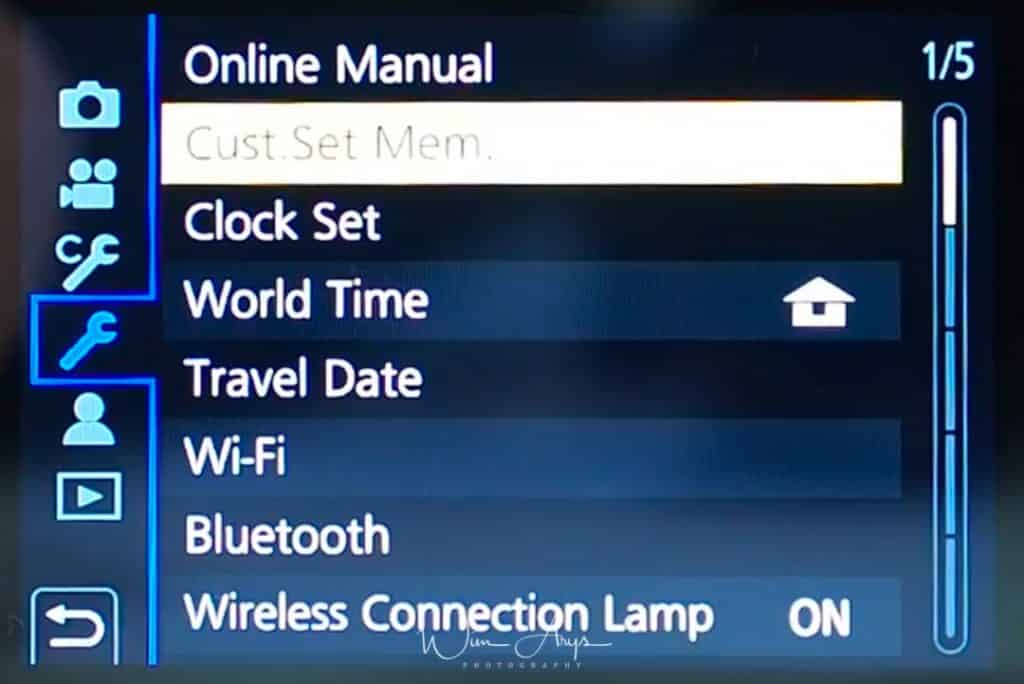
Online Manual
Display the URL or QR code to go to the online manual.
Cust. Set Mem.
Up to 5 sets of current camera settings can be registered using C1, C2, C3-1, C3-2 or C3-3. The first three are directly accessible via the Mode Dial.
Saving a custom camera is quite simple, set the mode dial to C1, C2 or C3, change the cameras settings to your preferences, go in the Menu to this setting and press MENU/SET on the screen.
Clock Set
You have already probably set time and date when you first turned on the Panasonic G9, but you can also change this here.
World Time
Sets the times for the region where you live (HOME) and your travel destination (DESTINATION). Time and date will be altered to reflect the local time and date at your travel destination.
Travel Date
If you set Travel Setup, elapsed days of your trip i.e. which day of the trip based on its departure and return dates will be recorded The travel date is automatically canceled if the current date is after the return date.
If you set Location, the name of the travel destination that you enter will be recorded.
Wi-Fi
It’s possible to control your Panasonic G9 with a smartphone or a tablet, display pictures on TV, print Wirelessly, Send images to a PC or use Web Services from Panasonic all via WiFi.
To use the Wi-Fi function on this camera, a wireless access point is needed off course.
By default, Wi-Fi is assigned to the Fn6 button when the camera is in Recording Mode, while it is assigned to Fn1 when the camera is in Playback Mode. You can assign it to any button you want.
When you want to connect to WiFi, simply press this button.
Wi-Fi Setup
Priority of Remote Device: Sets either the camera or the smartphone as the priority control device to be used during remote recording.
Wi-Fi Password: You can improve security by enabling password entry for a direct connection to a smartphone.
LUMIX CLUB: Acquires or changes the “LUMIX CLUB” login ID.
PC Connection: You can set the workgroup. To send images to a PC, a connection to the same workgroup as the destination PC is required.
Device Name: You can change the name (SSID) of this unit.
Wi-Fi Function Lock: To prevent incorrect operation and use of the Wi-Fi function by a third party and to protect saved personal information, protect the Wi-Fi function with a password.
Network Address: Displays the MAC address and IP address of this unit.
Approved Regulations: Displays the certification number for radio regulations.
Bluetooth
You can also connect to your Smartphone, Tablet or TV if your device has the Bluetooth functionality. A function called pairing is needed in order to establish a connection. You’ll find it in this menu, remember to also turn Bluetooth on if you want to do so.
Wireless Connection Lamp
This enables/disables the wireless connection lamp.
MENU → Setup Menu → page 2 of 5 (General Camera Setup)
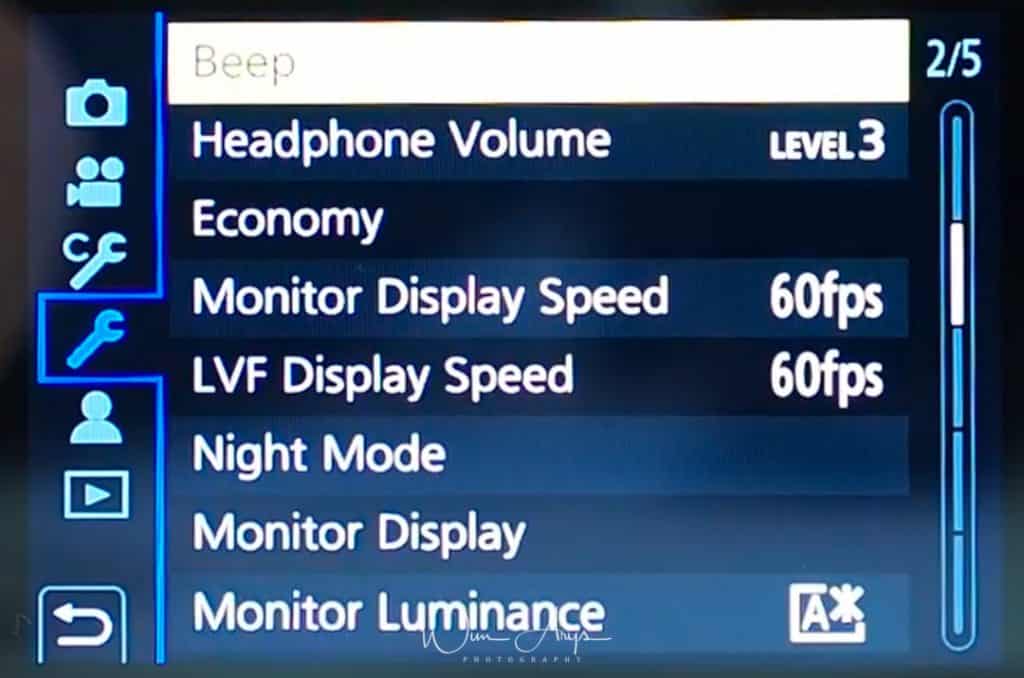
Beep
This allows you to set the electronic sound and the electronic shutter sound. Remember this will be off if you’re in Silent Mode!
Headphone volume
If you’re using a headphone, you can adjust the volume here.
Economy
These settings will determine the way the camera handles inactivity on your part to save battery life.
Sleep Mode: The camera is automatically turned off if the camera has not been used for the time selected on the setting.
Sleep Mode(Wi-Fi): The camera is automatically turned off if it is not connected to a Wi-Fi network and has not been used for 15 minutes (
Auto LVF/ Monitor Off: The monitor/viewfinder is automatically turned off if the camera has not been used for the time selected on the setting.
Power Save LVF Shooting: If you display the monitor using the viewfinder/monitor automatic switching function, the camera will turn off automatically after being left idle.
Monitor Display Speed
This sets the monitor frame rate to either 120fps or 60fps. 120fps will run smoother at the cost of battery life.
LVF Display Speed
This sets the viewfinder frame rate, to either 60 or 120fps. Again, at 120 fps you’ll see movement smoother at the cost of battery life.
Night Mode
This displays the monitor and viewfinder screens in red. It reduces the difficulty in seeing the surroundings caused by brightly-lit screens at night or in any low-light environment.
Monitor Display
Brightness, color, or red or blue tint of the Monitor/viewfinder can be adjusted.
Monitor Luminance
These settings will affect how and when brightness of the monitor is adjusted.
Auto: The brightness is adjusted automatically depending on how bright it is around the camera.
Mode 1: Makes the monitor brighter than normal.
Mode 2: Set the monitor to the standard brightness.
Mode 3: Makes the monitor brighter than standard.
MENU → Setup Menu → page 3 of 5 (General Camera Setup)
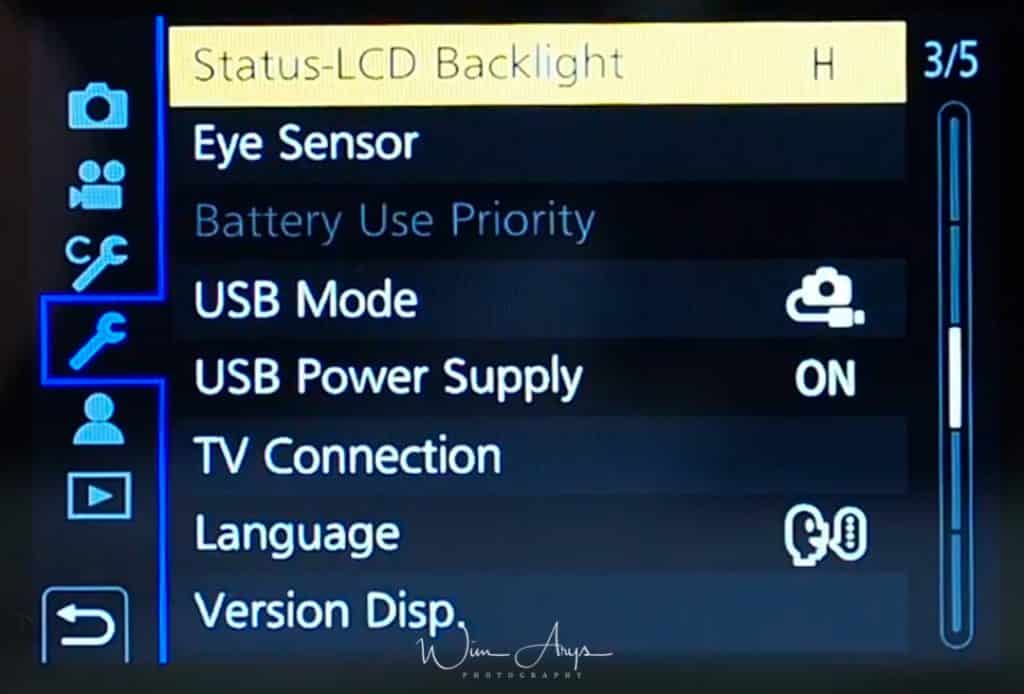
Status LCD Backlight
You can set the LCD Backlight to High, Low or Off.
Eye Sensor
Sensitivity will This will set the sensitivity of the eye sensor.
LVF/Monitor Switch will This will set the method for switching between the monitor and viewfinder.
USB Mode
Sets the communication method when connecting using the USB connection cable.
Select on Connection: Select this setting to select the USB communication system when connecting to another device.
PC Storage: Select this setting to export images to a connected PC.
PC Tether: Select this setting to control the camera from a PC installed with supported software.
Pictbridge PTP: Select this setting when connecting to a printer supporting PictBridge.
USB Power Supply
Supplies power via the USB connection cable when the camera is connected to a PC or PowerBank.
TV Connection
Set the format for the HDMI output when playing back on the HDMI compatible TV and monitor connected with this unit using the HDMI cable. It’s possible to set it to Auto or 4K, 1080p, 1080i, etc…
Language
Set the language displayed on the screen.
Version Disp
This enables the firmware versions of the camera and lens to be checked before an upgrade for instance.
MENU → Setup Menu → page 4 of 5 (General Camera Setup)
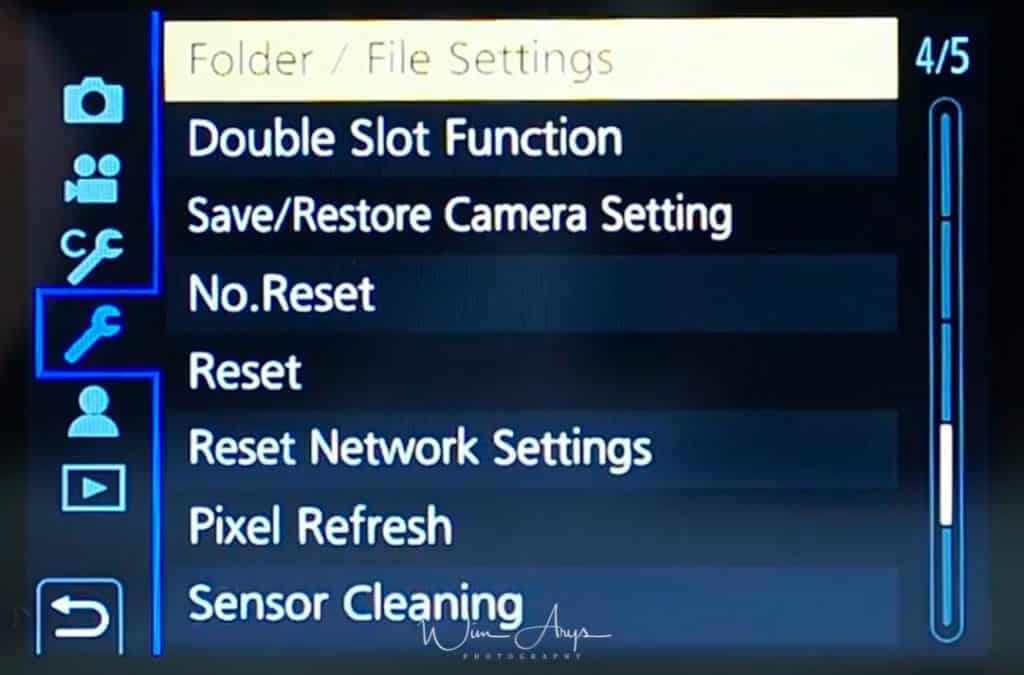
Folder/File Settings
Set the folder and file name patterns in which images are to be saved.
Double Slot Function
Set the way recording to the card slots 1 and 2 is performed.
- Relay Rec: Relays recording to the other card slot even after the first card runs out of free space during recording. Records same images to the two cards.
- Backup Rec: Records same images to the two cards.
- Allocation Rec: Allows you to specify the card slot to be used for recording for different image formats like Jpeg on one and RAW on the other.
Save/Restore Camera Setting
Save the camera’s setup information to the card. Since saved setup information can be imported to the camera, you can apply the same setup to more than one camera.
No.Reset
Reset the file number of the next recording to 0001.
Reset
The following settings are reset to the default:
- Recording settings.
- Setup settings Wi-Fi Setup and Bluetooth settings.
- Custom settings (Face Recog. and[Profile Setup settings.
- Setup/custom settings (except for Wi-Fi Setup, Bluetooth, Face Recog. and Profile Setup).
Reset Network Settings
The following network settings are reset to the default:
- Wi-Fi Setup (Excluding LUMIX CLUB).
- Registered device information in Bluetooth and values in Wi-Fi network settings.
Pixel Refresh
It will perform optimization of imaging device and image processing. Use this function when you start seeing hot or dead pixels in your images.
Sensor Cleaning
Dust reduction to blow off the debris and dust that have affixed to the front of the imaging device is performed.
MENU → Setup Menu → page 5 of 5 (General Camera Setup)
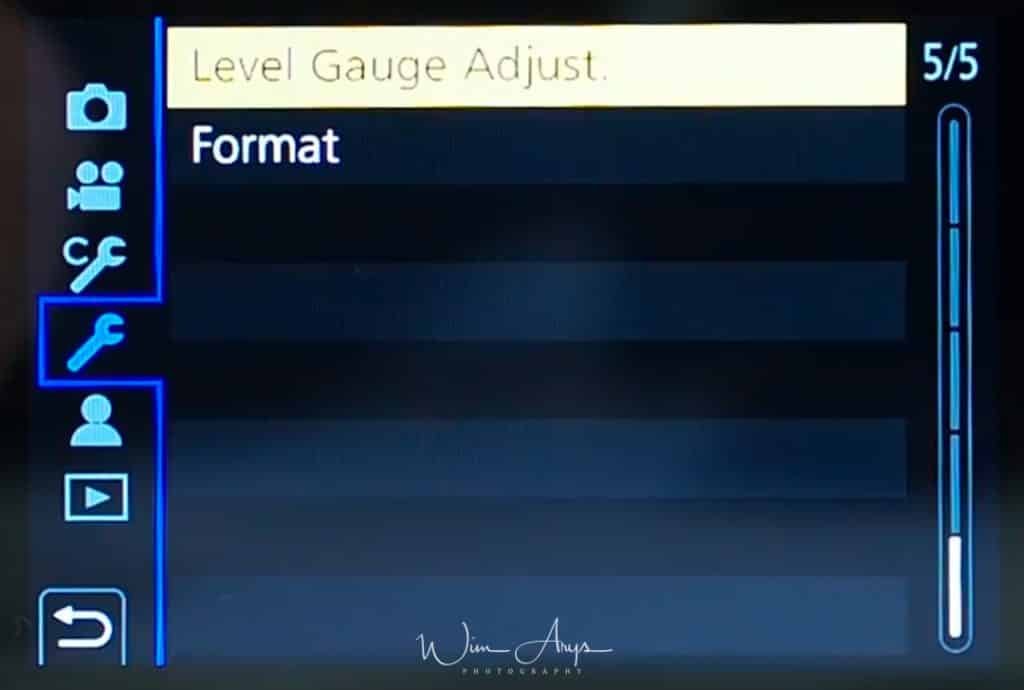
Level Gauge Assist
Adjust: Hold the camera in a horizontal position, and press MENU/SET. The level gauge will be adjusted.
Level Gauge Value Reset: Restores the default level gauge setting.
Format
Format the card before recording a picture with this unit.
Since data cannot be recovered after formatting, make sure to back up necessary data in advance.
MENU → My Menu (that little man)
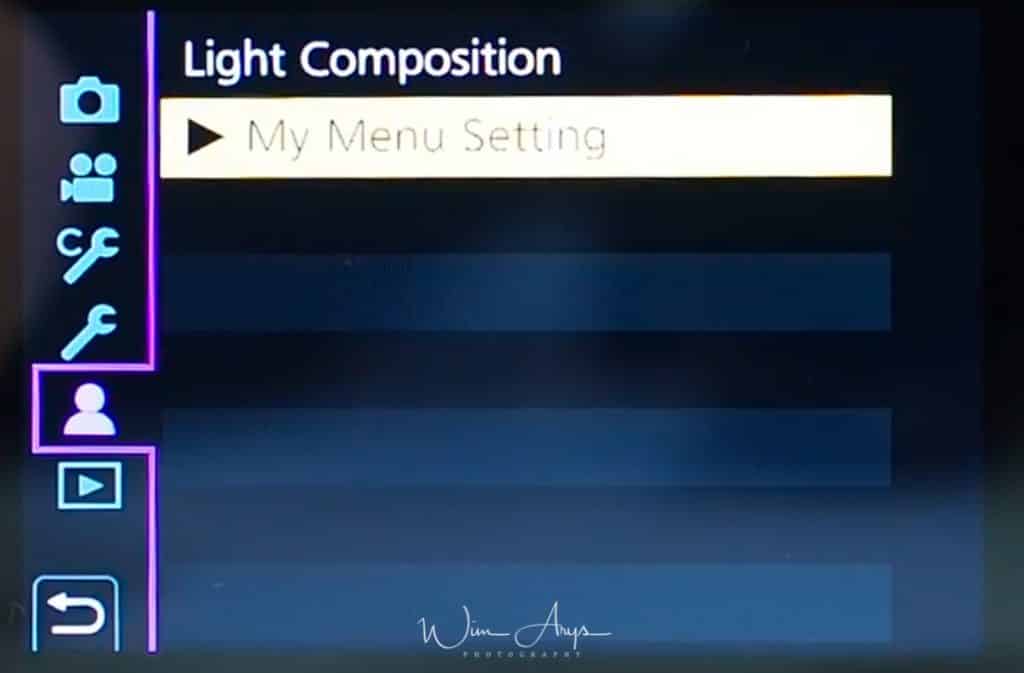
Light Composition
Select multiple frames from 6K/4K burst files that you wish to combine in a composite image. Very cool feature. Parts of the image that are brighter than the preceding frame will be superimposed on the preceding frame to combine the frames into one picture.
My Menu Setting
You can register frequently-used menus and display them in My Menu. You can register up to 23 menus for quick access.
- Add: Specifies the menu to be displayed in My Menu to register it.
- Sorting: Rearranges the menus displayed in My Menu. Select the menu you want to move and set the destination.
- Delete: Deletes registered menus from the displayed menu list.
- Display from my menu: Sets the type of the menu screen to be displayed.
MENU → Playback Menu → Page 1
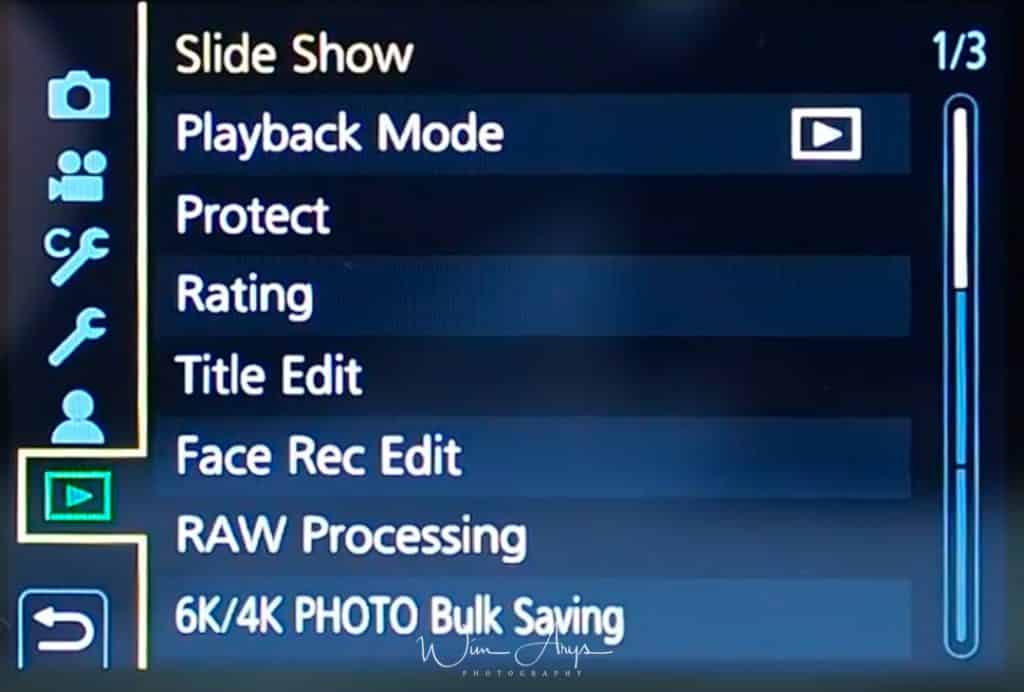
Slide Show
ou can play back the pictures you have taken in synchronization with music, and you can do this in sequence while leaving a fixed interval between each of the pictures.
You can also put together a slide show composed of only still pictures, only motion pictures, etc.
You can change the settings for slide show playback by selecting [Effect] or [Setup] on the slide show menu screen.
Playback Mode
Playback in Normal Play, Picture Only or Video Only can be selected.
Protect
You can set protection for pictures you do not want to delete by mistake.
Rating
You can set five different rating levels for images to do the following:
- Delete all the pictures not set as ratings.
- Checking the rating level on the file detail display of an operating system, such as Windows 10.
Title Edit
You can add text (comments) to pictures. After text has been registered, it can be stamped in prints using Text Stamp.
Face Rec Edit
You can clear and replace all information relating to face recognition in selected images.
RAW Processing
You can process the pictures taken in RAW format. The processed pictures will be saved in JPEG format.
- White Balance: Allows you to select a White Balance preset and adjust it. If you select an item you can process the image with the setting at the time of recording.
- Brightness correction: Allows you to correct the brightness within the range between – 2 EV and +2 EV.
- Photo Style: Allows you to select a photo style effect.
- i.Dynamic: Allows you to select an i.Dynamic setting.
- Contrast: Allows you to adjust the contrast.
- Highlight: Allows you to adjust the brightness of bright portions.
- Shadow: Allows you to adjust the brightness of dark portions.
- Saturation and Color Tone: Allows you to adjust the saturation. (When Monochrome or L.Monochrome is selected in Photo Style, you can adjust the color tone.)
- Filter Effect: Allows you to select a filter effect. (Only when Monochrome or L.Monochrome is selected in Photo Style)
- Noise Reduction: Allows you to adjust the noise reduction setting.
- i.Resolution: Allows you to select an i.Resolution setting.
- Sharpness: Allows you to adjust the resolution effect.
6K/4K PHOTO Bulk Saving
You can save pictures of a 6K/4K burst file that were extracted from any 5 second period at once.
MENU → Playback Menu → Page 2
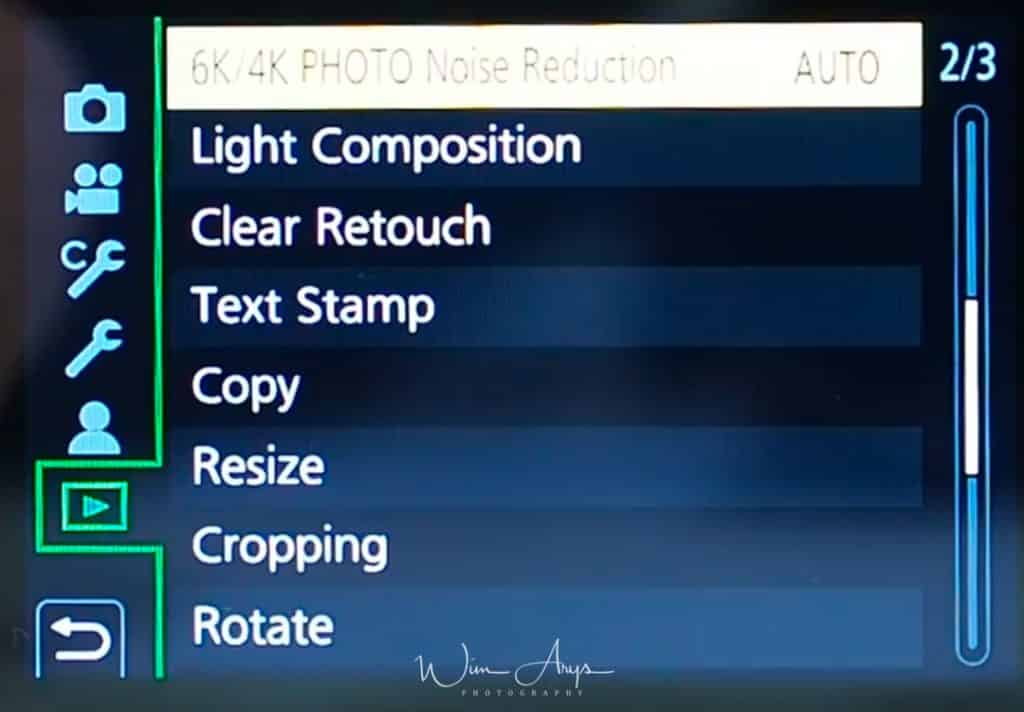
6K/4K PHOTO Noise Reduction
When saving pictures, reduce the noise produced during recording by high ISO sensitivity.
Light composition
Select multiple frames from 6K/4K burst files that you wish to combine. Parts of the image that are brighter than the preceding frame will be superimposed on the preceding frame to combine the frames into one picture.
Clear Retouch
Remove unwanted objects and such right from the camera menu. The erasure operation can only be performed by touching. Clear Retouch automatically enables the touch operation.
Text Stamp
You can stamp recording information like names, dates, places on recorded images.
Copy
Copy images on the card to the other card.
Resize
To allow easy posting to web pages, attachment to e-mail etc., picture size (number of pixels) is reduced.
Cropping
You can enlarge and then clip the important part of the recorded picture.
Rotate
Rotate pictures manually in 90 degree steps.
MENU → Playback Menu → Page 3
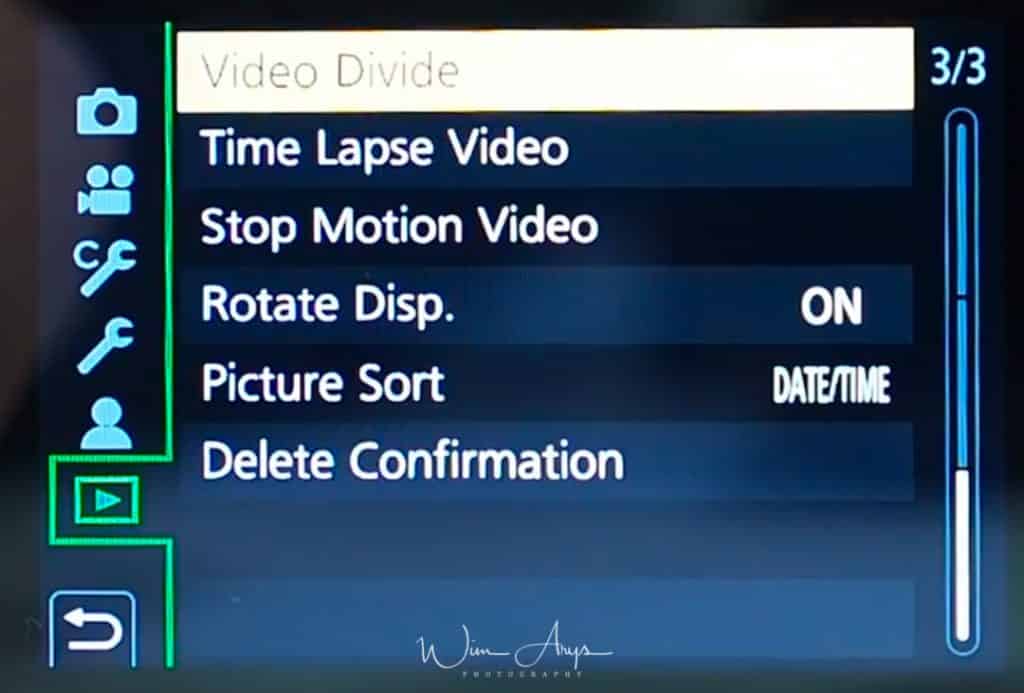
Video Divide
Recorded motion picture and 6K/4K burst files can be divided in two. It is recommended for when you want to divide a part you need with a part you do not need.
Time Lapse Video
This function allows you to create a motion picture from a picture group recorded with Time Lapse Shot.
Stop Motion Video
A Motion picture is created from group pictures taken with Stop Motion Animation.
Rotate Disp.
This mode allows you to display pictures vertically if they were recorded holding the camera vertically.
Picture Sort
You can set the order in which the camera displays images during playback.Either via file name or date/time.
Delete Confirmation
This sets which option, Yes or No, will be highlighted first when the confirmation screen for deleting a picture is displayed.
Quick access with the Q Menu (Fn 2)
The most commonly used settings can be accessed through what is called the Q Menu. This is the FN2 button that you’ll find right next to the screen, above the trash bucket button.
The features that can be adjusted using Quick Menu are determined by the mode or a display style the camera is in.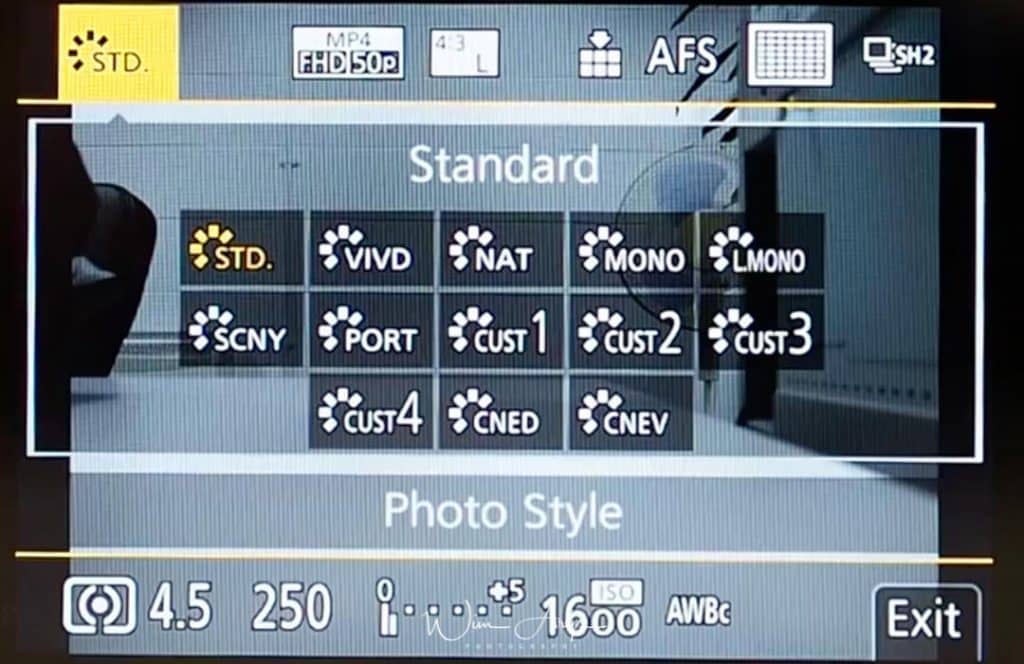
Photo Style
This applies only to Jpeg images, and the RAW preview when you load them into an app like Lightroom.. You can select a colour effect here.
- Standard: standard Panasonic colour and contrast rendering.
- Vivid: Brilliant effect with high saturation and contrast.
- Natural: Soft effect with low contrast.
- Monochrome: Monochrome (black and white)effect with no color shades.
- L.Monochrome: Black-and-white effect with rich gradation and crisp black accents.
- Scenery: An effect appropriate for sceneries with vivid blue skies and greens.
- Portrait: An effect appropriate for portraits with a healthy and beautiful skin tone.
- Custom 1-4: Make your own presets for easy recall when needed.
- Cinelike D: Gives priority to the dynamic range by using a gamma curve designed to create film-like images. Suited for editing.
- Cinelike V: Gives priority to the contrast by using a gamma curve designed to create film-like images.
As mentioned earlier, it’s possible to create your own Photo Style or customise the preset styles. This is basically a way of hacking into the Jpeg engine and adjusting it to your own style and preferences. There are 6 areas that you can alter.
- Contrast: add or decrease the difference between the brightness and the darkness in the picture.
- Sharpness: add a degree of sharpness or make your images softer.
- Noise Reduction: add noise reduction for high ISO shooting.
- Saturation: add more vividness to the colours. Or remove some.
- Color Tone: add a blue, orange, red or green filter to your image.
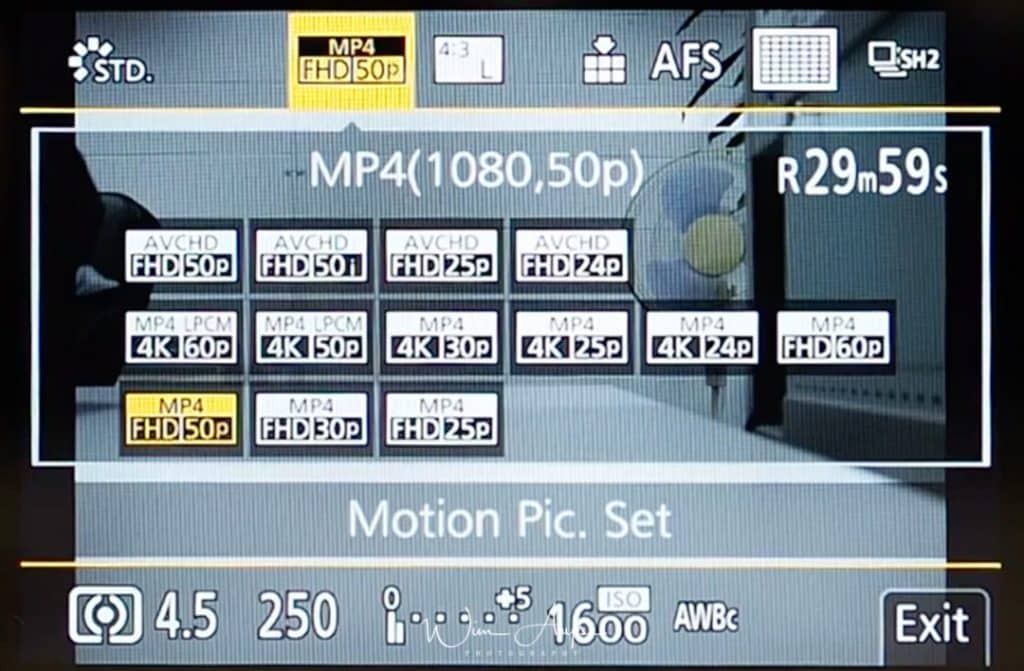 Motion Pic. Set
You can change bitrate and frame-rate for video here, as well as select the appropriate movie container.
AVCHD
MP4
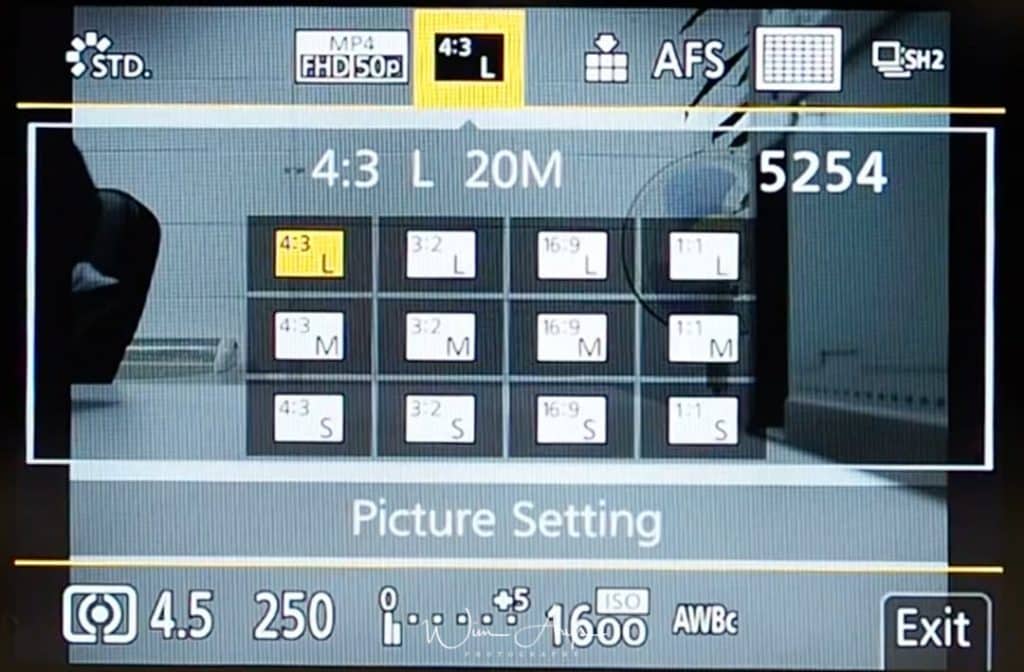
Picture Setting
You can quickly change picture size and picture quality here for your Jpeg’s.
These are the aspect ratios available:
- 4:3: native sensor ratio
- 3:2: the ratio used in full frame cameras
- 16:9: for a wider looking view
- 1:1: Square aspect ratio, mostly used for social sharing
Quality wise, you can choose between Small (S), Medium (M) and Large (L) files sizes. Obviously, Large will have the best quality Jpeg’s, at the expense of larger files. If you only shoot Jpeg (and not RAW) set it to Large. If you shoot both (Jpeg+RAW, see next screen), you could set it to small or medium since you’ll always work with the RAW in post processing. This way, you’ll still have a Jpeg for sharing quickly online or as a reference whilst still saving some space.
Quality
Probably the most important setting is Quality. You can select either Jpeg, where the RAW data from the sensor is processed by an in-camera algorithm to produce a viewable image, or save your images in this RAW format. RAW retains all the data of the sensor, and is meant to be edited afterwards in a desktop application like Lightroom or Luminar. Saving as RAW means that you have much more creative freedom afterwards to push shadows or pull highlights, sharpen and enhance your image in any way you please. A Jpeg retains only a fraction of this information, according to the algorithm inside the camera which might or might not suit your style and/or needs.
Hence, my recommendation is always to shoot RAW or RAW Jpeg. This does mean larger files, but SD cards are inexpensive compared to your beautiful new Lumix. But some photographers prefer to shoot in Jpeg only because they are for instance not interested in post-processing images. In this case, I would set the Jpeg to the highest quality setting.
 AFS/AFF
AFS is an abbreviation of Auto Focus Single and AFF is an abbreviation of Auto Focus Flexible. In AFS, the focus stays locked while the shutter button is pressed halfway and in AFF focus is continuously readjusted according to the movement of the subject. See AFF as a function between Single AF and Continuous AF.
This can easily be changed by using the dial on the right of the ECF too:
The AFC function below AFS/AFF continuously changes focus according to the movement of your subject.
Some more info on these modes for clarification:
- AFS will find focus and stay focused at that distance until you take a photo or release the shutter button. This is handy if you want to focus and then recompose your shot for instance.
- AFF will do the same unless it detects subject movement, at which time it will temporarily switch to AFC operation in order to re-focus.
- AFC won’t start to seek focus until you half-press the shutter, and will continually evaluate subject movement and change focus as needed.
- With AFS you can can lock focus on a particular point, then swing the camera to get the right framing; with AFC, it will not lock focus, but will keep re-focusing. That’s why Pinpoint focusing can’t be used with AFC.
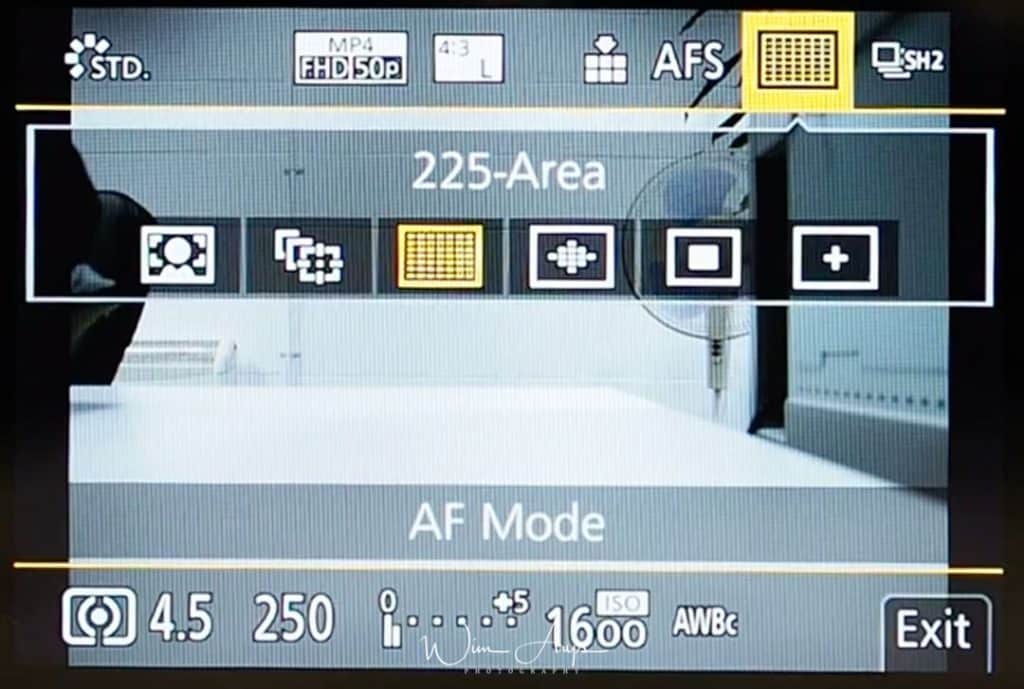
AF Mode
This allows the focusing method that suits the positions and number of the subjects to be selected. There are 6 different methods available, each suited for different scenarios.
Face/Eye Detection
A person’s face, eyes, and body (the entire body or the upper half of the body) are automatically detected.
When the camera detects a person’s face or body, an AF area is displayed over the detected person.
- Yellow: This is the AF area for the person to be brought into focus. The camera automatically selects the person.
- White: These are the AF areas for people other than the person to be brought into focus. This type of AF area is displayed when more than one person is detected.
When a person’s face or eyes are detected, the eye closer to the camera will be brought into focus, if the eyes are inside the yellow frame.
The camera can detect the faces of up to 15 people. To specify the person or eye to be brought into focus, align an AF area with the desired person or eye. You can do so easily by touching a person indicated with an AF area.
Tracking
The camera keeps adjusting the focus and exposure automatically to the specified moving object. Perform either of the following operations to lock the subject to be tracked:
- Use a button: aim the AF tracking frame D over the subject, and press the shutter button halfway.
- Use the touch screen: touch the subject on the screen.
If it fails to lock, AF area will flash in red, and disappear.
The AF area turns yellow while the subject is locked and green while the shutter button is pressed halfway. Press the Menu button to cancel the lock.
225 Area
Widest setting with all AF points used. Up to 225 AF areas can be focused. This is effective when your subject is not in the center of the screen.
Custom Multi
From among 225 AF areas, you can freely set the optimum shape of the AF area for the subject.
1-Area
The camera focuses on the subject in the AF area on the screen.
Pinpoint
You can achieve a more precise focus on a point that is smaller than 1-Area. If you press the shutter button halfway, the screen that lets you check the focus by enlarging it.

Burst Shot Setting
You can choose your bust shot setting here for continuous drive mode.
Burst shooting means that you’ll shoot continuously when you press the shutter button. You can apply different Burst Mode settings to Burst Shot 1 and and Burst Shot 2 Setting in these menus.
You’ll see SH (for super high burst rates), SH pre (which actually goes back a few seconds in time and saves these images too). These SH modes are only available with the electronic shutter. Version 2 is always faster that version 1.
Then we have High, Medium and Low which work with the Mechanical shutter too. The actual burst rate will be higher if you shoot Jpeg only.
Metering Mode
You can change how the light is metered here, and hence how a correct exposure is calculated by the camera. If you feel that the camera takes over- or underexposed images according to your personal preferences, it might be worth changing the metering mode.
Implementation of this is quite basic in this camera, you have a total of only 3 methods to choose from:
- Multiple: This is the method in which the camera measures the most suitable exposure by judging the allocation of brightness on the whole screen automatically.
- Center weighted: This is the method used to focus on the subject on the center of the screen and measure the whole screen evenly.
- Spot: This is the method to measure the subject in the spot metering target.
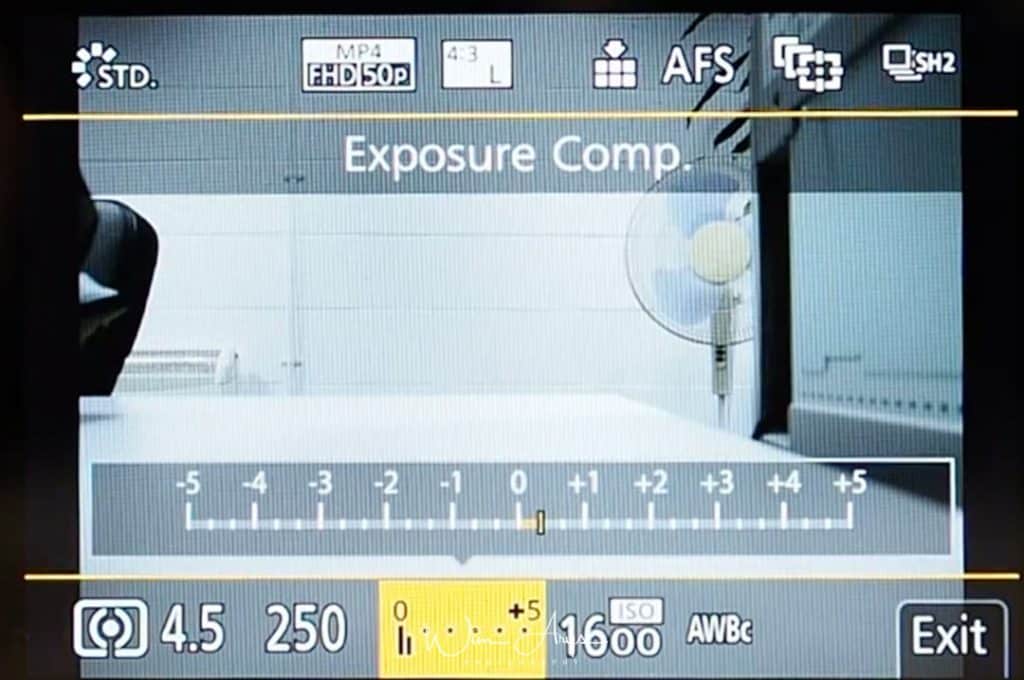
Exposure Comp
If you feel like your Lumix G9 is over- or underexposing your images (or you want to purposely underexpose), you can dial in what is called exposure compensation here. A range of plus minus 5 is available here to correct the auto exposure of the camera.

ISO sensitivity
Sets the upper and lower limits of the ISO sensitivity when you use Auto ISO or i ISO. Lower Limit should be set to 200 and upper limit to 3200, this is the range where you’ll get usable images without too much noise.
Conclusion
So this was a quick run-though of all the Panasonic G9 Menu items, with pointers, tips and tricks along the way. This information should get you familiarised with this fantastic mirrorless camera. If you would like any clarification or extra information on any functionality here, let me know through the comment section below. Happy shooting!
A great help to those of use new to this camera and possibly Panasonic in general, the only thing you left out is the fact that if you only shoot in RAW, the image on the rear screen when reviewing the images are of a very low quality. When you import to the computer they are fine – it might be better to shoot both RAW and JPEG
Hi Clifford, good point! I’ll have to include this in the settings.
I’m keen to experiment with night shots – stars, fireworks etc! With my old camera I used a bulb setting and long exposure. What do you advise I’m struggling to find a bulb setting sorry if this question is basic can you help? Thank you
Hi Cris, this is quite simple to do. Set the camera to M (manual mode) and keep turning the wheel to set the shutter speed to B.
Also:
– make sure that you’re using to mechanical shutter.
– make sure you are NOT in ‘burst’ or ‘sequential’ shooting mode.
Let me know how you get on.
Thank you
No problem 🙂
Hi Wim, which wheel are you referring to. Thanks.
The one that changes shutter speed, normally assigned to your right thumb on the grip I believe.
Thanks, very helpful info. Panasonic’s menus are very good but still a lot to learn. Appreciate it!
hello, some time I have problems to fine adjust the LVF (view finder) have you any tips? Thanks for the valuable information about the G9.
Hi Ben, fine adjust using the diopter? Or with focussing?
Thank you for a very thorough and extremely helpful article
Happy to help out James.
Very useful. Thanks.
From memory LVF runs at either 60 or 120.
Thanks Ern!
We are told to turn IS off when taking long exposures. The G9 has both optical and in body IS. The lens IS can be turned off on the lens if it has a switch or via the camera menu if the lens does not have a switch. But what about the inbuilt camera body IS. Can this and should this be turned off for long exposures, or is it always on? Thanks. Very useful guide thanks.
Hi Peter, the built-in IS (or sensor stabilisation) should be turned off for long exposures too. Best, Wim
I just purchased the G9 and have found that Hi res mode, HDR and Multi exposure mode are all grayed out. selecting them brings the message: “This menu item can’t be set”
I’ve tried changing settings to no avail.
Any ideas why?
Thanks
Hi David, have you tried switching to a different shooting mode like A (Aperture)? Best, Wim
The same happened to me Ihad to reset my camera now works just fine
Thanks for your input David
Hi, HDR menu is only valid with JPEG.
Your comments on the various modes for the G9 were very helpful. Setting up the camera before leaving for the photo shoot I’ve found the best. Your comments have helped with that effort.
Thanks Bill, if there is anything else you’d like to read, let me know.
I accidentally found that shifting from single image per shutter release to bracketed images can be accomplished without entering the menu system. Press the exposure compensation button on the top one time, then use either the joystick or the thumbwheel, pressing up or down to select the number of images desired and the stop interval between the images, then press the joystick in or the menu/set button. Done!
Thanks Willy, cool tip!
Responding to David Amundsen – look at P. 201 in the advanced manual. The following modes will cause the problem he’s experiencing:
– When recording 6K/4K photos
– When recording with the Post Focus function
– When recording in Burst Mode
– When recording with the Bracket function
– When [Quality] is set to [ ], [ ] or [ ]
– When using [Time Lapse Shot]
– When using [Stop Motion Animation] (only when [Auto Shooting]
is set)
– When recording in [High Resolution Mode]
Thanks for some great tips. Is there a way to move the histogram position from the centre of the view finder where mine sits at present.
I don’t think so Chris.
The histogram is easily movable. Just touch it on the monitor and slide it to wherever you prefer it to be.
I just purchased the G9. I tried to connect it to my mobile phone via Bluetooth. My phone detects the camera, but not the other way around. When I try to turn on Bluetooth on my camera, it displays a message that says “No paired devices. Please select the following by tapping Bluetooth button in home screen of ImageApp. What ImageApp is it referring to, and what home screen? I am unable to pair the devices
It’s a problem with many cameras and phones Jaswant. I would think that your phone is not fully compatible.
Your phone needs to have the Panasonic Image App installed on it. The app is available for Android phones on Google Play. I presume it’s available for iPhones, too, but since I don’t use iPhones, you’ll have to investigate that yourself. Once you have the app installed, it becomes a bunch of easier, although it’s not the easiest app to get used to.
You must have the Panasonic Image App installed on your device. I connect my Galaxy phone (and Galaxy tablet) using WiFi. Just set your device WiFi to ‘scan’ in ‘Settings’, then turn on WiFi in your G9. Easiest way to turn on WiFI is to look at the screen, tap the Fn icon and the top icon revealed will be Fn 6 Wireless. They will find each other, then launch the Image App..
I’m still puzzled by the image quality pictograms (the JPEG part – one row or two rows of rectangles). Intuitively, “two rows” means “more files”, i.e. stronger compression. But in practice, the “two rows” setting produces larger files.
Hi Wim,
What would be the setting to see the picture on the screen immediately we shoot it on the G9. Having been able to get it
Have you checked the Operation Menu page 4 of 6? Under Auto Review.
Great breakdown and applies to the new GX9 as well! Thanks.
An incredible piece of work: you covered every function on the G9 menu! Thanks for taking the many, many hours it took to put this together. Very kind of you.
Thanks Derek 🙂
Thank you for all info here!
When you are in auto iso, and in A mode, can you specify the minimum shutter time, let us say 1/120 sec, before the G9 raises iso?
Hi Jozef, you have the “minimum shutter speed” functionality. I’m quoting from ‘camera icon’ page 2 of 5 Iso sensitivity:
Min. Shtr Speed
“A very important setting if you feel that the Panasonic G9 is producing blurry images for your shooting style. Birds in flight, for instance, will need a faster shutter speed than many other types of photography.
Since most of the time, you’ll need to raise ISO to gain faster shutter speeds, Panasonic (and many other camera producers) have made this option available. You can set it to Auto, or choose a minimum shutter speed up to 1/32000. The latter is a bit high, but as I mentioned, if you shoot action sports or for certain types of nature photography, a minimum shutter speed of 1/1000 or 1/2000 should be set. At these speeds, you can begin to “freeze” action.”
When using the High Res mode, what is the longest exposure that it will do? One second or more? When the eight exposures are made, is there an audible click or other sound?
Maximum exposure time in High Resolution mode is 1 second. This is found on p.80 of the basic manual. When the exposure has been completed, the red recording state indicator will go out (p.79 in the basic manual).
One item of interest is that when using an external flash, the EV output of the flash can be adjusted easily by going to [Menu] > [Rec} > [Flash} > [Adjust]. Note that this adjustment must be made with the flash unit mounted and turned on. There’s also an even easier method (on p. 107 of the Advanced User Manual). Press [+/-] on the top plate, then rotate the rear dial to adjust the flash output. Flash compensation will be noted in the upper right corner of the monitor, but is only visible when the flash unit is mounted and turned on.
Cool, thanks Willy!
Hi is it possible to assign to the Fn keys the 150/180fps
FHD video mode?
I don’t think this is possible Dimitris.
I really appreciate all the hard work you’ve put into this Wim. Is there any way I can access a hard copy so that I can keep it in my bag?
Thanks, David
Working on it David.
Hi Wim a very comprehensive index, that must have taken you hours! When you’re in bulb mode, how do you control the shutter? Can you even attach a remote shutter release cable or through the Panasonic app only? Thanks!
Hi Eva, indeed, this is exactly the purpose of bulb mode.
This clearly took a long time, and involved much effort. It is deeply appreciated. Have you thought of publishing a book? I could not find a G9 book in English.
Hi Robert, I’m currently emailing a pdf to anyone who donates $10 and above.
I would be happy to donate $10, how do I do so?
Regards,
Rob
You should see the donation box on the right hand side on the top of the post Rob.
Hi Wim, I am nearing retirement and new to photography. I recently purchased the G9 and WOW, was I happy to find your article on settings, tips, etc. Thank you!
Is the pdf still available? If so, I do not see the donation box.
Thanks again for this informative document.
Mike Passarello
Hi Mike, please visit this page again, you’ll find the purchase link below the title.
I just got the G9 and was so glad to find your explanations of the menu settings. Thank you for helping me not feel so anxious about using the camera. I truly appreciate your work. Cheers, Tom.
Good tips. I saw AF sensitivity settings for video, not sure where, thought those sets were available for video. Or is that only photo or on the GH5?
I’m enjoying the cam, one issue i’m having is with the VF. I’m zooming in on pics to check sharpness, and often I see blotchyness which makes it hard to tell if pics are sharp. When I get them onto the PC, they are sharp. So the VF although set at default brightness and contrast etc,. looks a bit messy to me when zoomed in at times (and this is with ISO 200 images too). Is it because if high gain or sensitivity on the VF? Reminds me of watching a movie in dynamic mode on TV instead of Movie mode. Am I dreaming? I don’t remember having such problems checking sharpness on sony. thx
Another comment: the most confusing menu item is setting the LVF to maximum size through the LVF display set. I couldn’t get it back out to max and vice versa, and when you select the mode, it pops up a help tip. But when you go back to shoot nothing seems to change. I think you have to fool around with it, it doesn,t react like you think.
Another point I can’t see you mentioning EIS, electronic stabilisation as an additional benefit in video. I turned it on and it’s like night and day in video, like using a gimbal.
I am thoroughly confused. I am coming from a Lumix FZ-150, with which I never had a problem. I am completely perplexed by the video modes on the G9. When I select the Creative Movie mode, my autofocus is completely unavailable. It’s manual focus or nothing. AND no matter how I shoot video, no sound is recorded. I pull the SD card, put it in my PC and the video plays fine, but there is no sound at all.
Can anyone tell me what I’m missing?
Thank you ever so much for taking the time & energy to put this very comprehensive guide for the G9. I just traded in my GH4 for the G9. I enjoyed the GH4 tremendously but as I was shooting 80% stills and about 20% video I thought it migrating to G9 might be the logical path forward and a couple of hours into using the camera I am convinced I’ve made the right choice. I will go through your guide over the coming days to help me become really familiar with this new camera. Once again thank you
thank you, enjoy your camera.
Awesome article. Very much appreciated. I have had my G9 for a couple of weeks and am amazed at the customisability but I would really like to set the autofocus custom setting modes to one of the function buttons so I can easily change between sets(ie Set 1-4). This would be really helpful as I could quickly change the autofocus reactivity on the fly depending on the situation. But I can’t see this as an option for the function buttons. They have so many other options seems odd they haven’t made this function able to assigned to a function button and you have to go into the menu to change this. Or am I just missing it?
Hi Wim,
Thanks you for such a great article.
I have just purchased a G9 having switched from Oly EM1-mk2 and find it sooo much more user friendly with it’s menu system,buttons and dials….I was up and running almost immediately.
One thing that would be helpful too…is when certain functions are set it seems to knock out other functions [I guess this has to be] …Oly was the same…but would be good to have a list of what knocks out what…if you know what I mean…ie some of the menu options are greyed out which must happen with certain menu options.
Thanks again for a great read.
Hi Sandy, it’s true, depending on the Mode that you’re in this can be different. Best, Wim
Excellent article. I own a G9 and I am generally happy with it. I guess my only real gripe is hit & miss low light (low contrast) focusing and the 10 min recording limit for 4k. Who knows one day Panasonic may remove this with a firmware upgrade after all the upgrade to version 2.0 was simply incredible (thank you Panasonic). For the price I’ve paid for the G9 it is truly amazing.
Hi Wim, thanks for producing such a fantastic manual. Can you advise me how I can purchase your pdf of the manual?
Kind regards and thank you
John
John Flaherty
Greetings and thanks for this informative article.
Questions: what is the function of the level gauge adjust, and is there a way to place a level line in the viewfinder to help keeping the camera level?
Thanks again
Don’t think this is possible Richard.
Does the sensor lock in-place for wet cleaning if necessary? Is there a “lock sensor” function? Or does it lock when the camera is turned off?
The sensor does not lock in place. Just be VERY gentle when cleaning it, and be sire to use the cleaning kits that are sized correctly for M43 sensors.
Hi Wim
Have just purchased a G9…..in comparison to G3 (my old) camera what an improvement.
There is a point i think should be noted, unless already dealt with, and that is “histogram”………..contrast compensation is shown and has Fn on top of camera, but, is anybody aware that by using Histogram displayed on screen, and simultaniously pressing and holding the contrast button,by turning the rear dial you can see the histogram move over / under exposure, which helps as you know to balance the final picture
Hi wim, I bought a G-9 to use with Wemacro rail system for photographing minerals using Zerene Stacker. Do you have any suggestions regarding settings that will help me get started on this. The camera is mounted on a Nikon bellows, with a raynox 250 lens, and a 5X Olympic microscope objective. thanks for your consideration. . John BTW, this is a great primer for using the G-9. thanks for all your work to put it together.
Hi John, interesting setup! Use base ISO (200) and use a bright light source. Best, Wim