Luminar 2018 new features overview
Luminar 2018 new features overview (updated for Luminar 3 with libraries)
Introduction
Since my review of the original Macphun Luminar earlier this year, a lot has changed. Luminar is now fully functional on both Mac and PC, so Macphun decided a name change to Skylum was in order. Besides this, the latest version of Luminar 2018 includes some interesting (some might say game-changing) new features. Luminar 2018 is now available for pre-order and will be officially released later this month. There will also be a free and big update next year which will include an all-new catalog system, placing Luminar in direct competition with Lightroom.
I’ll be going over the, for me, most interesting additions to the already excellent photo editor in this post, including tutorials on how to achieve these looks.
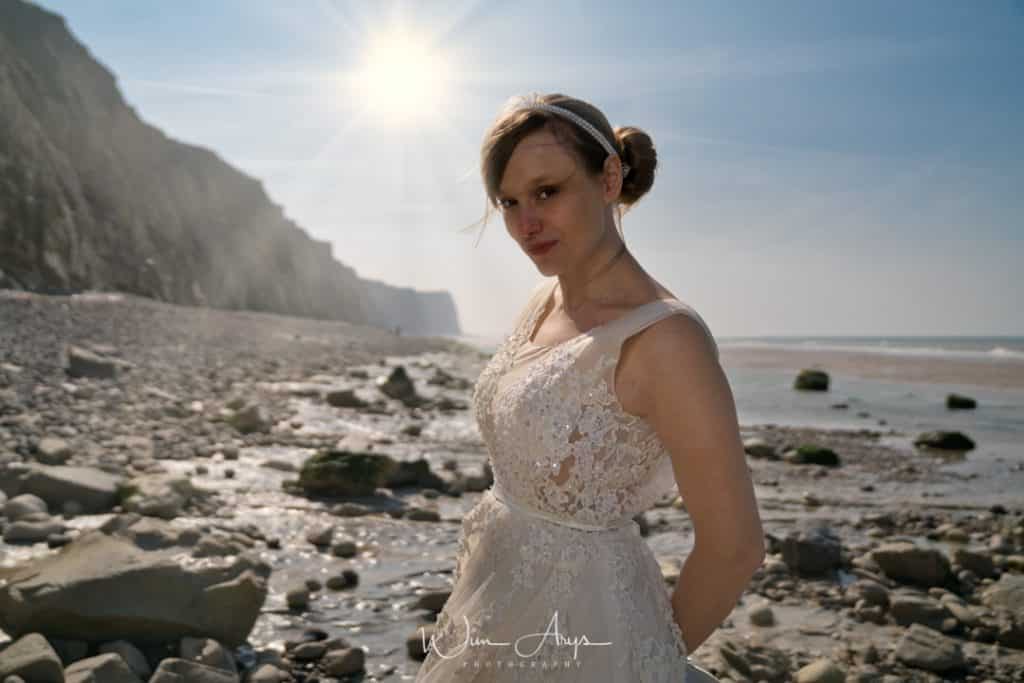
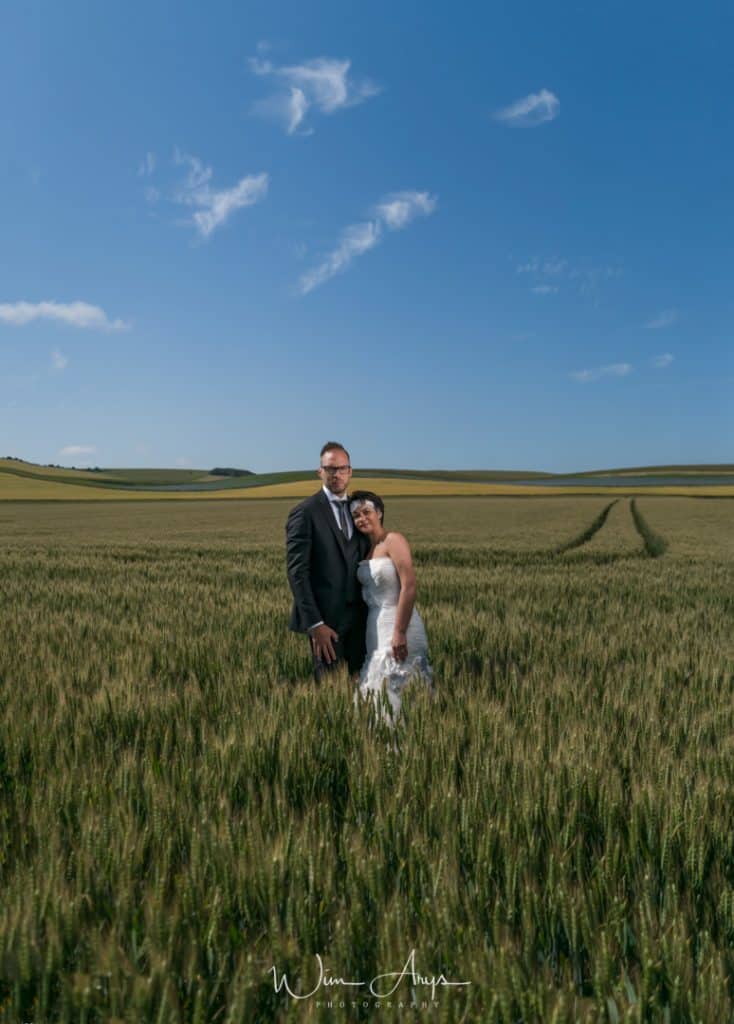
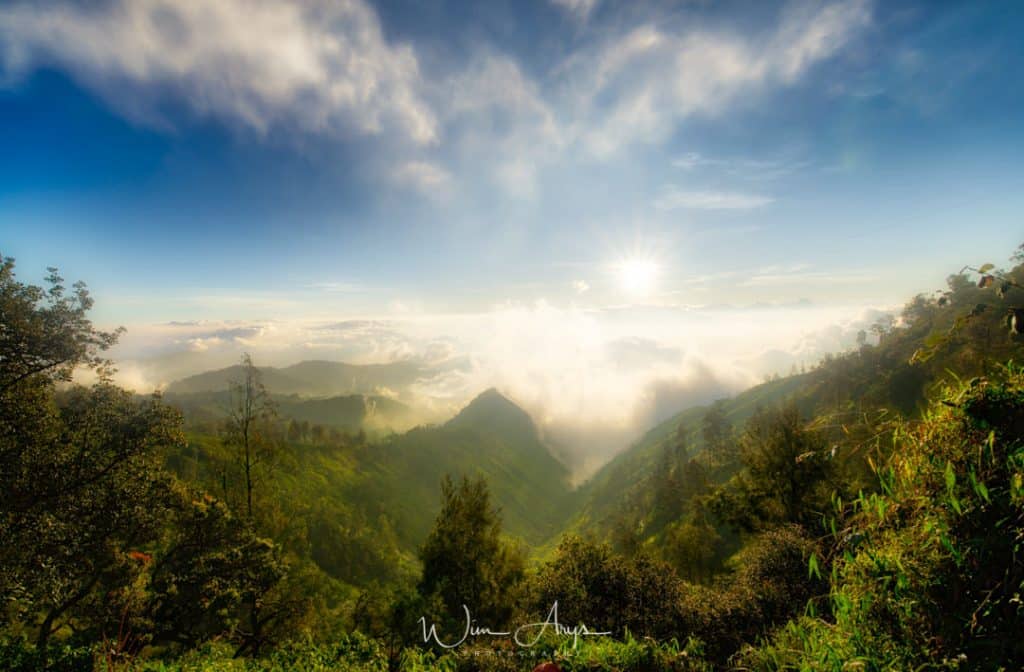
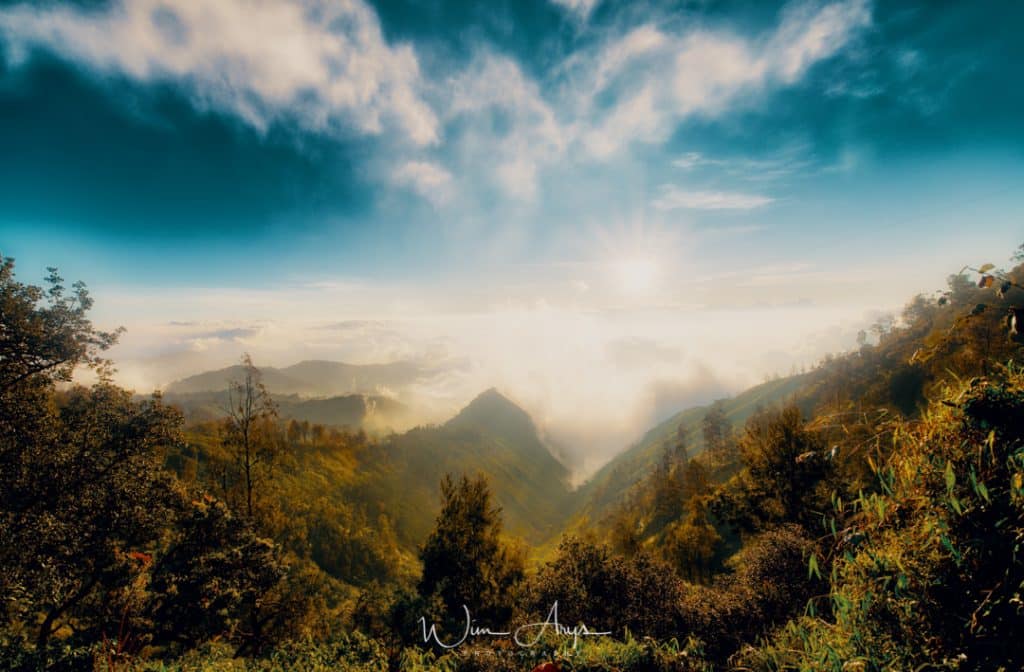
Sun Rays
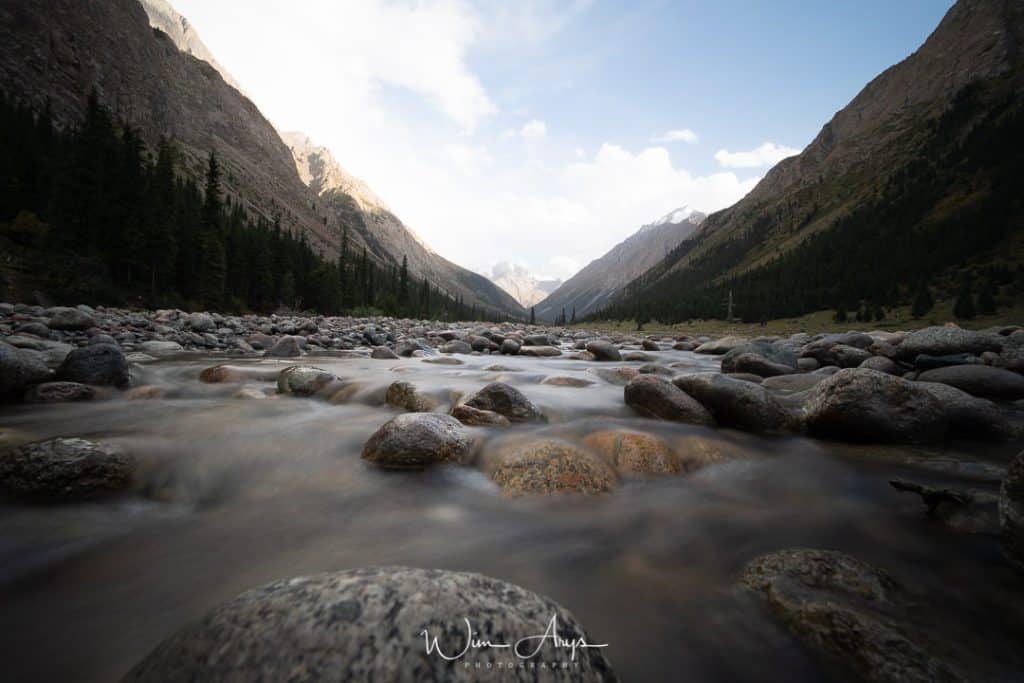
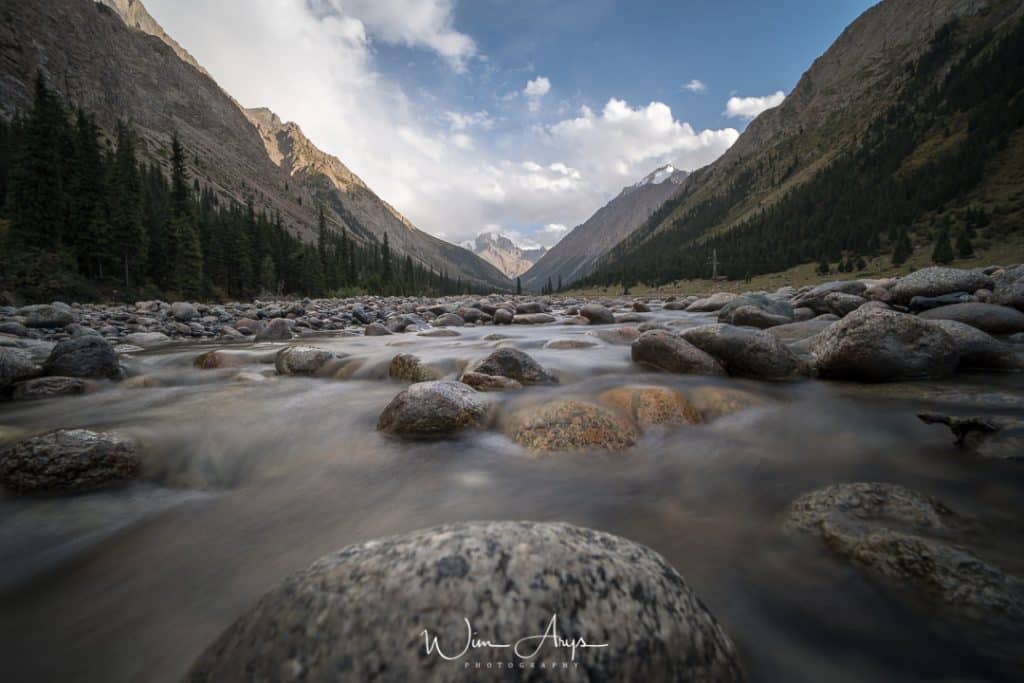
The Sun rays module is one of these new features. It allows you to add rays of light to your image and even the sun itself if you want. Before Luminar 2018, I used a plug-in from Digital Film tools called Rays (click for review) to do this, but it’s way easier and more convincing to add rays of light using Luminar now.
Step one is importing an image into Luminar 2018, either from the standalone app or through Lightroom using the plug-in (if you can’t find it in Lightroom, Launch Luminar standalone and make sure you’ve installed the plug-in extensions for Photoshop and LR by clicking on Luminar in the menu).
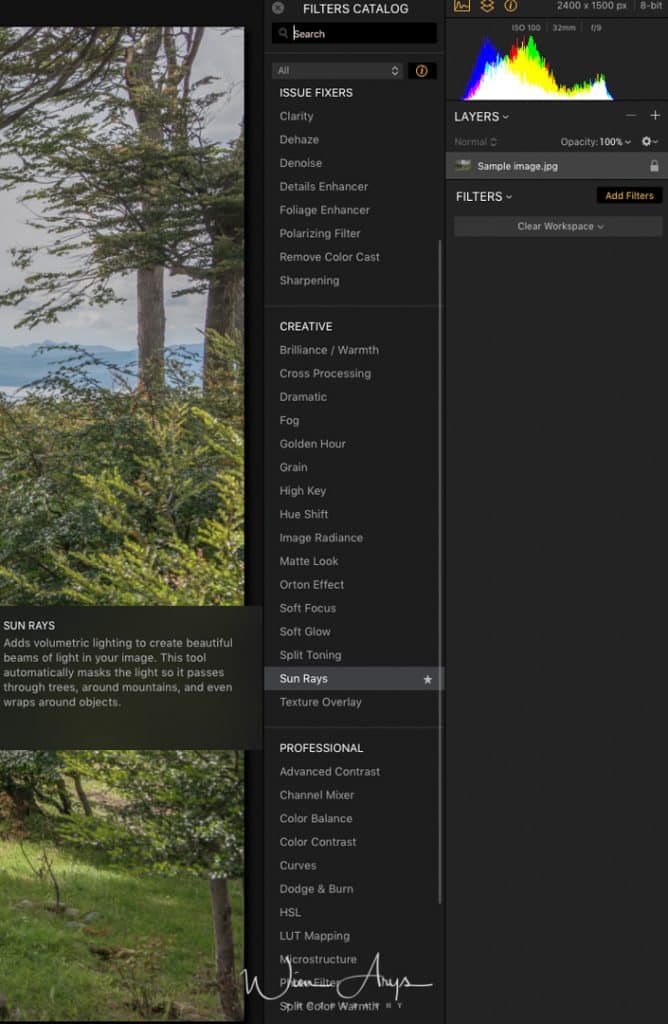
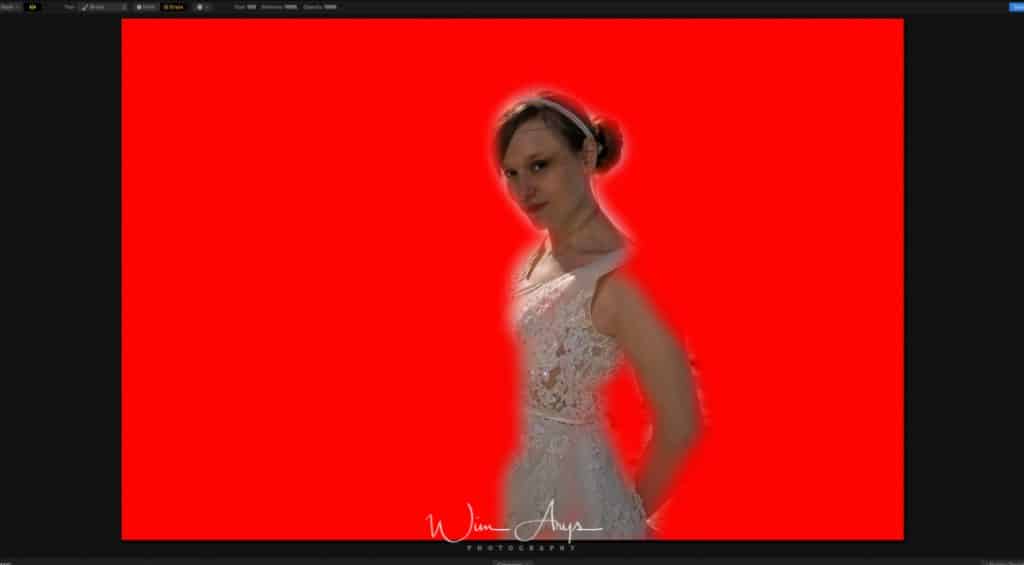
Next, you should add the Sun Rays filter (Add Filter) from the ‘Creative section’. Place the sun anywhere you like in the sky. There are lots of options on how you want your rays dispersed and the size of the ball, so experiment a little with that. Now that you’ve placed your sun, you’ll need to use the layer functionality in order to brush away the layers in the shadows. Luminar has the ability to mask any layer, and the brushes are auto-sensing, so this is quite easy to do.
And that is basically it, you can get quite convincing results in no time.
Matte Look
A matte look is all the rage now for wedding and portrait photography. Kudus to Luminar on adding features that photographers demand, and doing so in an easy and convenient way.
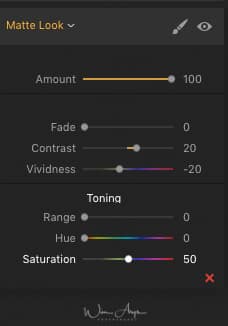
There are 7 sliders available in the Matte Look module. On top, you’ll find the usual amount slider fro 0 to 100%, great if you feel the matte effect is a bit too much and you need to dial it down. The fade slider below that more or less makes the image look more vintage, and you can add/ remove contrast and vividness too. Below these sliders, you’ll find a toning module that allows you to add a toning filter to the original image. Adding some noise from the (separate) noise module is also a good idea to add a little polish to the effect.
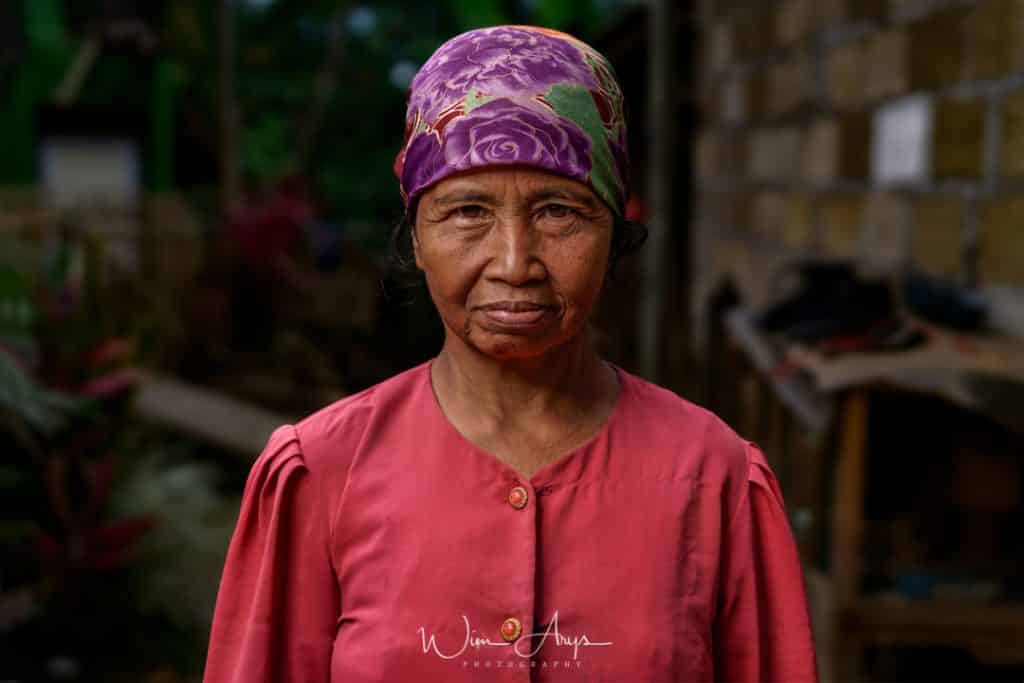
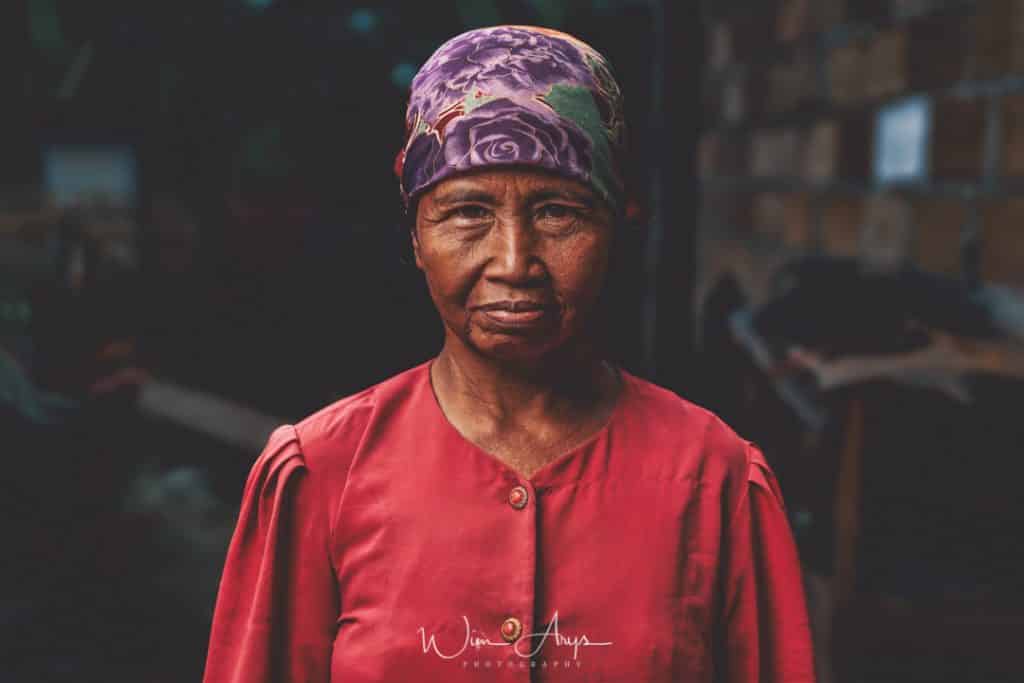
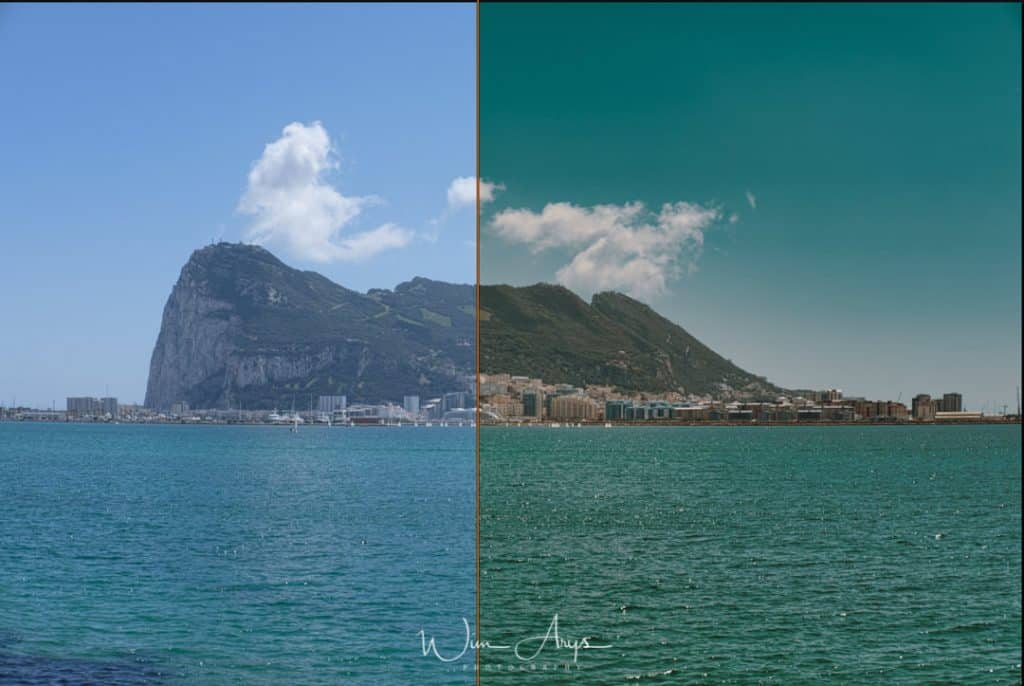
LUT mapping
Lut mapping is my favorite new feature. It’s the easiest way to apply film looks to images using LUT’s available today. LUT is short for color Look Up Table and allows you to remap the colors from your camera. Every single movie you see uses this technique to achieve a unique look and feel, and it is quite different to using a ‘vintage’ preset Lightroom. Since you’re remapping all colors, and not just modifying HSL, your images retain more of a 3-dimensional look.
Luminar 2018 will ship with a collection of LUT’s as a pre-order benefit, and there are plenty available for free online. If you want to go for the best ones available, have a look at lutify.me. Owner Goran makes some of the best LUT’s available ranging from Cinematic to B&W and even has a collection of looks lifted from movies. I’m mainly using his Teal & Orange collection here.
Applying LUT’s works best as a first step in your processing chain. You’ll find the LUT module in the ‘Professional’ section of the Filters Catalogue. You basically load the LUT you want, and you can add contrast and saturation. It’s always a good idea to tone down the amount and blend it back just a little with the original image.
After you’ve selected a LUT look, you can start editing your image like you normally would, adding other modules for exposure, contrast, highlights and shadows, de-hazing and so on.
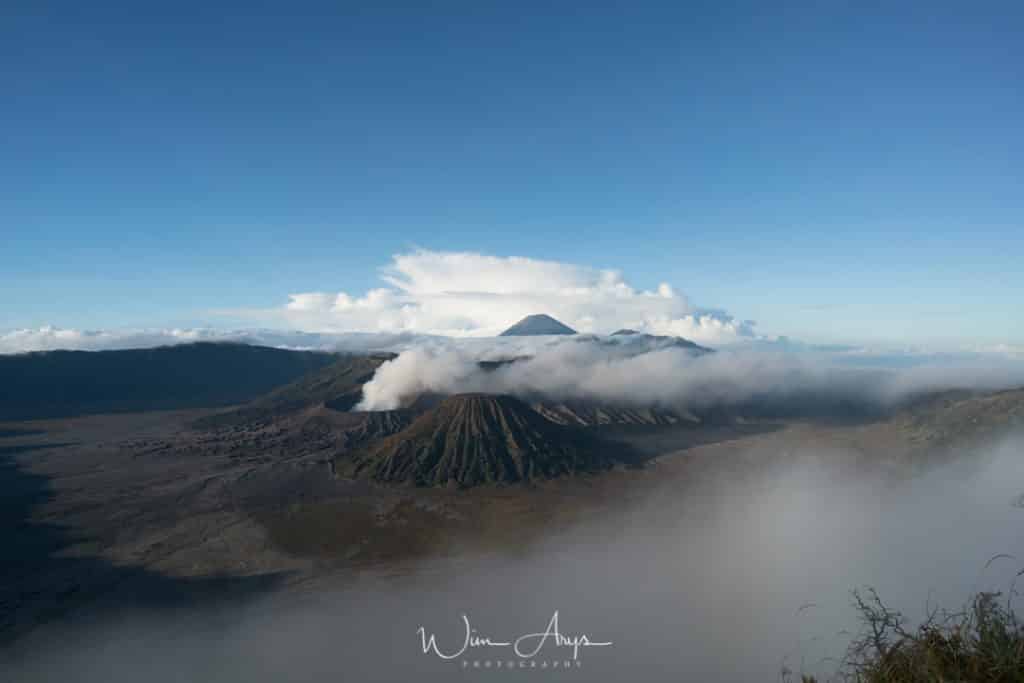
Luminar Sky AI: AI Sky Enhancer tool
A function added to Luminar in November 2018, Sky Ai or the AI sky enhancer tool automatically detects and enhances the sky in your image. This artificial intelligence is trained by means of input from hundreds of thousands of photos from many different photographers.


Skylum has trained a neural network to detect the sky as well as the other objects in your image. Skylum calls this semantic segmentation, basically software is taught what is sky and what is not within the context of the image. The software then automatically makes a mask of the sky, ensuring that only this part is affected.
After processing ,the skies are richer with detail and appear more vivid while still attaining a natural look. How much of this effect you want, depends on how much you move the slider to the right. If you feel that the slider is not giving you enough power, you can add multiple instances of the Sky AI filter module.
It’s not unlike the Dehaze effect in Adobe Lightroom, but if you like Vibrancy, Clarity, and Dehaze, this is a vast improvement due to the auto masking that speeds things up and targets the results. The auto masking feature also avoids halos and problematic edges.
Luminar 3 with libraries review
I’ve had a chance to work with the latest Luminar 3 with libraries. This interesting development means that Luminar is now a real alternative to using Adobe Lightroom in case you need the library functionality.
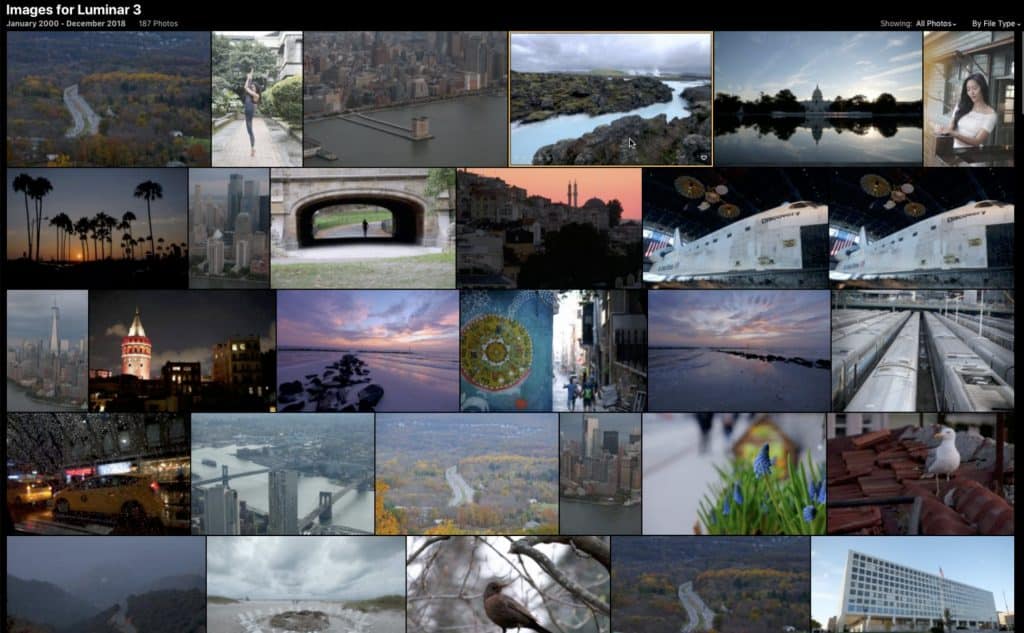
The inclusion of the library functionality of course means that the interface has changed slightly in order to incorporate the libraries tab. You’ll find this tab in the upper right corner next to the edit and info.

It’s also easy to navigate through your folders thanks to the albums and folder navigation menu.
Conclusion
The latest version of Skylum Luminar 3 with libraries again brings many exciting new features. I really like how Macphun (can I still say that?) seems to listen to what photographers really need and then incorporates this into their software. The best new features for me are the Sun Rays, Matte and LUT modules.
The Sun Rays module allows you to add rays of light and a sun to images in a very convincing way. Thanks to the easy masking tool, that you’ll find in all modules, it’s a breeze to add these rays to specific parts of your image. Matte makes fast work of achieving a matte look for portraits with just a few sliders, and I’m sure many wedding photographers will be very happy with this feature.


Finally, LUT mapping is my favorite feature. It has never been so easy to apply LUT’s to your images than with Luminar 2018. Using LUT’s will give your images specific movie like looks without flattening your image (what Lightroom presets usually do).
Luminar 3 with libraries is a huge update to an already very handy and worthwhile piece of software. If you’re already using an earlier version, it is definitely worth upgrading. I’f you haven’t heard of Luminar, you should take a serious look at this very mature piece of software.
I do believe that the libraries functionality needs a bit of work. Skylum has probably been rushing to get this update out because many potential users will want to switch to Luminar before the next Adobe photography subscription cycle begins in 2019. So the code will probably need an update the get everything to work faster and more stable.
Purchase and availability
Luminar 3 with libraries is available from December 18th 2018. You can pre-order now (December 6th until the 18th) at a price of $59 for new users or upgrade from the 2017 version for $49. If you use the promo code WIMARYSPHOTOGRAPHY you’ll get an additional $10 dollar discount.
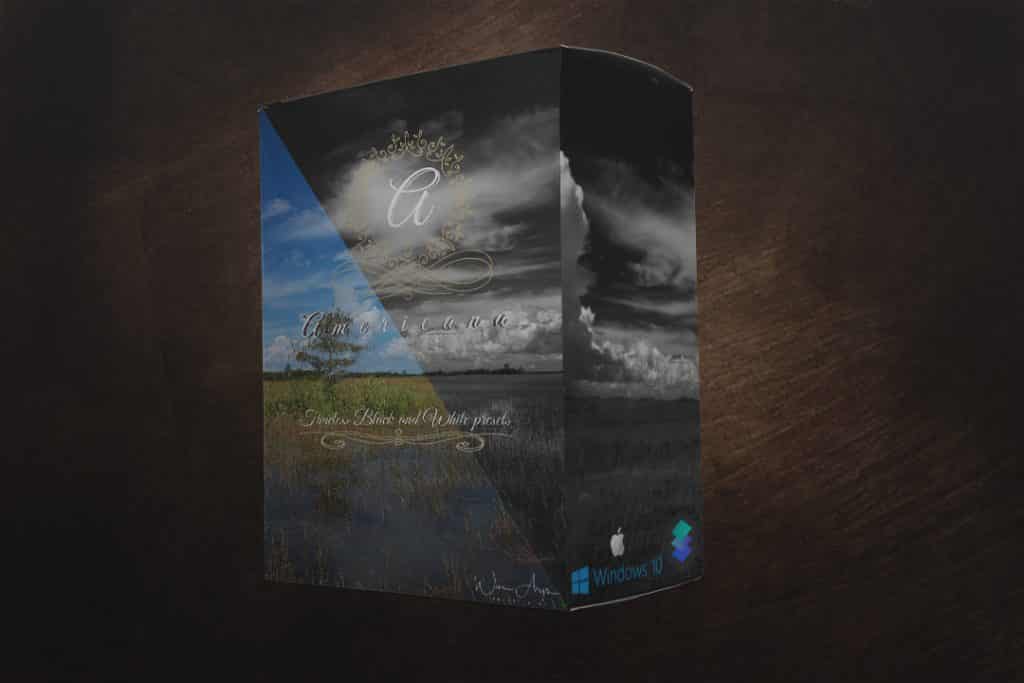
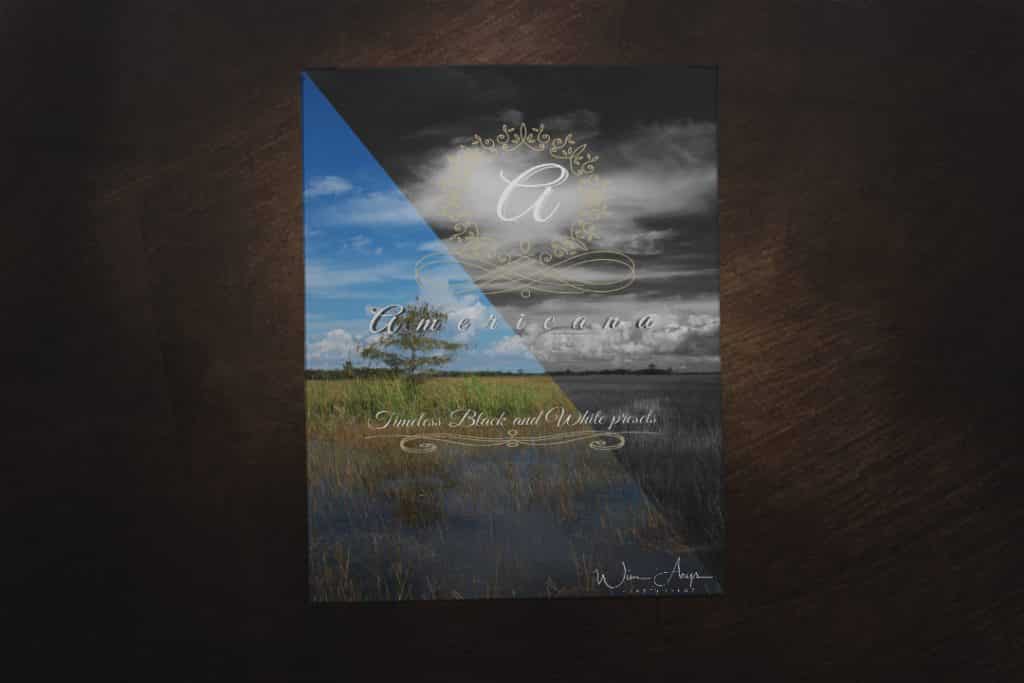
Besides the special preorder freebees package from Skylum I’m giving away my brand new preset collection called ‘Americana Black and White’ featuring ten custom made classic black and white presets for Luminar. All you have to do is send me a screenshot of your invoice with my coupon code to wimarys(at)gmail.com.


I appreciate the info on using Layers – it is somewhat difficult, but a very valuable tool. I’m now using Luminar 4.
Hi Jim, agreed in version 2018 it’s not as easy to use layers as in photoshop.