
Using LUT in Lightroom
Introduction
LUT is short for color Look Up Table and allows you to remap the colors from your camera. Every single movie you see uses this technique to achieve a unique look and feel, and it is quite different to using a ‘vintage’ preset Lightroom. Since you’re remapping all colors, and not just modifying HSL, your images retain more of a 3-dimensional look.
How to use a LUT in Lightroom
There are currently two ways to use LUT files in Adobe Lightroom.
LUT’s through the ‘Profile’ Tab (before version 7.3)
Preparing your LUT’s
The first step is to copy the LUT into the following location on your hard drive:
Users > [Your Username] > Library > ColorSync > Profiles
It’s important not to create any extra folders inside the Profiles folder.
Please note: In most cases, the library folder will be hidden. To copy files into this location you’ll first have to gain access to Library folder.
Once copied into the specified location, LUTs are ready to be accessed from within Adobe Photoshop Lightroom.
Loading LUT’s in Lightroom
You’ll notice that this is quite cumbersome to do, but it is currently the only way to use a LUT in Lightroom.
First, you’ll need to go to to the develop module in Lightroom and check the ‘soft proofing’ box below your image.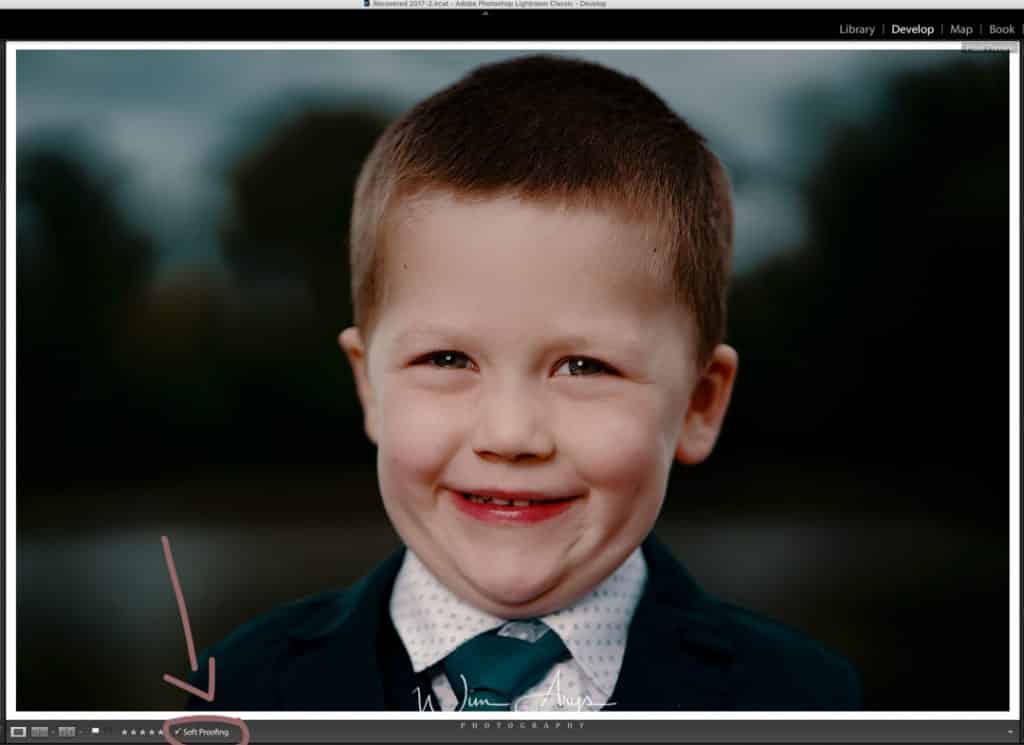
You’ll notice that on the upper right side of your screen, there is now a ‘soft proofing window below the histogram.
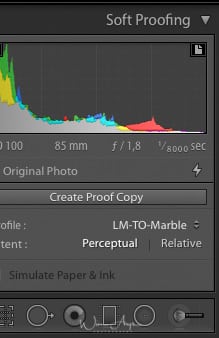
Inside that window, click on the profile tab, you’ll see that all the LUT’s that you put in the Lightroom Profiles folder in the first step will be there. If not, click on ‘other’ and select all the LUT’s you want to use inside Lightroom.
You can now edit your image as usual inside Lightroom.
The last step is that on export as jpeg, you’ll need to select the same LUT as color space in the File Settings tab below the JPEG option.
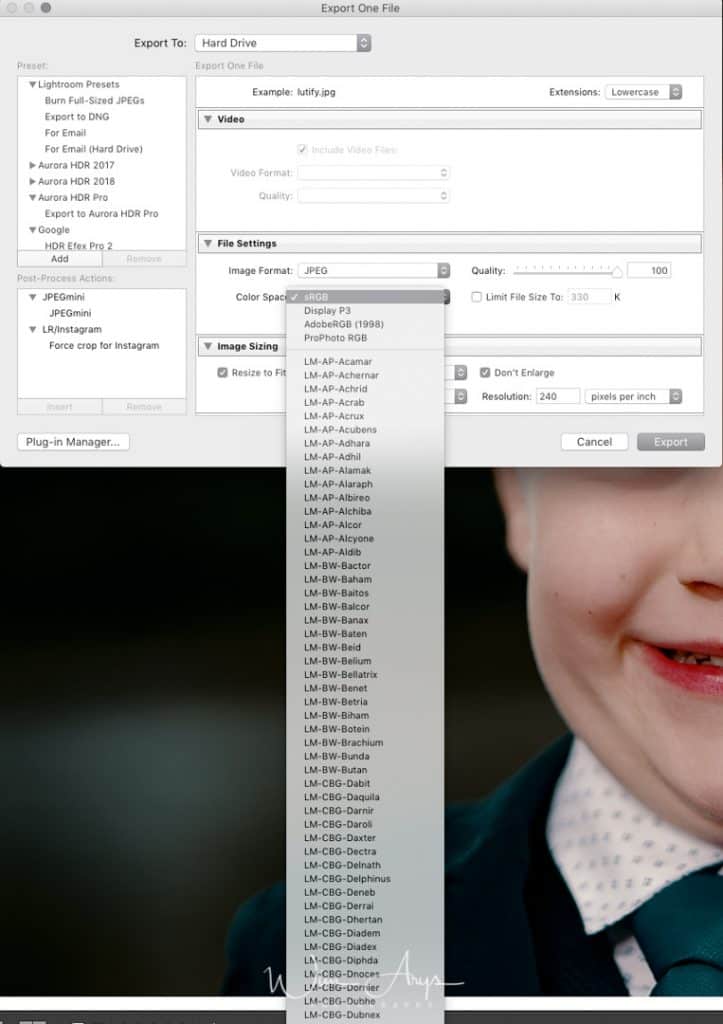
This is an important step, as this is how other apps will know what color space to use. If you don’t change this, your image will revert to sRGB, and the color profile will not be applied.
Most photo viewers will read this embedded color profile, but some like XEE don’t. The good thing is that when you upload to Facebook or Instagram, the right LUT will be applied.
Using LUT in Lightroom with the Lightroom Develop TAB (easiest method with Lightroom 7.3 or later))
It’s now possible to use LUT’s in Lightroom directly in the Develop Tab! You’ll first need to import your LUT (xmp) files into Lightroom. Don’t worry, it’s easy.
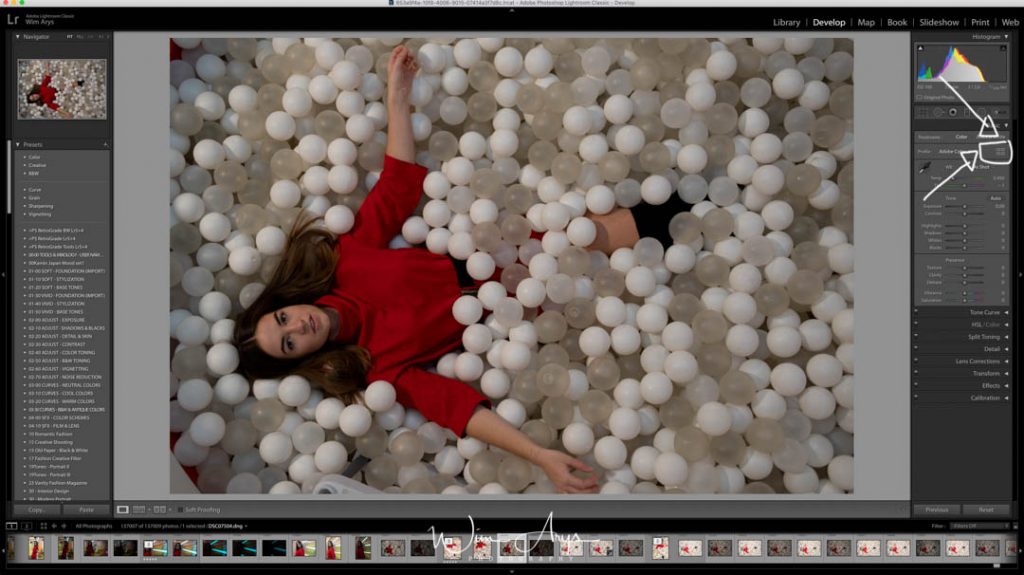
- Switch to the develop tab in Lightroom. It’s easy to find on your top right hand side when you start up the application.
- Step 2: Press the four rectangles inside the Develop tab as shown in the picture below. If you hover over it, it will say “Click to show the profile browser”. And yes click on it because we want to see the profile browser.
- Step 3: import your LUT (xmp) files into Lightroom by clicking on the ‘plus’ sign next to the words ‘Profile Browser’ in the tab. Navigate to your LUT folder and simply import the ones you like.
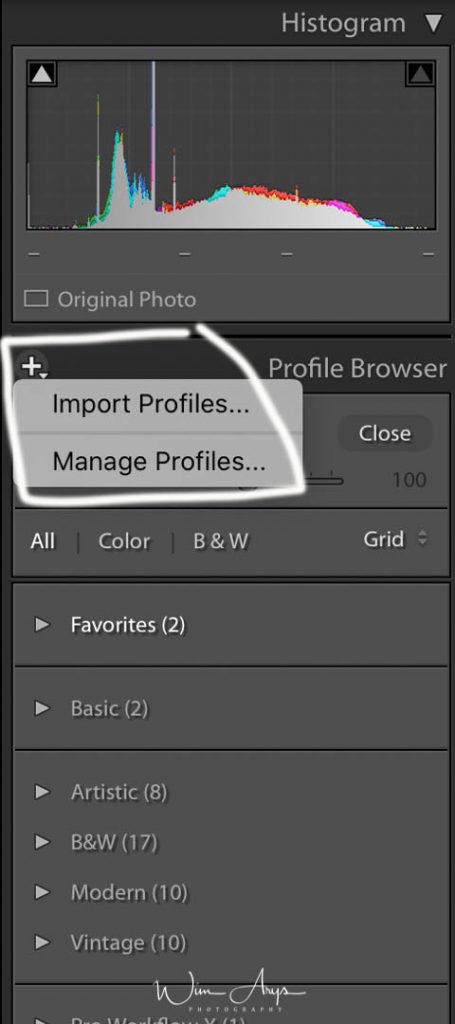
Once the are imported, you’re all set to start using LUT files inside Lightroom Classic or CC. You’ll find all your imported LUT files in the same Profile Browser window of the Lightroom Develop module (Tab). Simply scroll down and see a preview of your imported LUT’s.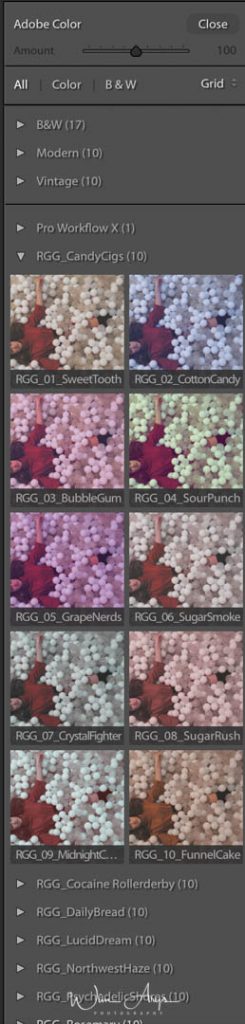
There is also an Amount Tab that allows you to add more or less of the Lut effect to your picture. Warning: setting this to 200% effectively means adding the same LUT twice, so be careful and use moderation.
Conclusion
The methods described here are the two ways how to use a LUT in Lightroom. If you’re on an old, pre 7.3 version of Lightroom you’ll have to use method 1 which is quite cumbersome. If however you have a newer version of Lightroom CC or classic, the second method is a lot easier and more practical.


Hi Wim,
Thank you for this!
I’m working with LUTs for a few months now and I just love what they do to the image. Then I tried to replicate the LUT look so I could make my own preset in LR without having to apply softproof. But without 100% success. I’m always afraid, especially when working with clients, that their photo viewers don’t support that specific color space…it already happened and pictures were used and uploaded with wrong colors :-/
So I came up with the idea to re-import the exported jpg’s (with LUT applied and correct color space) back into LR and export them again with AdobeRGB Color Space. And it seem to work!! 😉
Hi Pascal, definitely can relate to your problem here. Would it not be better to export as sRGB for optimal compatibility? Best regards, Wim
Hi! I love that have this! I cannot find my library folder anywhere to complete the first step. How do I find it?
Are you on PC or Mac?
Great site and and interesting read. You may want to add an update as this is no longer the only way to use LUTs in Lightroom. The new profile system allows you to use a Profile with a LUT attached. Admittedly you have to use ACR to create the Profile but once done it works in Lightroom like a normal Profile.
Finally done Dan.