
JPEG to RAW AI review
Introduction
With artificial intelligence being used in image editing software, it’s an interesting time for photographers. Topaz labs is on the forefront of machine learning with several unique and interesting apps on sale and in development. ‘JPEG to RAW AI‘ is one of these applications, designed to enhance your Jpeg files for further, RAW-style processing.
What does JPEG to RAW AI do
‘JPEG to RAW AI’ claims to extract enough data from a decent jpeg file so you’ll be able to process it in the same play as camera raw file. It’s uses machine-learning to convert a jpeg into a high-quality RAW file for better editing. ‘JPEG to RAW AI’ claims to remedy typical Jpeg processing problems like compression artifacts, banding, loss of details and narrow dynamic range. If you’ve ever used JPEG files as a base for advanced processing in Photoshop, you’ll have run into problems with dynamic range and a lack of color detail. SO this looks on the surface like a worthwhile app for your collection. Let’s investigate a bit further.
How does JPEG to RAW AI work?
Recover lost dynamic range and detail
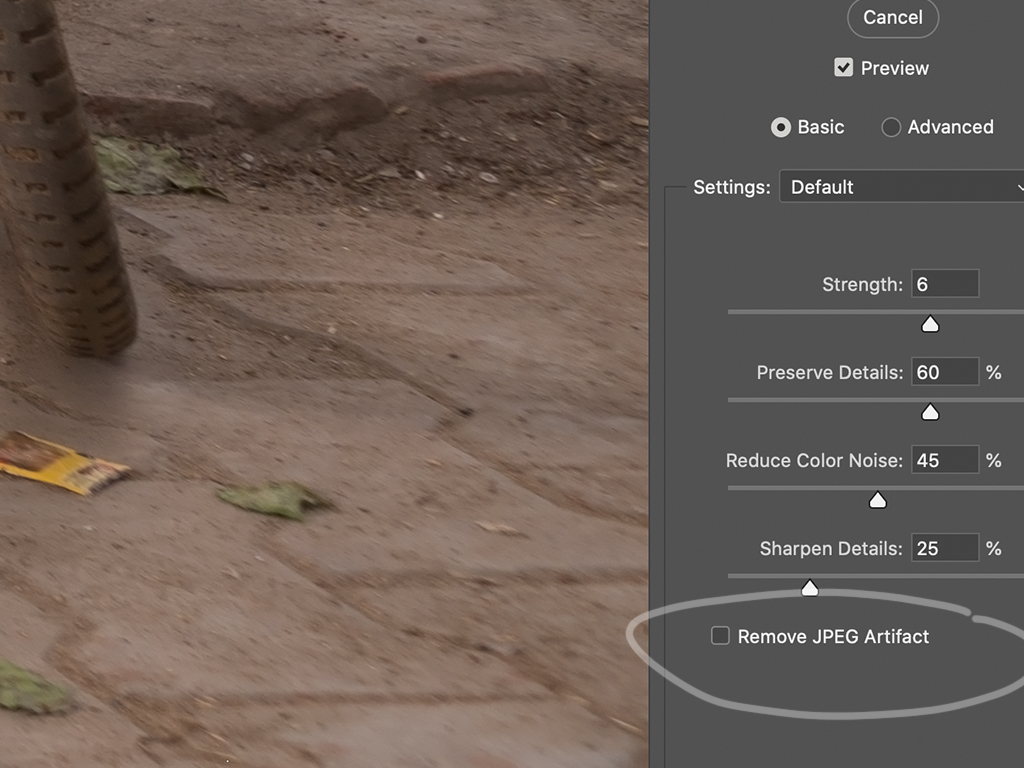
Images lose significant dynamic range when converted to jpeg. And I’ve had great difficulty in the past to recover lost detail from jpegs. In Photoshop, there is also a ‘Remove JPEG Artifact’ inside the reduce noise window, but results vary.
‘JPEG to RAW AI’ claims that while it is not possible to recover all missing details, it can work with even tiny amounts of information. Thanks to this created information, you can be more aggressive when adding or removing exposure and contrast. This can be handy if you have a blown out sky or an underexposed subject.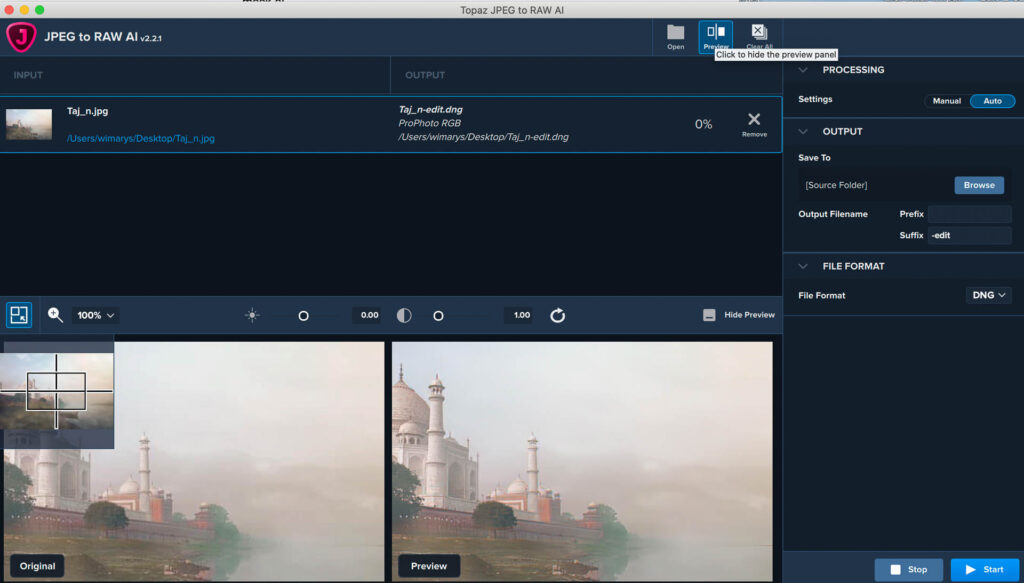
Recovering details
It’s inherent that’s during jpeg compression a lot of detail will be smoothed out. Pictures taken with an iPhone are also heavily compressed to save storage space. I can recover a lot of image detail with ‘JPEG to RAW AI’.
Recovering lost color information
SRGB vs Prophoto RGB
We save jpeg images in the sRGB color space. This is fine for use on websites, but when editing a photo and adjusting saturation or Vibrance will often see ugly color artifacts. ‘JPEG to RAW AI’ can expand this limited color space to Prophoto RGB, which is even Superior to regular raw file. This is possible because there is enough information in at least one of the color channels. Using this information, the machine learning algorithm can reconstruct missing color detail with a good level of accuracy. This all benefits you when adjusting your images Vibrance and Saturation in your image editor of choice, seeing no artifacts.
Color Depth
Bit depth or color depth is the amount of color information an image can store. You might have noticed that when you try to edit an image with low bit depth, color banding will appear in the sky. It’s also what often happens when you upload a photo to Facebook, by the way.
A normal 8-Bit jpeg file has 265 values per channel. When ‘JPEG to RAW AI’ has processed your Jpeg, it will have expanded this figure to over 65,000 per channel.
This will eliminate banding problems when editing your images for good.
Other artefacts
We are all used to seeing visible compression artifacts in jpeg images that are compressed. ‘JPEG to RAW AI’ can also help with this issue. It will remove these artifacts, even invisible ones in high-quality JPEG files.
Interface and workflow
Importing images
Single image processing
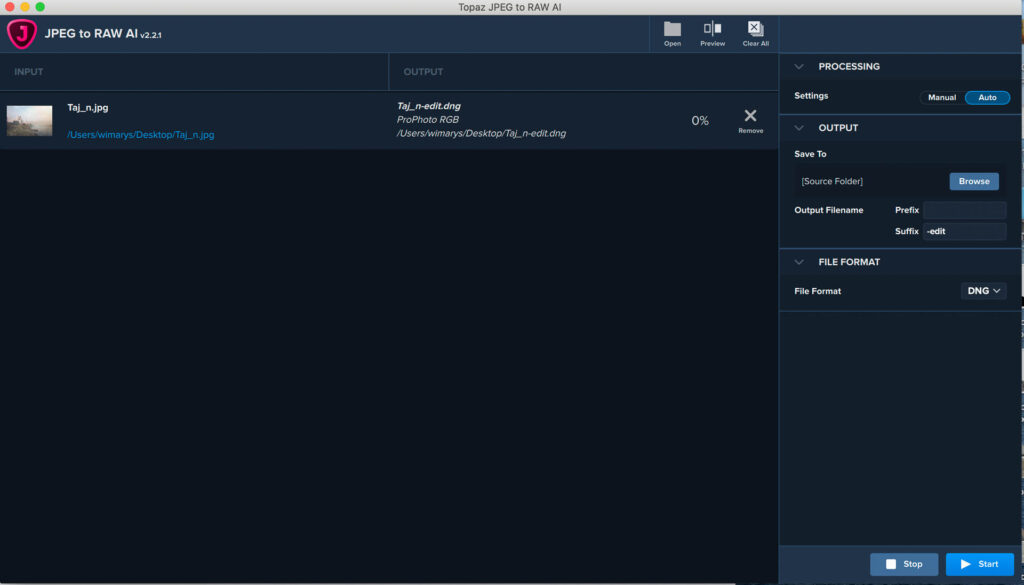
To get started, click open to import your image into ‘JPEG to RAW AI’. You can also drag and drop your image from the desktop or folder of chores for convenience.
Multiple image processing
To get started, open and select multiple images to import into the application. You can also drag-and-drop folder of images from the desktop or folder of choice to begin your workflow.
Processing window
You can decide between manual or automatic processing. Automatic choses appropriate settings to enhance your image. If you’re not pleased with the output file, I would suggest coming back and tinkering with the sliders yourself.
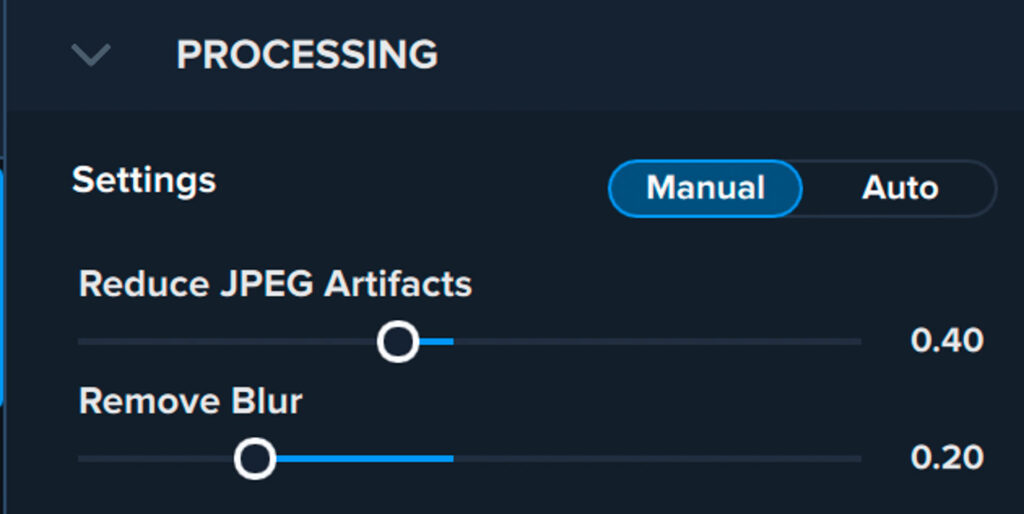
In the manual processing window, you’ll see 2 sliders. They call the first one ‘reduce jpeg artifacts’. The second one is the remove blur slider.
Reduce jpeg artifacts
Adjust ’reduce jpeg artifacts’ slider according to the noise level of your image. Noisier images may need to use a higher volume.
Remove blur
Adjust the remove blur slider according to the blur level of your image. Images may need to use a higher value.
output settings
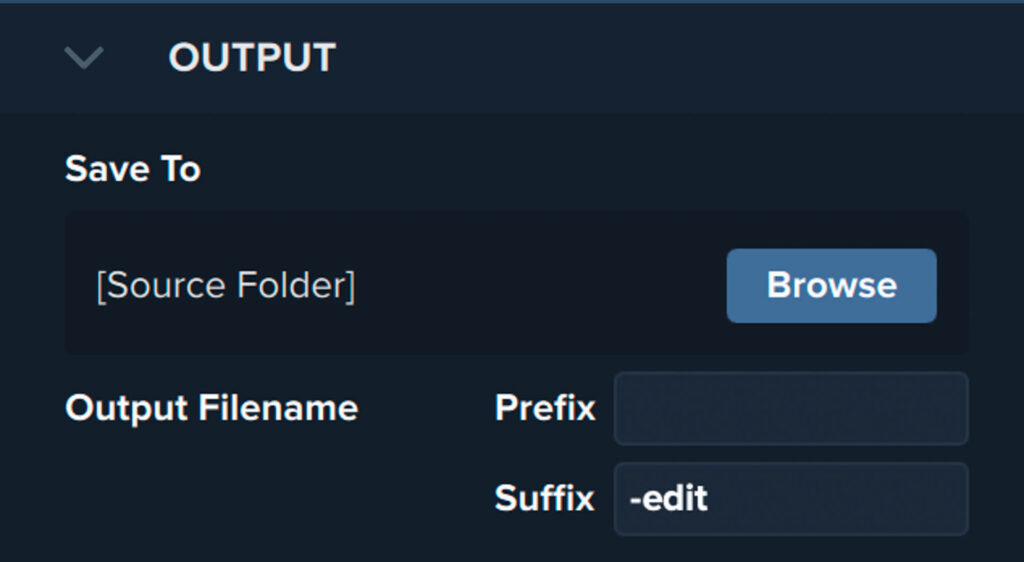
In the output settings, you can select where you’d like to save your processed image. It can save this image to either the location of the source image, or a custom folder. When using a custom output location, a browse button appears.
Output file name prefix / suffix
It will base the output file name on the source filename. You can add a prefix and or a suffix to create a unique output file name.
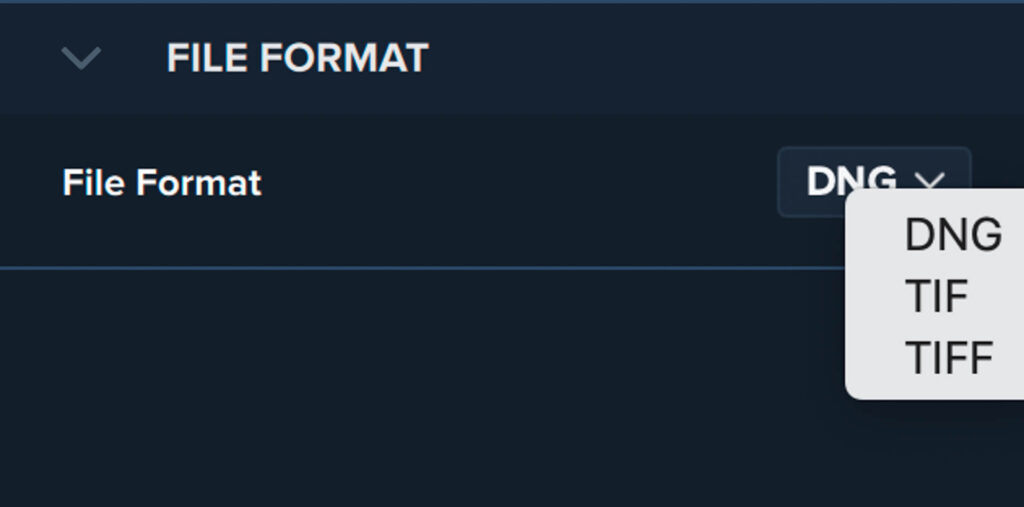
You can decide between DNG, Tif and Tiff formats as output extensions.
JPEG to RAW AI user experience
I love to travel for my photography. During a trip to India we visited the Taj Mahal. I found a fantastic and unusual view of the Taj Mahal from the banks of the Yamuna River. I got a couple of nice shots and transferred one as a jpeg to my phone. The next day, in the freakish formatting accident, I deleted all my raw files.
When I got home, I tried to fiddle around with the one jpeg I saved but never got anywhere. When I noticed that topaz labs released the software, I thought this would be an excellent case to test it.
The procedure itself is simple. You import your jpeg into ‘JPEG to RAW AI’, and heater select Auto or manual processing. I went for automatic processing and saved my output file as a DNG. My entire Lightroom catalog now comprises DNG’s since I’m now also compressing my raw files with an application called Rawsie. This keeps the size of all of my years of pictures manageable.
Anyway, once I aborted the new file into Lightroom, I could no longer tell the difference between my raw files and this convert to jpg.
[bafis_image before_img=”https://www.wimarys.com/wp-content/uploads/2020/06/JpegToRAWbefore.jpg” after_img=”https://www.wimarys.com/wp-content/uploads/2020/06/JPegToRAWAfterjpg.jpg” orientation=”horizontal” offset=”0.5″ before_label=”Before” after_label=”After”]
I must admit but I do always save my J packs in the highest quality too, but even still I was amazed with the transformation. I could pull out the shadows seeing no artefacts and darken highlights just as I would have been able to do with a 42 MP raw file., I’ve been researching a lot of color theory and love to implement this in my workflow too. this means a lot of fiddling with colors, changing vibrance, lightness and saturation. Again, I was not disappointed with the ‘JPEG to RAW AI’ file. Everything felt natural and easily manipulated.
Conclusion
If you’ve been shooting jpegs for years and discovered the advantages Raw files, ‘JPEG to RAW AI’ can be a significant help for you. Another use is, if, like me, you’ve lost a bunch of RAW files but recovered the jpegs. Here, you’ll find this app very useful too.
With an excellent quality jpeg I could use ‘JPEG to RAW AI’ to extract missing detail, dynamic range and color information and save it as a DNG file. I could use this file and manipulated and Photoshop in the same way as I would have been able to do with the original raw file. I should also note that much depends on the quality of your input Jpeg. If it’s already a small and compressed file, ‘JPEG to RAW AI’ won’t be able to recover as much information as when you have a large file to start from. So it’s important to keep your expectations realistic.
[bafis_image before_img=”https://www.wimarys.com/wp-content/uploads/2020/06/JPEG-TO-RAW-AI-before1.jpg” after_img=”https://www.wimarys.com/wp-content/uploads/2020/06/JPEG-to-RAW-AI-after1.jpg” orientation=”horizontal” offset=”0.5″ before_label=”original Jpeg” after_label=”DNG +3 exposure in camera RAW”]
If however you are determined to make the best of the legacy files you still have in your library, this $99 will be the best money you’ve ever spent. The only disadvantage being that you’ll only need to use it once to convert your image Library. Unless you want to continue shooting JPG to save space but now and again need a file that can handle a lot more editing.

Hey Wim, Awesome Information Sharing! I had the same issue once I forget too take backup and lost images from MicroSD card. Then I choose a different software such as Photo Recovery which easily recover raw, jpeg file from my MicroSD card. Thanks!
Of course data recovery should be attempted first. In my case, this was not a possibility that time. Even lost some nice images that I did not transfer to my phone. Jetlags and photography don’t always work together…