
Topaz Denoise AI review
Introduction
In my series of Topaz Labs product reviews, next up is Topaz ‘Denoise AI’. It’s possibly my most used Topaz Plug-in, and I often even prefer it over Sharpen AI for sharpening too. But the focus of ‘Denoise AI’ is noise reduction.

I’ve already explained in my other posts how these artificial intelligence or machine learning products come about. But as a quick reminder: they show a computer model thousands of images, some with noise and some without. It’s told to learn what the differences are between them. Eventually it learns what noise is and which type, so it can precisely target these areas with the correct noise reduction.
Denoise AI interface
Let’s have a look at the Topaz ‘Denoise AI’ interface and use this to gain a better understanding of what this application does and how it works. And what my impressions are.
Importing and batch processing
In the standalone version, you can either import a single image or multiple image via the import tab or plainly by dragging and dropping them on the application. You can select several images inside the application and make adjustments that will apply to all of those images selected. Or you can also go through them and tweak the settings one by one. The Photoshop plug-in works as usual, where you go into ‘filter’, find ‘topaz labs’ and select ‘Denoise AI’.
Processing settings
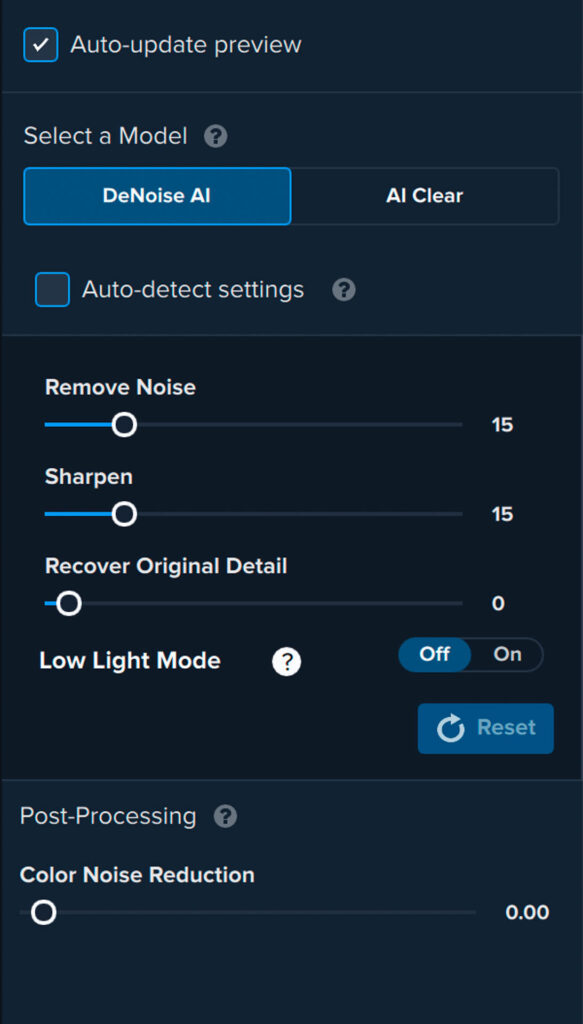
In the processing settings window, the first thing you should notice is the ‘Auto-Update preview’ checkbox. This will continuously update the preview image. Depending on how powerful your computer is, this update can take a long time. So if you find that annoying, turn it off here. You then simple need to press the preview on the left of the image in order for the preview to update.
Different noise reduction models
You can choose between the new ‘Denoise AI’ noise reduction model or the older ‘AI Clear’ model here. ‘AI Clear’ was developed some years ago and also offers automatic noise reduction and sharpening. ‘Denoise AI’ provides more functionality in fine-tuning the noise reduction, while ‘AI Clear’ provides a quicker fix. I often like the result from this ‘older’ model too, it mainly depends on the source file and what it needs.
‘Denoise AI’ is the latest model and also offers a fully automatic mode by enabling ‘Auto Detect settings’. This setting pushes the Machine Learning into gear and works very well. It’s also possible to tweak the results from Artificial Intelligence by moving the sliders.
It’s now an excellent time to talk about the different types of noise. Some more bothersome than others. It’s sometimes even nice to add some noise to an image to get a more grainy, film like structure. But that’s another post.
Luminance noise
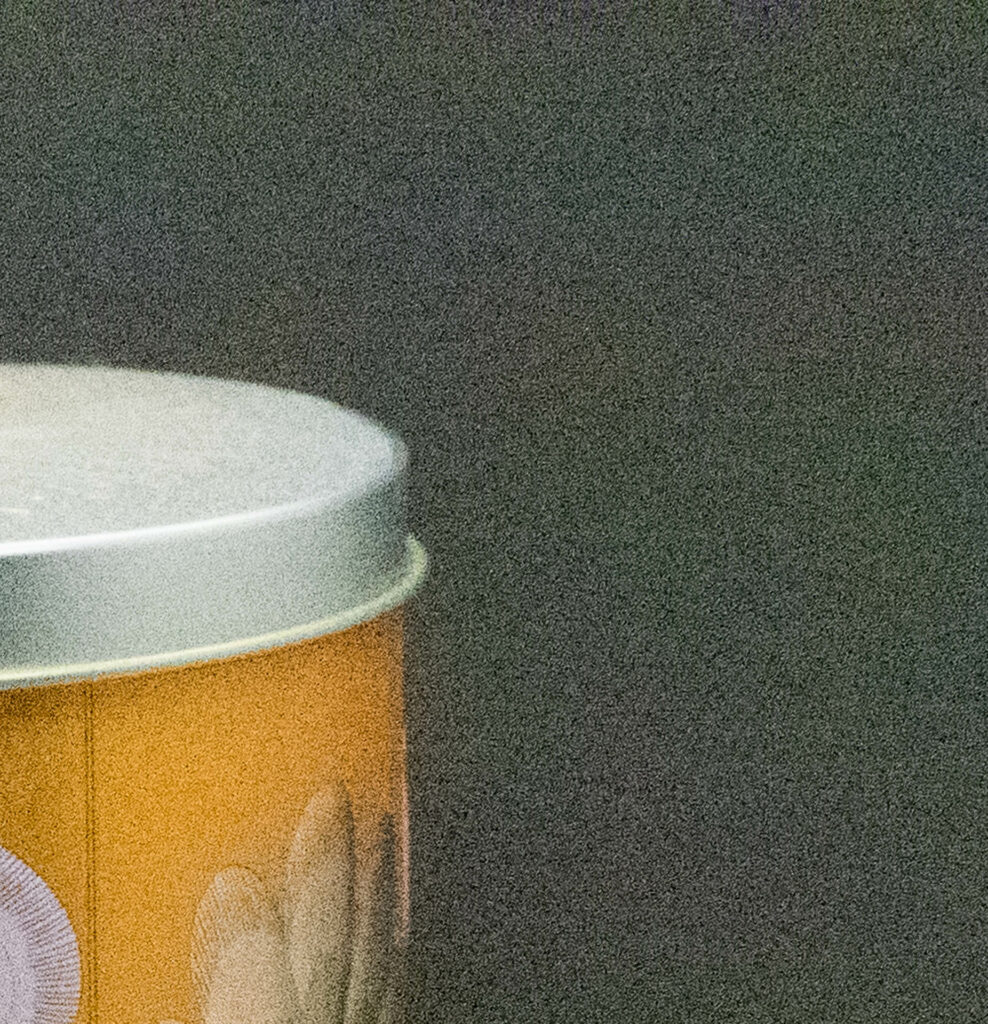
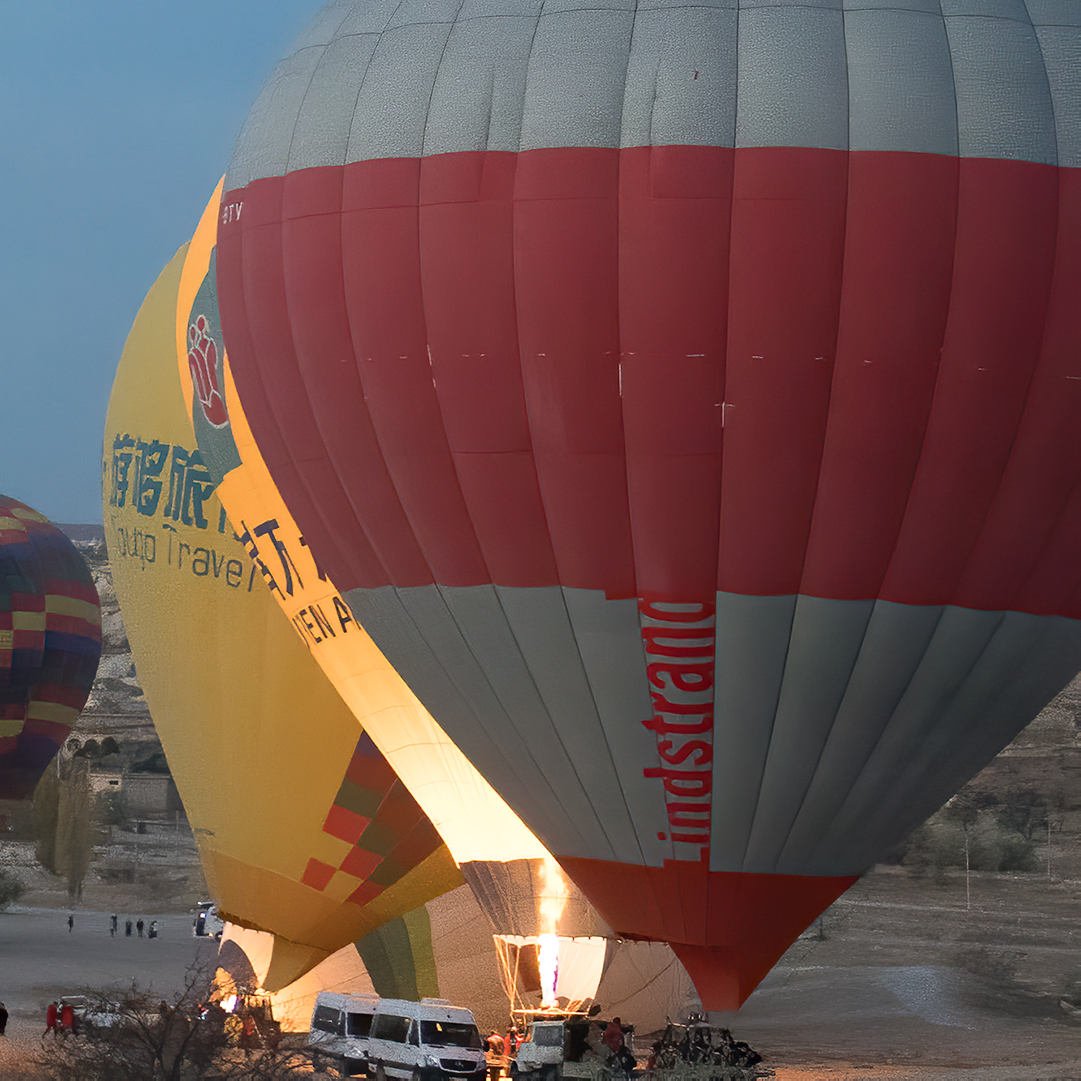
Luminance noise is a colourless noise that shows up as a darker grain in the highlights of your image. You can also notice it and as a lighter grain in the shadows. This noise is an artefact of over- or underexposed pixels. Different size sensors will have luminance noise with unique characteristics, and larger megapixel sensors show luminance more quickly at higher ISO settings. When you use the ‘remove noise’ slider in Topaz Denoise, you’re in fact removing this luminance noise
Chromatic noise
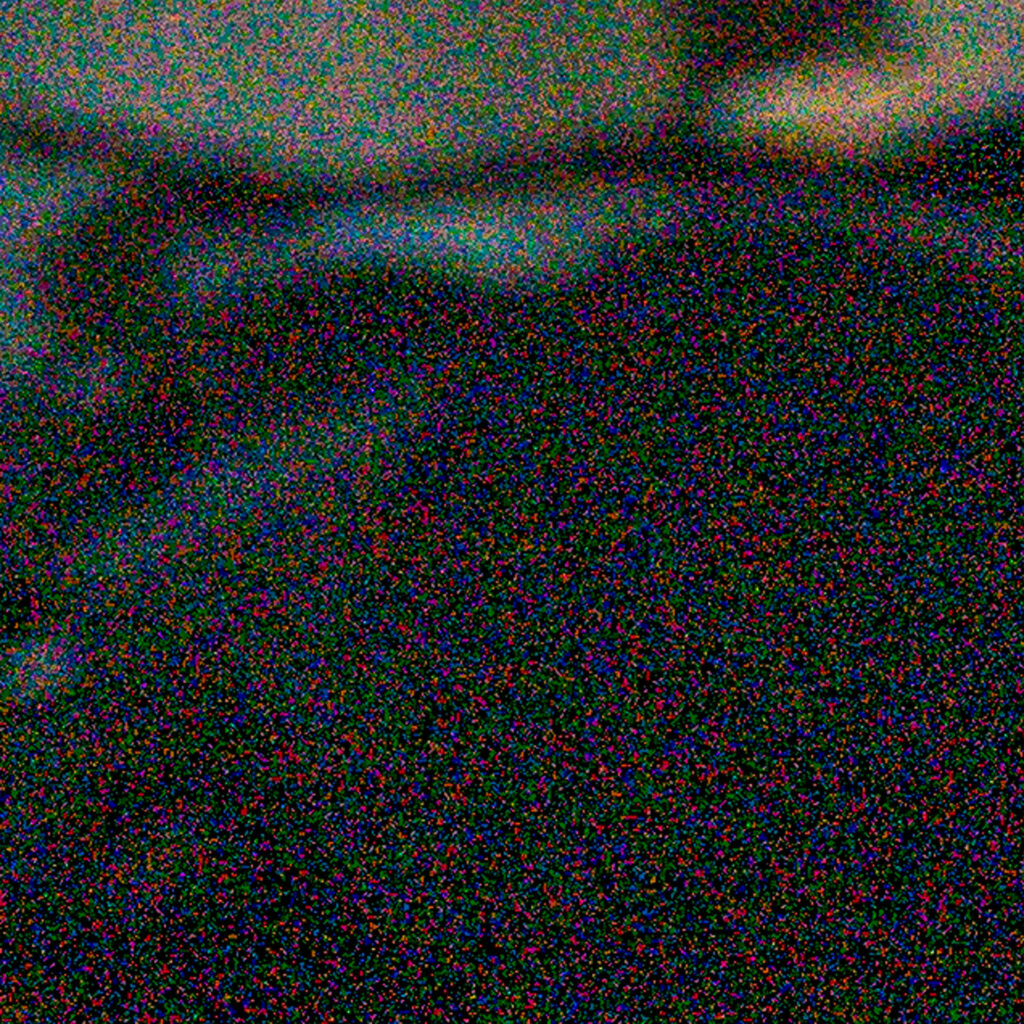
Chromatic noise is also called Colour Noise. You can recognise it by the distinct colour specks appearing across your photo. Chroma noise is most visible in underexposed or shadow parts of your image. If you’re dealing with a nighttime image like a stars cape or aurora borealis, you’ll often see a lot of colour noise. In Topaz Denoise, there is a special mode for images like this called low-light mode. Special care has been given so it does not eat stars in your starscapes.
For more ‘normal’ types of colour noise, the ‘Color Noise Reduction’ slider is more than enough.
Sharpen and recover detail
You’ll also find a ‘sharpen’ slider and a ‘recover detail’ slider. The best procedure is to first dial in your noise reduction. Then toggle between the before and the process preview. If you see any apparent reduction, dial it back in with the ‘recover detail’ slider. If beyond that, you want to add more sharpness to your image, use the ‘sharpness’ slider.
Top tab: Masking and Brighten

When you look at the top of the ‘Denoise AI’ interface, you’ll notice a tab with Masking, Original, View and Brighten.
The ‘Original’ button will show your unprocessed image in the preview window, ‘View’ allows you to toggle between a before/after split style preview window or a full version. Basic stuff, really. The ‘Masking’ button might leave you more puzzled, but it is what you think it is. Topaz ‘Denoise AI’ allows you to draw a mask on your image, excluding parts of it from being processed. They also implement the same idea is in ‘Sharpen Ai'(check my review) where I go into more detail on this functionality.
The ‘Brighten’ functionality is also an interesting feature. Let me explain. it’s recommended to start your workflow with ‘Denoise AI’. Since you might have a RAW image that is slightly underexposed, or with deep dark shadows, this ‘Brighten’ button virtually turns on the lights for you. This allows you to better see the noise in your image and select more appropriate levels of noise reduction for further editing. This prevents you from having to go back to noise reduction after raising shadows or adding exposure later on.
Save image and export options
The last stage of processing is the export tab. If you’re using the Topaz ‘Denoise AI’ plug-in, you press ‘apply’ to process and return to Photoshop. The standalone version has a few more options. You can export as a PNG, TIFF, JPG or DNG file. You can also reduce the quality of the image for a smaller file, change the filename, export directory and color profile. It’s always best to keep your files in a wide color profile like Prophoto RGB, unless saving JPG for the web. Choose sRGB for that or you might get some freaky colours in your browser.
Conclusion
Digital sensors have evolved massively in the last 2 decades. Unfortunately, in-body noise reduction has not and we are still stuck with algorithms that measure noise at pixel level and apply the same noise reduction to every pixel. Luckily machine learning is giving us more options, at least on your desktop. One of those applications driven by machine learning is Topaz ‘Denoise AI’. This denoise plug-in for Photoshop has learnt (and is still learning) what noise is, which type of noise is present and how best to reduce it to get a clear and natural looking noise free image. There are after all times where it’s needed to raise the ISO (and unfortunately add noise) for nighttime photography or fast action. Also, the trend for higher megapixel cameras also result in more noise in the image, especially at higher ISO levels.

The hard question is whether Topaz ‘Denoise AI’ is worth it. Is it better than Lightroom or Photoshop Denoise? Well, if you know exactly what you’re doing in Photoshop, it’s possible to get very close to the results you can get with Topaz ‘Denoise AI’. However, any solution other than serious Photoshop layer processing won’t have the same consistent quality output that ‘Denoise AI’ has. The automatic detection settings have also worked very well for me, and I prefer to add some sharpening in ‘Denoise AI’ over using other methods later on in my processing chain. I just feel that it looks more natural this way.
If you’re looking for just one Topaz labs machine learning plugin, ‘Denoise AI’ would be my choice.