The Art of Storytelling in Real Estate Photography: Capturing the Essence of Every Property
The world of real estate photography goes beyond simply showcasing a property. It’s about capturing the essence of a space and telling a story that evokes emotion, making potential buyers feel like they are already home. To achieve this, you need to implement several techniques and keep a keen eye for detail. In this article, we will discuss various aspects of storytelling in real estate photography, and how your images can leave a lasting impression on potential buyers.
Table of Contents:
- Understanding the Art of Storytelling in Real Estate Photography
- Elements to Consider in Real Estate Photography
- Interior Photography
- Exterior Photography
- Using Lighting and Staging Techniques to Create Emotion
- Post-Processing Tips for the Perfect Final Touch
- Storytelling Through Marketing and Social Media
- Frequently Asked Questions (FAQs)
Understanding the Art of Storytelling in Real Estate Photography
The essence of storytelling in real estate photography lies in capturing the unique personality of a property. It’s important to showcase not just the property’s features but also how it can become a perfect home or an appropriate workspace. By doing so, you can differentiate your property from other listings and foster a connection with potential buyers.
Elements to Consider in Real Estate Photography
Composition
One of the fundamental aspects of real estate photography is composition. To create visually compelling images, make sure that you have a focal point, utilize the rule of thirds, and incorporate leading lines. These techniques enable you to capture the viewer’s attention and guide them through the space.
Avoiding Clutter
When photographing a property, it is essential to eliminate distractions caused by clutter. Tidy spaces look more attractive, open, and welcoming. Remove any unnecessary items such as children’s toys, cooking utensils, or personal belongings to create a clean and organized appearance.
Interior Photography
Zoning In on the Details
Make sure to capture the unique architectural details and features within a property, such as built-in shelves, fireplaces, or vaulted ceilings. These details can be essential selling points and help potential buyers envision themselves living in the space.
Capture the Flow of the Space
When photographing a property, it is important to showcase not just individual rooms but also how they flow together. Shoot from various angles and use wide-angle lenses to capture the layout and give viewers a sense of the space.
Exterior Photography
Showcasing the Property’s Curb Appeal
First impressions are crucial in real estate photography, and capturing the property’s curb appeal is essential. Make sure to photograph the exterior fromvarious angles, highlighting its architectural features and landscaping. Don’t forget to capture the essence of the neighborhood, as this can be an important factor for potential buyers.
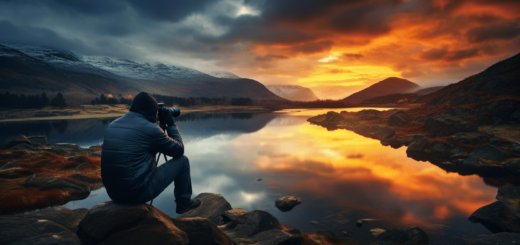
Utilize the Best Time of Day
Take advantage of natural lighting by shooting the exterior of a property during the “golden hour” – the hour just before sunset or shortly after sunrise. This is when the most beautiful and flattering light is available, casting warm tones and soft shadows that add depth and dimension to your photos.
Using Lighting and Staging Techniques to Create Emotion
Layered Lighting Techniques
Effective lighting techniques are key to creating an emotional and welcoming atmosphere in real estate photography. Consider using natural light, ambient light, and accent light to create a balance and enhance the overall appearance of a space. Remember, the right balance in lighting can evoke emotions and create a homely atmosphere, helping potential buyers connect with the property.
Staging for Emotional Connection
Staging a property allows potential buyers to envision themselves living in the space. Use furniture and décor elements that help accentuate the property’s features, and make sure each room has a clear purpose. Aim for a cozy and inviting atmosphere, allowing the viewer to feel welcomed and comfortable in the environment.
Post-Processing Tips for the Perfect Final Touch
Basic Adjustments
After capturing your real estate photographs, use post-processing software to make basic adjustments such as exposure, contrast, and white balance correction. These changes can enhance the overall quality of your images.
Perspective Correction
Sometimes, despite your best efforts, images may suffer from perspective distortion. Use post-processing software to correct verticals and straighten lines, ensuring a professional and polished finish.
Sky Replacement
In some instances, the weather may not cooperate during your shoot, resulting in dull or unappealing skies. Post-processing software allows you to replace the sky in your images, giving your exterior shots a more eye-catching and attractive appearance.
Storytelling Through Marketing and Social Media
Once you have captured and edited your images, it’s time to share them with potential buyers. Utilize various marketing channels, including real estate websites, social media platforms, and print materials, to showcase your property in the most effective manner. Consider creating virtual tours, video walkthroughs, and engaging written content to complement your images, allowing potential buyers to fully immerse themselves in the property.
Frequently Asked Questions (FAQs)
- What equipment should I have for real estate photography?
Invest in a professional camera, wide-angle lenses, a tripod, and external flash units. These tools will allow you to capture high-quality images, essential for a successful real estate photography business. - How can I improve my real estate photography skills?
Practice regularly, seek constructive feedback, learn from other professionals, and stay up-to-date with industry trends and techniques. Continuous education and training will help you refine your skills and produce captivating images. - How long does it take to photograph a property for real estate marketing purposes?
The time it takes will depend onthe size and complexity of the property, as well as your level of experience. On average, it takes 1-2 hours for a standard residential property. This time may increase for larger spaces or more complex shoots. - What should I charge for my real estate photography services?
Pricing for real estate photography varies depending on your experience, location, and the property’s size and complexity. Research the pricing in your area and consider offering competitive rates while still ensuring fair compensation for your work.
In conclusion, successful storytelling in real estate photography is an art form that goes beyond capturing images. It’s about evoking emotions and capturing the essence of a property, allowing potential buyers to see themselves living, working, or investing in that space. By paying attention to composition, staging, lighting, and post-processing, you’ll be well on your way to creating exceptional images that tell the story of each property you photograph, separating you and your company from the competition.