
Welcome to the world of photography! Whether you’re a seasoned photographer or just starting out, one of the key skills you’ll need to master is exposure. Understanding how to manipulate light in your photographs can make all the difference in creating stunning images.
Exposure refers to the amount of light that reaches the camera’s sensor. It determines how bright or dark your photo will be, as well as the level of detail and atmosphere captured in the image. Mastering exposure is essential for creating well-balanced and visually appealing photographs.
In this article, we will explore the art of exposure in photography and how you can use it to enhance your images. From understanding the basics of exposure to exploring different lighting conditions, we will cover everything you need to know to improve your photography skills. So, grab your camera and let’s dive in!
Understanding Exposure in Photography
In the world of photography, exposure is one of the most fundamental concepts to understand. It refers to the amount of light that enters the camera and hits the camera sensor, resulting in the brightness or darkness of your image. Mastering exposure is essential for creating well-exposed and visually appealing photographs. In this section, I will guide you through the basics of exposure and its key components: shutter speed, aperture, and ISO.
The Basics of Exposure
Exposure is all about finding the right balance of light to capture an image that reflects your artistic vision. Understanding the relationship between the three key elements of exposure – shutter speed, aperture, and ISO – is crucial for achieving the desired effect in your photographs.
Shutter Speed
Shutter speed refers to the length of time your camera’s shutter remains open, allowing light to enter. It determines how motion is captured in your images, whether it’s freezing fast action with a quick shutter speed or creating a sense of motion with a slower one. Think of it as the “duration” that light has to paint your image.
- Fast Shutter Speed: A fast shutter speed, such as 1/1000th of a second or faster, is ideal for freezing action. It’s perfect for sports photography or capturing fast-moving subjects.
- Slow Shutter Speed: On the other hand, a slow shutter speed, such as 1/30th of a second or slower, can be used to create motion blur. This technique is often used in landscape photography or to capture the smooth flow of water.
Aperture
Aperture refers to the opening in your lens through which light enters the camera. It is measured in f-stops and controls the amount of light reaching the camera sensor.
- Wide Aperture (Low f-number): A wide aperture, such as f/1.8, allows more light to enter the camera, resulting in a shallow depth of field. This is ideal for portraits or when you want to isolate your subject from the background.
- Narrow Aperture (High f-number): A narrow aperture, such as f/16, lets in less light and increases the depth of field. This is useful in landscape photography when you want to capture sharp details from the foreground to the background.
ISO
ISO refers to the sensitivity of your camera’s sensor to light. It determines how much light is required to produce a well-exposed image.
- Low ISO: A low ISO setting, such as ISO 100, is ideal in well-lit situations as it produces images with minimal noise. Use this setting when shooting in bright daylight or well-lit indoor environments.
- High ISO: In low-light situations, a higher ISO setting, such as ISO 1600 or higher, is necessary to capture enough light for a well-exposed image. However, keep in mind that higher ISO values can introduce noise or graininess to your photos.
Understanding the interplay between these components and experimenting with different settings is essential to achieve the desired exposure for your photographs. Remember, there is no one-size-fits-all solution, and the best way to learn is to practice and experiment with these settings.
Choosing the Right Photography Tour
Planning a photography tour can be an exciting and rewarding experience. It’s an opportunity to explore new destinations, hone your skills, and capture breathtaking images. But with so many options available, how do you choose the right photography tour for you? Here are some key factors to consider when making your decision:
Researching Destinations
- Location: Start by considering the type of photography you’re most interested in. Are you drawn to capturing landscapes, wildlife, street scenes, or cultural events? Look for tours that specialize in those particular subjects.
- Season and Weather: Research the climate and seasons of potential destinations. This will help you determine the optimal time to visit for the type of photography you want to focus on. For example, autumn may be the ideal time for vibrant foliage in one region, while another destination may offer stunning wildlife migrations during a specific month.
- Accessibility: Consider how easily accessible the destinations are. Will you need to take multiple flights or endure long drives? Factor in travel time and logistics when making your decision.
Considering Tour Providers
- Experience and Expertise: Look for tour providers with a proven track record in photography tours. Check their website for information about their experience, the backgrounds of their guides, and testimonials from previous participants.
- Group Size: Consider the size of the tour groups. Smaller groups often allow for more personalized attention from the tour leader and create a more intimate learning environment. On the other hand, larger groups may offer a more diverse range of perspectives and opportunities to connect with fellow photographers.
- Photography Instruction: Find out if the tour includes photography instruction and mentorship. This can be invaluable, especially if you’re looking to improve your skills or learn new techniques.
- Accommodation and Meals: Consider the quality of accommodation and meals included in the tour package. Comfortable lodging and delicious meals can enhance your overall experience.
Reviewing Itineraries
- Diversity of Locations: Look for tours that offer a variety of locations and photographic opportunities. This will ensure that you have a wide range of subjects to capture and can experiment with different styles and techniques.
- Flexibility: Consider how flexible the itinerary is. Can you explore and photograph at your own pace, or is there a strict schedule to follow? Flexibility allows for unexpected discoveries and the ability to spend more time on an interesting subject.
- Guided vs. Self-Guided: Decide whether you prefer a fully guided tour or if you’re comfortable exploring some locations on your own. Some tours offer a mix of guided and self-guided opportunities, allowing you to strike a balance between independence and guidance.
- Value for Money: Evaluate the overall value for money. Compare the cost of the tour with the inclusions, such as accommodation, meals, transportation, and photography instruction. Determine if the price aligns with your expectations.
Remember, a carefully planned and well-executed photography tour can provide you with incredible photography opportunities and lifelong memories. Don’t rush the decision-making process, and consider all the factors that are important to you. Choose a tour that aligns with your interests and goals, and most importantly, enjoy the journey of capturing stunning images.
Preparing Your Gear
When it comes to photography, having the right gear can make all the difference in capturing stunning images. Before you embark on your photography tour, it’s essential to make sure you have all the necessary equipment to optimize your exposure. Here are some key items to consider when preparing your gear:
Camera Body and Lenses
- Camera body: Invest in a camera body that offers manual control over exposure settings. This will give you the flexibility you need to adjust your exposure according to the lighting conditions.
- Lenses: Different lenses have varying aperture capabilities, which can affect the amount of light that enters your camera. Consider bringing a selection of lenses, including wide-angle lenses for landscape shots and telephoto lenses for capturing distant subjects.
Tripods and Stabilization
- Tripod: A sturdy tripod is a crucial tool for achieving sharp and steady images, especially in low-light conditions where longer exposure times are required. Look for a tripod that is lightweight, yet sturdy enough to support your camera setup.
- Remote shutter release: A remote shutter release allows you to trigger your camera without physically touching it, minimizing the risk of camera shake. This is particularly useful when using longer exposure times or shooting in challenging lighting conditions.
Filters and Accessories
- Neutral Density (ND) filters: ND filters reduce the amount of light that enters your camera, allowing you to use longer exposure times and capture movement, such as flowing water or clouds. Experiment with different densities to achieve the desired effect.
- Polarizing filter: A polarizing filter helps reduce glare and reflections from non-metallic surfaces, such as water or glass. It also enhances colors and contrasts, giving your images a more vibrant look.
- Lens cleaning kit: Keep your lenses clean and free from dust and smudges with a lens cleaning kit. Dirty lenses can affect image quality and result in unwanted artifacts.
By ensuring you have the right gear, you’ll be well-equipped to handle different lighting conditions and capture stunning images during your photography tour. Remember to pack extra batteries and memory cards to avoid running out of power or storage space. Being prepared will give you the peace of mind to focus on your creativity and get the most out of your photography experience.
Pro Tip: Before heading out on your photography tour, take some time to familiarize yourself with your gear and practice using it in different settings. This will help you feel more confident and comfortable when capturing images on location.
Optimizing Camera Settings
When it comes to capturing the perfect exposure on your photography tours, optimizing your camera settings is crucial. Understanding and adjusting your camera’s settings will allow you to have more control over the exposure and help you capture stunning images. Here are some tips to optimize your camera settings for the best results:
Metering Modes
Metering modes determine how your camera measures the light in a scene to set the exposure. Here are the most common metering modes and when to use them:
- Matrix/Evaluative Metering: This mode evaluates the entire scene and determines the exposure based on different zones. It’s suitable for well-balanced scenes with even lighting.
- Spot Metering: Spot metering allows you to meter a small area in the frame, which is ideal for high-contrast scenes or when you want to expose for a specific subject. Aim the spot at the subject you want to expose correctly.
- Center-Weighted Metering: Center-weighted metering gives more weight to the center of the frame while taking the exposure readings. It’s useful when your subject is centered or occupies a significant portion of the frame.
Exposure Compensation
Exposure compensation allows you to adjust the exposure from the camera’s suggested settings. It comes in handy when the camera’s metering system may be fooled by a particularly bright or dark scene. Here’s how to use exposure compensation:
- Bright Scenes: Use negative exposure compensation (-0.3 to -1 EV) to avoid overexposing the highlights.
- Dark Scenes: Use positive exposure compensation (+0.3 to +1 EV) to brighten up the shadows and prevent underexposure.
White Balance
White balance refers to the color temperature of the light in a scene. It’s crucial to set the correct white balance to ensure accurate colors in your photographs. Here are some common white balance settings and when to use them:
- Auto White Balance (AWB): This setting allows the camera to automatically adjust the white balance based on the lighting conditions. It’s a good option when the lighting is constantly changing.
- Daylight: Use this setting when shooting outdoors in daylight. It provides a neutral, balanced color temperature.
- Cloudy: Choose this setting when shooting on cloudy days. It adds warmth to the photo, compensating for the coolness of the clouds.
- Shade: Select this setting when shooting in shaded areas. It warms up the colors, making them more vibrant.
Adjusting these camera settings will empower you to capture well-exposed images that accurately represent the scene. Experiment with different settings and learn how they affect your photos. Remember, practice makes perfect, so don’t be afraid to try new things and push the boundaries of your creativity!
“Optimizing your camera settings is like unlocking the full potential of your photography. It allows you to have full control over the exposure and bring your creative vision to life.”
Exploring Different Lighting Conditions
When it comes to photography, light is your best friend – it can make or break your images. Understanding different lighting conditions and learning how to use them to your advantage is key to capturing breathtaking photos on your photography tours. Let’s dive into some popular lighting conditions and how you can make the most of them:
Golden Hour Photography
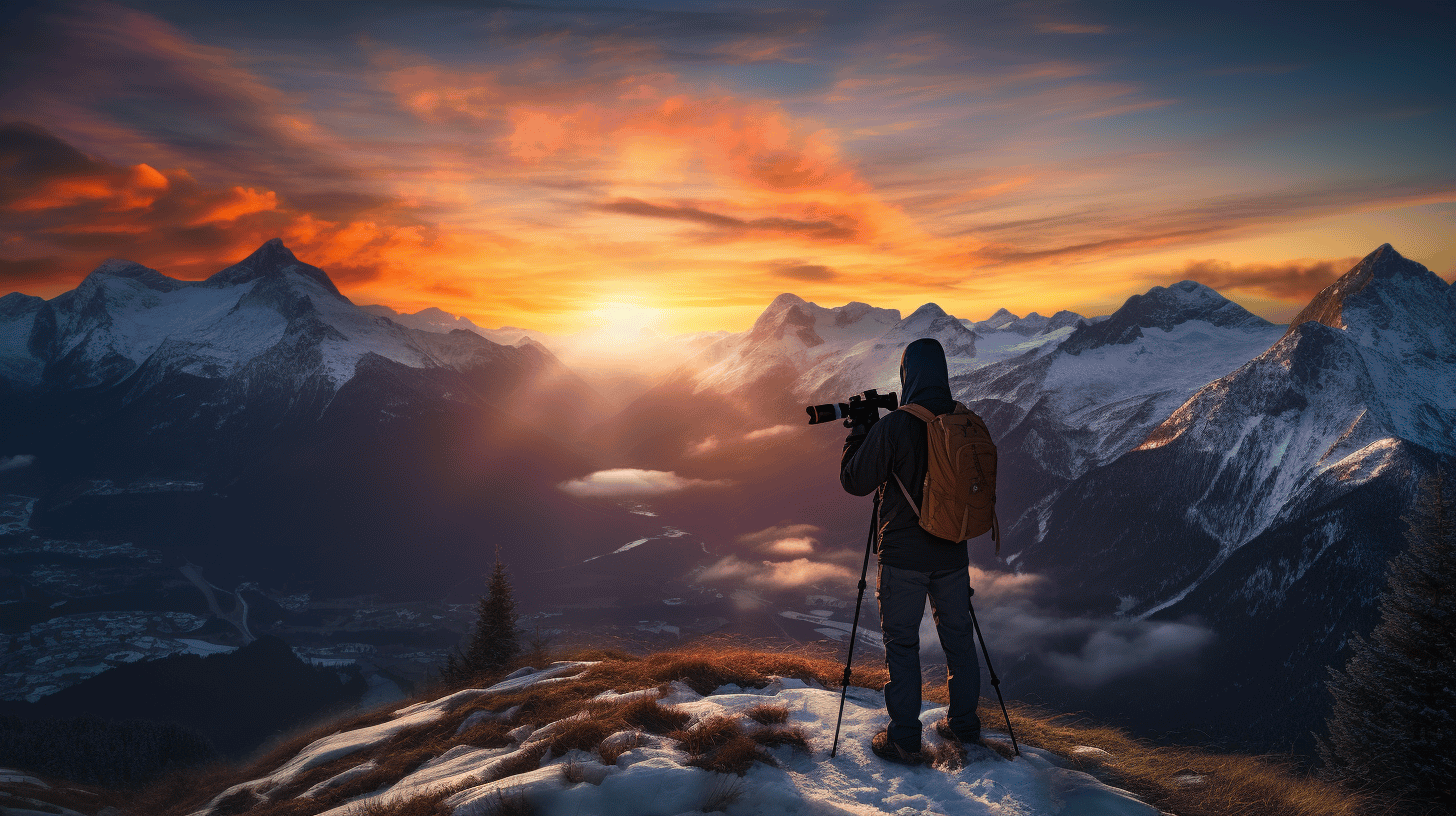
The golden hour, also known as the magic hour, is the period shortly after sunrise or before sunset. During this time, the sun is low in the sky, creating a soft, warm, and golden light that adds a beautiful touch to your photos. Here are a few tips for capturing stunning golden hour shots:
- Plan Ahead: Use weather apps or websites to find out the exact time of sunrise or sunset in your location. Arrive early to set up your equipment and scout for the perfect composition.
- Use Silhouettes: Position your subject between the camera and the light source to create captivating silhouettes. Experiment with different poses and angles for striking results.
- Experiment with Backlighting: Position your subject in front of the sun and play with different angles to create beautiful backlighting effects. This can add a dreamy and ethereal quality to your images.
Blue Hour Photography
The blue hour occurs just before sunrise or after sunset when the sky takes on a beautiful blue hue. This lighting condition provides a unique and tranquil atmosphere in your photos. Here are a few tips for capturing captivating blue hour shots:
- Use Long Exposures: Blue hour lighting can create a magical, otherworldly effect when captured with long exposures. Use a tripod to keep your camera steady and experiment with different exposure times to achieve the desired effect.
- Include Cityscapes: Blue hour photography is often associated with urban landscapes. Include cityscapes, skylines, or architectural structures to create a contrast between the warm artificial lights and the cool blue ambiance.
- Play with Reflections: Look for water bodies or reflective surfaces to capture stunning reflections during the blue hour. This adds depth and visual interest to your images.
Low Light and Night Photography
Low light and night photography can be challenging but also incredibly rewarding. Mastering these lighting conditions allows you to unleash your creativity and capture stunning images that showcase the beauty of the night. Here are a few tips to improve your low light and night photography skills:
- Use a Sturdy Tripod: In low light conditions, using a tripod is essential to keep your camera steady and avoid camera shake. This will help to ensure sharp images.
- Experiment with Long Exposures: In low light or at night, longer exposures can be used to capture the ambient light and create beautiful light trails or star trails. Practice using different shutter speeds to achieve various effects.
- Experiment with Light Sources: Embrace the artificial light sources present in the scene. Experiment with capturing the colorful glow of streetlights, neon signs, or even the stars in the night sky. These light sources can add a captivating mood and atmosphere to your images.
Remember, each lighting condition brings its unique charm and challenges. Don’t be afraid to experiment, step out of your comfort zone, and embrace the different lighting conditions you encounter during your photography tours. With practice and a keen eye, you’ll be able to create stunning images, no matter the lighting situation.
“Light is the magical ingredient that brings a photo to life. Embrace the different lighting conditions and let them guide your creative journey.”
Composition and Framing Techniques
When it comes to photography, composition and framing play a crucial role in creating visually appealing and impactful images. How you position your subject within the frame and utilize various techniques can make a significant difference in the overall quality of your photos. Here are some composition and framing techniques to help you master the art of light on your photography tours:
Rule of Thirds
The rule of thirds is one of the fundamental techniques in composition. It involves dividing your frame into a grid of nine equal parts using two horizontal and two vertical lines. The idea is to position your subject along these lines or at the intersections to create a balanced and visually pleasing composition. This technique helps to create a sense of movement and guides the viewer’s eye through the image.
Leading Lines
Leading lines are elements in a photo that draw the viewer’s attention towards the main subject. These lines can be straight, curved, or diagonal, and they create a visual path that leads the eye from one part of the image to another. Examples of leading lines include roads, fences, rivers, or even natural elements like tree branches. By incorporating leading lines into your composition, you can add depth and guide the viewer’s gaze to the main focal point.
Foreground and Background
To add depth and dimension to your photographs, consider incorporating elements in the foreground and background. This technique helps to create a sense of scale and gives the viewer a better understanding of the scene. It could be a tree branch in the foreground, a building in the background, or any other element that adds visual interest to the composition. By carefully selecting and positioning these elements, you can enhance the overall composition and make your subject stand out.
Balancing Elements
Another important aspect of composition is balancing the elements within the frame. Think about how various elements within the image relate to one another and strive for a harmonious composition. Avoid placing all the visual weight on one side, as it can create an imbalance and make the photo feel off-balance. Instead, distribute the visual weight evenly to achieve a balanced composition.
Framing the Subject
Framing is a technique that involves using elements within the scene to create a frame around the subject. This can be achieved by using natural elements like tree branches, doorways, or windows, or even by utilizing man-made structures such as archways or tunnels. By framing the subject, you not only draw attention to it but also add depth and layers to the composition. It creates a visual boundary that isolates the subject and makes it stand out within the frame.
Negative Space
Negative space refers to the empty or unoccupied areas of the frame. It can be a plain wall, a clear sky, or any other uncluttered area. Utilizing negative space in your composition can help create a sense of simplicity, minimalism, and focus on the subject. It provides breathing room for the viewer’s eye to rest and also adds a sense of balance and harmony to the overall composition.
Remember, these composition and framing techniques are not strict rules to follow but rather guidelines to enhance your creativity. Experiment with different techniques and find your own unique style. By mastering these techniques, you can take your photography to the next level and capture stunning images that truly showcase the art of light.
Mastering Exposure Techniques
Exposure is one of the fundamental aspects of photography that can make or break a shot. It refers to the amount of light that enters the camera’s sensor, and mastering exposure techniques can greatly enhance the quality of your photos. Whether you’re a beginner or a seasoned photographer, here are some tips to help you become a pro at exposure.
Bracketing
Bracketing is a technique that allows you to take multiple shots of the same scene with different exposures. This can be useful in situations where the lighting conditions are challenging or when you’re unsure of the correct exposure settings. By taking a series of shots with varying exposures, you can later select the one that best captures the details and tones you desire.
Exposure Lock
Exposure lock is a feature found on most cameras that allows you to lock in your exposure settings. This can be particularly useful in situations where you want to focus on a specific subject that may not be in the center of the frame. By using exposure lock, you can ensure that the exposure remains consistent throughout your composition, even if you need to recompose the shot.
Histogram Analysis
The histogram is a graphical representation of the tonal distribution in your photo. It shows the distribution of brightness from pure black on the left side to pure white on the right side. By analyzing the histogram, you can get a better understanding of the exposure levels in your image.
- If the histogram is shifted to the left, it indicates that the image is underexposed and lacks detail in the shadows.
- If the histogram is shifted to the right, it indicates that the image is overexposed and lacking detail in the highlights.
- A well-balanced histogram with data spread across the entire graph indicates a good exposure.
By utilizing the histogram, you can adjust your exposure settings while shooting to achieve a well-exposed image.
Pro Tip: Remember that the ideal exposure may vary depending on the desired mood and creative vision of your shot. Don’t be afraid to experiment and push the boundaries of exposure in your photography.
Now that you have a better understanding of exposure techniques, it’s time to put them into practice and start capturing stunning photos. Remember to take your time to experiment, learn from your mistakes, and develop your own unique style. Happy shooting!
Post-Processing Tips
Post-processing is an essential part of the photography process. It allows you to enhance your images and bring out the best in them. Here are some tips to help you optimize your post-processing workflow and achieve stunning results:
RAW Image Processing
- Shoot in RAW format: RAW files contain all the data captured by your camera’s sensor, giving you more flexibility in post-processing.
- Use a RAW converter: Software such as Adobe Lightroom or Capture One allows you to process RAW files with ease.
- Adjust white balance: RAW files give you the ability to fine-tune the white balance, ensuring accurate colors in your final image.
- Make exposure adjustments: RAW files offer more latitude for exposure adjustments. You can recover details in shadows and highlights, creating a balanced image.
Adjusting Exposure in Editing Software
- Use exposure sliders: Adjust the exposure sliders in your editing software to fine-tune the overall brightness and contrast of your image.
- Enhance shadows and highlights: Use the shadow and highlight sliders to bring out details in the darker and brighter areas of your photo.
- Graduated filters: Apply graduated filters to balance exposure in different parts of your image. This is especially useful for landscapes where the sky is brighter than the foreground.
- Dodge and burn: Utilize dodge and burn tools to selectively lighten or darken specific areas of your photo. This technique can help draw attention to certain elements or create a more balanced exposure.
Selective Exposure Corrections
- Use adjustment brushes: Adjustment brushes allow you to selectively apply exposure corrections to specific areas of your image. This is useful when you only want to brighten or darken certain parts of the photo.
- Blend multiple exposures: If you have bracketed exposures, you can blend them together using techniques such as HDR (High Dynamic Range) or exposure blending. This can help you achieve a wider dynamic range in your final image.
- Luminosity masking: Luminosity masking is a technique that allows you to make exposure adjustments based on the brightness levels in different areas of your photo. This can help you create more natural-looking and balanced exposures.
Remember, post-processing is an opportunity to enhance your images, but it’s important to maintain a balance. Avoid over-processing your photos, as this can result in a loss of detail and a less natural appearance. Take the time to experiment and find your own editing style that complements your photography.
“Post-processing is like the final polish on a photograph. It brings out the true potential of an image and allows you to express your artistic vision.”
Interacting with the Environment
When it comes to photography, the environment you are shooting in plays a crucial role in creating stunning images. Whether you are capturing landscapes, portraits, or street scenes, understanding how to interact with the environment can take your photos to the next level. Here are some tips to help you make the most of your surroundings on photography tours:
Working with Natural Light
- Take advantage of different times of day: The quality of light changes throughout the day, and each time has its own unique charm. Experiment with shooting during sunrise, sunset, and midday to see how the natural light affects your images.
- Pay attention to the direction of light: The direction of light can greatly impact the mood and depth of your photos. Backlighting can create silhouettes, while side lighting can add dimension. Keep an eye out for interesting shadows and highlights that can enhance your composition.
- Utilize reflections: Reflections can add a touch of magic to your photos. Look for bodies of water, glass surfaces, or shiny objects that can create interesting reflections. Experiment with different angles and perspectives to capture captivating images.
Using Artificial Lighting
- Consider using a flash: While natural light is beautiful, sometimes you may need to supplement it with artificial lighting. A flash can help fill in shadows or add a pop of light to your subject. Experiment with different flash techniques, such as bounce flash or off-camera flash, to achieve your desired effect.
- Explore different lighting modifiers: Light modifiers, such as softboxes, diffusers, and reflectors, can help you shape and control artificial light. They can soften harsh light, create interesting shadows, or add a natural-looking glow to your subjects. Don’t be afraid to experiment with different modifiers to achieve the desired mood and atmosphere in your photos.
- Try light painting: Light painting is a creative technique that involves manually painting or illuminating a subject or scene with a light source. This technique can produce stunning and unique results, especially in low-light situations. Experiment with different light sources, such as flashlights or LED panels, and long exposure times to create captivating light trails and patterns.
Capturing Unexpected Moments
- Be observant: Keep your eyes open and constantly scan your surroundings for those unexpected moments that make for great photographs. Look for interesting interactions, candid expressions, or unique events unfolding. These spontaneous moments can often result in the most memorable and impactful images.
- Get out of your comfort zone: Don’t be afraid to step outside your usual photographic style or subject matter. Embrace the unfamiliar and be open to serendipitous discoveries. Exploring new environments and subjects can unleash your creativity and lead to fresh and exciting photographs.
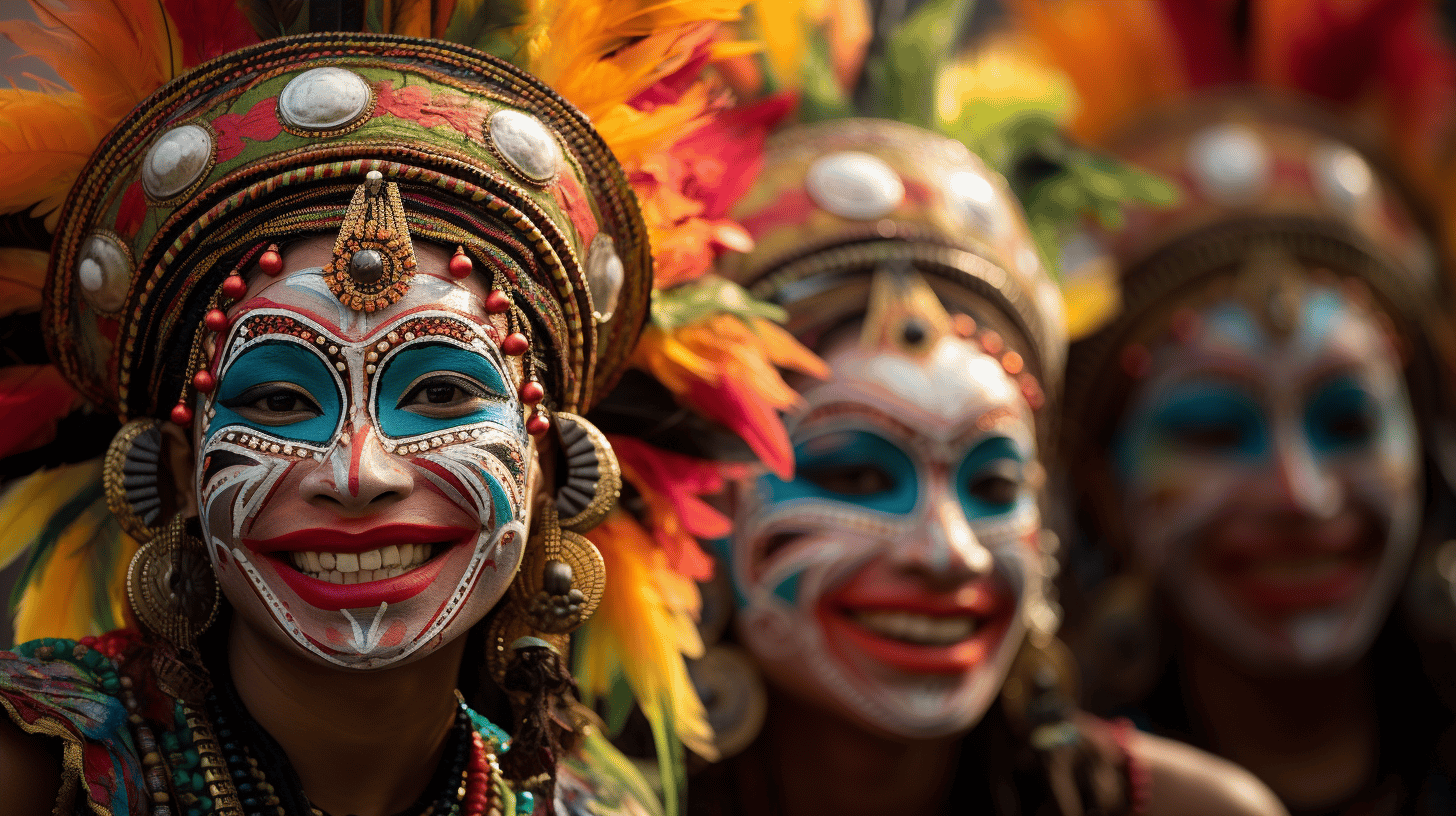
- Build connections: Interacting with the people and environment around you can not only enhance your photography but also enrich your overall experience. Engage with locals, ask for their stories, and immerse yourself in the culture. Building connections can lead to unique photographic opportunities and allow you to capture the true essence of a place.
Remember, photography is a journey of self-expression. Use these tips as a guide, but don’t hesitate to experiment and follow your instincts. The more you interact with your environment, the more you’ll grow as a photographer and create images that truly speak to your unique vision. So, go out there, embrace the world around you, and capture moments that will last a lifetime.
Conclusion
In conclusion, mastering exposure is a crucial skill for photographers looking to take their craft to the next level. By understanding the basics of exposure and learning how to optimize camera settings, explore different lighting conditions, and apply composition techniques, you can create stunning images that truly capture the essence of your subject.
Remember to also prepare your gear, interact with the environment, and utilize post-processing techniques to enhance your photos even further. And if you’re interested in learning more about photography, camera reviews, and getting inspiration for your projects, be sure to check out Wimarys.com. With helpful articles, tutorials, and tips, this website is a valuable resource for photographers of all levels.
So go out there, experiment with different exposure techniques, and let the art of light guide your photography journey. Happy shooting!
Visit Wimarys.com for more photography tips, reviews, and inspiration.
Frequently Asked Questions
- What is exposure in photography?
Exposure in photography refers to the amount of light that reaches the camera’s image sensor or film. It determines how bright or dark an image appears.
- Why is mastering exposure important in photography?
Mastering exposure is crucial in photography as it directly affects the overall quality of the image. Proper exposure helps capture details, maintain accurate colors, and create the desired mood in a photograph.
- What are the key elements of exposure in photography?
The key elements of exposure in photography are aperture, shutter speed, and ISO. Aperture controls the amount of light by adjusting the size of the lens opening, shutter speed determines the duration of the exposure, and ISO defines the camera’s sensitivity to light.
- How can I achieve correct exposure in my photographs?
Achieving correct exposure involves finding the right balance between aperture, shutter speed, and ISO settings. Understanding the exposure triangle and using tools like the histogram can help you ensure proper exposure in your photographs.
- Are there any photography tours or workshops available to learn exposure techniques?
Yes, there are numerous photography tours and workshops that specialize in teaching exposure techniques. These tours provide hands-on experiences, expert guidance, and stunning locations to practice and enhance your exposure skills.
0 Comments