Mastering Portrait Photography: Techniques and Tips for Photography Enthusiasts
Welcome to the exciting world of portrait photography! Whether you’re a seasoned photographer looking to improve your skills or a newcomer eager to dive into this captivating genre, this article is here to guide you on your journey to mastering the art of portrait photography.
Portraits have a timeless appeal, allowing us to capture the essence of a person, their emotions, and their unique story in a single frame. From posed studio shots to candid outdoor captures, portraits offer endless opportunities for creativity and self-expression.
In this comprehensive guide, we will explore various techniques and tips that will elevate your portrait photography to new heights. We will delve into essential composition techniques, lighting strategies, lens and aperture selection, as well as the latest creative trends in the field. Additionally, we will cover the importance of timing and location, the art of building connections with your subjects, and share valuable tips to help you capture stunning portraits in any situation.
But before we dive into the specifics, let’s take a moment to set the stage for what’s to come. With the rise of social media platforms and the increasing demand for high-quality visual content, portrait photography has become more popular than ever. With just a few clicks, we can share our stunning portraits with the world, inspiring and connecting with others through the power of imagery.
So, whether you aspire to become a professional portrait photographer or simply want to capture beautiful moments of your loved ones, this guide will equip you with the knowledge and techniques needed to bring your vision to life. So grab your camera, prepare to embrace your creativity, and let’s embark on this exciting journey into the world of portrait photography.
Composition Techniques
When it comes to capturing captivating photographs, composition techniques play a crucial role. Properly arranging the elements within the frame can transform an ordinary photo into something truly extraordinary. In this article, we will explore three composition techniques that can take your photography to the next level: positioning for uniqueness, storytelling, and framing for intrigue. So, let’s dive in and discover how to create compelling images that grab the viewer’s attention and leave a lasting impression.
Positioning for Uniqueness
One of the key aspects of composition is finding unique perspectives and angles to capture your subject. By experimenting with different positions, you can create visually stunning images that stand out from the crowd. Here are some strategies to consider when positioning your subject:
- Get low or high: Instead of shooting at eye level, try getting down low or shooting from a higher vantage point. This change in perspective can add depth and interest to your composition.
- Off-center composition: Instead of placing your subject in the center of the frame, try placing it off-center for a more dynamic composition. This technique, known as the Rule of Thirds, can create a sense of balance and harmony in your photographs.
- Frame within a frame: Look for natural frames within your environment, such as arches, windows, or foliage. By framing your subject within these elements, you can add depth and lead the viewer’s eye towards the main focal point.
Storytelling
One of the most powerful uses of photography is its ability to tell a story. By carefully composing your shots, you can convey emotions, capture meaningful moments, and transport the viewer into another world. Here’s how you can use composition to weave narratives within your photographs:
- Create a focal point: Identify the main subject or element that tells the story and make it the focal point of your image. This could be a person, an object, or a specific detail.
- Include context: Consider including elements in the frame that provide context and help convey the narrative. This could be the environment, props, or other people or objects that add to the story being told.
- Use leading lines: Leading lines are compositional elements such as roads, paths, or fences that guide the viewer’s eye towards the main subject. They can create a sense of movement and direction within the frame, enhancing the storytelling aspect of your photograph.
Framing for Intrigue
Framing is another powerful composition technique that can add intrigue and visual interest to your images. By using elements within the scene to frame your subject, you can draw the viewer’s attention to the main focus of the photograph. Consider these framing techniques to create captivating compositions:
- Natural frames: Look for natural elements such as tree branches, archways, or doorways that can act as frames for your subject. These frames can add depth and visual interest to your photographs.
- Foreground elements: Incorporate foreground elements like rocks, flowers, or other objects that partially obscure the main subject. This can create a sense of depth and add a mysterious or dreamy quality to your images.
- Negative space: Don’t be afraid of leaving empty space in your composition. Negative space can create a sense of anticipation and draw attention to the subject, making it a focal point.
By embracing these composition techniques – positioning for uniqueness, storytelling, and framing for intrigue – you can elevate your photography skills and capture stunning images that leave a lasting impact on your viewers. So, grab your camera, explore different angles, and let your creativity shine through your lens. Happy shooting!
Learn more about the Rule of Thirds and how it can enhance your compositions here.
Lighting Techniques
Lighting is a crucial aspect of photography that can make or break a shot. Whether you’re a professional photographer or just love taking pictures with your smartphone, understanding different lighting techniques can elevate the quality of your photos and help you achieve the desired mood and atmosphere.
In this article, we’ll explore three lighting techniques that can take your photography to the next level: diffusing light, bringing your own lighting, and manipulating natural and artificial elements. Let’s dive in!
Diffusing Light
Have you ever taken a photo and found that the lighting was too harsh, resulting in unwanted shadows or blown-out highlights? Diffusing light can help solve this problem by creating a softer and more even light source. Here are a few ways to achieve this effect:
- Cloudy Day Magic: On overcast days, the clouds act as a natural diffuser, spreading the sunlight and providing a beautifully soft light. Take advantage of these days to capture stunning portraits or nature shots.
- DIY Diffuser: If you’re shooting indoors or on a sunny day, you can create your own diffuser using materials like white curtains, sheets, or even a shower curtain. Simply place it between the light source and the subject to soften the light and achieve a more flattering look.
- Reflective Surfaces: Another way to diffuse light is by using reflective surfaces, such as reflector boards or even a simple white foam board. These surfaces bounce the light back onto the subject, reducing harsh shadows and creating a more balanced lighting situation.
Bringing Your Own Lighting
While natural light can be beautiful, bringing your own lighting setup gives you complete control over the lighting conditions. This technique is particularly useful when shooting in low-light environments or in situations where the available lighting is less than ideal. Here are some options to consider:
- Off-Camera Flash: Using an off-camera flash allows you to position the light source wherever you want, creating dramatic lighting effects or filling in shadows. Experiment with different angles and intensities to achieve different moods and styles in your photos.
- Portable LED Lights: Portable LED lights are a versatile and convenient option for adding artificial lighting to your photos. They come in various sizes and can be easily adjusted to create the desired amount and quality of light. These lights are especially useful for capturing portraits, still life, or product shots on the go.
Manipulating Natural and Artificial Elements
Sometimes, you may want to manipulate the lighting environment to create a specific atmosphere or highlight certain elements in your photos. Here are a few techniques to consider:
- Silhouettes: Shooting against a bright light source like the sun can create striking silhouette shots. Simply position your subject between yourself and the light source, and expose for the background rather than the subject. This technique adds drama and mystery to your images.
- Bokeh: Bokeh refers to the soft, out-of-focus areas in a photo. To achieve beautiful bokeh, use a wide aperture (low f/number) and position your subject in front of a busy background. This technique creates a dreamy and ethereal look, drawing attention to the sharp and in-focus subject.
- Light Painting: Light painting involves using long exposure and moving a light source around the frame to create patterns or draw pictures. This technique is especially popular in night photography and can result in stunning and unique images.
Now that you have a better understanding of these lighting techniques, it’s time to grab your camera and start experimenting. Remember, practice makes perfect, so don’t be afraid to try different approaches and see what works best for your style of photography. With time and experience, you’ll develop your own signature lighting style that sets your photos apart. Happy shooting!
Lens and Aperture Techniques
Welcome to the world of lens and aperture techniques! Whether you’re a seasoned photographer or just starting out, understanding how to choose the right lens and utilize aperture effectively can make a world of difference in your photography. In this article, we will explore the different aspects of lens selection and aperture settings to help you capture stunning images.
Choosing the Right Lens
When it comes to choosing a lens, it can feel overwhelming with the wide range of options available. However, the lens you select has a significant impact on the outcome of your photos. Here are some factors to consider when choosing the right lens for your needs:
- Focal Length: The focal length of a lens determines the perspective and field of view in your images. A shorter focal length, such as a wide-angle lens, is ideal for capturing landscapes or fitting a large group of people into the frame. On the other hand, a longer focal length, like a telephoto lens, is great for wildlife photography or capturing distant subjects.
- Aperture Range: The aperture range of a lens determines how wide the lens can open, controlling the amount of light that enters the camera. A lens with a wider aperture (lower f-number) allows for more light and is useful in low-light conditions. Additionally, a wider aperture creates a shallow depth of field, resulting in a blurred background and emphasizing the subject.
- Lens Quality: The quality of the lens plays a crucial role in the sharpness, clarity, and overall image quality. While high-quality lenses may come at a higher price, they often offer superior optics, reduced distortion, and better image stabilization.
Remember, the right lens for you depends on your specific photography style and needs. Take your time to research and experiment with different lenses to find the perfect fit.
Creating Shallow Depth of Field
One of the most captivating techniques in photography is creating a shallow depth of field. This technique allows you to isolate your subject from the background, resulting in a beautifully blurred background while keeping the subject sharp. Here’s how you can achieve this effect:
- Select a Wide Aperture: To create a shallow depth of field, you’ll need to use a wide aperture (low f-number). The wider the aperture, the shallower the depth of field becomes.
- Get Closer to Your Subject: The distance between the camera and the subject also affects the depth of field. By getting physically closer to your subject, you can further enhance the separation between the subject and the background.
- Position Your Subject Wisely: Consider the placement of your subject in relation to the background. By placing your subject further away from the background, you can maximize the blurred effect on the background.
With these techniques, you can achieve stunning portraits, where your subject takes center stage while the background beautifully fades away.
Wide Aperture for Group Portraits
When it comes to capturing group portraits, using a wide aperture can be beneficial to ensure that everyone in the frame remains in focus. Here’s how a wide aperture can work:
- Increased Depth of Field: A wide aperture (low f-number) creates a shallow depth of field, which can make it challenging to keep multiple subjects sharp in a group portrait. However, you can counter this by increasing the distance between your subjects and using a narrower aperture (higher f-number). This will help increase the depth of field, keeping everyone in focus.
- Bokeh Effect: Even with a narrower aperture for a wider depth of field, you can still achieve a pleasant background blur, known as the bokeh effect. It adds a touch of artistry to your group portraits, making them visually appealing.
By finding the right balance between aperture settings and positioning your subjects, you can capture beautifully composed group portraits that showcase the camaraderie and connections between individuals.
Remember, mastering lens and aperture techniques takes practice, so don’t be afraid to experiment and explore different possibilities. Understanding how to choose the right lens and utilize aperture settings effectively can elevate your photography skills, allowing you to capture images that truly stand out.
Creative Trends in Portrait Photography
When it comes to portrait photography, there is always room for creative experimentation. In recent years, photographers have been pushing the boundaries of traditional portraiture, incorporating unique elements and techniques to capture stunning and captivating images. In this article, we will explore some of the current creative trends in portrait photography, including film photography, flash photography, neon night photography, blurred motion photography, neon-themed backgrounds, gradients and duotones, and minimalism.
Film Photography
Film photography has experienced a resurgence in popularity, offering a nostalgic and timeless aesthetic that digital photography can’t replicate. With its rich tones, grainy textures, and unpredictable nature, film photography adds a unique charm to portraits. It encourages photographers to slow down, think critically about composition, and anticipate the perfect moment to capture. Film formats such as 35mm, medium format, and even instant film have become go-to choices for many portrait photographers seeking a vintage and authentic feel to their images.
Flash Photography
Flash photography has come a long way from the harsh and unflattering lighting typically associated with it. Nowadays, photographers are using flash creatively to enhance their portraits, injecting a sense of drama and adding a stunning visual impact. By manipulating the direction and intensity of the flash, photographers can create beautifully dramatic images with soft shadows and highlights that bring out the subject’s features and add depth to the photograph.
Neon Night Photography
Neon night photography is a trend that has gained traction in recent years. By incorporating vibrant neon signs and cityscapes into portraits taken during the nighttime, photographers create a mesmerizing and surreal atmosphere. The neon lights add a pop of color and an urban feel that elevates the overall aesthetic of the image. This trend is particularly popular for capturing portraits in urban environments, showcasing the energy and vibrancy of city life.
Blurred Motion Photography
Blurred motion photography adds a dynamic and energetic touch to portraits. By intentionally introducing movement into the image, whether by incorporating a moving subject or deliberately moving the camera, photographers can create visually striking portraits that captivate the viewer’s attention. This technique adds a sense of motion and a unique artistic flair to the photograph, leaving a lasting impression.
Neon-Themed Backgrounds
Incorporating neon-themed backgrounds has become a popular choice for portrait photographers looking to create visually striking and vibrant images. Whether it’s using neon-colored backdrops, LED lights, or even light painting techniques, the neon-themed backgrounds add a futuristic and eye-catching element to portraits. This trend allows photographers to play with colors, patterns, and textures, creating a visually captivating experience for the viewer.
Gradients and Duotones
Gradients and duotones have become increasingly popular in the world of portrait photography. By applying a gradient or duotone effect to an image, photographers can create a unique color palette that adds depth and visual interest to portraits. This trend allows photographers to experiment with different color combinations, creating a mood or atmosphere that complements the subject and tells a story.
Minimalism
In an age of visual overload, minimalism has emerged as a powerful trend in portrait photography. Embracing simplicity and clean lines, minimalistic portraits focus on the subject, stripping away unnecessary distractions and leaving only the essential elements. This trend allows photographers to convey the subject’s emotions and personality, capturing their essence in a pure and captivating way.
In conclusion, portrait photography is constantly evolving, with photographers exploring new creative trends to capture unique and captivating images. Whether it’s through film photography, flash photography, neon night photography, blurred motion photography, neon-themed backgrounds, gradients and duotones, or minimalism, these trends add a fresh and artistic touch to the world of portraiture. So grab your camera, experiment with these trends, and let your creativity soar in the world of portrait photography.
Timing and Location
When it comes to capturing stunning photographs, timing and location play a crucial role. Choosing the right time and place can elevate your images from ordinary to extraordinary. In this section, we will explore the concept of timing and location in photography and how it can enhance your photos.
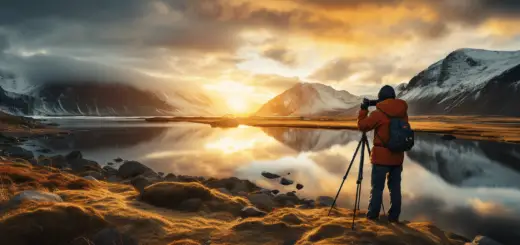
Golden Hour
One of the most popular times for photographers to shoot is during the “Golden Hour.” This magical time occurs just after sunrise and just before sunset when the sun is low on the horizon, casting a warm, golden light. The softness of the light during this time creates a beautiful, flattering glow that adds a touch of magic to your images. The Golden Hour is renowned for its stunning landscapes, dreamy portraits, and captivating silhouettes.
Magic Hours
While the Golden Hour is well-known for its enchanting light, the “Magic Hours” extend beyond just the early morning and late afternoon. These hours include the time just before sunrise and just after sunset, when the sky is filled with vivid colors and the world is wrapped in a mystical ambiance. During these moments, the balance between artificial and natural light creates a unique atmosphere that photographers love to capture.
Avoiding Harsh Shadows
Harsh shadows can be a major challenge when shooting in bright sunlight or during midday. Have you ever taken a photo only to have half of your subject cast in shadow? It can be frustrating, but luckily, there are ways to avoid this issue. By planning your photo sessions around the Golden Hour or Magic Hours, you can avoid harsh shadows altogether. The soft, diffuse light present during these times creates a more evenly lit scene, ensuring that your subjects look their best.
Additionally, seeking out locations with adequate shade can also help prevent harsh shadows. Look for spots with trees, buildings, or other objects that can provide a natural source of diffusion.
Remember, the timing and location you choose for your photography sessions can make all the difference in the mood, lighting, and overall impact of your images. So, next time you plan a photoshoot, be mindful of the Golden Hour and Magic Hours, and avoid harsh shadows to capture truly breathtaking photographs. Happy shooting!
Related Article: Want to learn more about different lighting techniques in photography? Check out our comprehensive guide on using natural light in photography.
Building Connection and Rapport
Building a positive connection and rapport with your subject is crucial for capturing authentic and compelling photographs. When your subject feels comfortable and at ease, it opens the door to capturing genuine emotions and moments that truly reflect their personality. In this section, we’ll discuss two essential aspects of building connection and rapport: making a positive connection with the subject and working with the subject before the shoot.
Making a Positive Connection with the Subject
Establishing a positive connection with your subject starts even before you pick up your camera. Here are a few tips to help you establish a good rapport:
- Research and Prepare: Take the time to learn about your subject before the shoot. This could include reviewing their portfolio, reading their bio, or even having a conversation with them. Understanding their background and interests can help you find common ground and spark interesting conversations during the shoot.
- Engage in Conversation: Before diving into the photography session, engage your subject in a friendly conversation. Ask about their day, their hobbies, or any interesting anecdotes they’d like to share. This not only helps create a relaxed atmosphere but also shows genuine interest in them as a person.
- Be Empathetic: Patience and empathy go a long way in building a connection. Make sure your subject feels heard and understood. Take the time to listen to their needs, concerns, and ideas. By creating a safe space for them to express themselves, you’ll be able to capture more authentic and meaningful moments.
- Offer Direction and Guidance: While it’s important to let your subject be natural and express themselves, providing gentle direction can help create better compositions and poses. Offer suggestions and guidance while still allowing them to feel empowered and in control of their actions.
Working with the Subject Before the Shoot
Collaboration and preparation before the actual shoot can significantly contribute to building a strong connection with your subject. Here are a few ways you can work with your subject before the shoot:
- Communication is Key: Clearly communicate your ideas, vision, and expectations to your subject. Discuss the purpose of the shoot, any specific poses or themes you have in mind, and the overall mood you want to capture. This collaborative approach allows your subject to feel involved and invested in the project.
- Location Scouting Together: If possible, involve your subject in location scouting. Take them to potential shooting locations and allow them to provide input. Their familiarity and comfort with the environment will positively impact their comfort level during the actual shoot.
- Wardrobe and Styling: Discuss wardrobe options with your subject and guide them on what works best for the desired look and feel of the shoot. Consider asking them for multiple outfit options and provide feedback to help them make the best choices.
- Plan and Share a Shot List: Creating a shot list together ensures that both you and your subject are on the same page about the types of photos you want to capture. It provides a clear structure and direction for the shoot, avoiding any confusion or missed opportunities.
Remember, building a strong connection and rapport with your subject is a continuous process that starts well before the shoot and continues throughout the entire session. By showing genuine interest, empathy, and collaboration, you’ll create an environment where your subject feels comfortable and confident, resulting in beautiful and authentic photographs.
Tips and Techniques
Carrying Your Camera at All Times
One of the most fundamental tips for capturing great photographs is to have your camera with you at all times. You never know when a perfect shot opportunity will present itself, so it’s essential to be prepared. Whether you’re out running errands, taking a walk in the park, or attending a social event, having your camera accessible allows you to seize those magical moments that may be gone in an instant.
Pro Tip: Keep your camera in a small, lightweight camera bag or invest in a comfortable camera strap that allows you to carry it hassle-free. This way, you won’t miss any spontaneous photo opportunities.
Adjusting Camera Settings in Advance
To ensure you don’t miss a shot, it’s crucial to adjust your camera settings in advance. Instead of fumbling with your camera’s buttons and menu options when a perfect moment arises, take the time to set up your camera before you head out to shoot. This way, you can fully concentrate on capturing the moment without any distractions.
Pro Tip: Familiarize yourself with your camera’s different shooting modes, such as aperture priority or manual mode, and learn how to adjust your settings quickly. A little practice beforehand can go a long way in capturing outstanding photos.
Using Natural Light
Harnessing the power of natural light is key to achieving stunning photographs. Natural light can add a beautiful and captivating element to your images, enhancing colors and textures. Whether you’re shooting outdoors or near a window, pay attention to the direction and quality of light to create an atmosphere that complements your subject.
Pro Tip: Golden hour, the period shortly after sunrise or before sunset when the sun is low in the sky, offers soft and warm light that can transform ordinary scenes into extraordinary ones. Take advantage of this magical time of day for breathtaking photos.
Soft Faded Backgrounds
One technique that can instantly elevate your photographs is creating a soft and faded background, also known as bokeh. This technique allows you to separate your subject from the background, drawing the viewer’s attention directly to what you want to highlight.
Pro Tip: To achieve a beautiful bokeh effect, use a wide aperture (low f-stop number) when shooting. This will help create a shallow depth of field, blurring the background and making your subject stand out.
Sharp Focus Techniques
Achieving sharp focus is essential for capturing professional-looking photos. Blurry or out-of-focus images can be disappointing and detract from the overall impact of your photographs. To ensure your subject is crystal clear:
- Use the autofocus function on your camera.
- Select the appropriate focus point.
- Steady your camera with a tripod or using proper hand-holding techniques to minimize camera shake.
Pro Tip: Experiment with different focus techniques, such as using selective focus to draw attention to specific details or using continuous autofocus to capture action shots with precision.
Capturing a Wide Variety of Images
Don’t limit yourself to a specific subject or style of photography. Explore and experiment with different genres to push your creative boundaries. Capturing a wide variety of images not only helps you grow as a photographer but also exposes you to new techniques and perspectives.
Pro Tip: Challenge yourself to capture unique and unexpected moments. Look for interesting angles, explore different compositions, and tell stories through your images.
Bold Colors and Patterns
Incorporating bold colors and patterns can add visual interest and vibrancy to your photographs. Don’t shy away from capturing vibrant hues or eye-catching patterns; they can create impactful and memorable images.
Pro Tip: Look for contrasting colors or patterns that can create a dynamic composition. Experiment with different perspectives and viewpoints to capture the essence of the colors and patterns you encounter.
Subtle Smiles and Expressions
When photographing people, capturing their genuine and subtle smiles and expressions can make for highly compelling images. These small moments of emotion can convey a powerful story and create a connection between the viewer and the subject.
Pro Tip: To capture authentic expressions, engage with your subjects and make them feel comfortable. Take your time, be patient, and wait for those natural and intimate moments to unfold.
Softening Light
While natural light is beautiful, it can also be harsh, casting unflattering shadows on your subjects. To soften harsh light and create a more pleasing appearance, you can use diffusers or bounce the light off reflective surfaces.
Pro Tip: If you don’t have any photography accessories on hand, improvisation is key. Use everyday items like a white sheet or a foam board to diffuse or bounce light, enhancing the overall look of your images.
Remember, the key to improving your photography skills is practice. So, grab your camera, apply these tips and techniques, and embark on your journey to capturing breathtaking photos. Happy shooting!
Now that you’re familiar with essential tips and techniques, let’s dive deeper into each aspect and explore how to harness the power of capturing beautiful moments. Start with carrying your camera at all times.
Conclusion
Mastering the art of portrait photography is a journey that requires dedication, practice, and a willingness to experiment with different techniques and trends. By honing your composition, lighting, lens, and timing skills, you can capture stunning portraits that truly showcase the essence of your subjects.
Throughout this article, we’ve explored various composition techniques, such as positioning for uniqueness and framing for intrigue, as well as lighting techniques like diffusing light and manipulating natural and artificial elements. Additionally, we’ve delved into the importance of lens selection and aperture settings, highlighting the value of choosing the right lens and creating a shallow depth of field.
We’ve also discussed some emerging creative trends in portrait photography, including film photography, flash photography, neon night photography, and blurred motion photography. These trends offer opportunities to bring unique and visually striking elements to your portraits.
Timing and location play a crucial role in portrait photography, with the golden hour and magic hours offering exceptional lighting conditions to capture stunning portraits. By avoiding harsh shadows and taking advantage of these optimal moments, you can elevate the quality of your photographs.
In addition to technical skills, building connection and rapport with your subjects is essential for capturing authentic and compelling portraits. Making a positive connection and working with your subjects before the shoot can help create a comfortable and relaxed atmosphere, resulting in more natural and expressive images.
To become a well-rounded portrait photographer, we’ve shared various tips and techniques, such as carrying your camera at all times, adjusting camera settings in advance, and utilizing natural light. Additionally, we’ve highlighted the importance of capturing a wide variety of images to provide diversity in your portfolio, as well as incorporating bold colors, patterns, and subtle smiles and expressions to add depth and personality to your portraits.
In conclusion, mastering portrait photography requires a combination of technical knowledge, artistic vision, and the ability to connect with your subjects. By continuously learning, experimenting, and embracing new techniques and trends, you can refine your skills and create captivating portraits that leave a lasting impression.
For more photography inspiration, tutorials, tips, and reviews, be sure to visit Wimarys.com, where you’ll find a wealth of resources and insights from Wim Arys, a portrait and landscape photographer. Whether you’re a beginner or an advanced enthusiast, Wimarys.com is your go-to destination for all things photography.
Frequently Asked Questions
- What are some essential techniques for mastering portrait photography?
Some essential techniques for mastering portrait photography include understanding lighting and composition, establishing a connection with the subject, experimenting with different angles and perspectives, and using the appropriate equipment and settings.
- What are the best tips for capturing natural and authentic portrait photographs?
To capture natural and authentic portrait photographs, it’s important to create a comfortable and relaxed atmosphere, encourage natural expressions and poses, have a conversation with the subject, and utilize natural light whenever possible.
- What camera equipment is recommended for portrait photography?
For portrait photography, it is recommended to use a DSLR or mirrorless camera with a variety of lenses, such as a portrait lens (around 50mm or 85mm), a wide-angle lens, and a telephoto lens. Additionally, investing in a good tripod and external flash can be beneficial.
- How can I enhance portraits during post-processing?
During post-processing, you can enhance portraits by adjusting exposure and white balance, applying selective retouching for skin smoothing and blemish removal, enhancing colors and contrast, and sharpening the image. However, it’s important to maintain a natural and realistic look.
- Are there any specific tips for photographing children or pets in portraits?
When photographing children or pets in portraits, it’s crucial to be patient and flexible, allow for spontaneity and playfulness, use props and toys to engage with them, get down to their eye level, and capture their unique personalities and expressions.