
Welcome to the world of landscape photography! Whether you’re a beginner looking to explore a new hobby or an experienced photographer seeking to enhance your skills, this article will provide you with valuable insights and techniques to capture stunning landscape images.
Landscape photography is a wonderful way to connect with nature and showcase the beauty of our surroundings. It allows you to capture breathtaking landscapes, from majestic mountains to serene seascapes, and everything in between. But capturing the essence of a landscape goes beyond pointing and shooting – it requires a deep understanding of the fundamentals and a creative approach.
In this article, we will delve into the essentials of landscape photography, including composition, camera settings, gear, lighting, and post-processing. We’ll also explore different styles of landscape photography and discuss the importance of ethics and conservation in this field. So grab your camera and let’s embark on a journey to create remarkable landscape images that will leave a lasting impression!
Understanding the Basics of Landscape Photography
Have you ever marveled at stunning landscape photographs and wondered how they were taken? Landscape photography is a wonderful way to capture the beauty of nature and create evocative images that transport viewers to different places. But to create impactful landscape photos, it’s important to understand the basics of this genre. In this section, we will explore the fundamental techniques and concepts that will help you capture breathtaking landscapes.
Importance of Composition
Composition plays a vital role in landscape photography, as it helps guide the viewer’s eye and creates a sense of balance in the image. Here are a few composition techniques to consider:
- Rule of Thirds: Dividing your frame into three equal parts horizontally and vertically, and placing your main subject or points of interest along these lines or at their intersections.
- Leading Lines: Using natural or man-made elements such as roads, fences, or rivers to lead the viewer’s eye into the scene and add depth to your composition.
- Foreground Interest: Including interesting elements in the foreground, like rocks, flowers, or trees, to add depth and create a sense of scale.
Working with Natural Lighting
Lighting is a crucial element in landscape photography, as it can dramatically enhance or detract from your images. Here are some tips for working with natural light:
- Golden Hour and Blue Hour: The period shortly after sunrise and just before sunset is known as the golden hour. During this time, the light is soft, warm, and creates a beautiful glow on the landscape. The blue hour, on the other hand, occurs just before sunrise and after sunset when the sky takes on a deep blue hue.
- Backlighting and Silhouettes: Experimenting with backlighting can create stunning silhouettes and add a sense of drama to your images. Position your subject between you and the light source for striking results.
- Using Shadows and Contrast: Shadows can add depth and dimension to your photos. Experiment with how shadows interact with the landscape, emphasizing textures and creating visual interest.
Choosing the Right Time and Weather
The time of day and weather conditions can significantly impact the mood and atmosphere of your landscape photographs. Here are a few factors to consider:
- Weather: Different weather conditions can create unique opportunities for landscape photography. Stormy skies, rainbows, fog, or even snow can add drama and interest to your images.
- Seasons: The changing seasons offer a variety of opportunities for landscape photography. Spring brings vibrant colors and blooming flowers, while autumn paints landscapes with warm tones and falling leaves. Make sure to plan your shoots accordingly to capture the essence of each season.
- Time of Day: The quality of light varies throughout the day. Shooting during the early morning or late afternoon generally produces soft, warm light that enhances the landscape. Midday light can be harsh and result in strong shadows, so you might want to avoid shooting during this time.
Understanding these basics of landscape photography will serve as a solid foundation for creating stunning landscape images. Next, let’s dive into the essential gear you’ll need to capture these breathtaking scenes.
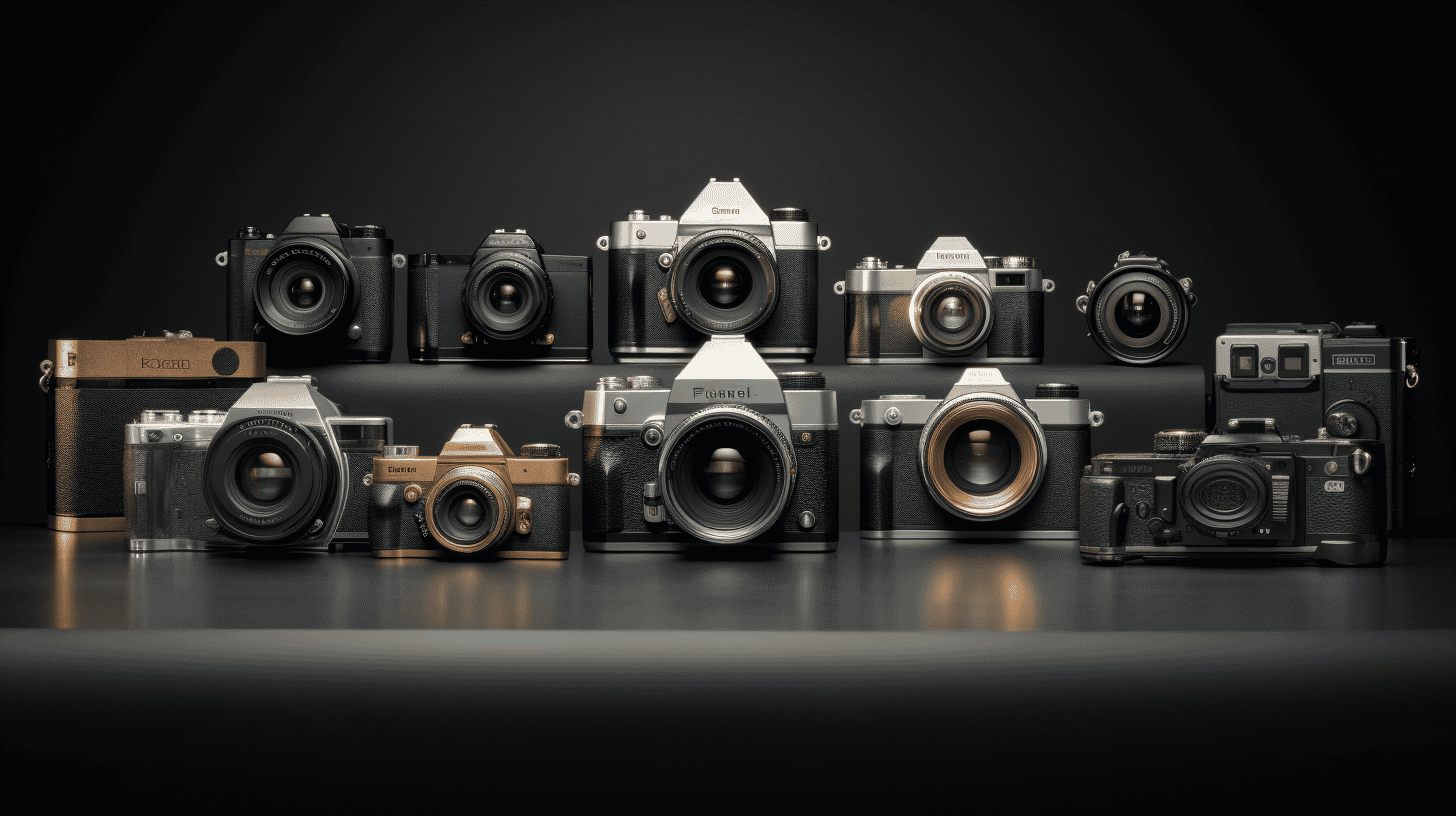
Essential Gear for Landscape Photography
When it comes to landscape photography, having the right gear is crucial to capturing stunning images. Here are some essential items that every landscape photographer should have in their toolkit:
Camera and Lens Selection:
- Full-frame DSLR or Mirrorless Camera: These cameras offer higher image quality and better low-light performance, which are important for landscape photography.
- Wide-angle Lens: A wide-angle lens with a focal length of around 14-24mm is ideal for capturing the expansive views often seen in landscapes.
- Telephoto Lens: A telephoto lens with a focal length of around 70-200mm can help you capture details and compress the perspective of distant objects.
- Lens Filters: Neutral density (ND) filters are useful for controlling exposure in bright conditions, while polarizing filters can enhance the colors and reduce glare in your images.
Tripods and Filters:
- Sturdy Tripod: A stable tripod is essential for keeping your camera steady during long exposures or when shooting in low light conditions. Look for a tripod that is lightweight, yet sturdy enough to support the weight of your camera and lens.
- Circular Polarizing Filter: This filter can help reduce reflections, enhance colors, and improve overall image clarity and contrast.
- Graduated Neutral Density Filters: These filters are used to balance the exposure between the bright sky and the darker foreground in high-contrast scenes.
Remote Shutter Release:
A remote shutter release allows you to trigger your camera without touching it, minimizing the risk of camera shake. This is especially useful when using longer shutter speeds or shooting in bulb mode.
Having the right gear is important, but it’s equally important to know how to use it effectively. In the next section, we’ll explore some essential camera settings that can help you capture beautiful landscape images.
Mastering Camera Settings
Mastering camera settings is essential for capturing stunning landscape photos. Understanding how to use different settings on your camera will allow you to have more control over your images and ensure that you capture the scene exactly how you envision it. Here are some key camera settings to consider:
Aperture, Shutter Speed, and ISO
- Aperture determines the depth of field in your photo. A wider aperture (lower f-stop) will create a shallow depth of field, while a smaller aperture (higher f-stop) will result in a greater depth of field. Experiment with different apertures to achieve the desired focus and background blur in your images.
- Shutter speed controls the amount of time the camera’s sensor is exposed to light. Slow shutter speeds (longer exposure times) can be used to capture motion blur in moving elements such as waterfalls or clouds, while fast shutter speeds freeze action. Learn to adjust shutter speed depending on the effect you want to achieve in your landscapes.
- ISO measures the sensitivity of your camera’s image sensor to light. A lower ISO (e.g., 100 or 200) is ideal for landscapes in bright lighting conditions to maintain image quality and reduce noise. In low-light situations, you may need to increase the ISO to capture enough light, but this can introduce graininess or noise to your images.
White Balance Settings
- White balance affects the color temperature of your photos, ensuring that colors appear natural under different lighting conditions. Most cameras have preset white balance options such as daylight, cloudy, or tungsten. Experiment with different settings or use the custom white balance feature to match the lighting conditions accurately.
Focusing Techniques
- Manual focus gives you complete control over what is in focus in your landscape photos. Use it when you want to ensure a particular element is sharp and in focus.
- Autofocus is useful for general landscape shots. Use the single-point autofocus mode to select the exact point you want to focus on, or use the autofocus tracking mode for dynamic scenes with moving objects.
Remember to practice using these camera settings in various lighting conditions and landscapes to gain familiarity and confidence. Play around with different combinations to achieve different effects and styles in your landscape photography.
Composition and Framing Techniques
When it comes to landscape photography, composition plays a crucial role in capturing captivating images that draw the viewer’s attention. Composition refers to the arrangement and placement of various elements within a photograph to create a visually pleasing and balanced image. Here are some composition and framing techniques that every landscape photographer should know:
1. Rule of Thirds
The Rule of Thirds is a fundamental principle in photography composition. Imagine your image divided into a 3×3 grid, with two horizontal and two vertical lines. The points where these lines intersect are the points of interest, and placing your main subject or key elements along these lines or intersections can create a more visually appealing image.
For example, if you’re photographing a stunning landscape with beautiful mountains, you can position the horizon along one of the horizontal lines and the mountains along the vertical lines. This creates a balanced composition that draws the viewer’s eye.
2. Leading Lines
Leading lines are lines within your photograph that lead the viewer’s eye into the image, guiding them towards the main subject or focal point. These lines can be natural or man-made and can be used to add depth and visual interest to your photos.
For instance, when photographing a winding road through a scenic landscape, the road can act as a leading line, drawing the viewer’s eye deeper into the image. Other examples of leading lines can include rivers, paths, fences, or even branches.
3. Foreground Interest
Including a strong foreground element can add depth and dimension to your landscape photographs. A foreground element is a subject or object in the foreground that captures the viewer’s attention and creates a sense of scale and perspective.
For instance, you could include a tree branch, a rock formation, or even a person in the foreground of your image to provide a point of interest and add visual interest to the scene. This technique not only adds depth to the image but also creates a sense of immersion for the viewer.
Remember, composition and framing are not strict rules, but rather creative guidelines that can be broken or bent to capture unique and artistic images. It’s essential to experiment and explore different compositional techniques to develop your style and create visually striking landscape photographs.
Working with Natural Lighting
When it comes to landscape photography, lighting plays a crucial role in creating stunning and captivating images. Natural lighting can add depth, dimension, and mood to your photographs, transforming an ordinary scene into something extraordinary. Here are some essential tips for working with natural lighting in landscape photography:
Golden Hour and Blue Hour
- The golden hour refers to the period shortly after sunrise or before sunset when the natural light is warm and soft. This is considered the best time for landscape photography as it creates a beautiful, golden glow that enhances the colors and textures of the scene.
- The blue hour, on the other hand, occurs before sunrise or after sunset when the sky takes on a deep blue hue. This time provides unique opportunities for capturing moody and ethereal landscapes.
Backlighting and Silhouettes
- Backlighting occurs when the main source of light comes from behind the subject. This technique can create a dramatic effect, with the subject appearing as a silhouette against a bright, glowing background.
- Silhouettes can add a sense of mystery and intrigue to your photographs. To create a silhouette, position your subject between the camera and a bright light source, such as the setting sun.
Using Shadows and Contrast
- Shadows are an important element in landscape photography, as they can add depth and visual interest to your images. Pay attention to the direction and length of shadows, as they can help define the shape and form of the landscape.
- Contrast refers to the difference between light and dark areas in a photograph. High contrast scenes with areas of bright light and deep shadows can create a dramatic and dynamic effect.
Remember, the key to working with natural lighting in landscape photography is to be patient and adaptable. The lighting conditions can change quickly, so be prepared to adjust your settings and composition accordingly. Experiment with different techniques and embrace the unique qualities that each lighting situation offers.
“Light can completely change the mood and atmosphere of a landscape photograph. It’s essential to understand how to work with natural lighting to capture the essence and beauty of a scene.”
Capturing Dynamic Landscapes
Capturing dynamic landscapes can be a thrilling experience for any photographer. It allows you to capture the beauty of nature in its most impressive forms and create stunning images that evoke emotions in the viewer. Whether you are a beginner or an experienced photographer, there are several techniques and tools you can use to enhance your landscape photography and capture those breathtaking moments. In this section, we will explore three specific techniques that can help you capture dynamic landscapes: long exposure photography, panoramic stitching, and HDR photography.
Long Exposure Photography
Long exposure photography is a technique that involves using a slow shutter speed to capture motion in a scene. It is particularly effective in capturing the movement of water, such as rivers, waterfalls, or crashing waves. By using a longer exposure time, you can create a beautiful silky effect on the water, giving it a smooth and ethereal appearance.
Tips for Successful Long Exposure Photography:
- Use a tripod to keep your camera steady during the long exposure.
- Use a neutral density filter to reduce the amount of light entering the camera, allowing for longer exposure times.
- Experiment with different exposure times to achieve the desired effect.
- Incorporate elements of interest in the frame, such as rocks or trees, to provide a sense of scale and contrast to the flowing water.
Panoramic Stitching
Panoramic stitching is a technique that allows you to capture a wider field of view by stitching multiple images together to create a single, seamless panorama. It is particularly useful when trying to capture expansive landscapes that cannot fit within the frame of a single photograph.
Tips for Successful Panoramic Stitching:
- Use a tripod to keep the camera steady and ensure consistency in each frame.
- Overlap each image by at least 30% to provide enough overlap for the stitching software to align and blend the images seamlessly.
- Use manual exposure settings to maintain consistent exposure across all frames.
- Be mindful of any moving objects, such as clouds or people, which can create stitching errors.
HDR Photography
HDR (High Dynamic Range) photography is a technique that involves capturing multiple exposures of the same scene, combining them into a single image to achieve a greater range of tonal detail and dynamic range. It is particularly useful in situations where there is a significant difference in lighting conditions between the brightest and darkest areas of a scene.
Tips for Successful HDR Photography:
- Use a tripod to ensure that each exposure is aligned perfectly.
- Shoot in RAW format to capture the maximum amount of detail and information in each exposure.
- Bracket your exposures by taking multiple shots at different exposure settings. Aim for exposures that capture highlight details, mid-tones, and shadow details.
- Utilize HDR software or post-processing techniques to blend the exposures, preserving details in both the highlights and shadows.
Remember, the key to capturing dynamic landscapes lies in experimentation and creativity. Don’t be afraid to try different techniques and push your creative boundaries. Each landscape is unique, and by exploring different techniques such as long exposure photography, panoramic stitching, and HDR photography, you can capture the beauty of these landscapes in a way that is both visually stunning and captivating. So grab your camera, head out into nature, and capture the dynamic landscapes that await you. Happy shooting!
Post-Processing Tips for Stunning Landscape Images
When it comes to landscape photography, capturing a stunning image in-camera is just the first step. Post-processing plays a crucial role in enhancing and refining your photographs to truly make them stand out. Whether you’re a beginner or a seasoned photographer, here are some post-processing tips to help you create stunning landscape images:
Basic Adjustments and Color Correction
One of the first steps in post-processing landscape images is to make basic adjustments to the exposure, contrast, and color. Here are a few key tips to keep in mind:
- Exposure: Adjust the exposure settings to ensure that the image is neither too bright nor too dark. Look for the histogram and make sure that it is well-distributed without any clipping in the highlights or shadows.
- Contrast: Increase the contrast slightly to bring out the details and add depth to your image. Be careful not to overdo it, as it can make the photo look unnatural.
- Color Correction: Adjust the white balance to ensure accurate colors in your landscape. You can choose to keep the colors realistic or enhance them for a more artistic effect.
Enhancing Details and Sharpness
Once you’ve made the necessary adjustments, you can focus on enhancing the details and sharpness of your landscape image. Here are a few techniques to achieve this:
- Sharpening: Apply selective sharpening to bring out the fine details in your landscape. Be careful not to oversharpen, as it can introduce artifacts and make the image look unnatural.
- Clarity: Use the clarity slider to enhance mid-tone contrast and add definition to your landscape. This can help bring out the textures and make the image appear sharper.
- Selective Dodging and Burning: Use dodging and burning techniques to selectively lighten or darken specific areas of your landscape. This can help add depth and dimension to your image.
Removing Unwanted Objects
In landscape photography, it’s common to encounter unwanted objects that can distract from the main subject. Here are a few techniques to remove such objects in post-processing:
- Spot Healing: Use the spot healing brush tool to remove small unwanted objects, such as dust spots or blemishes, from your landscape. Simply click on the object, and the tool will analyze the surrounding pixels to blend it seamlessly.
- Clone Stamp: The clone stamp tool allows you to remove larger unwanted objects by sampling a specific area and cloning it over the object you want to remove. This tool requires more precision and attention to detail.
- Content-Aware Fill: Some post-processing software, like Adobe Photoshop, offer a content-aware fill feature that intelligently removes unwanted objects by analyzing the surrounding pixels and filling in the gap seamlessly. This can be a powerful tool for removing objects from your landscape images.
Remember, post-processing is a personal choice, and the goal is to enhance your photographs while maintaining a natural and realistic look. Experiment with different techniques and find a style that resonates with you. Keep in mind that the purpose of post-processing is to enhance what you’ve captured in-camera, not to completely alter the reality of the landscape.
“Post-processing is not about fixing mistakes, but about enhancing the vision you had when you clicked the shutter.” – Unknown
By applying these post-processing tips, you can take your landscape images to the next level and create stunning photographs that truly showcase the beauty and awe of the natural world. Happy editing!
Exploring Different Landscape Photography Styles
When it comes to landscape photography, there isn’t just one right way to do it. In fact, one of the most exciting aspects of this genre is the opportunity to explore different styles and approaches. Each style has its own unique characteristics and can help you capture the beauty of the natural world in a variety of ways. Let’s take a look at some popular landscape photography styles that you can try out:
Minimalist Landscapes
Minimalist landscape photography focuses on simplicity and the absence of unnecessary elements. The goal is to create images that have a clean and uncluttered look, often with a single subject as the focal point. This style relies on minimalistic compositions, strong lines, and negative space. By eliminating distractions and simplifying the scene, minimalist landscapes evoke a sense of tranquility and serenity.
Intimate Landscapes
Intimate landscapes zoom in on small details within the larger landscape, such as flowers, rocks, or other natural elements. The idea is to capture the beauty and intricacies of these smaller subjects, highlighting their unique textures, patterns, and colors. This style allows you to showcase the often overlooked details that make up the larger landscape, revealing its hidden beauty.
Wide-Angle Landscapes
Wide-angle landscape photography aims to capture expansive scenes and emphasize the vastness of the natural world. It involves using wide-angle lenses to capture a broad field of view, allowing you to include as much of the landscape as possible. This style is particularly effective in capturing grand landscapes, such as mountain ranges, seascapes, and wide open spaces. It helps create a sense of depth and immersion, making the viewer feel as if they are standing right there in the scene.
Black and White Landscapes
Black and white landscape photography strips away color distractions and focuses on the interplay between light and shadow. It allows you to emphasize texture, contrast, and tonal range, creating powerful and moody images. Black and white landscapes can add a timeless and artistic feel to your photographs, enhancing the drama and emotions of the scene.
Long Exposure Landscapes
Long exposure photography involves using longer shutter speeds to capture motion blur in the landscape, such as flowing water, moving clouds, or swaying trees. It creates a sense of movement and fluidity in your images, adding a dynamic element to static scenes. Long exposure landscapes can convey a sense of tranquility and surrealism, transforming familiar scenes into something magical.
HDR Landscapes
High Dynamic Range (HDR) photography combines multiple exposures of the same scene to capture a wider range of tonal values. It allows you to preserve details in both the highlights and shadows, creating a more balanced and realistic representation of the scene. HDR landscapes are great for capturing scenes with extreme contrast, such as sunsets or landscapes with strong backlighting.
Abstract Landscapes
Abstract landscape photography breaks away from traditional representations of landscapes and explores more experimental and artistic approaches. It focuses on capturing shapes, patterns, and colors in the natural world, often resulting in surreal and dreamlike images. Abstract landscapes allow you to express your creativity and imagination, pushing the boundaries of traditional landscape photography.
Remember, these landscape photography styles are just a starting point. Don’t be afraid to experiment and combine different styles to create your own unique vision. Develop your own signature style and let your creativity shine through your photographs. Happy exploring!
“Landscape photography is the supreme test of the photographer – and often the supreme disappointment.” – Ansel Adams
Location Scouting and Research
When it comes to landscape photography, one of the key elements that can make or break your images is the location you choose. A stunning location can elevate an ordinary photograph into a masterpiece. But how do you find these picture-perfect spots? It all comes down to location scouting and research. Here are some tips to help you in this process:
Researching Potential Locations
Research is the first and most crucial step in finding the perfect landscape photography locations. Here are a few ways you can conduct your research:
- Online Resources: Utilize websites, forums, and social media platforms where photographers share information about their favorite spots. Websites like 500px, Flickr, and Instagram can provide inspiration and insight into potential locations.
- Guidebooks and Travel Guides: Look for guidebooks specific to your target location. These books often highlight popular landmarks and hidden gems that may not have made it onto the internet.
- Maps and Satellite Imagery: Use online mapping tools like Google Maps and Google Earth to scout potential locations. Satellite imagery can give you an idea of the landscape and terrain, allowing you to plan your shoot ahead of time.
Planning for Different Seasons
Different seasons can drastically change the appearance of a landscape. Therefore, it’s essential to consider the time of year when planning your shoot. Here’s what you need to keep in mind:
- Seasonal Changes: Research how the landscape changes with the seasons. Some locations may look incredible during spring when flowers are in full bloom, while others may be more ideal during fall with vibrant foliage.
- Weather Conditions: Take into account the weather conditions during the different seasons. Certain landscapes may look more dramatic under stormy skies, while others may benefit from the soft light of a sunny day.
- Sunrise and Sunset Times: Make note of the sunrise and sunset times for your chosen locations. These golden hours offer the best natural lighting for landscape photography. Plan your shoot accordingly by arriving early to set up and scout out the best vantage points.
Finding Unique Perspectives
To make your landscape images stand out, look for unique perspectives that offer a fresh take on well-known locations. Here are a few tips to help you find these unique angles:
- Explore Off-the-Beaten-Path: While popular landmarks are undoubtedly worth capturing, don’t be afraid to venture off the beaten path. Explore lesser-known locations, backroads, and trails to discover hidden gems that not everyone has photographed.
- Viewpoint Research: Look for viewpoints that can provide a different perspective on a familiar location. Research other photographer’s work or use online tools to find out where they were positioned when capturing their stunning shots.
- Local Knowledge: Tap into the knowledge of locals or experienced photographers familiar with the area you’re exploring. They can offer valuable insights and suggest spots that may not be well-documented.
Remember, location scouting and research are essential steps in landscape photography that can save you time and frustration. Putting in the effort to find unique and breathtaking locations will ensure that your images will stand out from the crowd. So grab your camera, get out there, and let the landscapes inspire your creativity!
Ethics and Conservation in Landscape Photography
Respecting the Environment
When photographing landscapes, it is crucial to prioritize the well-being of the environment. Here are some ways to ensure you are respecting the environment:
- Stay on designated trails: Stick to established paths and trails to avoid damaging delicate vegetation or habitats.
- Leave no trace: Carry out everything you bring in and avoid littering. Be mindful of your surroundings and do not disturb or remove any natural elements.
- Minimize your impact: Avoid trampling on fragile vegetation or disturbing wildlife. Keep a safe distance from animals to prevent unnecessary stress.
- Practice responsible camping: If you are camping overnight, follow guidelines for Leave No Trace camping principles. Leave the campsite as you found it, without any evidence of your stay.
- Do not alter the landscape: Refrain from moving or rearranging elements in the scene to create a more “perfect” composition. It is important to photograph nature as you find it, without altering its natural state.
Photographing Sensitive Areas
Some areas are especially sensitive to human presence, and extra caution should be exercised when photographing them. Here are a few guidelines to follow when photographing sensitive landscapes:
- Research photography restrictions: Before visiting a location, research any specific rules or restrictions related to photography. Some areas may have limitations on access or photography to protect fragile ecosystems or cultural sites.
- Be mindful of seasonal restrictions: Certain areas have specific time periods when access is restricted to protect wildlife during sensitive breeding or nesting seasons. Respect these restrictions and plan your visits accordingly.
- Avoid overcrowding: If you find yourself in a popular location, be mindful of other photographers and visitors. Give each other space to work and avoid overcrowding sensitive areas.
- Use proper techniques for wildlife photography: When photographing wildlife, make sure to maintain a safe distance and not disturb their natural behavior. This is crucial for their well-being and conservation.
Sharing and Educating
As landscape photographers, we have the opportunity to inspire others and raise awareness about the beauty and importance of nature. Here are some ways to share and educate responsibly:
- Educate yourself: Learn about the places you photograph, including their ecological significance, cultural history, and any conservation efforts. This knowledge will allow you to tell a more meaningful story through your images.
- Share with intention: When sharing your landscape photographs, consider the context and message you want to convey. Use captions and descriptions to educate viewers about the importance of conservation and the need to protect these natural spaces.
- Support conservation organizations: Consider donating a portion of your print sales or proceeds from photography workshops to conservation organizations. This helps support their efforts in preserving and protecting our natural landscapes.
- Practice ethical digital editing: While post-processing plays a role in enhancing landscape images, it’s important to maintain the integrity of the scene. Avoid excessive manipulation that alters the reality of the landscape or misrepresents the natural environment.
By following these ethical practices, we can all contribute to the preservation and appreciation of our natural landscapes. Remember, we are not just photographers; we are also stewards of the environment. Let’s capture the beauty of nature while respecting and conserving it for future generations to enjoy.
Conclusion
In conclusion, landscape photography is a beautiful and rewarding art form that allows us to capture the beauty of the natural world. With the right tools, techniques, and knowledge, you can take your landscape photography to the next level and create stunning images that showcase the true essence of a place.
Remember, it’s important to understand the basics of composition, lighting, and timing in order to create compelling images. Use the rule of thirds, leading lines, and foreground interest to guide the viewer’s eye and create visual interest. Experiment with different natural lighting conditions and learn to embrace the unique qualities they bring to your images.
Invest in essential gear such as a reliable camera and lens combination, a sturdy tripod, and a set of quality filters to enhance your images and give you more creative control. Mastering camera settings such as aperture, shutter speed, and ISO will allow you to capture the scene exactly how you envision it.
Don’t forget the importance of post-processing in landscape photography. Basic adjustments, color correction, and enhancing details can make a significant difference in the final outcome of your images. However, remember to maintain a balance and avoid excessive editing that can make your images look unnatural.
Explore different landscape photography styles and find your own unique voice. Whether you prefer minimalist landscapes, intimate close-ups, or wide-angle vistas, there are endless possibilities to express your creativity.
Finally, always practice ethical and conservation-minded approaches to landscape photography. Respect the environment, follow regulations and guidelines when photographing sensitive areas, and use your images as a tool to educate and inspire others to appreciate and protect the natural world.
So grab your camera and get out there! Start exploring the incredible landscapes that surround you, and don’t be afraid to push your creative boundaries. With passion, practice, and patience, you can capture breathtaking images that tell the story of the world around us. Happy shooting!
Frequently Asked Questions
- What are the essential tools for landscape photography?
Some essential tools for landscape photography include a sturdy tripod, a wide-angle lens, neutral density filters, a remote shutter release, a backpack for carrying equipment, and a lens cleaning kit.
- What techniques can I use to capture stunning landscape photos?
To capture stunning landscape photos, you can use techniques like the rule of thirds, leading lines, framing, using a tripod for stability, experimenting with different perspectives, and adjusting exposure for different lighting conditions.
- What camera settings are recommended for landscape photography?
Recommended camera settings for landscape photography include using a small aperture (high f-stop number) for a larger depth of field, a low ISO setting for reduced noise, shooting in RAW format for better post-processing flexibility, and using the manual focus mode.
- How can I find the best locations for landscape photography?
To find the best locations for landscape photography, you can research online for popular spots, seek local recommendations, explore national parks and nature reserves, and experiment with different seasons and weather conditions to capture unique shots.
- What post-processing techniques are used for landscape photography?
Common post-processing techniques for landscape photography include adjusting exposure and contrast, enhancing colors and saturation, sharpening details, removing distractions, and applying graduated filters or adjustments to balance the exposure in the sky and foreground.


0 Comments