Exploring the Wonders of Landscape Photography: Tips for Beginners
Landscape photography captures the breathtaking beauty of nature and allows us to appreciate the world around us in a whole new light. From majestic mountains to serene seascapes, the possibilities are endless when it comes to landscape photography. Whether you’re a beginner looking to dip your toes into this captivating art form or an experienced photographer seeking to enhance your skills, this article is for you. Get ready to embark on a journey of exploration as we delve into the wonders of landscape photography and provide you with valuable tips and insights to help you capture stunning images.
In this article, we’ll cover a wide range of topics, from the importance of a tripod in landscape photography to the effects of shutter speed on your images. We’ll also discuss the art of location research and scouting, as well as the best natural lighting conditions for capturing breathtaking landscapes. Additionally, we’ll explore techniques to add depth and creativity to your shots, such as silhouette and abstract photography. Along the way, we’ll also address the question of whether investing time or camera gear is more important.
So, whether you’re an avid hiker or simply appreciate the beauty of nature, join us as we unravel the secrets of landscape photography and unlock the potential of your camera to capture stunning visuals. Let’s dive in and discover the art of capturing the world around us through the lens!
Importance of Tripod in Landscape Photography
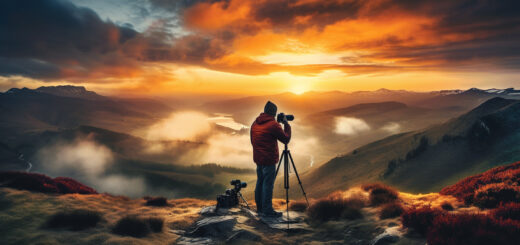
In the world of landscape photography, capturing stunning and sharp images is key. Whether you’re a seasoned professional or an enthusiastic hobbyist, using a tripod can significantly enhance the quality of your photos. Here’s why a tripod is an essential tool for landscape photography:
- Stability: One of the main advantages of using a tripod is the stability it provides. It eliminates the potential for camera shake caused by hand-holding the camera, resulting in sharper images. By securing your camera to a tripod, you can ensure that it remains steady, even during long exposures or in challenging shooting conditions.
- Composition: A tripod allows you to take your time to compose your shot precisely. With the camera securely mounted, you can carefully adjust the framing, compose the image, and make fine adjustments without the worry of introducing camera shake. This enables you to capture well-composed and balanced landscape photos with ease.
- Long Exposures: Landscape photography often involves capturing long exposures for various creative effects, such as smooth waterfalls or streaking clouds. Achieving these types of shots handheld can be nearly impossible without introducing motion blur. A tripod enables you to use longer shutter speeds while keeping the camera perfectly stable, resulting in beautifully smooth and detailed long exposure images.
- Low Light Shooting: In low-light situations, such as during sunrise or sunset, using a tripod becomes even more critical. When light is scarce, you may need to use slower shutter speeds or smaller apertures to capture the scene properly. Without a tripod, you would have to compromise on image quality by increasing the ISO, which can introduce unwanted noise. With a tripod, you can maintain low ISO settings while capturing sharp and noise-free images.
- Precision and Consistency: Using a tripod ensures consistency in your shots, allowing you to replicate settings and compositions accurately. This is particularly useful when capturing multiple images to create panoramas or for exposure bracketing. The stability provided by a tripod ensures that each shot aligns perfectly, resulting in seamless panoramas or well-blended HDR images.
Remember, not all tripods are created equal. Invest in a sturdy and reliable tripod that suits your specific needs. Look for features such as adjustable legs, a robust head with smooth panning and tilting capabilities, and a compact and lightweight design for easy transportation.
So, whether you’re capturing the grandeur of a mountain range, the serenity of a lake, or the intricate details of a flower, using a tripod in landscape photography is paramount. Its stability, compositional flexibility, and ability to handle long exposures and low-light conditions make it an indispensable tool for every landscape photographer. So, grab your tripod, head out into nature’s playground, and capture awe-inspiring images that will make you proud.
Maintaining Consistent Lighting
Lighting plays a crucial role in photography, as it can make or break a shot. Whether you’re capturing portraits, landscapes, or still life, having consistent lighting is essential for achieving professional-looking results. In this section, we will explore two techniques that can help you maintain consistent lighting in your images: locking ISO and white balance settings.
Locking ISO and White Balance
When shooting in different lighting conditions, your camera’s ISO and white balance settings can significantly impact the overall look of your images. By locking these settings, you can ensure that your photographs consistently reflect the desired visual tones and colors, irrespective of the lighting changes.
1. Locking ISO
ISO refers to the sensitivity of your camera’s image sensor to light. A higher ISO setting makes your camera more sensitive to light, which is beneficial in low-light situations. However, high ISO values can introduce noise and graininess into your images. By locking the ISO, you avoid any unintentional changes that may occur when shooting in varying lighting conditions. Here’s how you can do it:
- Set your camera to Manual mode.
- Dial in your desired ISO value based on the lighting conditions.
- Locate the ISO lock feature in your camera’s menu or settings.
- Enable the ISO lock to prevent any changes to the ISO setting while shooting.
2. Locking White Balance
White balance refers to the color temperature of the light in your scene. Different light sources have varying color temperatures, such as daylight being cooler (bluish) and incandescent light being warmer (yellowish). When the white balance is off, it can result in inaccurate colors in your photographs. By locking the white balance, you maintain consistent color tones throughout your images. Follow these steps to lock white balance:
- Switch your camera to Manual mode or Custom white balance mode.
- Adjust the white balance setting to match the color temperature of the lighting in your scene.
- Locate the white balance lock option in your camera’s menu or settings.
- Activate the white balance lock to ensure the setting remains constant during shooting.
By locking the ISO and white balance settings, you establish a baseline for your images’ exposure and color rendition, regardless of the changing lighting conditions. This technique can be especially helpful when shooting events, where lighting may vary from one location to another. With consistent lighting, you have more control over the mood and atmosphere you want to convey in your photographs.
“Locking ISO and white balance settings can help maintain consistent lighting in your images.”
Remember, maintaining consistent lighting not only enhances the overall aesthetic appeal of your photos but also simplifies post-processing, as you’ll have a cohesive set of images to work with. Take the time to understand and utilize these techniques, and you’ll see a noticeable improvement in the consistency and quality of your photographs.
Effects of Shutter Speed
Imagine being able to capture the motion of a waterfall, the streaks of light from passing cars, or the delicate movements of a dancer all in one photograph. Well, with the magic of shutter speed, you can do just that. Shutter speed is a powerful tool in photography that allows you to control how long your camera’s shutter stays open, influencing the way motion is captured in your images.
Experimenting with shutter speed can create different effects in landscape photography. By adjusting the duration of the exposure, you can freeze action or create a sense of motion. Let’s take a closer look at the impact of shutter speed on your photos:
- Freezing Action: A faster shutter speed, such as 1/1000th of a second or faster, can freeze the motion in your image. This is ideal for capturing fast-moving subjects like sports or wildlife. With a fast shutter speed, you can freeze a bird in mid-flight or capture a soccer player in action without any blur.
- Motion Blur: On the other end of the spectrum, a slower shutter speed allows you to introduce motion blur into your images. With a longer exposure time, anything in motion will appear blurred, creating a dynamic and artistic effect. It’s perfect for capturing the movement of waterfalls, rivers, or even people.
- Light Trails: One of the most stunning effects you can achieve with a slow shutter speed is capturing light trails. By using a long exposure, you can transform the headlights and taillights of passing cars into beautiful streaks of light. This technique works best at dusk or at night when there’s enough contrast between the dark surroundings and the moving lights.
- Panning: To convey a sense of motion while keeping your main subject sharp, you can use a technique called panning. This involves tracking your subject’s movement with your camera and using a slower shutter speed. The result is a sharp subject against a blurred background, giving a thrilling sense of speed.
Remember, the right shutter speed will depend on the specific scene and the effect you want to achieve. It’s always a good idea to experiment with different settings and see how they impact your photos.
“So, the next time you’re out capturing landscapes with your camera, don’t be afraid to play with shutter speed. It’s a creative tool that can elevate your photography to new heights!” [1]
[1] internal-link
Location Research and Scouting
When it comes to capturing stunning landscape shots, location research and scouting are vital. Taking the time to explore and familiarize yourself with potential shooting locations beforehand can greatly enhance the quality of your photographs. So, before you embark on your next photography adventure, here are some reasons why conducting location research and scouting is essential.
Benefits of Location Research and Scouting
- Optimizing Your Time: Researching locations ahead of time allows you to make the most of your precious shooting hours. By identifying key spots and hotspots in advance, you can plan your itinerary effectively and maximize your time in each location.
- Finding Unique Perspectives: Researching locations provides valuable insight into the area’s topography and landmarks. This knowledge enables you to discover unique viewpoints and perspectives that may not be immediately apparent. By scouting for lesser-known spots, you can add a fresh and distinctive touch to your photographs.
- Understanding Lighting and Weather Conditions: By researching your shooting locations, you can gain a better understanding of the lighting and weather conditions you’re likely to encounter. This information allows you to plan your shoots around ideal lighting conditions, such as golden hour or blue hour, to capture the desired mood and atmosphere in your images.
- Ensuring Safety: Scouting locations in advance helps you identify any potential safety hazards or tricky terrain before you set out to photograph them. This knowledge allows you to take the necessary precautions and prepare the right gear or equipment accordingly. Safety should always be a top priority when venturing into unfamiliar environments.
How to Conduct Location Research and Scouting
When it comes to conducting effective location research and scouting, here are a few practical steps you can follow:
- Online Research: Utilize online resources, such as photography forums, social media platforms, and travel blogs, to gather information about potential locations. Check out photographs shared by other photographers to get an idea of what you can expect and any standout features.
- Topographic Maps: Topographic maps are excellent tools for understanding the geographical features and contours of an area. They provide valuable insights into the elevation, terrain, and possible viewpoints, helping you plan your shoots strategically.
- Google Earth/Maps: Make use of satellite imagery and street view features from platforms like Google Earth or Google Maps to get a visual sense of the locations you’re interested in. This allows you to virtually explore the area and identify potential shooting spots.
- Local Knowledge: Reach out to locals or local photography communities for insider tips and recommendations. They can provide valuable insights on hidden gems, off-the-beaten-path locations, or seasonal variations that you may not find in traditional guides.
Remember, location research and scouting are ongoing processes. Each trip provides an opportunity to discover new places and refine your understanding of known locations. So, grab your camera, do your research, and get ready to capture breathtaking landscapes that will leave a lasting impression on your viewers. Happy shooting!
Want to learn more about landscape photography techniques? Check out our guide to composition and framing to take your landscape shots to the next level.
Best Natural Lighting for Landscape Photography
When it comes to landscape photography, lighting is everything. Finding the right lighting conditions can make or break a shot. While there are various factors to consider, one of the most important elements is natural lighting. Natural light can create stunning effects, enhance colors, and add depth to your photographs. In this article, we will explore the best natural lighting for landscape photography and how it can transform your images.
Early Morning and Late Afternoon
One of the key times to capture amazing natural lighting for landscape photography is during the early morning and late afternoon. Known as the golden hours, these moments offer a soft, warm glow that can produce breathtaking results. Here’s why:
- Soft, Warm Light: During the early morning or late afternoon, the angle of the sun is lower, resulting in softer and warmer light. This gentle illumination creates a beautiful ambiance, especially when it hits the landscape at an angle.
- Enhanced Colors: The warm light of the golden hours can intensify the natural colors of your surroundings. It brings out the richness of the landscape, making greens appear greener, blues more vibrant, and warm tones more pronounced. This is particularly beneficial when photographing landscapes with foliage or bodies of water.
- Sculpted Shadows: The low angle of the sun during the golden hours creates long shadows that add depth and dimension to your images. These shadows can highlight the contours of the landscape, accentuating its natural features and creating a sense of texture.
- Reduced Contrast: Unlike the harsh midday sun, which can create intense contrasts and harsh shadows, the golden hours offer a more balanced and diffused light. This softer lighting allows for better exposure control, reducing the risk of blown-out highlights or overly dark shadows in your photographs.
To make the most of the early morning or late afternoon lighting, try these tips:
- Plan Ahead: Check the sunrise and sunset times in your area and plan your shoot accordingly. Arriving early or staying late will give you ample time to set up your equipment and explore different compositions.
- Be Patient: As the light changes rapidly during the golden hours, be patient and observe how it interacts with the landscape. Take your time to find the best angles and compositions that showcase the beauty of the scene.
- Experiment with Angles: The low angle of the sun during golden hours creates unique opportunities to play with light and shadow. Try shooting from different angles, including shooting into the sun or using backlighting, to create interesting and atmospheric images.
- Use Filters: Consider using graduated neutral density filters to balance the exposure between the bright sky and the darker foreground. This can help you maintain details in both areas of your photograph.
Remember, there are no hard and fast rules when it comes to photography. Every landscape and lighting condition is unique. While early morning and late afternoon lighting often provide the best natural lighting for landscape photography, don’t be afraid to explore other times of the day or experiment with different lighting conditions. Ultimately, it’s your creativity and vision that will make your photographs stand out. So grab your camera, embrace the golden hours, and capture the breathtaking beauty of nature.
Adding Depth to Images
Adding depth to your images can make them more impactful. Whether you’re a professional photographer or simply enjoy capturing moments with your smartphone, understanding the concept of depth and how to incorporate it into your photographs can elevate your skills to the next level.
When we talk about depth in images, we’re referring to the perception of three-dimensional space. It allows the viewer to feel like they’re looking into the photo rather than just at it. Creating a sense of depth can make your images more immersive and engaging, drawing the viewer in and making them feel like they’re a part of the scene.
To add depth to your images, consider the following tips and techniques:
- Foreground Elements: Include objects or subjects in the foreground of your composition to create a sense of depth. This can be anything from a branch in the foreground of a landscape shot to a person in the foreground of a street scene.
- Leading Lines: Utilize lines in your composition that lead the viewer’s eye into the image. These lines can be natural, like a river or road, or man-made, like a fence or pathway. Leading lines can guide the viewer’s gaze and create a sense of depth and perspective.
- Layering: Experiment with layering elements in your composition. This can involve positioning objects or subjects at different distances from the camera, creating a sense of depth and dimension. Try to incorporate foreground, midground, and background elements to add depth to your images.
- Depth of Field: Control the depth of field in your images by adjusting your aperture. A wider aperture (smaller f-stop number) will create a shallow depth of field, with the subject in focus and the background blurred. Alternatively, a narrower aperture (larger f-stop number) will result in a greater depth of field, with more of the scene in focus.
- Perspective: Experiment with different perspectives and angles to add depth to your images. Get low to the ground or shoot from a higher vantage point to change the viewer’s perception of space. This can create interesting and dynamic compositions that enhance the overall depth of the image.
By incorporating these techniques into your photography, you can add depth to your images and create a more immersive experience for the viewer. Whether you’re capturing breathtaking landscapes, candid portraits, or everyday moments, adding a sense of depth can transform your images from ordinary to extraordinary.
Remember, practice makes perfect, so don’t be afraid to experiment and push the boundaries of your creativity. Keep in mind that adding depth to your images is not about following strict rules but rather about developing your own unique style and vision. So grab your camera or smartphone, head outside, and start exploring the world of depth in photography.
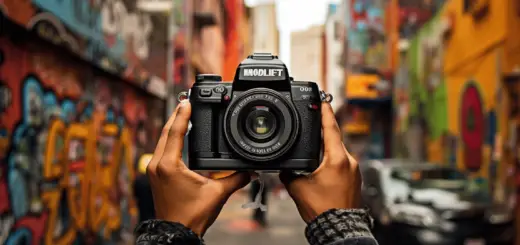
Investing Time vs. Camera Gear
When it comes to photography, many enthusiasts and professionals alike often find themselves caught in a dilemma: should they invest more time in honing their skills or splurge on the latest and greatest camera gear? It’s a debate that has been going on for years, with passionate arguments on both sides. While having high-quality equipment is undoubtedly valuable, it’s important to recognize the significant impact that investing time can have on improving the quality of your photographs. In this section, we’ll explore why putting in the hours to develop your skills may be more beneficial than solely relying on advanced camera gear.
The Power of Skill Development
Mastering the art of photography goes beyond having the most expensive camera or lenses. While having professional-grade gear can certainly enhance the technical aspects of your images, it’s ultimately the photographer’s creative vision and skill that makes a picture truly captivating. Consider the following benefits of investing time in developing your photography skills:
- Creativity and Composition: Understanding composition, lighting, and the ability to capture the right moment are skills that are developed through practice and experience. These elements play a significant role in creating visually stunning and impactful images.
- Versatility: Learning different techniques and experimenting with various genres of photography allows you to expand your creative horizons. With a solid foundation of skills and knowledge, you’ll be able to adapt to different shooting conditions and subjects, regardless of the gear at your disposal.
- Problem-Solving: Investing time in photography allows you to learn from your mistakes and find solutions to overcome challenges. Whether it’s dealing with difficult lighting conditions or finding creative ways to capture a subject, problem-solving skills can elevate the quality of your work.
Finding the Balance
While investing time in skill development is essential, it doesn’t mean that camera gear is irrelevant. Having access to high-quality equipment can offer advantages such as:
- Technical Excellence: Advanced camera gear often comes with superior features and capabilities, allowing you to capture images with exceptional detail, dynamic range, and low-light performance.
- Specialized Needs: Depending on your specific photography interests, specialized gear such as telephoto lenses for wildlife photography or macro lenses for close-up shots can deliver results that would be challenging to achieve with more basic equipment.
However, it’s crucial to find the right balance between investing in gear and honing your skills. Ultimately, the gear is just a tool, and it’s the photographer’s vision and expertise that bring images to life. As Chase Jarvis, a renowned photographer, once said, “The best camera is the one that’s with you.” So, instead of becoming overly reliant on the latest gear, strive to build a solid foundation of skills that allow you to capture stunning images regardless of the equipment you use.
In conclusion, while investing in advanced camera gear can undoubtedly enhance your photography, it’s important to recognize the immense value of investing time in skill development. By continuously learning, practicing, and expanding your creative horizons, you’ll be able to create compelling images that truly captivate viewers. So, whether you choose to invest in new camera gear or dedicate time to improving your skills, remember that the true magic of photography lies in the photographer’s ability to see the world through a unique lens.
Aerial Photography using Drones
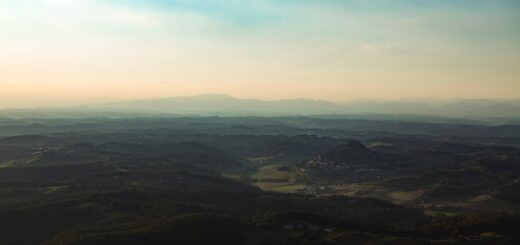
Aerial photography is a popular technique used in landscape photography to capture stunning, bird’s-eye views of the world below. Over the years, advancements in technology have made it more accessible and affordable for photographers to achieve these awe-inspiring aerial shots. One particular tool that has revolutionized the field is the drone.
Using drones for aerial photography has gained traction and become a growing trend among photographers. With the ability to fly high and capture images from unique perspectives, drones offer a whole new dimension to photography. Here are some reasons why photographers are turning to drones for their aerial photography needs:
- Flexibility and Mobility: Drones provide photographers with the flexibility to capture images from various angles and positions, enabling them to explore new creative possibilities. With a drone, photographers can easily change altitude, direction, and position, allowing them to adapt to the landscape and capture shots that were once impossible or highly challenging.
- Cost-Effective: Hiring helicopters or planes for aerial photography can be expensive and impractical. Drones offer a cost-effective alternative, eliminating the need for specialized equipment and personnel to operate them. With drones, photographers can achieve professional results without breaking the bank.
- Quality and Resolution: Modern drones are equipped with high-resolution cameras that rival those found in traditional photography equipment. These cameras can capture sharp and detailed images, even from great heights. With drones, photographers can capture stunning visuals with remarkable clarity and precision.
- Safety: Unlike traditional aerial photography methods that may involve putting individuals at risk, drones provide a safe and efficient way to capture aerial images. Photographers can operate drones remotely, reducing the need for physical proximity to hazardous areas. This ensures the safety of everyone involved in the process.
Overall, aerial photography using drones opens up a whole new world of possibilities for photographers. With their flexibility, cost-effectiveness, high-quality capabilities, and enhanced safety features, drones have become an indispensable tool in the arsenal of landscape photographers.
Whether it’s capturing awe-inspiring landscapes, documenting architectural marvels, or simply exploring the world from above, aerial photography using drones continues to push the boundaries of what is possible in photography. So, if you’re a photography enthusiast looking to take your skills to new heights, consider incorporating drones into your arsenal and explore the limitless possibilities they offer.
The trend of aerial photography using drones is on the rise, and it’s not hard to see why. The unique perspectives, breathtaking views, and creative opportunities that drones provide make them an invaluable tool for landscape photographers. So, get ready to soar to new heights and capture images that will leave a lasting impression on both you and your audience.
Variety and Creativity in Landscape Shots
When it comes to landscape photography, capturing unique and creative shots is key to standing out from the crowd. While traditional landscape photos can be breathtaking, adding variety and creativity to your shots can truly elevate your photography skills. Here are some tips to help you inject a sense of originality into your landscape images:
- Experiment with different perspectives: Instead of settling for the typical eye-level view, try getting low to the ground or climbing up high to capture your landscapes from unique angles. This can bring a fresh and interesting perspective to your photos.
- Play with composition: Don’t be afraid to break the rules of composition and experiment with different framing techniques. Try using leading lines, framing elements, or the rule of thirds to create visually striking and dynamic compositions.
- Include foreground elements: Adding foreground elements such as rocks, plants, or people can help create a sense of depth and scale in your photographs. These elements can also act as interesting focal points, drawing the viewer’s attention and adding visual interest to your images.
- Capture weather phenomena: Don’t shy away from capturing unusual weather conditions. Stormy skies, fog, rain, or even a rainbow can add drama and a sense of mood to your landscape shots. Be prepared to wait for the right conditions and be ready to seize the moment when they occur.
- Experiment with different lighting conditions: While golden hour and blue hour are popular times for landscape photography, don’t limit yourself to just these times of the day. Explore shooting during different times of day, such as midday or even nighttime, to capture unique lighting situations and create a distinct atmosphere in your images.
Remember, the key to adding variety and creativity to your landscape shots is to think outside the box and push yourself to try new things. Don’t be afraid to step out of your comfort zone and embrace experimentation. By doing so, you’ll be able to create stunning, one-of-a-kind images that will truly make your portfolio shine.
Ready to unleash your creativity in landscape photography? Learn more about composition techniques to enhance your shots and editing tips to bring out the best in your images.
Frequently Asked Questions
- What is landscape photography?
Landscape photography is a genre of photography that captures scenic and natural environments, such as mountains, valleys, forests, and seascapes.
- What are some essential tips for beginners in landscape photography?
Some essential tips for beginners in landscape photography include: 1. Planning and scouting locations, 2. Understanding composition and framing, 3. Utilizing natural light and golden hour, 4. Using a tripod for stability, and 5. Experimenting with different camera settings and angles.
- What equipment is necessary for landscape photography?
Some necessary equipment for landscape photography includes: 1. DSLR or mirrorless camera, 2. Wide-angle lens, 3. Tripod, 4. ND filters, and 5. Remote shutter release.
- How can I enhance the colors in my landscape photos?
To enhance the colors in landscape photos, you can try adjusting the white balance, using graduated ND filters, shooting during the golden hour, and post-processing techniques such as boosting saturation and vibrance selectively.
- How can I make my landscape photos more captivating?
To make your landscape photos more captivating, you can focus on capturing unique perspectives, incorporating interesting foreground elements, using leading lines to create depth, experimenting with long exposure techniques, and post-processing to enhance details and contrast.