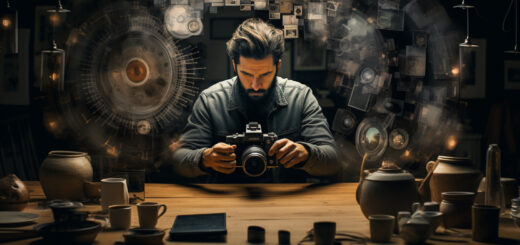
Exploring Macro Photography: Tips and Techniques for Capturing Tiny Details
Are you ready to explore a whole new world of photography, where tiny details come to life in stunning clarity? Welcome to the captivating realm of macro photography! In this article, we will dive deep into the tips and techniques that will help you master the art of capturing the miniature wonders that surround us.
Macro photography allows you to get up close and personal with your subjects, revealing intricate details that are often overlooked by the naked eye. Whether it’s the delicate veins of a flower petal, the mesmerizing patterns on an insect’s wings, or the textures of a droplet of water, macro photography enables you to capture these small marvels with breathtaking precision.
But before we embark on this exciting journey, let’s take a moment to understand what macro photography is all about and why it holds such importance in the world of photography. Let’s get started!
Understanding Macro Photography
Macro photography is a fascinating genre that allows photographers to explore the intricate beauty of small subjects and capture stunning details that often go unnoticed. With a magnification ratio of 1:1 or higher, macro photography opens up a whole new world of possibilities for capturing the tiniest of details and creating impactful images.
Definition of Macro Photography
Macro photography involves capturing small subjects and details at a magnification ratio of 1:1 or higher. It allows photographers to showcase the intricate details of insects, flowers, plants, and other tiny objects. Through the lens of a macro photographer, the unseen world becomes visible, revealing the delicate patterns, textures, and colors that often escape the naked eye.
In macro photography, the goal is to fill the frame with the subject, highlighting its smallest features and creating larger-than-life images. The magnification ratio determines the level of detail that can be captured. A 1:1 ratio means that the subject will appear on the camera’s sensor at its actual size. Higher magnification ratios, such as 2:1 or 5:1, enable photographers to capture even smaller subjects in great detail.
Importance of Macro Photography
Macro photography holds a significant place in the world of photography for several reasons:
- Exploring the Unseen: Macro photography allows us to explore the intricate beauty of tiny objects that often go unnoticed. By revealing the hidden details, textures, and patterns, macro photography draws our attention to the world around us and encourages us to appreciate the smallest things that nature has to offer.
- Creative Expression: Macro photography offers endless creative possibilities. It allows photographers to experiment with composition, focus, depth of field, and lighting to create visually stunning images. Through unique angles and perspectives, photographers can present familiar subjects in a new and captivating light.
- Scientific Study: Macro photography plays a crucial role in scientific research and documentation. It allows scientists to study and document the behavior, structure, and diversity of small organisms, contributing to our understanding of the natural world.
- Artistic Impact: Macro photography has a powerful impact in the art world. Its ability to capture intricate details and evoke emotions makes it a versatile and captivating form of artistic expression. Macro images often elicit a sense of awe, wonder, and appreciation for the beauty found in the smallest corners of our world.
In conclusion, macro photography provides a unique opportunity to explore and capture the unseen world. It allows photographers to dive into the intricate details of small subjects and bring their beauty to life. Whether for scientific documentation or artistic expression, macro photography offers endless creative possibilities and allows us to appreciate and celebrate the smallest wonders of our world.
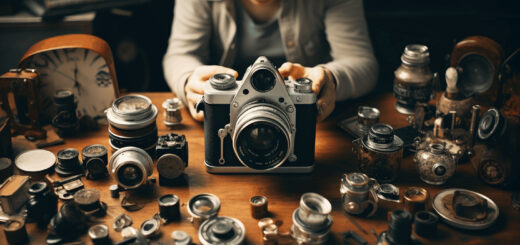
Essential Equipment for Macro Photography
Macro photography is a fascinating genre that allows photographers to capture intricate details of small subjects, revealing a whole new world to the viewer. To achieve stunning macro shots, it’s essential to have the right equipment at your disposal. In this article, we’ll explore some of the must-have tools for macro photography. Let’s dive in!
Macro Lens
A dedicated macro lens is undoubtedly the most ideal choice for capturing macro photographs. Designed specifically for close-up photography, these lenses offer excellent image quality and magnification capabilities. Here are a few reasons why a macro lens is worth the investment:
- High Magnification: Macro lenses allow you to capture extreme close-ups with high magnification, highlighting the tiniest details in your subject.
- Optical Performance: With their advanced optics, macro lenses deliver exceptional image quality with sharpness, contrast, and minimal distortion.
- Proper Working Distance: Macro lenses provide an adequate working distance between the camera and subject, preventing shadows and allowing better lighting options.
Whether you’re photographing insects, flowers, or small objects, a macro lens is a vital tool to have in your photography kit.
Extension Tubes
Another useful tool for macro photography is extension tubes. Extension tubes are helpful in increasing the magnification capabilities of non-macro lenses, making them a more budget-friendly option for macro enthusiasts. Here’s how they work:
- Increased Magnification: By placing extension tubes between the camera body and lens, you can move the lens further away from the image sensor, effectively increasing the magnification and allowing for closer focusing.
- Versatility: Extension tubes can be used with a variety of lenses, giving you the flexibility to experiment and achieve different levels of magnification.
- Affordability: Compared to a dedicated macro lens, extension tubes are a cost-effective alternative that can yield impressive macro results.
While extension tubes may not offer the same level of optical performance as dedicated macro lenses, they are a great option for photographers looking to explore the macro world without breaking the bank.
Macro Filters
Macro filters are another handy accessory for macro photography. These filters can be attached to the front of a lens to achieve a macro effect, allowing for close-up shots even with non-macro lenses. Here’s what you need to know about macro filters:
- Variable Magnification: Macro filters come in different strengths, ranging from +1 to +10 diopters. Each diopter represents an incremental increase in magnification, giving you the flexibility to adjust the level of close-up detail in your photographs.
- Affordability and Portability: Macro filters are relatively inexpensive and easy to carry, making them a convenient option for photographers who want to experiment with macro photography on the go.
- Compatibility: Macro filters can be used with a wide range of lenses, making them a versatile choice for those who have a collection of lenses but don’t own a dedicated macro lens.
While macro filters can produce stunning macro-like results, it’s worth noting that the optical quality may not be as high as a dedicated macro lens or extension tubes. However, they are an affordable option that can help expand your macro photography capabilities.
Tripod
In macro photography, even the slightest camera shake can ruin an otherwise excellent shot. That’s why a stable tripod is crucial for achieving sharp images. Here’s why a tripod is an essential tool for macro photography:
- Stability: A tripod provides stability and eliminates camera shake, ensuring sharp images, especially when using slower shutter speeds.
- Precise Composition: With a tripod, you can take your time to compose your shot accurately, fine-tuning the framing and focus without worrying about handhold stability.
- Long Exposures: Macro photography often involves shooting with smaller apertures and longer exposures to achieve greater depth of field. A tripod is indispensable for such situations, allowing you to keep the camera steady for extended periods.
Invest in a sturdy tripod that can handle the weight of your camera and lens combination to achieve the best results in your macro photography adventures.
Now that you’re equipped with the essential tools for macro photography, it’s time to head out and explore the fascinating world of close-up photography. With the right equipment and a keen eye for detail, you’ll be able to capture stunning macro shots that will captivate and inspire viewers. Happy shooting!
Techniques for Successful Macro Photography
Macro photography allows photographers to delve into the fascinating world of small subjects, capturing intricate details that are often invisible to the naked eye. To master the art of macro photography, it’s important to understand and employ various techniques that can enhance the quality of your shots. Whether you’re a beginner or an experienced photographer looking to refine your skills, here are some tried-and-true techniques that can help you achieve success in macro photography:
Choosing the Right Subject
Selecting the right subject is crucial in macro photography. Look for subjects that possess interesting textures, patterns, or vibrant colors, as these elements can add depth and visual interest to your photographs. From delicate flowers to tiny insects, there are countless subjects waiting to be discovered. Here are a few tips when it comes to choosing the right subject:
- Look for subjects with intricate details that can be accentuated in macro photography.
- Seek out subjects with vibrant colors that will make your photos pop.
- Experiment with different angles to capture the most appealing aspects of your subject.
- Be patient and observant, as the perfect subject might be hiding in plain sight.
Lighting Considerations
Lighting plays a crucial role in macro photography, as it can dramatically influence the mood and overall quality of your shots. Here are some lighting considerations to keep in mind:
- Experiment with different lighting setups, such as natural light, diffusers, reflectors, or macro-specific ring lights. Each lighting source can create a unique effect on your subject.
- Be aware of the direction of light and how it affects the shadows and highlights in your photos.
- Consider using a small, portable LED light source to add supplemental lighting when shooting in low-light conditions or in shadowy areas.
Using a Narrow Aperture
When it comes to macro photography, achieving a greater depth of field is crucial to ensure that your subject remains sharp throughout the image. One effective way to achieve this is by using a narrow aperture, indicated by a higher f-number. Here are some benefits of using a narrow aperture in macro photography:
- Greater depth of field: This means more of your subject will be in focus, showcasing its intricate details.
- Enhanced sharpness: A narrow aperture helps in ensuring that your subject is sharp and well-defined throughout the image.
- Background separation: By using a narrow aperture, you can create a pleasing background blur, isolating your subject and making it stand out.
Focusing Techniques
Achieving sharp focus is essential in macro photography, where even the slightest movement can result in a blurry image. Here are some focusing techniques to incorporate into your macro photography workflow:
- Manual focus: Take control of your camera’s focus by manually adjusting it to ensure precise sharpness on your subject.
- Focus stacking: This technique involves taking multiple shots at different focus points and combining them in post-processing to create a final image with maximum sharpness throughout.
- Using focus limiters: Some macro lenses have a focus limiter function, which allows you to limit the range within which the lens will attempt to autofocus. This can help to increase the speed and accuracy of autofocus.
Remember, practice makes perfect in macro photography. Experiment with these techniques, adapt them to suit your style, and keep pushing the boundaries of your creativity. With persistence and a keen eye for detail, you’ll be capturing stunning macro images in no time.
“Macro photography is like opening a door to an unseen world, revealing the beauty and intricacy that often goes unnoticed. By mastering various techniques and honing your skills, you can unlock this captivating realm and present it to the world with your lens.”
Composition and Creativity in Macro Photography
Macro photography allows you to capture the intricate details of small subjects, revealing a world that often goes unnoticed. It’s a fascinating genre that requires a keen eye for composition and a touch of creativity. By applying certain techniques and experimenting with different approaches, you can take your macro photography to the next level. In this article, we will explore three key aspects of composition and creativity in macro photography: the rule of thirds, foreground and background elements, and unconventional angles.
Rule of Thirds
When it comes to creating visually pleasing compositions, the rule of thirds is a fundamental principle to keep in mind. This rule suggests that an image should be divided into nine equal parts by two horizontal and two vertical lines. By placing your subject off-center along these intersecting points, you can create a more dynamic and engaging composition.
Take a look at this example: a beautiful macro shot of a delicate flower. Instead of placing the flower right in the center of the frame, the photographer has positioned it slightly off to the right, following the rule of thirds. This placement adds a sense of balance and allows the viewer’s eyes to naturally move around the frame, taking in the intricate details of the subject.
Foreground and Background
In macro photography, the foreground and background elements play a crucial role in adding depth and context to your images. These elements can help tell a story and create a more immersive experience for the viewer. By paying attention to what is happening beyond your main subject, you can create a more visually interesting composition.
Imagine capturing a macro shot of a bee pollinating a flower. By including some of the surrounding flowers or elements in the frame, you are able to convey the environment in which the bee operates, giving the viewer a better understanding of the subject’s behavior and habitat. This added context adds depth and visual interest to your photograph.
Unconventional Angles
One way to add a unique perspective to your macro photography is by experimenting with unconventional angles. Instead of always shooting from eye-level, try getting low to shoot from the ground level, or shooting from above to capture a different viewpoint. You can also play with reflections to create stunning and unexpected compositions.
For instance, instead of photographing a droplet of water on a leaf from a straightforward angle, consider capturing its reflection on a mirrored surface. This technique adds a touch of creativity to your image, making it stand out from the traditional macro shots.
In conclusion, composition and creativity are essential in macro photography to create visually appealing and captivating images. By applying the rule of thirds, paying attention to foreground and background elements, and experimenting with unconventional angles, you can elevate your macro photography skills and capture stunning shots that leave a lasting impression on viewers.
So, grab your camera, head out into nature, and let your creativity flow as you explore the fascinating world of macro photography!
Post-Processing Tips for Macro Photographs
Macro photography is a fascinating genre that allows photographers to capture incredible detail and close-up views of the world around us. While getting a sharp and detailed macro shot straight out of the camera is always ideal, post-processing can take your macro photographs to the next level. In this article, we will explore some essential post-processing tips that can help you enhance and refine your macro images.
RAW Editing
When shooting macro photographs, it’s recommended to shoot in RAW format. RAW files contain all the raw image data captured by your camera’s sensor, giving you greater flexibility during post-processing. Here are some key advantages of working with RAW files when editing macro photographs:
- Maximum Image Information: RAW files retain a vast amount of image information, allowing you to adjust exposure, white balance, and other settings without sacrificing image quality.
- Flexible White Balance Adjustments: Shooting in RAW enables you to fine-tune the white balance of your macro photographs during post-processing, ensuring accurate color reproduction.
- Recover Shadow and Highlight Detail: RAW files offer greater latitude for recovering lost details in shadows and highlights, allowing you to rescue an otherwise unusable macro shot.
To make the most of your RAW files, consider using software like Adobe Camera Raw or Lightroom to edit and process your macro photographs. These tools provide a range of adjustment options for exposure, color, sharpness, and more, allowing you to bring out the best in your macro shots.
Selective Sharpening
One of the critical aspects of macro photography is capturing fine details. However, sharpening the entire image uniformly can often lead to the introduction of unwanted artifacts. To overcome this, employing selective sharpening techniques can help enhance the details without compromising the overall quality of the image. Here’s how you can apply selective sharpening to your macro shots:
- Create a Duplicate Layer: Start by creating a duplicate layer of your image to work on non-destructively.
- Apply High Pass Filter: Go to the Filter menu, choose Other, and select High Pass. Adjust the radius to bring out the desired level of sharpness in the fine details.
- Add a Layer Mask: With the duplicate layer selected, click on the layer mask icon to add a mask. By using a brush with a low opacity, paint over the areas where you want to apply the sharpening effect.
- Refine the Mask: To fine-tune the sharpening effect, use a soft brush with a lower opacity to refine the mask. This will help you selectively sharpen specific areas of your macro photograph, such as the intricate details of a flower or an insect.
By using these selective sharpening techniques, you can enhance the fine details in your macro shots without compromising the overall integrity of the image.
Noise Reduction
Macro photography often involves shooting at high magnifications and close focusing distances, which can introduce unwanted noise into your images. While noise can be distracting, especially in areas of smooth transition or areas with fine details, it is essential to apply noise reduction tools cautiously to maintain the integrity of the small details. Here’s how you can effectively reduce noise in your macro photographs:
- Use Noise Reduction Software: Software applications like Adobe Camera Raw, Lightroom, or noise reduction plugins offer powerful noise reduction tools that can help eliminate or reduce noise in your macro shots.
- Avoid Overdoing Noise Reduction: Applying excessive noise reduction can result in loss of fine details and a smeared appearance. Use the noise reduction sliders conservatively to achieve a balance between noise reduction and maintaining the overall quality of the image.
- Target Specific Areas: Consider using masking techniques to selectively apply noise reduction to specific areas of your macro photograph. This approach allows you to preserve the critical details while reducing noise in less important areas.
By applying noise reduction techniques carefully, you can minimize unwanted noise in your macro photographs while retaining the integrity of the small details that make these images so captivating.
Remember, post-processing should be used to enhance your macro photographs, not to completely alter them. By following these post-processing tips, you can bring out the best in your macro shots while maintaining their natural beauty and appeal. Happy editing!
Keep in mind that shooting in RAW format and using selective sharpening and noise reduction tools are just a few of the many post-processing techniques available for macro photography. Experiment with different editing techniques and find a workflow that works best for your style and creative vision.
Inspiration and Resources for Macro Photography
Macro photography is a fascinating genre that allows us to explore hidden worlds and capture incredible details in the smallest of subjects. Whether you’re a beginner or an experienced photographer, finding inspiration and resources is essential to keep your creative juices flowing and enhance your skills. In this article, we’ll explore some fantastic online communities, photography books, and macro photography websites that will take your macro photography to the next level.
Online Communities
Joining online communities and forums is a great way to connect with fellow macro photographers, share your work, and gain inspiration from others’ stunning shots. Here are a few popular communities you can join:
- Macro Photography Community: This community brings together macro photography enthusiasts from around the world. Share your images, ask for feedback, and learn from other members’ experiences.
- Photography Talk – Macro Forum: Here, you can engage with a diverse group of photographers who share a passion for macro photography. Discuss techniques, equipment, and get valuable tips from experienced photographers.
- Reddit – r/MacroPhotography: Reddit is known for its active communities, and r/MacroPhotography is no exception. Join this subreddit to share your work, participate in discussions, and discover inspiration from fellow macro photographers.
Photography Books
Delving into photography books dedicated to macro photography techniques can provide valuable insights and inspiration. Here are a few must-read books for macro enthusiasts:
- “Understanding Macro Photography: Creative Techniques for Image Makers” by David Taylor: This book covers essential concepts, techniques, and equipment needed to master macro photography. It includes step-by-step instructions and showcases stunning macro images for inspiration.
- “Macro Photography: The Universe at our Feet” by Andres Moline: In this visually stunning book, Moline takes you on a journey into the world of macro photography. With breathtaking images and expert guidance, this book will inspire you to capture the intricate details of nature up close.
- “Extreme Macro Photography: Achieving Beautiful and Creative Close-Ups” by John Kimbler: If you’re looking to push the boundaries of macro photography, this book is a must-have. Kimbler provides detailed explanations of advanced techniques and shares his insights on capturing unique and creative close-ups.
Macro Photography Websites
When it comes to finding tutorials, tips, and galleries of stunning macro shots, exploring dedicated macro photography websites is a goldmine of information. Here are a few websites worth visiting:
- Macro Photography World: This website is a treasure trove of macro photography resources. From beginner tutorials to advanced techniques, you’ll find everything you need to elevate your macro photography skills.
- The Macro Lens: The Macro Lens is a comprehensive resource that covers all aspects of macro photography. Discover tips and tricks, equipment reviews, and get inspired by the stunning macro images featured on the site.
- Nature TTL: Although not solely focused on macro photography, Nature TTL offers an excellent section dedicated to macro techniques and inspiration. Learn from expert photographers and explore a vast collection of macro images to spark your creativity.
So, whether you’re seeking inspiration or looking to expand your knowledge, these online communities, photography books, and macro photography websites will provide you with a wealth of resources to take your macro photography to new heights. Join the conversation, learn from the experts, and unleash your creativity in the world of macro photography.
Conclusion
In conclusion, macro photography offers a captivating and unique way to explore the intricate details of the world around us. By using specialized equipment and techniques, photographers can capture stunning close-up shots that reveal a hidden realm of beauty. From capturing the delicate petals of a flower to the intricate patterns on an insect’s wings, macro photography allows us to appreciate the small wonders that often go unnoticed.
To dive into the fascinating world of macro photography, it’s essential to have the right equipment, including a macro lens, extension tubes, and tripod. Additionally, mastering techniques such as selecting the right subject, using appropriate lighting, and optimizing focus will help you achieve outstanding results.
Remember to embrace creativity and experimentation in your compositions, using techniques like the rule of thirds and exploring unconventional angles. And once you’ve captured your macro images, don’t forget to enhance their impact through thoughtful post-processing techniques such as RAW editing, selective sharpening, and noise reduction.
If you’re eager to learn more about macro photography, find inspiration, or discover helpful resources, you can visit Wimarys.com, a website dedicated to photography and run by Wim Arys. With a focus on Sony mirrorless cameras, the website offers a wealth of tutorials, reviews, and tips that can help take your photography skills to new heights.
So grab your camera, get up close and personal with the intricate details of the world, and unlock a new level of creativity with macro photography. Happy shooting!
Visit Wimarys.com for more photography inspiration and tutorials.
Frequently Asked Questions
- What is macro photography and how is it different from close-up photography?
Macro photography is a type of photography that focuses on capturing tiny details of small subjects, usually at a 1:1 ratio or higher. It involves using specialized lenses or extension tubes to achieve extreme close-up shots. Close-up photography, on the other hand, refers to capturing close-up images without necessarily achieving the same level of magnification as in macro photography.
- What equipment do I need for macro photography?
To get started with macro photography, you’ll need a DSLR or mirrorless camera, a macro lens or extension tubes, a tripod for stability, and a remote shutter release to minimize camera shake. Additional tools like a macro focusing rail, diffuser, and reflector can also be useful.
- What are some techniques for achieving sharp focus in macro photography?
To achieve sharp focus in macro photography, it’s crucial to use a small aperture (high f-number) to increase depth of field. Focus stacking, where you take multiple shots at different focus distances and blend them together in post-processing, can also help ensure that all details are in sharp focus.
- How can I achieve good lighting in macro photography?
Lighting plays a critical role in macro photography. Natural light diffused through a cloudy sky or a softbox can create soft and even lighting. Alternatively, you can use a macro ring light or off-camera flash with diffusers to control and enhance the lighting on your subject.
- Are there any specific composition techniques for macro photography?
In macro photography, composition becomes even more important as you’re capturing small details. Consider using the rule of thirds, leading lines, and negative space to create visually appealing compositions. Experiment with different angles, perspectives, and focal points to add depth and interest to your macro shots.