Beyond Auto Mode: Essential Camera Settings for Capturing Stunning Images on Tours
Are you tired of using your camera’s auto mode and ending up with mediocre photos? Do you want to take your photography skills to the next level and capture stunning, professional-looking images on your tours? If so, you’ve come to the right place!
In this article, we will explore the essential camera settings that go beyond auto mode, allowing you to have full control over your photographs. Understanding and utilizing these settings will help you unleash your creativity and capture breathtaking shots that truly showcase the beauty of your surroundings.
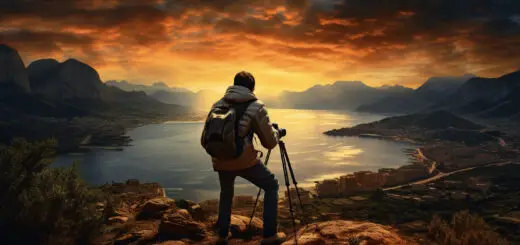
So, whether you’re exploring new destinations, going on a wildlife safari, or simply strolling through your neighborhood, these camera settings will empower you to bring out the best in your photography skills. Let’s dive in and discover the key settings that will elevate your images to new heights!
Understanding Your Camera
When it comes to capturing stunning images on your tours, understanding your camera and its various settings is essential. While the auto mode can be convenient, it often limits your creative control and may not always produce the desired results. By exploring the manual mode and adjusting the camera settings, you can take your photography to the next level.
Camera Modes and Shooting Settings
Your camera comes with different shooting modes, such as automatic mode, aperture priority, shutter priority, and manual mode. While automatic mode takes care of all the settings for you, it can be restrictive. Aperture priority and shutter priority modes allow you to control specific settings while the camera handles the rest. Manual mode, on the other hand, gives you complete control over all the settings, allowing you to unleash your creativity.
Exploring Manual Mode
Manual mode might seem intimidating at first, but it offers the most control over your camera settings. You can adjust the aperture, shutter speed, and ISO according to your preference. By learning to use manual mode effectively, you can capture images with the perfect exposure and depth of field.
Understanding Exposure Triangle
The exposure triangle is a fundamental concept in photography that involves the relationship between aperture, shutter speed, and ISO. Understanding how these three elements work together is crucial for achieving the right exposure in your images. Aperture controls the amount of light entering the camera, shutter speed determines the duration of exposure, and ISO defines the sensitivity of the camera sensor to light.
Adjusting these settings allows you to control the exposure and achieve the desired effect. For example, a larger aperture (small f/number) creates a shallow depth of field, blurring the background and emphasizing the subject. A faster shutter speed freezes motion, while a slower one creates a sense of motion blur.
Mastering your camera’s manual mode and understanding the exposure triangle will give you the freedom to experiment with different settings and unleash your creative potential. So don’t be afraid to step outside of auto mode and take control of your camera!
“Understanding your camera and its various settings is essential for capturing stunning images. Don’t be afraid to step outside of auto mode and take control of your camera!”
Setting the Right ISO
When it comes to capturing stunning images on tours, setting the right ISO is crucial. ISO refers to the sensitivity of your camera’s image sensor to light. By adjusting the ISO settings, you can control the amount of light that enters the camera and ultimately impact the quality of your images. Here’s what you need to know about setting the right ISO:
What is ISO and How it Affects Image Quality
ISO is an acronym for International Organization for Standardization, which is a measure of the camera sensor’s sensitivity to light. The ISO value determines how quickly the sensor can capture light and convert it into a digital image. Higher ISO values make the sensor more sensitive to light, whereas lower ISO values make it less sensitive.
The ISO setting directly affects the image quality. Higher ISOs can introduce more digital noise or grain in the image, resulting in a loss of sharpness and detail. On the other hand, lower ISO values produce cleaner and sharper images with less noise.
Low vs. High ISO Settings
- Low ISO settings (e.g., ISO 100-400) are ideal for well-lit situations, such as outdoor photography on a sunny day or with a lot of natural light. They produce cleaner images with less noise and finer details.
- High ISO settings (e.g., ISO 800 and above) are necessary in low-light conditions when you need to capture more light. However, higher ISO values can introduce noise, so it’s essential to find the right balance.
Finding the Optimal ISO for Different Lighting Conditions
To set the right ISO for your shots, consider the following tips:
- Outdoor Daytime: In bright daylight, select a low ISO (e.g., ISO 100-200) to capture the scene with minimal noise and maximum detail.
- Indoor and Low-Light: In dimly lit environments, you’ll need to increase your ISO to allow more light into the camera. Experiment with ISO values between 800 and 1600 to find the optimal balance between exposure and noise.
- Night Photography: When shooting at night, you may need to push your ISO even higher to capture enough light. Start with ISO 1600 and adjust accordingly.
Remember, different cameras handle high ISO settings differently, so it’s a good idea to experiment with your camera to see how it performs at various ISO values. Keep in mind that newer camera models often offer better noise reduction technology, allowing you to use higher ISO values with less noise.
By understanding the principles of ISO and experimenting with different settings, you can capture stunning images in any lighting conditions during your tours. Don’t be afraid to adjust the ISO to achieve the desired effect and ensure your images truly shine.
Mastering Aperture and Depth of Field
When it comes to capturing stunning images on your tours, mastering aperture and understanding depth of field can make a world of difference. Aperture is an essential camera setting that controls the amount of light entering your camera and determines how much of your image will be in focus. Depth of field, on the other hand, refers to the range of distance in your image that appears sharp. Let’s dive deeper into these concepts and explore some techniques for capturing breathtaking photos.
Aperture Explained
Aperture is the opening in your lens through which light enters your camera. It is measured in f-stops, with lower numbers indicating larger openings and higher numbers representing smaller openings. The aperture also influences the amount of light that reaches the camera sensor, so it plays a crucial role in exposure control.
Controlling Depth of Field
Depth of field refers to the area of your image that appears sharp. A shallow depth of field creates a blurred background and draws attention to the subject, while a deep depth of field keeps everything in focus. By adjusting the aperture, you can control the depth of field and create different visual effects.
Techniques for Capturing Stunning Portraits
Portraits are a popular subject for many photographers, and understanding aperture and depth of field can greatly enhance your portrait photography. Here are a few techniques to consider:
- Wide Aperture: Use a wide aperture (small f-stop number) to create a shallow depth of field and blur the background. This technique helps to isolate the subject and make them stand out.
- Bokeh Effect: Experiment with different lenses and apertures to create a pleasing bokeh effect. Bokeh refers to the aesthetic quality of the out-of-focus areas in your image. Using a wide aperture and focusing on a subject in the foreground can produce beautiful bokeh.
- Focus Stacking: If you want to have both the subject and the background in sharp focus, try focus stacking. This technique involves taking multiple shots at different focal points and then blending them together in post-processing to achieve a greater depth of field.
Remember, the right aperture setting will depend on the effect you want to achieve and the available light. Take some time to experiment and find the aperture that works best for your composition.
“Aperture and depth of field are like the canvas and brushes of a painter. They allow photographers to create a visual masterpiece.”
So, the next time you’re out on a tour and want to capture stunning images with a beautiful background blur or a tack-sharp landscape, don’t forget to master your aperture and explore the world of depth of field. It’s a key step in your journey towards becoming an accomplished photographer.
In the next section, we’ll explore the importance of shutter speed and how it can help you capture the perfect moment.
Perfecting Shutter Speed
Shutter speed is one of the most important camera settings that can significantly impact the outcome of your images. It determines how long your camera’s shutter stays open, allowing light to reach the camera sensor. Mastering shutter speed will not only help you capture sharp images but also give you creative control over motion in your photos. So, let’s dive into the world of shutter speed and explore the techniques for perfecting it!
Shutter Speed and Motion
Shutter speed plays a crucial role in capturing motion in your photographs. It determines whether your subject will be frozen in action or shown with motion blur. The faster the shutter speed, the more frozen the motion will appear, while a slower shutter speed will introduce motion blur.
Freezing Fast Action
To freeze fast action, you need to use a fast shutter speed. This is ideal for capturing sports events, wildlife, or any subject that is moving quickly. A shutter speed of 1/500th of a second or faster can help you capture sharp images of fast-moving subjects.
Creating Motion Blur
On the other hand, using a slower shutter speed can create beautiful motion blur effects. This technique is commonly used in photographing waterfalls, car lights at night, or any subject that is in motion. By using a slow shutter speed, such as 1/30th of a second or longer, you can capture the movement and create a sense of motion in your images.
Adjusting Shutter Speed for Exposure
In addition to its impact on motion, shutter speed also affects the overall exposure of your image. When shooting in manual mode, you need to adjust your shutter speed based on the amount of light available.
Remember, when using a faster shutter speed, less light will enter the camera, resulting in a darker image. Conversely, using a slower shutter speed will allow more light, resulting in a brighter image.
Using a Tripod for Long Exposures
When using slow shutter speeds, it’s essential to stabilize your camera to avoid any unwanted camera shake. Even the slightest movement can cause blurriness in your images. To ensure sharpness, use a tripod or any other stable surface to keep your camera steady during longer exposures.
Experimenting with Different Shutter Speeds
To master shutter speed, it’s important to experiment with different settings. Take the time to shoot the same subject with various shutter speeds and observe the results. This will give you a better understanding of how different speeds impact the final image.
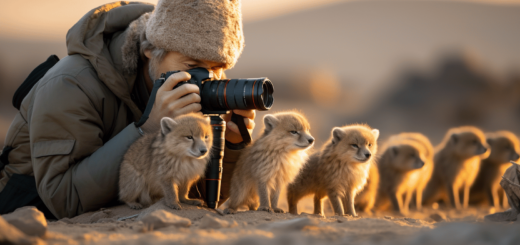
Sports and Wildlife Photography Tips
When shooting sports or wildlife, it’s crucial to use a fast shutter speed to freeze the action. Aim for a speed of 1/500th of a second or faster. Additionally, using continuous autofocus mode can help you track moving subjects more effectively.
Creative Long Exposure Photography
Long exposure photography opens up a whole new world of creative possibilities. By using a slow shutter speed, you can capture light trails, smooth water, beautiful star trails, and surreal effects. Experiment with slower speeds, such as 1/30th of a second or longer, to achieve these stunning effects.
So, take your time to experiment and play with different shutter speeds. Whether you want to capture the fast-paced action or create dreamy, long exposure shots, mastering shutter speed will take your photography to the next level. Happy shooting!
“In photography, there is a reality so subtle that it becomes more real than reality.” – Alfred Stieglitz
White Balance for Accurate Colors
Have you ever taken a photograph only to find that the colors appear off? Maybe your image looks too warm with a yellowish tone or too cool with a bluish hue. This is where the white balance setting on your camera comes into play. White balance is a crucial camera setting that helps you capture accurate colors in different lighting conditions. Let’s dive into the details of white balance and how to use it effectively.
Understanding White Balance
White balance refers to the adjustment of colors in a photograph to ensure that white appears as true white, regardless of the lighting conditions. Different light sources, such as natural light, fluorescent lights, or incandescent bulbs, emit light with varying color temperatures. Our eyes can adjust to these different light sources, but cameras need a little help.
Choosing the Right White Balance Setting
Most cameras offer a range of white balance presets, such as Auto, Daylight, Cloudy, Shade, Fluorescent, and Tungsten. Each preset is designed to compensate for the color temperature of a particular lighting condition. Here’s a breakdown of some common white balance settings and when to use them:
- Auto: This setting allows the camera to analyze the scene and determine the best white balance setting automatically. It works well in many situations, but it may not always produce accurate colors.
- Daylight: Use this setting when shooting outdoors on a sunny day. It preserves the natural warm colors of sunlight.
- Cloudy: Use this setting when shooting on a cloudy or overcast day. It compensates for the cooler light and adds warmth to your images.
- Shade: This setting enhances warm tones and adds a touch of orange to counterbalance the bluish shade in shaded areas.
- Fluorescent: Use this setting when shooting under fluorescent lights. It reduces the greenish cast often produced by these light sources.
- Tungsten: Use this setting when shooting under incandescent lighting. It counters the warm, yellowish tones and produces more neutral colors.
Customizing White Balance for Creative Effects
While the presets work well in most situations, there may be times when you want to be more creative with your white balance. Most cameras allow you to set a custom white balance. This involves capturing an image of a white or neutral-gray card under the same lighting conditions as your subject. To set a custom white balance:
- Place a white or neutral-gray card in front of your camera, filling the frame.
- Set your camera to the Manual mode.
- Access the custom white balance menu in your camera settings.
- Select the image of the white or neutral-gray card as the reference image.
- Save the custom white balance setting.
Custom white balance ensures accurate colors based on the specific lighting conditions of your scene. It can be especially useful in mixed lighting situations or when you want to create a specific mood or tone in your photographs.
Remember, mastering white balance is essential for achieving accurate colors in your images. Experiment with different white balance settings, and don’t be afraid to customize it to your liking. By doing so, you’ll capture stunning photographs with true-to-life colors that will wow your friends and family.
“The right white balance can make all the difference in bringing out the true colors of your subject. Don’t overlook this essential camera setting!”
Utilizing Metering Modes
Metering modes play a crucial role in determining how your camera measures and calculates the exposure for a scene. By understanding the different metering modes and when to use them, you can ensure accurate and well-exposed images. Let’s take a closer look at the three common metering modes: Evaluative metering, spot metering, and partial metering.
Evaluative Metering
Evaluative metering, also known as matrix metering or multi-segment metering, is the default metering mode on most cameras. This mode takes into account various factors such as brightness, contrast, and color to calculate the exposure for the entire scene.
- Evaluative metering is ideal for balanced lighting situations where you have a mix of bright and dark areas in your frame.
- It works well for landscape shots or when you want to capture an overall exposure for the entire scene.
- Keep in mind that the camera’s built-in metering system is not infallible, and you may need to make exposure adjustments depending on the lighting conditions.
Spot Metering
Spot metering allows you to measure the exposure based on a small, specific area in your frame. This mode is particularly useful when there is a significant difference in brightness between your subject and the background.
- Spot metering provides precise exposure for your subject, disregarding other areas in the frame.
- It’s great for capturing a well-exposed subject against a bright or dark background.
- To use spot metering effectively, place the metering spot on your subject and half-press the shutter button to lock the exposure. Then, recompose and take the shot.
Partial Metering
Partial metering is a mode that falls between evaluative metering and spot metering. It meters a larger area than spot metering but still considers a smaller portion of the frame compared to evaluative metering.
- Partial metering is ideal when you want to prioritize the exposure for your subject, but still, take into account the surrounding areas.
- It works well for portraits or situations where you want to ensure a correct exposure for the main subject while maintaining some detail in the background.
- To use partial metering, position your subject in the center of the frame, and half-press the shutter button to lock the exposure. Then, recompose if needed and capture the shot.
Understanding and utilizing the different metering modes can greatly enhance your photography, allowing you to achieve accurate exposures in various lighting conditions. Experiment with these modes to see which one works best for your particular shooting scenario.
“By mastering metering modes, you take control of how your camera measures exposure, ensuring accurately exposed and well-balanced images.”
Using Focus Modes Effectively
When it comes to capturing sharp and well-focused images on your tours, understanding and using the right focus mode is crucial. Different focus modes provide different levels of control over how your camera locks onto a subject and tracks its movement. By mastering focus modes, you can ensure that your images are crisp, clear, and visually engaging. In this section, we will explore three common focus modes and discuss when to use each one.
Single Autofocus Mode
The single autofocus mode is typically the default setting on most cameras. In this mode, you aim your camera at your subject, half-press the shutter button to lock focus, and then fully press the button to take the shot. The camera will focus on the subject at the moment you half-press the shutter button and maintain that focus until you take the picture.
When to use single autofocus mode:
- When your subject is stationary or not moving much
- When you have time to compose your shot and focus accurately
- When photographing landscapes, still life, or portraits of people posing
Continuous Autofocus Mode
The continuous autofocus mode, also known as AI Servo (Canon) or AF-C (Nikon), is designed to track moving subjects. In this mode, your camera continuously adjusts the focus as the subject moves closer or farther away from you. This is especially useful when photographing sports events, wildlife, or any fast-paced action where the subject is in motion.
When to use continuous autofocus mode:
- When your subject is in motion or moving unpredictably
- When you need to maintain focus on a moving object
- When photographing action shots, such as sports or wildlife photography
Manual Focus
Sometimes, the autofocus system may struggle to lock onto your subject, especially in low light conditions or when there are multiple points of interest in the frame. In such situations, switching to manual focus can give you more control over where you want the focus to be. In manual focus mode, you turn the focus ring on your lens to adjust the focus until the subject appears sharp in your viewfinder.
When to use manual focus:
- When the autofocus system is struggling to lock onto your subject
- When shooting in low light or low contrast situations
- When you want to take creative control of the focus point
“Mastering focus modes is essential for capturing sharp and well-focused images. Understanding when to use single autofocus, continuous autofocus, or manual focus can significantly improve your photography skills.”
Remember, every camera manufacturer may have different names for focus modes, so consult your camera’s manual to find the corresponding names for the focus modes mentioned above. Experimenting with different focus modes in various shooting scenarios will help you become comfortable and proficient in using them effectively. So, don’t hesitate to try out different modes and see the difference they make in your images.
In the next section, we will explore various composition techniques that can help you capture captivating shots and elevate your photography to the next level.
Composition Techniques for Captivating Shots
When it comes to capturing stunning images on tours, understanding the technical aspects of your camera is only part of the equation. Composition plays a crucial role in creating captivating shots that grab the viewer’s attention and evoke emotions. By applying certain techniques, you can elevate your photography to new heights. Here are some composition techniques to help you capture truly mesmerizing images:
Rule of Thirds
The rule of thirds is a fundamental technique in photography composition. Imagine dividing your frame into a tic-tac-toe grid with two horizontal and two vertical lines. The rule suggests placing the main subjects or points of interest along these lines or at their intersections. This off-center placement creates a more dynamic and visually appealing composition compared to placing the subject in the center of the frame.
Leading Lines
Leading lines are elements within a photograph that guide the viewer’s eye towards a specific point of interest. These lines can be anything from the straight lines of a road or railway to the curving branches of a tree. By strategically incorporating leading lines into your composition, you can create a sense of depth, perspective, and movement in your images.
Foreground and Background Interest
Adding foreground and background elements to your composition can create depth and add interest to your images. By including a visually captivating foreground, such as a colorful flower or an interesting object, you can lead the viewer’s eye deeper into the image. Similarly, having an engaging background can provide context and enhance the overall story you want to convey in your photograph.
“The composition is a powerful tool in photography. It allows you to create a visual narrative that draws the viewer into the image and evokes emotions. By using techniques such as the rule of thirds, leading lines, and foreground and background interest, you can take your photography to the next level and capture truly captivating shots.”
Remember, while these composition techniques can guide you, don’t be afraid to experiment and think outside the box. Each scene and subject is unique, so feel free to adapt these techniques to suit your vision and style. With practice, observation, and an artistic eye, you can create photographs that not only document your tours but also leave a lasting impression on anyone who sees them. Happy shooting!
Mastering Lighting and Exposure
When it comes to photography, lighting and exposure play a significant role in capturing stunning images. The way you manipulate light and exposure can greatly impact the mood and quality of your photos. Whether you’re shooting in natural light or using artificial lighting, here are some essential tips to help you master lighting and exposure for breathtaking results:
Natural Light vs. Artificial Light
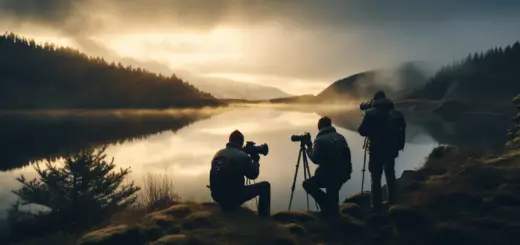
Understanding the different types of lighting and how they affect your images is crucial. Natural light, as the name suggests, comes from the sun and can create beautiful, soft, and warm tones in your photos. It’s best to shoot during the golden hours, which are the first hour after sunrise and the last hour before sunset, as the light is softer and more flattering.
On the other hand, artificial light refers to any light source that is not natural, such as indoor lighting, studio lights, or flashes. This type of lighting gives you more control over the intensity and direction of light, allowing you to create dramatic effects in your images.
Exposure Compensation
Exposure refers to the amount of light that reaches the camera’s sensor. It determines how bright or dark your image will appear. Exposure compensation is a useful feature that allows you to adjust the exposure value of your image manually. It’s particularly handy when shooting in challenging lighting conditions, such as high-contrast scenes or backlit subjects.
To use exposure compensation, simply locate the exposure compensation dial on your camera or access it through the menu settings. Adjusting the dial to the positive side (+) will make your image brighter, while moving it to the negative side (-) will darken the image.
Using Fill Flash
Fill flash is a technique commonly used in outdoor photography to balance the exposure between the subject and the background. It involves using a flash to “fill in” the shadows on your subject’s face or to add additional illumination to a scene.
To use fill flash, set your camera to a manual or semi-automatic mode like aperture priority. Then, activate your camera’s flash and ma
Conclusion
In conclusion, understanding and mastering your camera settings is essential for capturing stunning images on tours. By going beyond auto mode and exploring manual settings, you have the power to control every aspect of your photography and unleash your creativity. Here’s a recap of what we’ve covered:
- Camera Modes and Shooting Settings: Familiarize yourself with the different camera modes and shooting settings to gain more control over your images.
- Exploring Manual Mode: Switching to manual mode allows you to have complete control over the exposure settings, resulting in more accurate and creative images.
- Understanding the Exposure Triangle: The exposure triangle consists of aperture, shutter speed, and ISO. Understanding how these three elements work together will help you achieve the desired exposure.
- Setting the Right ISO: The ISO setting determines the camera’s sensitivity to light. Choosing the appropriate ISO for different lighting conditions is crucial for maintaining image quality.
- Mastering Aperture and Depth of Field: Aperture controls the amount of light entering the camera and also affects the depth of field. Experimenting with different aperture settings can lead to stunning images with shallow or deep focus.
- Perfecting Shutter Speed: Shutter speed determines how long the camera’s shutter remains open. Mastering this setting allows you to freeze fast action or create artistic motion blur.
- White Balance for Accurate Colors: White balance ensures that the colors in your images appear natural and accurate. Adjusting the white balance setting or customizing it can enhance the overall color tone.
- Utilizing Metering Modes: Different metering modes help you measure the amount of light in a scene. Choosing the right metering mode can help you achieve the optimal exposure.
- Using Focus Modes Effectively: Understanding focus modes allows you to control where your camera focuses. Experimenting with single autofocus, continuous autofocus, and manual focus can result in sharper, more focused images.
- Composition Techniques for Captivating Shots: Composition plays a vital role in creating visually pleasing images. Utilizing techniques such as the rule of thirds, leading lines, and foreground and background interest can take your images to the next level.
- Mastering Lighting and Exposure: Understanding the difference between natural light and artificial light, utilizing exposure compensation, and incorporating fill flash can help you achieve well-lit and balanced images.
By implementing these camera settings and techniques, you’ll be able to capture stunning images on your tours. Remember, practice makes perfect, so don’t be afraid to experiment and get creative with your photography. Happy shooting!
Frequently Asked Questions
- What are the essential camera settings for capturing stunning images on tours?
The essential camera settings for capturing stunning images on tours include adjusting the aperture, setting the ISO, choosing the right shutter speed, using the appropriate white balance, and utilizing the correct focus mode.
- How does adjusting the aperture affect image quality on tours?
Adjusting the aperture controls the depth of field, determining how much of the image is in focus. A wider aperture (lower f-stop number) creates shallow depth of field, making the subject stand out against a blurred background, while a narrower aperture (higher f-stop number) ensures more of the scene is in focus.
- What is ISO, and what ISO setting should I use on tours?
ISO refers to the camera’s sensitivity to light. On tours, you should set the ISO to the lowest value possible to minimize noise and maintain image quality. Increase the ISO only when shooting in low-light situations where a faster shutter speed is necessary.
- How does shutter speed affect image capture on tours?
Shutter speed controls the amount of time the camera’s sensor is exposed to light. A faster shutter speed freezes motion, ideal for capturing action shots, while a slower shutter speed creates motion blur, great for capturing the sense of movement in a scene.
- Why is white balance important for capturing accurate colors on tours?
White balance ensures that the colors in your images appear natural and accurate under different lighting conditions. Adjust the white balance setting on your camera to match the lighting situation, such as daylight, cloudy, or indoor lighting, to avoid unnatural color casts.