
Long Exposure Photography with the Fujifilm X-T1 and X-E2
Introduction
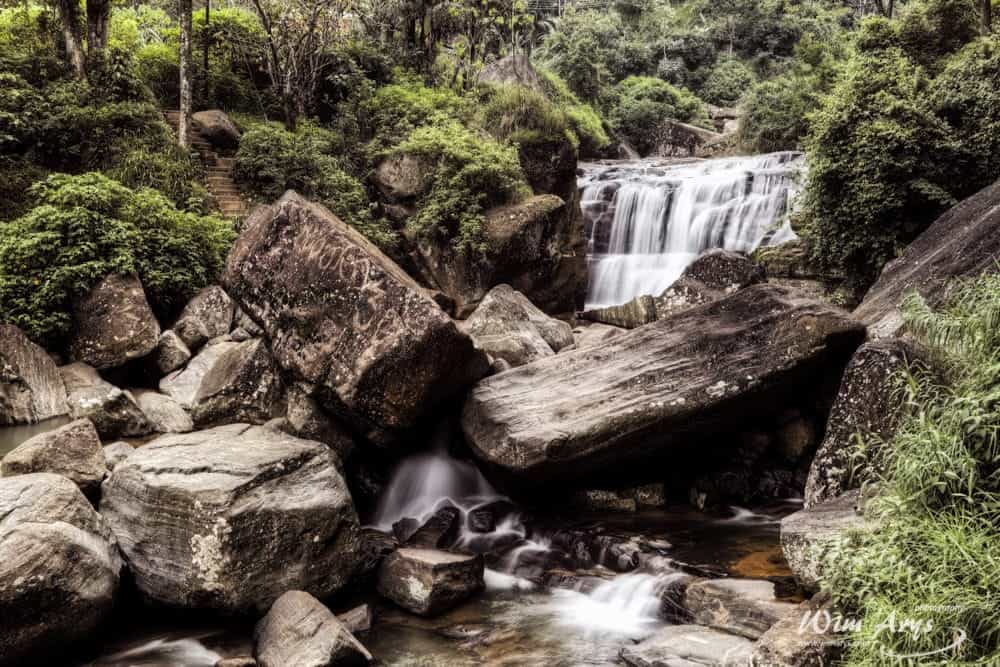
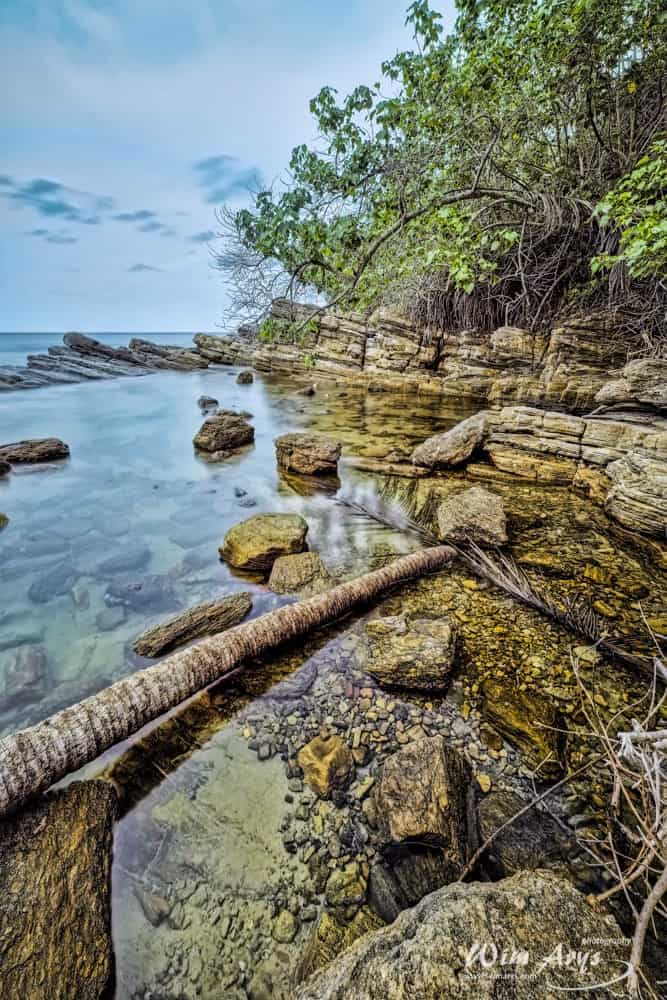
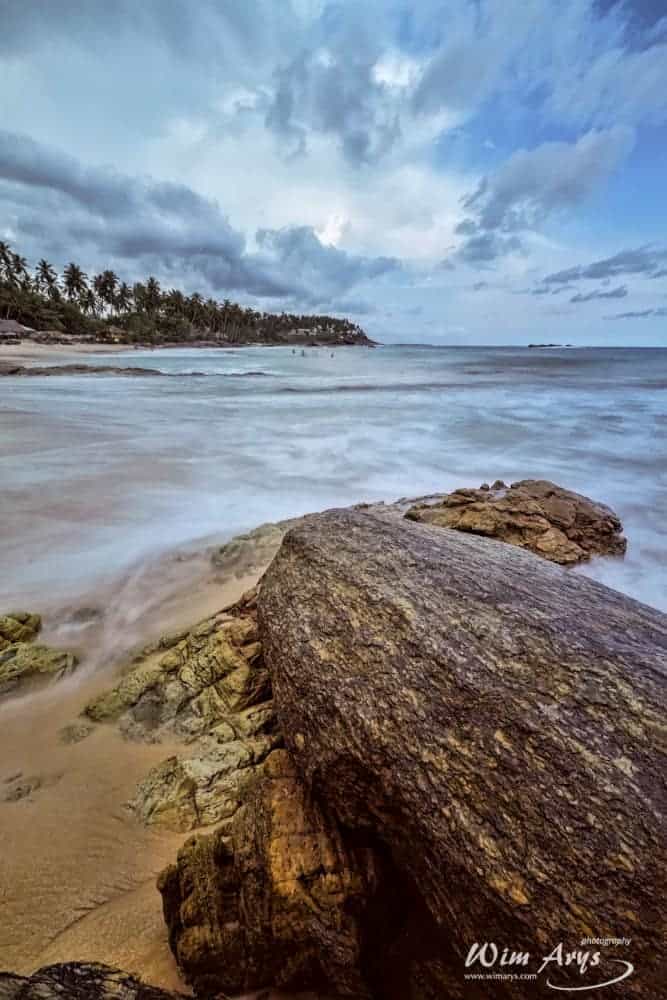
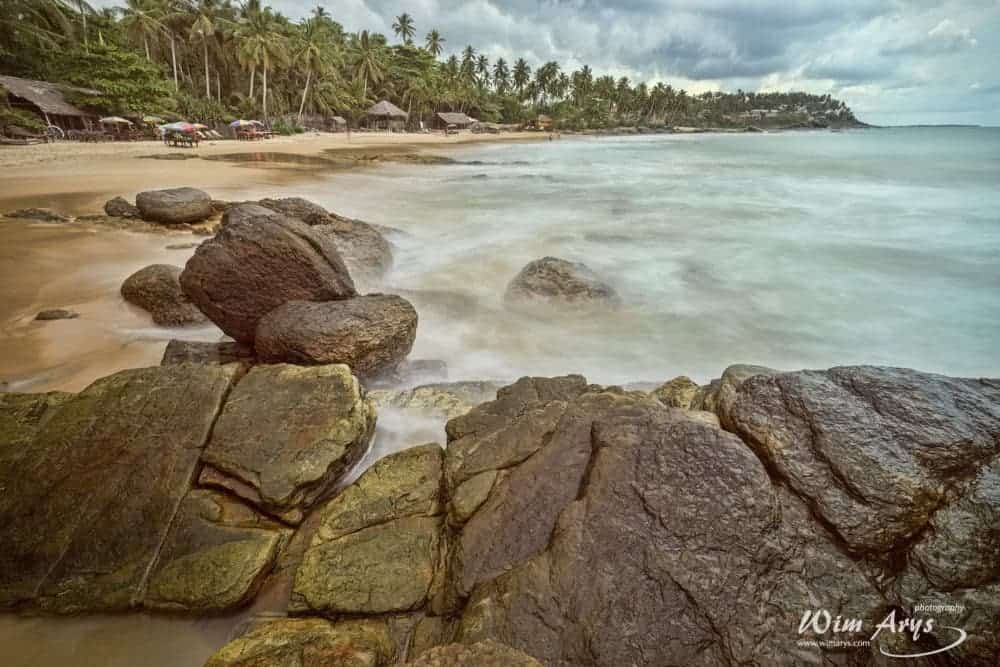
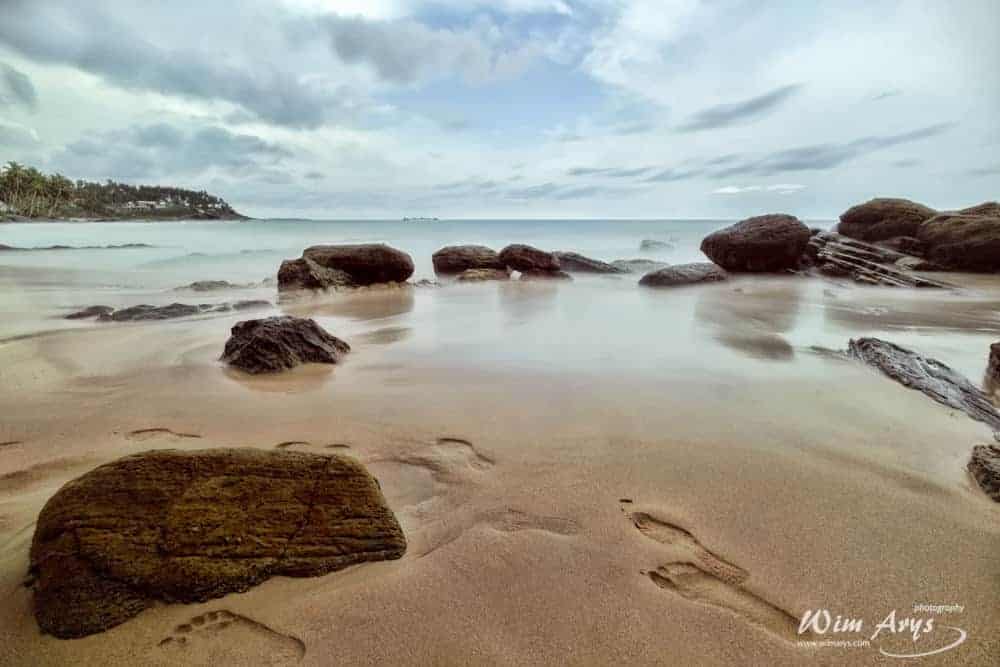
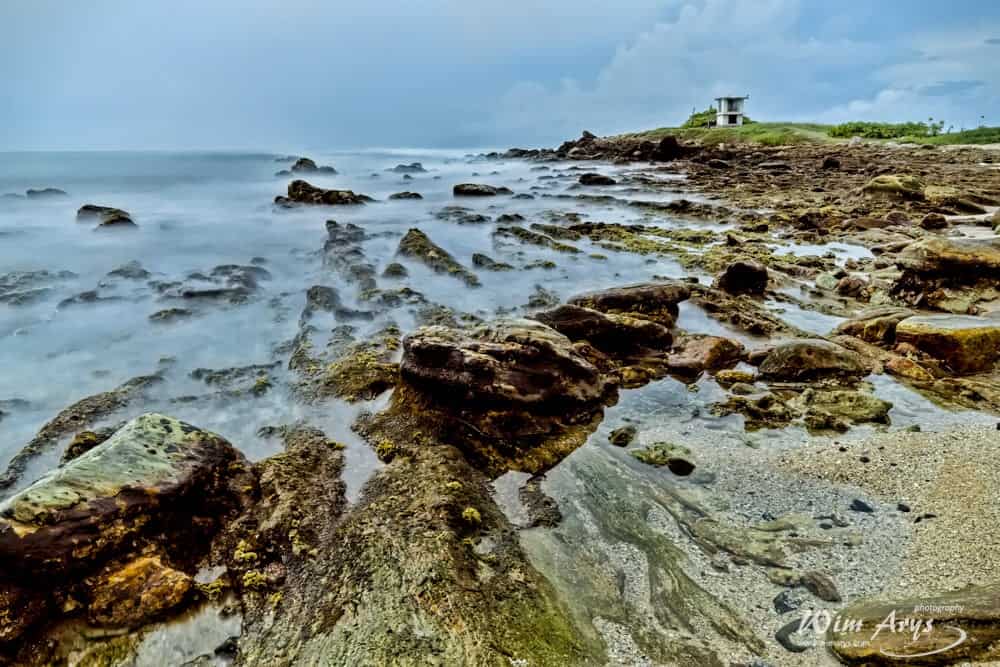
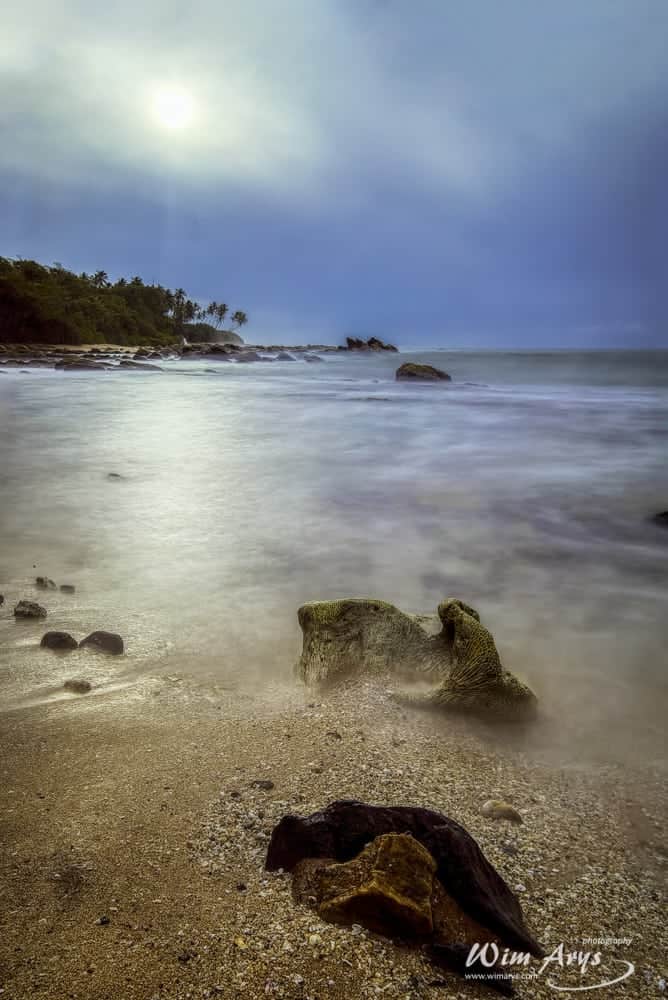
Long exposure photography has been around since the first cameras were invented. Indeed, to capture an image on silver plated copper (the so-called Daguerreotype camera), an exposure of several minutes was necessary. It’s interesting to look at the ghostly images of cities from that era, as no people are actually in them due to the long exposure time. Now almost two centuries later, photographers are still intrigued by this technique. It allows us to capture motion, show the effects of passing time and smooths out water or light trails. Images with longer exposure times tend to make moving people or dark objects disappear adding a serene and otherworldly appearance to long exposure photos.
How to make long exposures: tips and tricks
A digital camera with Shutter Priority and/or Bulb Mode
Firstly, you’ll need a good camera that you’re familiar with, with either a functionality called bulb mode or S (shutter) priority mode. Shutter priority allows you to dial in the shutter time you want to use. I’m using the Fuji X-T1 and X-E2 here with the wide angle XF 10-24mm f/4 lens. To achieve longer shutter times for long exposure photography, you can play around with larger apertures, just remember that most lenses tend to be sharpest at f/8, with diffraction setting in around f/11. (Diffraction is a loss of sharpness due to light scattering when you close the iris of your lens by the way). If you’re a modestly experienced photographer, you’ll know that an aperture of f/8 won’t get you anywhere near what we’d call a long exposure.

Ten Stop ND filter
To achieve longer shutter times, you can play around with larger apertures, just remember that most lenses tend to be sharpest at f/8, with diffraction setting in around f/11. (Diffraction is a loss of sharpness due to light scattering when you close the iris of your lens by the way). If you’re a modestly experienced photographer, you’ll know that an aperture of f/8 won’t get you anywhere near what we’d call a long exposure, so this is where an ND filter comes in. Neutral density filters ‘stop’ light entering your lens, enabling you to use longer shutter speeds. These come in many flavours, from front-of-lens screw-in types to rectangular pieces of glass/resin with attachable filter holders to slide them in front of your lens.
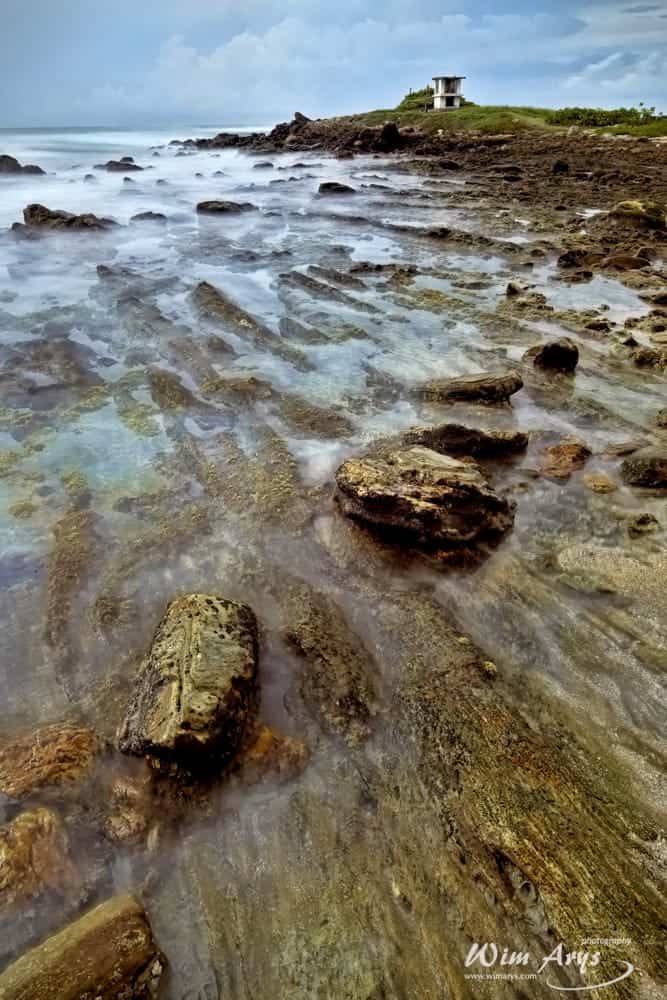
You can try a few screw-in filters, but if you’re using wide-angle lenses, you’ll quickly run into vignetting issues (darker corners) with these. If you’re serious about this type of photography, I’d suggest investing in either LEE filters or the new Firecrest 100 x 100 mm filters with holder from a company called Formatt Hitech. I’m my experience; you’ll need at least a ten stop ND filter to get to around 30 seconds. That’s either an LEE big stopper or a Firecrest ND10 in case you’re wondering. These are all quite fragile pieces of glass (or resin), so take care when handling them if you don’t want to get any scratches on them.
Camera settings
Going back to your camera set-up, you’ll want to shoot RAW to have the maximum quality files to work with later on. ISO shoot be set to the lowest possible value, on the Fuji X-T1 this is ISO200. This means you’ll get the least possible amount of noise in your long exposure photography, and also will allow you to have longer shutter times than say ISO800. You’ll be able to go lower on other cameras, especially Full Frame cameras, but these values are purely indicative anyway (dating back to the time when film rolls were used, but not linearly transposable to digital sensors).
I’ve used a full-frame Sony A7r to do long exposures at ISO64 and ended up with just as much noise. Also, turn on ‘long exposure noise reduction’ in your camera menu. The noise builds up during long exposures, and as the sensor heats up due to being activated, this also adds noise to the process. The Long Exposure Noise Reduction setting will prepare your image after your capture and deal with at least some of your noise. I know it might sound strange to do this in-body when shooting RAW files, and not just process them later, but you get better results this way.

Sturdy tripod and rotating head
You’ll also need to invest in a sturdy tripod. You’ll be visiting sandy and salty beaches, hard to reach waterfalls and climbing mountains in all kinds of weather. Suffice to say that your equipment will take a beating from time to time, so make sure it is water resistant and as light as possible. I use a Manfrotto MT190CXPRO4 Carbon Tripod and an X PRO 3 Way Head. I regularly put the Carbon Tripod in the shower, as sand and salt gets in the tubes and joints.
The three-way head almost weighs as much as the tripod but has proved precious in the field. The precision controls on all three axes make quick and precise adjustments possible to frame my shot and get everything level. You’ll often be working at dusk or dawn, when the light is best, and the sun can set or rise quickly, so any gear you have that can give you an edge timing wise is valuable.
Different shooting techniques
There are some techniques you can use during the shoot to get better images like bracketing and focus stacking. Taking 3 or five sequential shots with plus or minus one EV and merging them later as an HDR can yield impressive results. I would suggest stacking them in Adobe Photoshop though, as you get more control using layer masks than an automated HDR. This will add noise to the final merged image, so be careful here.
Focus stacking is taking sequential shots with different focus points. This can help to get a final image that fully looks in focus, although I believe this is not always needed. Photoshop has an excellent tool to do this: open up your images as layers in PS, and then go to the Edit menu where you first select Auto-Align layers. This will align your images, not a big issue when you’re using a tripod, but still helpful at times. Finally, you select ‘Auto Blend Layers’. PS will automatically find the sharpest pixels in all your layers and blend them together.
RAW processing
You’ll almost always have some colour cast when using a 10 or 16 stop ND filter, and my first processing step usually involves going to Iridient Developer. Iridient is an RAW conversion programme with advanced functionality. Besides the usual white balance controls, you can also do fine adjustments to shadows, mid-tones and highlights. It’s also an excellent piece of software to pull out some extra detail or sharpening. Don’t exaggerate here, as we’ll do some added sharpening in later steps. Iridient will also take care of any possible lens corrections needed, and as you’ll often find extra vignetting problems with ND filters, I always correct these in their ‘lens’ out page, adjusting midpoint and radius sliders too.
‘Final Look’ processing
You should by now have ended up with a useable TIFF file, with a decent white balance, sharp image with no vignetting visible. I use Lightroom as a Picture Library and file handling hub, and of course for basic adjustments. I regularly switch on the ‘Auto Tone’ settings, I never really like the results, but use it basically as a Reset button for my brain. An image might look good on your screen, but you’d want it to translate well to other screens and paper too. Auto Tone and WB helps me check if I haven’t made any mistakes along the way. Running the TIFF through Athentech’s Perfectly Clear 2 (starting point is their landscape preset) usually resolves these issues (including any residual colour cast) although I always disable sharpening and noise reduction as we’ll do that later. It’s superior to Lightroom when it comes to adjusting exposure, or at least less aggressive.
My final step uses many of Topaz Labs plug-ins. Long Exposure photography usually looks best with a bit of HDR magic that I apply with their Detail Plugin. I transfer my image to PhotoFxLab for this. This environment is similar to Photoshop in the sense that you can also work with blending, masks and layers. Another interesting plugin is Topaz Restyle, that remaps the colours and saturation of your original image which I blend back with the original image to get a more interesting look. All Topaz plug-ins also have a variety of blending modes that change how the original image interacts with the chosen effect, a feature I always use.
All this processing will have added noise to your image, so you’ll need to find the right balance between sharpness and noise. I ofter find the Lightroom’s built-in noise reduction is quite efficient on Long Exposure images. So I either use that or Google Nik’s Dfine 2, depending on what looks best.
well done.
maybe it is interesting for you too: http://www.achim-sieger.de/lee-little-stopper-vergleichstest/#more-1241
Thanks, Alexander, two interesting filter comparisons. The Haida square ND filters seem to be a good buy, although (as usual with Haida) not as precise in terms of how much light they are stopping. This makes it harder to calculate exposure times, and it’s crucial to get a correct exposure with this kind of photography. If you need to crank up the shadows too much in post, it adds a lot of noise, and overexposed images just look bad. I contacted Formatt Hitech about my colour cast findings with Firecrest filters (as I read many reviews online saying there is none) but no reply up to now. I’m going to try their 16 stop Firecrest ND 4.8 too before posting my review, as they are the only company currently making one (that I know of).
or here: http://www.achim-sieger.de/nd-filter-test-lee-big-stopper-formatt-hitech-prostop-irnd-haida/