
Landscape photography has become increasingly popular in recent years, with people flocking to capture the beauty of nature in all its glory. The allure of stunning landscapes, breathtaking sunsets, and majestic mountains has inspired countless photographers to venture into the world of landscape photography.
But what sets apart a truly remarkable landscape photograph from a mediocre one? What are the essential tips and tools that can help aspiring photographers achieve success in this genre? In this article, we will explore the key elements and techniques that can take your landscape photography to the next level.
From mastering composition and utilizing natural light effectively to investing in high-quality camera equipment and essential accessories, we will provide valuable insights and actionable advice to elevate your landscape photography skills. Whether you’re a beginner or an experienced photographer looking to refine your craft, these tips and tools will help you capture captivating and impactful landscape photos.
So grab your camera, pack your tripod, and get ready to embark on a journey through the world of landscape photography. Let’s explore the essential tips and tools that will guide you towards landscape photography success!
Using a Tripod for Sharpness and Stability
Capturing sharp and stable photos is a goal that many photographers strive for. It’s frustrating to snap a picture, only to find that it’s blurry or not as sharp as desired. That’s where a tripod comes in handy. Using a tripod can greatly improve the sharpness and stability of your photos, allowing you to capture crystal clear images with ease. Let’s take a closer look at why using a tripod is essential for achieving optimal sharpness and stability.
The Benefits of Using a Tripod:
- Eliminates Camera Shake: One of the main causes of blurry photos is camera shake. Even the smallest movement of your hand can result in a blurred image. By using a tripod, you can eliminate camera shake completely, ensuring sharp and crisp photos.
- Stabilizes Heavy Equipment: If you’re using a heavy lens or a camera with a large body, it can be challenging to hold it steady for an extended period. A tripod provides a stable base, taking the weight off your hands and allowing you to focus on composing your shot.
- Allows for Longer Exposures: In low light or nighttime conditions, longer exposures are often necessary to capture enough light. However, even the slightest movement during a long exposure can ruin the shot. With a tripod, you can keep your camera perfectly still, enabling you to capture beautiful long exposure images without any blurriness.
How to Properly Use a Tripod:
To make the most out of your tripod and achieve optimal sharpness and stability in your photos, follow these tips:
- Choose the Right Tripod: Invest in a sturdy tripod that can securely hold the weight of your camera and lens. Look for a tripod made of durable materials like carbon fiber or aluminum, with adjustable legs and a stable center column.
- Set Up on Solid Ground: Find a stable surface for your tripod, such as the ground or a solid platform. Avoid areas where the ground might be soft or unstable, as this can impact the stability of your tripod.
- Securely Attach the Camera: Use a quick-release plate or a screw to attach your camera securely to the tripod head. Ensure that the camera is not loose and can’t wobble.
- Adjust the Height and Position: Adjust the tripod’s height and position to best suit the composition you want to achieve. Make sure the tripod is level, and use the tripod’s legs and head adjustments for precise positioning.
- Use a Remote Shutter or Timer: Minimize any physical contact with the camera by using a remote shutter release or the camera’s built-in timer. This will further reduce the risk of camera shake and improve sharpness.
Remember, using a tripod is not only beneficial for capturing sharp photos but also for experimenting with different techniques, such as long exposures, low light photography, and panoramic shots. It’s a valuable tool that every photographer should have in their kit.
So, the next time you want to achieve sharpness and stability in your photos, don’t forget to bring along your trusty tripod. It’s a game-changer that can take your photography to the next level. Happy shooting!
Experimenting and Breaking the Rules
Have you ever been told that you should always follow the rules? Well, when it comes to creative endeavors, sometimes breaking the rules can lead to the most interesting and innovative results. Experimenting and pushing boundaries can unlock new possibilities and take your work to the next level. So, why should you consider breaking the rules? Let’s explore a few reasons:
1. Fostering Creativity
By stepping outside of the conventional rules and norms, you are giving yourself the freedom to think outside the box. When you break the rules, you are forced to find alternative solutions and explore new ideas. This process of experimentation can spark your creativity and lead to unexpected breakthroughs.
2. Differentiating Yourself
In a world where everyone is striving to fit in, breaking the rules can help you stand out from the crowd. By daring to be different and challenging the status quo, you have the opportunity to carve a unique niche for yourself. When you break the rules, you create something that hasn’t been seen or done before, making you memorable and distinctive.
3. Evolution of Art and Design
Artistic and design movements throughout history have been shaped by creators who were willing to break the established rules of their time. From the Impressionists to the Cubists, these artists challenged conventions and pushed the boundaries of what was considered acceptable. By breaking the rules, you contribute to the evolution of your craft and pave the way for future innovation.
4. Finding Your Authentic Voice
When you break the rules, you are giving yourself permission to explore and discover who you truly are as a creative. By rejecting the limitations imposed by tradition or societal norms, you can tap into your unique perspective and create work that is a true reflection of yourself. Breaking the rules allows you to find your authentic voice and express it authentically.
As we can see, breaking the rules can have numerous benefits when it comes to creative pursuits. It allows for creativity to flourish, sets you apart from the crowd, drives the evolution of your craft, and helps you find your own artistic voice. So, don’t be afraid to step out of your comfort zone and experiment. Embrace the unconventional and be open to the possibilities that come with breaking the rules.
Composition Techniques for Impactful Photos
Capturing impactful photos doesn’t always come down to having the latest gear or the most expensive camera. Sometimes, it’s the composition of the photo that can make all the difference. The way you arrange the elements within a frame can turn an ordinary scene into something extraordinary. In this article, we’ll explore two composition techniques that can help you take your photography to the next level: leading lines and foreground elements.
Leading Lines
Leading lines are a powerful composition technique that draws the viewer’s eye into the photo and creates a sense of depth and movement. These lines can be any linear element in the scene, such as roads, fences, rivers, or even man-made objects like buildings or bridges. Here’s why leading lines are so effective:
- Guides the viewer’s eye: Leading lines act as visual cues, directing the viewer’s gaze towards the main subject or focal point of the photo. They create a natural flow and guide the viewer’s eye through the image, creating a sense of visual exploration.
- Adds depth: By incorporating leading lines in your composition, you can create a three-dimensional effect in the two-dimensional space of a photograph. The lines provide a sense of perspective and depth, making the image more visually engaging.
- Creates a sense of movement: Leading lines have the power to imply motion or direction within a photo. When you incorporate diagonal or converging lines, it creates a dynamic visual effect that adds interest and energy to the composition.
Foreground Elements
Foreground elements are another powerful tool in composition that can add depth and context to your photos. By including interesting objects or elements in the foreground, you can create a more immersive experience for the viewer. Here’s why foreground elements are worth considering:
- Adds depth and dimension: By placing objects in the foreground of the frame, you can create a sense of depth and dimension in your photos. It gives the viewer a layered view of the scene, making it feel more realistic and captivating.
- Frames the main subject: Foreground elements can act as natural frames for the main subject of your photo, drawing the viewer’s attention to the focal point. This framing technique helps create a visual hierarchy and makes the subject stand out more prominently.
- Provides context and storytelling: Including foreground elements can provide important context or tell a story within your photo. It can help convey a sense of scale, emphasize the environment, or add visual interest to an otherwise ordinary scene.
Remember, composition techniques like leading lines and foreground elements are just tools at your disposal. Experiment with different compositions and see what works best for your subject and the story you want to tell. Don’t be afraid to break the rules and think outside the box. With practice and creativity, you’ll be able to capture more impactful and visually stunning photos.
So, whether you’re shooting landscapes, street photography, or portraits, keep these composition techniques in mind and let your creativity shine through your lens. Happy shooting!
To learn more about other composition techniques, check out our article on Rule of Thirds.
Enhancing Photos with Effective Use of Natural Light
Introduction:
When it comes to photography, lighting plays a crucial role in capturing stunning and visually appealing images. While artificial lighting has its benefits, nothing quite compares to the beauty and versatility of natural light. Whether you’re a professional photographer or someone who enjoys taking photos as a hobby, understanding how to effectively use natural light can elevate your images to the next level.
The Importance of Natural Light:
Natural light has several advantages over artificial lighting sources. Here’s why it’s worth harnessing the power of natural light in your photography:
- Softness and Flattering Illumination: Natural light tends to be softer and more diffused than artificial light, resulting in a more flattering and natural-looking illumination on your subject. This softness can help minimize harsh shadows and create a gentle, appealing glow.
- Varied Colors and Tones: Natural light changes throughout the day, giving you the opportunity to capture different colors and tones in your images. From the warm golden hour light at sunrise or sunset to the cool blue tones during midday, natural light adds depth and visual interest to your photos.
- Creating Mood and Atmosphere: The quality of light can drastically impact the mood and atmosphere of your photos. For example, soft morning light can create a sense of tranquility and calmness, while dramatic sidelight in the evening can add a touch of mystery and intrigue. By using natural light creatively, you can evoke emotions and tell a story through your images.
Working with Natural Light:
To make the most of natural light in your photography, consider the following tips:
- Plan Your Shoot Around Golden Hour: Golden hour refers to the period shortly after sunrise or before sunset when the light is soft, warm, and diffused. It’s often considered the best time for outdoor photography due to its flattering qualities. Plan your shoots accordingly to take advantage of this magical time.
- Use Diffusion Techniques: If the sunlight is too harsh, you can soften it by using diffusers or modifiers. These tools help scatter the light and create a more even, diffused illumination on your subject. Diffusing the light can help reduce harsh shadows and create a gentle, flattering glow.
- Embrace Backlighting: Backlighting occurs when the main source of light is behind your subject. This technique can create a beautiful halo effect, add depth, and create a sense of drama in your images. Experiment with positioning your subject to capture stunning silhouettes and a dreamy, ethereal aesthetic.
- Be Mindful of Shadows: While shadows can add depth and dimension to your photos, excessive or unflattering shadows can be distracting. Pay attention to the placement and intensity of shadows on your subject and make necessary adjustments, such as using reflectors to bounce light and minimize shadows.
Incorporating Natural Light into Your Photography Workflow:
Understanding how to effectively use natural light is essential, but incorporating it seamlessly into your photography workflow takes practice and experience. Here are some ways to incorporate natural light into your process:
- Scout Locations: Before your shoot, scout locations that offer interesting natural lighting opportunities. Look for areas with varied landscapes, such as open fields, forests, or waterfronts, where you can make the most of different lighting conditions.
- Experiment and Practice: Take the time to experiment with different lighting scenarios and practice using natural light in various settings. Play around with different angles, compositions, and settings on your camera to understand how they interact with the available light.
- Post-Processing: While capturing the right light in-camera is crucial, post-processing can further enhance the impact of natural light in your images. Use software such as Adobe Lightroom to fine-tune the exposure, contrast, and color balance, bringing out the full potential of the natural light captured.
Conclusion:
Harnessing the power of natural light can transform your photography by adding depth, mood, and a natural beauty to your images. Understanding the advantages of natural light, learning techniques to work with it effectively, and incorporating it into your photography workflow can help you create captivating and visually striking photos. So, grab your camera and start exploring the world of natural light photography—it’s a journey that’s full of creativity and endless possibilities.
Learn more about the importance of lighting in photography
Utilizing Filters for Improved Quality
Photography enthusiasts are always on the lookout for ways to enhance the quality of their images. While post-processing tools and techniques can go a long way in achieving this goal, photographers can also maximize their creativity and control at the time of capture by utilizing various filters. Filters play a crucial role in altering the characteristics of light, resulting in stunning visual effects and improved image quality.
Graduated Neutral Density Filters
One type of filter that photographers often reach for is the graduated neutral density (ND) filter. This specialized filter is particularly useful when dealing with challenging lighting situations, such as capturing a landscape with a bright sky and darker foreground. A graduated ND filter helps to balance the exposure between the sky and the foreground, resulting in a more evenly exposed image.
How does a graduated ND filter work? Well, it’s simple yet effective. The filter is designed in such a way that it has a clear portion at one end and a darkened portion at the other, with a smooth transition in between. By positioning the darkened portion over the brighter area of the scene, such as the sky, the filter reduces the amount of light reaching the camera sensor in that particular area. This helps to prevent overexposure and preserve the details in the highlights, resulting in a well-exposed image overall.
Here are a few key benefits of using graduated ND filters:
- Balanced exposure: Graduated ND filters help in balancing the exposure between bright and dark areas of a scene, creating a more visually pleasing image.
- Preservation of details: By preventing overexposure in the highlights, these filters help retain important details, especially in the sky.
- Reduced post-processing: When you get the exposure right in-camera with a graduated ND filter, it minimizes the need for extensive post-processing adjustments later on.
- Creative control: These filters provide photographers with creative control over the dynamic range of a scene, enabling them to capture more accurately what they see with their own eyes.
Circular Polarizers
Another popular choice among photographers is the circular polarizer filter. This handy tool helps to reduce glare and reflections, enhance color saturation, and improve overall image clarity. Whether you’re shooting landscapes, water bodies, or even portraits, a circular polarizer can greatly enhance the visual impact of your images.
Here are a few advantages of using circular polarizers:
- Reduced glare and reflections: When shooting in bright conditions or capturing images with reflective surfaces, a circular polarizer can minimize unwanted glare and reflections, allowing for clearer and more vibrant photos.
- Enhanced color saturation: The filter selectively filters out polarized light, resulting in enhanced color saturation and richer tones.
- Improved contrast: Circular polarizers can help in achieving deeper, more dramatic skies by reducing atmospheric haze and increasing contrast.
- Sharper images: By cutting through atmospheric haze and glare, circular polarizers improve overall image clarity, resulting in sharper and more detailed photographs.
In conclusion, incorporating filters into your photography workflow can significantly improve the quality of your images and unlock new creative possibilities. Whether you choose to use graduated ND filters for balanced exposures or circular polarizers for reduced glare and enhanced saturation, these tools can make a real difference in your photographic journey. Experiment with different filters and see how they can elevate your photography to the next level.
Learn more about different types of filters and their applications in our comprehensive Filters Guide.
Long Exposure Photography for Capturing Motion Blur
Have you ever looked at a photograph and wondered how the photographer was able to capture the movement of a flowing river or the streaks of light from passing cars? The answer lies in long exposure photography. By using longer shutter speeds, photographers are able to create stunning images that showcase motion blur in a unique and captivating way.
Long exposure photography allows you to capture the passage of time in a single frame, adding a sense of dynamism and energy to your photos. It can be used to create a variety of effects, from silky smooth waterfalls and cloud movement to light trails and star trails. Whether you’re a seasoned professional or just starting out, experimenting with long exposure photography is a great way to get creative and take your photography skills to the next level.
How does long exposure photography work?
At its core, long exposure photography involves using a slow shutter speed to capture movement over an extended period of time. When you press the shutter button, the camera’s sensor remains exposed to light for a longer duration, allowing for motion blur to occur. This technique is particularly effective when used in situations where there is a stark contrast between moving and static elements in the frame.
Here’s a step-by-step breakdown of how to capture stunning long exposure photos:
- Select the right equipment: To get started with long exposure photography, you’ll need a camera that allows you to manually control the shutter speed. Additionally, investing in a stable tripod is essential to keep the camera steady during the longer exposure times.
- Find a suitable subject: Look for a scene that includes elements of movement, such as rushing water, passing cars, or swaying trees. These subjects will create the desired motion blur effect when captured with a long exposure.
- Set up your camera: Mount your camera on the tripod for stability. Switch your camera to manual mode to have full control over the exposure settings. Adjust the ISO to the lowest possible setting to reduce noise in the image. Finally, set a slow shutter speed, typically between a few seconds and several minutes, depending on the desired effect.
- Compose your shot: Take your time to compose your shot, considering the movement and static elements in the frame. Remember, the longer the exposure, the more pronounced the motion blur will be. Experiment with different compositions and angles to capture the most captivating image.
- Take the shot: Once you’re satisfied with the composition and settings, gently press the shutter button to begin the exposure. Keep the camera as steady as possible to avoid any unwanted camera shake during the exposure.
- Review and adjust: After the exposure, review the image on your camera’s LCD screen. Make any necessary adjustments to the settings or composition to enhance the final result. Don’t be afraid to experiment and try different exposure times to achieve your desired effect.
Conclusion
Long exposure photography is a powerful technique that allows you to capture the beauty of motion blur in a single frame. By using slow shutter speeds and carefully selecting your subjects, you can create stunning images that convey a sense of movement and energy. So grab your camera, find a captivating scene, and get ready to explore the world of long exposure photography.
Researching and Scouting Locations
When it comes to planning a project or event, one of the most crucial steps is researching and scouting the perfect location. Whether it’s a wedding, a film shoot, or a business conference, finding the right setting can make all the difference in creating a memorable and successful experience. In this section, we will explore some effective strategies for researching and scouting locations that fit your specific needs.
Gathering Information
Before diving into the process of scouting locations, it’s essential to gather all the necessary information to make an informed decision. Here are some tips to help you get started:
- Define your requirements: Begin by clearly defining your requirements and expectations for the location. Consider factors such as capacity, amenities, accessibility, and aesthetic appeal.
- Conduct online research: Start your search by scouring the internet for potential locations. Websites like VenueFinder or Eventective can be invaluable resources for finding a wide range of venues.
- Seek recommendations: Reach out to colleagues, friends, or industry professionals who may have experience organizing similar events. Their recommendations can provide you with valuable insights and save you time in the research process.
Scouting Locations
Once you have gathered a list of potential locations, it’s time to hit the road and start scouting. This hands-on exploration will give you a better feel for the spaces and help you determine if they are the right fit. Here are some tips to make the most out of your scouting trips:
- Schedule visits: Contact the venues on your list and schedule visits to tour the spaces in person. This will give you an opportunity to assess the ambiance, layout, and functionality of each location.
- Ask the right questions: Come prepared with a list of questions to ask the venue representatives. Some key inquiries may include availability, pricing, restrictions, and any additional services they offer.
- Take notes and pictures: During your visits, take detailed notes and pictures to help you remember the key features of each location. This will come in handy when comparing and making a final decision.
Making the Decision
After conducting thorough research and scouting, it’s time to make a decision on the perfect location. Here are some factors to consider:
- Fit for purpose: Ensure that the selected location meets all your requirements and is suitable for the specific purpose of your event or project.
- Budget: Evaluate the cost of each location and determine if it aligns with your budget. Keep in mind additional expenses such as catering, decorations, and transportation when making your decision.
- Availability: Check the availability of the location on your desired date(s) and determine if it can accommodate your timeframe.
Remember, finding the right location can set the stage for a successful event or project. Take the time to research and scout different options, ask the right questions, and consider all the relevant factors. By following these steps, you’ll be well on your way to finding the perfect location that meets all your needs and exceeds your expectations.
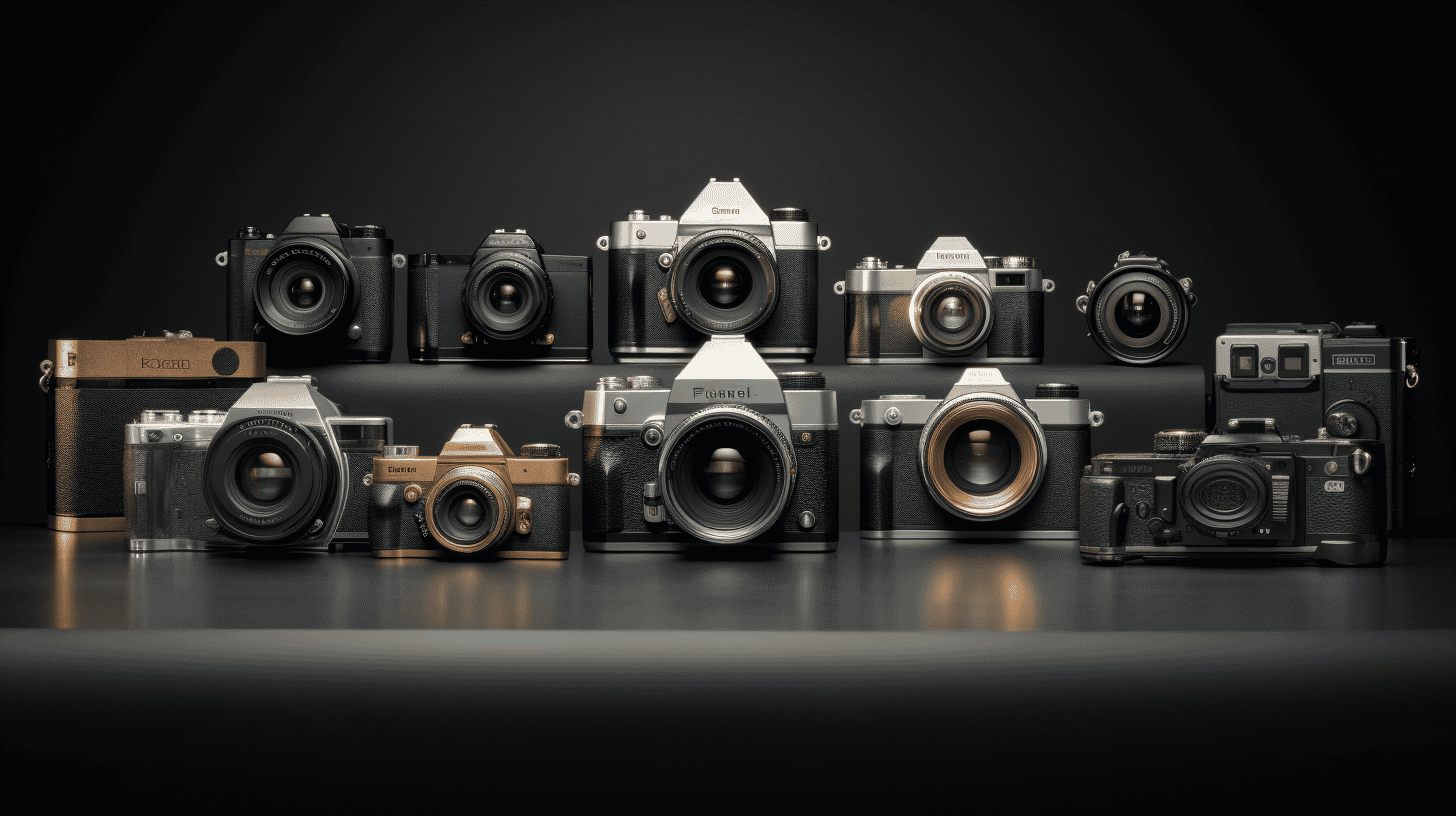
Investing in High-Quality Camera Equipment
Whether you’re a professional photographer or just a passionate hobbyist, investing in high-quality camera equipment is essential for capturing stunning photographs. With a plethora of options available on the market, it can be overwhelming to navigate through the sea of cameras, lenses, and accessories. However, making wise choices when it comes to camera gear can have a significant impact on the quality of your images. Here are a few reasons why investing in high-quality camera equipment is worth every penny:
- Superior Image Quality: One of the most significant advantages of high-quality camera gear is its ability to produce exceptional image quality. High-end cameras and lenses are built with advanced technologies, such as larger image sensors, higher resolution capabilities, and superior optics. These features result in sharper, more detailed images with better color reproduction, dynamic range, and low-light performance.
- Durability and Reliability: High-quality camera equipment is designed to withstand the rigors of professional use, ensuring that it remains reliable over time. Unlike cheaper alternatives, these cameras and lenses are built with robust construction materials that can handle rough handling, adverse weather conditions, and frequent usage. Investing in reliable gear means less downtime for repairs and replacements, allowing you to focus more on capturing the perfect shot.
- Versatility and Flexibility: High-quality camera systems offer a wider range of compatibility with various lenses, accessories, and lighting equipment. This versatility allows you to experiment with different focal lengths, shooting styles, and creative techniques. It also gives you the flexibility to adapt to different shooting scenarios, whether it’s capturing breathtaking landscapes, fast-paced sports events, or intimate portraits.
- Long-term Cost Savings: While high-quality camera gear may come with a higher price tag initially, it can be a wise long-term investment. Cheaper equipment tends to have a shorter lifespan and may require more frequent upgrades due to technological advancements. By investing in high-end gear, you’re likely to enjoy its superior performance and features for a more extended period, ultimately saving money in the long run.
- Professional Reputation: If you’re a professional photographer, your clients expect high-quality results. By investing in top-of-the-line camera equipment, you’re signaling your commitment to delivering exceptional work. Clients will perceive you as a well-equipped professional, which can lead to more opportunities, higher rates, and a stronger reputation in the industry.
When it comes to purchasing high-quality camera equipment, it’s essential to do thorough research, read reviews, and seek advice from professionals or experienced photographers. Determine your specific needs and priorities, whether it’s image quality, portability, or specific features, before making a purchasing decision. Remember, investing in high-quality camera gear is a long-term investment that can elevate your photography skills and help you capture those awe-inspiring moments with precision and clarity.
Essential Accessories for Landscape Photography
Landscape photography is not just about having a good camera and lens. It’s also about having the right accessories to enhance your photography experience and ensure that you capture stunning shots. In this article, we will explore three essential accessories that every landscape photographer should have in their kit: a sturdy tripod, a remote shutter, and a camera bag.
Sturdy Tripod
A sturdy tripod is an absolute must-have for landscape photography. Why is it so important? Here are a few reasons:
- Stability: A tripod provides the stability needed for sharp and clear landscape shots, especially in low-light conditions or when using slower shutter speeds. It eliminates camera shake caused by handholding the camera, resulting in sharper images.
- Composition: With a tripod, you can take your time to compose your shot and frame it exactly how you envision it. You can make small adjustments without the fear of losing the frame’s desired position.
- Long Exposures: Tripods are essential for capturing long exposure shots, where you keep the shutter open for an extended period. This technique allows for beautiful motion effects, such as silky smooth waterfalls or streaking clouds.
When choosing a tripod, consider the following factors:
- Sturdiness: Look for a tripod made with durable materials like aluminum or carbon fiber. It should be able to support the weight of your camera and lens, even in windy conditions.
- Height and Weight: Consider the height and weight of the tripod, as you’ll have to carry it around during your photography outings. Choose a tripod that is lightweight, compact, and adjustable to your desired height.
- Ball Head: Ensure that the tripod has a sturdy and versatile ball head, allowing you to adjust your camera’s position easily.
Remote Shutter
A remote shutter is another essential accessory for landscape photography. It allows you to trigger the camera without physically touching it, minimizing the risk of camera shake. Here’s why a remote shutter is beneficial:
- Long Exposures: Just like a tripod, a remote shutter helps you capture long exposure shots without introducing any vibrations caused by pressing the camera’s shutter button.
- Self-Portraits: If you’re planning to include yourself in the landscape shots, a remote shutter enables you to trigger the camera from a distance. You can set up the composition, get into place, and take the shot without running back and forth.
- Bulb Mode: Some cameras require a remote shutter release to access the bulb mode, which allows you to keep the shutter open for an extended period.
When choosing a remote shutter, consider the compatibility with your camera model and the range it offers. Some remote shutters also come with additional features like interval shooting, which can be handy for time-lapse photography.
Camera Bag
A camera bag might not be the most glamorous accessory, but it is undoubtedly essential for protecting your gear and keeping it organized. Here’s why you should invest in a good camera bag:
- Protection: A camera bag provides cushioning and padding to protect your camera, lenses, and other accessories from bumps, shocks, and weather elements.
- Organization: A well-designed camera bag keeps your gear organized and easily accessible. It often has compartments and dividers, allowing you to arrange your equipment efficiently.
- Convenience: A camera bag makes it easy to carry all your gear, including your tripod, remote shutter, lenses, filters, and other accessories, in one place. It often has comfortable straps or handles for convenient transportation.
When choosing a camera bag, consider the size to accommodate your gear and any additional items you may want to carry, like extra batteries, memory cards, lens filters, or even a water bottle. Look for durability, comfort, and a design that suits your style and preferences.
In conclusion, investing in these essential accessories— a sturdy tripod, a remote shutter, and a camera bag—can greatly enhance your landscape photography experience. They provide stability, convenience, and protection for capturing stunning shots and elevating your skills as a landscape photographer. So, pack your gear and head out into nature, confident that you have the necessary tools to capture breathtaking landscapes.
Utilizing the Rule of Thirds for Composition
When it comes to creating visually appealing images, composition plays a crucial role. One popular technique that photographers and artists use to add balance and interest to their work is the “Rule of Thirds.” This rule involves dividing your frame or canvas into a 3×3 grid using two horizontal and two vertical lines, resulting in nine equally-sized boxes.
The Basics of the Rule of Thirds
Using the Rule of Thirds, the idea is to align your subject or points of interest along these gridlines or at the intersections. This technique helps create a sense of balance and draws the viewer’s eye to specific areas of the image. Instead of placing your subject dead center, the Rule of Thirds encourages you to consider alternate placements that can enhance your composition.
Here’s a quick breakdown of how the Rule of Thirds works:
- Gridlines: Imagine two equally spaced horizontal lines and two equally spaced vertical lines overlaying your image or frame, creating a grid of nine rectangles.
- Points of Interest: The four points where the lines intersect are known as “power points” or “points of interest.” Placing your subject or a specific element of interest on one of these points can make your composition more visually appealing.
- Subject Placement: Instead of having your subject in the center of the frame, try placing it along one of the gridlines or at an intersection. This can create a more dynamic composition and add a sense of movement or depth.
- Balancing Elements: As you compose your image, consider how other elements within the frame can complement your subject. By placing these elements along the other gridlines or intersections, you can achieve better balance and harmony in your composition.
Examples of the Rule of Thirds in Action
To illustrate the effectiveness of the Rule of Thirds, let’s take a look at a few examples:
- Portrait Photography: Instead of placing the subject’s face at the center of the frame, try positioning their eyes along the top horizontal line. This technique not only adds balance but also draws attention to the subject’s gaze. The mouth can be placed along the bottom horizontal line, creating a pleasing composition.
- Landscape Photography: When capturing a stunning landscape, you can use the Rule of Thirds to carefully position the horizon. For example, if the sky is more interesting than the foreground, position the horizon along the bottom horizontal line to give more emphasis to the captivating skies.
- Still Life Painting: In a still-life painting, you can arrange objects along the gridlines to create a harmonious composition. Placing a vase of flowers along one vertical line and a bowl of fruit along another can create an interesting and dynamic balance.
Remember, the Rule of Thirds is a guideline, not a strict rule. Feel free to experiment and adapt it to suit your creative vision. The goal is to use this technique to enhance your composition and create visually captivating images or artwork.
By incorporating the Rule of Thirds into your composition, you can elevate your photographs or artwork to a whole new level. So, the next time you frame a shot or start a new painting, don’t forget to utilize this simple yet powerful technique. Happy creating!
Capturing Close-up Shots with a Macro Lens
In the world of photography, capturing close-up shots can bring a whole new dimension to your images. Whether you’re photographing tiny details in nature, intricate textures, or small objects, a macro lens is a powerful tool that can help you achieve stunning results.
Unleashing the Power of a Macro Lens
A macro lens is specifically designed to capture extreme close-up shots with exceptional clarity and detail. It allows you to focus on subjects that are incredibly close to the camera, revealing intricate features that are often invisible to the naked eye. Here are a few key advantages of using a macro lens:
- Magnification: One of the primary features of a macro lens is its ability to magnify small subjects. This enables you to capture the minute details and textures that might go unnoticed otherwise.
- Sharpness: Macro lenses are engineered for close-up photography, which means they are optimized to deliver exceptional sharpness in your images. This is crucial when you’re capturing intricate details, as it ensures every small element is clear and well-defined.
- Depth of Field: Macro lenses tend to have a shallow depth of field, which means that the subject is sharply focused while the background appears beautifully blurred. This helps draw attention to the main subject and create a visually pleasing separation between the subject and the background.
- Versatility: While macro lenses are primarily used for close-up photography, they can also be great for other types of photography. Many macro lenses have a versatile focal length, allowing you to use them for portraits, still life, and even some landscape shots.
Tips for Capturing Amazing Close-up Shots
Now that you understand the power and potential of a macro lens, here are some useful tips to help you make the most out of your macro photography:
- Focus on Composition: Just like any other type of photography, composition is key. Pay attention to the arrangement of your subject, the background, and the overall balance of the shot.
- Use a Tripod: Macro photography requires precision and stability. Using a tripod will help eliminate camera shake and ensure sharp, blur-free images.
- Experiment with Lighting: Lighting can make or break a macro shot. Consider using natural light, diffusers, reflectors, or even artificial lighting setups to enhance your subject and create appealing shadows and highlights.
- Explore Different Angles: Don’t limit yourself to shooting straight-on. Experiment with different angles and perspectives to add depth and visual interest to your images.
- Pay Attention to Depth of Field: Since macro lenses have a shallow depth of field, it’s crucial to choose the right focus point and aperture setting. Consider using a smaller aperture to increase the depth of field and ensure more of your subject is in focus.
- Get Close, But Not Too Close: It’s tempting to get as close to your subject as possible, but remember that macro lenses have a minimum focusing distance. Getting too close can result in your subject being out of focus. Experiment and find the sweet spot that allows you to capture the desired level of detail.
By following these tips and unleashing the power of a macro lens, you’ll be able to capture breathtaking close-up shots that showcase the beauty of the small and often overlooked details in our world. So grab your macro lens and start exploring the fascinating world of macro photography!
Want to learn more about different types of lenses? Check out our article on Understanding Camera Lenses for a comprehensive guide.
Enhancing Photos with a Polarizing Filter
Have you ever looked at a stunning landscape photograph and wondered how the colors were so vibrant, the skies so clear, and the reflections so crisp? Chances are, the photographer used a polarizing filter to enhance and perfect the image. In this article, we’ll explore how a polarizing filter can take your photos to the next level, capturing the true beauty of the scene before you.
What is a Polarizing Filter?
A polarizing filter is a powerful tool that photographers use to control and manipulate light. It works by selectively blocking certain polarized light waves, reducing glare and reflections, and enhancing colors and contrast. This indispensable piece of gear is commonly used in landscape, architecture, and nature photography to capture breathtaking images.
Benefits of Using a Polarizing Filter
Using a polarizing filter can greatly enhance the quality of your images and help you achieve the desired effect. Here are some key benefits of utilizing this versatile tool:
- Reducing Glare and Reflections: Reflections from shiny surfaces such as water, glass, or metal can often ruin a photograph. A polarizing filter helps to minimize these unwanted reflections, allowing you to capture clear, unobstructed views.
- Enhancing Colors and Contrast: By blocking certain polarized light waves, a polarizing filter enhances the saturation and richness of colors, making them pop. It also increases the contrast between different elements of the scene, resulting in a more visually stunning image.
- Increasing Clarity and Sharpness: The filter helps to eliminate atmospheric haze and smog, giving your photos a crisp, clear look. It also reduces the scattering of light, resulting in sharper and more detailed images.
- Bringing Out the Skies: One of the most notable effects of a polarizing filter is its ability to darken the skies, making clouds appear more dramatic and vibrant. This can add depth and impact to your landscape photographs, creating a captivating visual experience.
Tips for Using a Polarizing Filter
To make the most out of your polarizing filter, here are some helpful tips to keep in mind:
- Position the Filter Correctly: Polarizing filters work best when the sun is at a 90-degree angle to the subject. So, rotate the filter while looking through the viewfinder or the LCD screen until you achieve the desired effect.
- Use a Tripod: Since polarizing filters tend to reduce the amount of light that enters the camera, using a tripod can help stabilize your shots, especially in low-light situations.
- Experiment with Different Angles: Depending on the angle at which the filter is positioned, the effect of polarization varies. Don’t be afraid to experiment and see how the different angles affect the overall look of your image.
Remember, a polarizing filter is a valuable tool that can greatly enhance your photography skills. Whether you’re capturing landscapes, cityscapes, or vibrant portraits, this filter can help you achieve stunning, magazine-worthy images that truly stand out. So, grab your camera, attach that polarizing filter, and watch as your photos come to life with vibrant colors and captivating clarity.
Travel-Friendly and Durable Gear Setup
When it comes to landscape photography, having a travel-friendly and durable gear setup is essential. No matter where your photography adventures take you, having equipment that can withstand the rigors of travel and protect your gear is crucial. Here are a few tips and tools to consider for a travel-friendly and durable gear setup:
- Camera Bag: Investing in a high-quality, well-padded camera bag is a must. Look for a bag that offers ample space for your camera body, lenses, filters, and other accessories. Opt for a bag with sturdy and adjustable straps for comfortable carrying, and make sure it has additional compartments to keep everything organized and protected.
- Weather-Resistant Camera: When shooting landscapes, you might encounter unpredictable weather conditions. Having a weather-sealed camera body ensures that your equipment is protected from dust, moisture, and even light rain. It’s definitely worth considering when choosing your gear.
- Rugged Tripod: A sturdy and durable tripod is essential to keep your camera stable and secure during long exposures or when shooting in low-light conditions. Look for a tripod that is lightweight yet sturdy enough to withstand wind and uneven terrain. Carbon fiber tripods are a great option as they offer a good balance between weight and durability.
- Remote Shutter: A remote shutter allows you to trigger your camera without physically touching it, which helps minimize camera shake and ensures sharper images. Whether it’s a wireless remote or a cable release, having this accessory in your gear setup will be beneficial, especially when shooting long exposures or self-portraits.
Having a travel-friendly and durable gear setup not only ensures the safety of your equipment but also makes your photography journey more convenient and enjoyable. With the right equipment, you can focus on capturing stunning landscapes without worrying about the well-being of your gear.
Note: If you’re interested in learning more about photography equipment and techniques, Wimarys.com features helpful articles and reviews to guide you on your photography journey.
Frequently Asked Questions
- What are some essential tips for landscape photography success?
Some essential tips for landscape photography success include: 1. Planning your shoot, 2. Capturing the right light, 3. Using a tripod for stability, 4. Composing your shot effectively, and 5. Editing your photos to enhance their impact.
- What are some essential tools for landscape photography?
Some essential tools for landscape photography include: 1. A sturdy tripod, 2. A wide-angle lens, 3. Neutral density (ND) filters, 4. Graduated neutral density (GND) filters, and 5. A remote shutter release.
- How can I improve my composition in landscape photography?
To improve your composition in landscape photography, you can: 1. Use the rule of thirds, 2. Look for leading lines, 3. Create depth with foreground elements, 4. Pay attention to the balance of your elements, and 5. Experiment with different perspectives.
- What are the benefits of using ND filters in landscape photography?
Using ND filters in landscape photography allows you to: 1. Control exposure in bright light conditions, 2. Achieve long exposure effects such as blurring water or clouds, 3. Create dynamic and balanced exposures, and 4. Enhance color saturation and contrast.
- Is post-processing important in landscape photography?
Yes, post-processing plays a crucial role in landscape photography. It allows you to enhance colors, adjust exposure and contrast, remove distractions, and bring out the details and textures in your photos. However, it’s important to maintain a natural and realistic look during editing.


0 Comments