
Athentech Perfectly Clear 2 for Lightroom and Photoshop review
Introduction
Perfectly Clear is a photo adjust and portrait retouching plug-in for both Adobe Lightroom and Photoshop. You can more-or-less divide the functionality of this plug-in into two sections: overall image enhancement and portrait beautification.The underlying technology for image enhancement tries to emulate the non-linear response of the human eye in order to achieve realistic and more balanced images from digital cameras. Their Beautification processes automatically find faces in your imagery and applies part-specific processes depending on age and gender.
Update: If you want the latest promo codes and check what is new in version 3, read my review here.
Athentech Perfectly Clear 2 Presets Overview
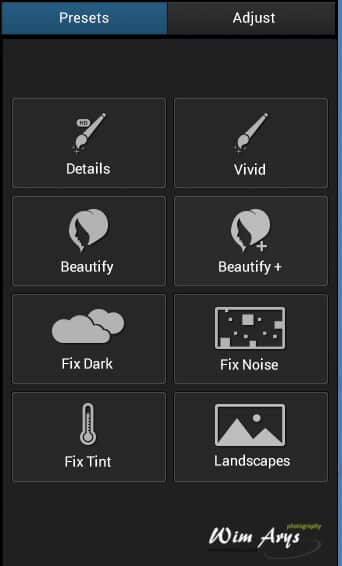
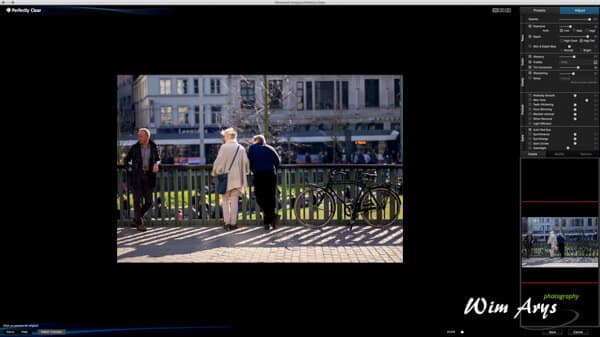
When launching this plug-in from either Lightroom or Photoshop, you’ll find a basic interface with eight basic presets. These presets are starting points, and you can further tweak/add modules from other presets in the Adjust panel.
Exposure Correction
The human eye dynamically adjusts for exposure, whereas your camera can only use a single aperture. It’s not possible for a single aperture to open and close at a single opening and properly expose everything in a photo. As a compromise, your camera calculates an overall exposure between the brightest light and darkest tones available. Perfectly Clears’ dynamic adjustment algorithm makes adjustments pixel by pixel to mimic how your eyes scan a scene to get everything in your image exposed correctly.
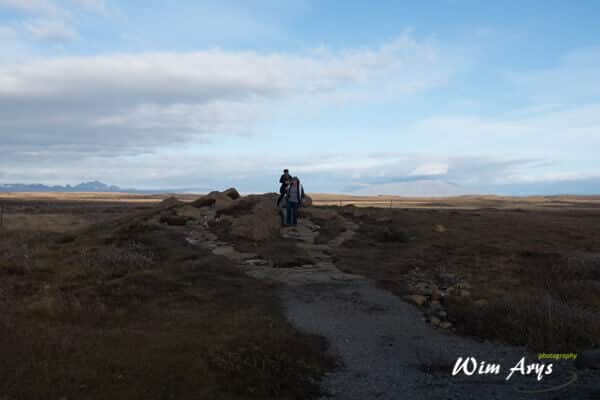
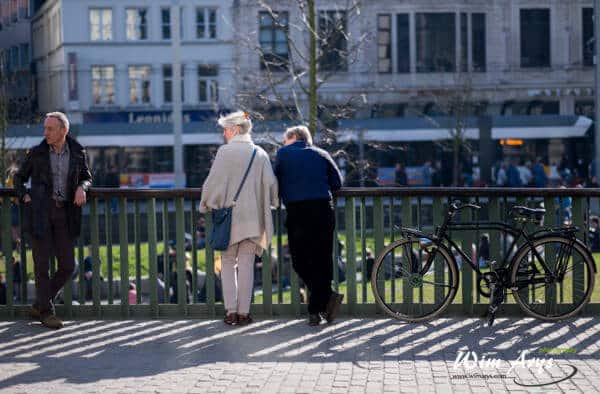
underexposed landscape
You can tweak the image according to your liking by adjusting the slider. Moving it to the right will increase the exposure in the darker areas much more than in the brighter areas. If overall you’d like a more brilliant image you can change the Auto Exposure to ‘High’, or Low if you’re into more Low Key Photography.
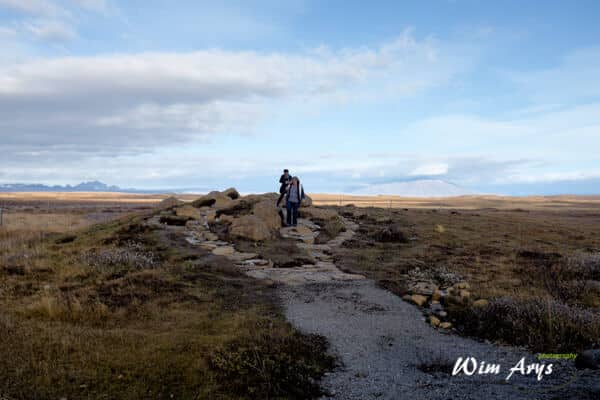
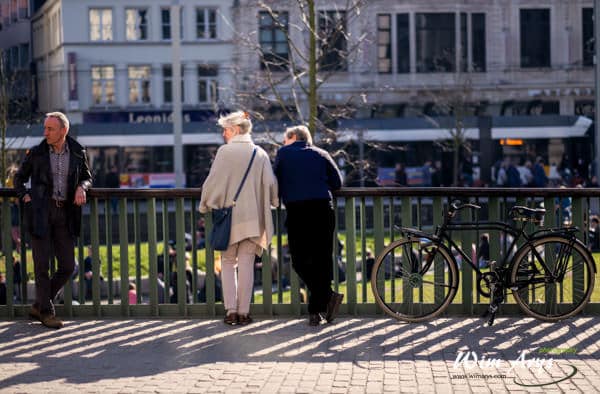
landscape with exposure and vibrancy correction
Vibrancy Correction
Some cameras will render washed out and faded images. This is due to the in-camera illuminance enhancement you’ll often seen in JPEG files. This process adds white to a photo in order to make it more bright. This is very different in the way our eyes see as our eyes are always moving around and changing iris size during the viewing process. Traditional software brightness adjustments will look for the darkest pixel in the foto and change these RGB values to zero, making for an unrealistic colour reproduction.
Perfectly Clear Models the eyes’ logarithmic response to light on a pixel-by-pixel basis. Hence making for a realistic reproduction of your captured scenes.
Tint Correction
scene with a blue tint
No matter what camera you prefer, you’ll always get some images with an abnormal tint. Using a grey reference chart improves white balance dramatically but is not always that practical. Auto White balance looks at the brightest object in your image and assumes this should be white, but this is often not the case in reality. Another reason is that the camera is exposed to multiple light sources simultaneously. As there is no multi white balance available, the camera has to pick one of these light sources as white.
scene with perfectly clear tint adjustment
Tint Corrections’ algorithm does not rely on this brightest point equal white technique. It automatically detects any tinting issues and corrects these. It is possible to tweak the amount of auto correction.
Beautify Correction

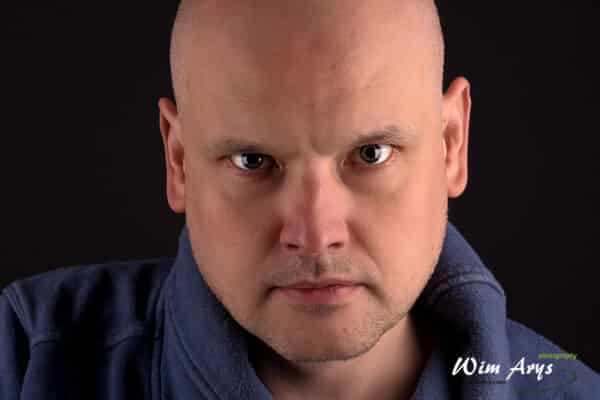
unedited studio portrait
Beautify uses sophisticated algorithms and advanced face detection to identify age, gender and key facial features including skin tone and texture. PC will smartly apply ten beautify corrections automatically with often astonishing results. Four of the presets, Vivid, Details Beautify and Beautify Plus have automatic face detection built-in. If your image does not have any faces in it, no beautify setting will be applied.
portrait with beautify preset
Beautify offers a one click mild beautify option with some skin smoothing and eye enhancement. Beautify plus is more aggressive with added skin smoothing with whiter teeth, a slight amount of facial slimming, larger eyes and less shine on the face.

portrait with beautify plus preset
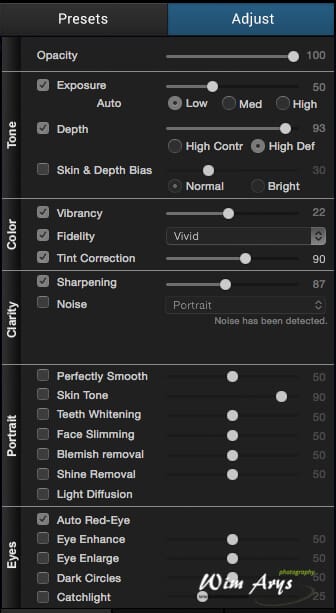
All these presets are adjustable via the Adjust Panel. We’ll go over all the available corrections. You’ll find all flexible corrections in the ‘Portrait’ and ‘Eyes’ sections.
Portrait Adjustment section
Perfectly Smooth
The Slider changes how much skin smoothing is applied. Lower values will retain more skin texture, higher settings will produce smoother and flawless skin
Skin Tone
Modern cameras capture some of the infrared portions of the colour spectra, making flesh tones appear redder. This is especially the case with flash photography. This slider will reduce the red for a more natural skin tone. It targets specifically the infrared spectrum that was captured by your camera
Teeth whitening
Automatically detects when a significant portion of the teeth is visible. Teeth whitening in post production is a tricky business and can often look unnatural. Start with small values and gradually increase the slider until you’ve found a good balance between skin and teeth.
Face Slimming
Portrait photographers know that capturing a three-dimensional person in 2D Lenses can sometimes distort faces and make them look wider than people look in person. Perfectly clear seems to work mostly on the jawline. Some slight face slimming can also make your subject look younger.
Blemish removal
Will target blemishes such as pimples and other face imperfections. Moving the slider to the right removes more stains and makes the skin appear smoother.
Shine Removal
Removes shine you sometimes get with flash photography or subjects without makeup. Brings back more of the natural skin tone in the shine areas. Make sure to leave some highlights to maintain a natural skin appearance.
Light Diffusion
Simulates the use of a flash diffuser for a slightly softer and warmer look.
Eyes Adjustment Section
Auto Red-Eye
Will remove Red-Eye automatically. It’s only applied when the software detects this in your subject or subjects.
Eye Enhance
Will lighten the eyes and bring out the colour of the eyes. It also applies area specific sharpening. You’ll notice the eyes become brighter and more alive when moving the slider to the right.
Eye Enlarge
People have the tendency to squint or slightly close their eyes when smiling. This slider can be used to open slightly or enlarge your subject’s eyes. Use sparingly.
Dark Circles
Removes the dark circles under the eyes and removes them according to your preferences. When you have an image with multiple faces, Perfectly Clear will analyse these faces according to gender and age, and will apply the best suitable correction per face.
Catchlight
Having a catchlight in the subjects eyes can often make a portrait look alive. It simulates the reflection of a flash in the eyes like what you’d get in a studio environment.
Conclusion
Although not a one-stop, fix-it-all plug-in, Perfectly Clear version 2 offers some unique and fast processing capabilities. You can use it as a plug-in straight from Lightroom and Photoshop and will enhance pretty much any image you run through it. The presets offer a good starting point for any imagery, and the adjust panel makes it easy for you to change the desired parameters intuitively.
It’s also a breeze to make new presets and apply this to a batch of images from Lightroom; this functionality will appeal to many wedding or portrait photographers. Their unique face and facial contours detection work remarkably well, without the need to ‘help’ the software find face parameters. I also like the fact that the face retouching can be set to quite mild corrections. Yes, there are other retouching plug-ins out there like Portrait Professional, but they often render fake looking results, and I usually resort to manual brushing and retouching techniques in Photoshop before. Another advantage is that Perfectly Clear 2 does not apply any face enhancements if none are detected, so it’s safe to leave these on if your processing different types of imagery in one batch.
Their adaptive exposure, vibrancy and tint correcting algorithms can give spectacular results with only a few clicks. I know of no other software that can generate good looking results this fast and hassle-free.
Price and Availability
The plug-ins for either Lightroom or Photoshop are available for $149 each or bundled for $199. You can download a demo or purchase from their website. You can use the discount code ‘wimarysphotography’ for a 10% discount at checkout.
Wim – Thanks for an insightful review. I’ve used the trial download of Perfectly Clear 2.0 for about a week and today purchased it. For my work, it’s outstanding, will save hours of twiddling sliders in Lightroom.
Not entirely sure I’m using noise reduction to its full capacity in Perfectly Clear, but so far I find the NR in PhotoNinja to be infinitely superior. I can shoot faces in “darkness” at ISO 12,800 and correct them for really nice, grain-free smoothness with good gradation in PhotoNinja – this goes far beyond what Perfectly Clear can do. But for photos up to maybe ISO 5000 under all kinds of conditions (outdoor full light, indoors with decent lighting) Perfectly Clear is amazing. People are telling me the results are remarkable – with unprecedented clarity, depth, and that sense of “aliveness.”
What I would really like to do is devise a workflow for using Perfectly Clear and Noise Ninja together, one after the other, as needed, on the same RAW files. At this point, I’m so new to both programs that I’m kind of in the dark. Can you give us some insights about that – for example, how we can run a batch of photos through Perfectly Clear, then adjust the noise with PhotoNinja? It would really, really help. Thanks.
Hi George, the best way for me is to work from lightroom. Use LR as your image database, first batch export to photo ninja (i agree, best raw converter for sharpening with NR). Then export back to LR as TIFF, and batch export to Perfectly Clear for final touch-ups.
Thanks Wim. That’s very helpful. – gb
Thanks for your reply George. It’s quite a useful plugin, and I’m using it daily now to add depth to images, remove colour casts and touch-up faces.
Pretty pricey.
Hugh, wait until Black Friday…