
Canon EOS R6 advanced manual
Introduction
The Canon EOS R6 is a full frame system camera with 8-stop image stabilization and 4K 60p video. This camera ensures that you can capture every moment and give an extra dimension to your visual story. This is due to the 20 megapixel CMOS sensor, internal stabilization system and extensive video options.
The camera offers the possibility to shoot videos in 4K resolution with 60fps. With no less than 1053 available AF areas phase detection points. The impressive ISO range of 100-102. 400 (expandable to 50-204. 800) makes the EOS R6 excellent for low light situations. It also has an electronic shutter, with which you shoot images up to 20fps, and a mechanical shutter with which you shoot images in 12fps. With the high-quality 0.5-inch OLED color electronic viewfinder, you keep a close eye on the subject and it reproduces even the smallest details.
Firstly, you might have landed here for another Canon mirrorless camera. Even though the menus are similar, it’s best to use my specific guide per camera.
You can find other manuals here:
If you’re new to digital photography or Canon mirrorless cameras, I’m sure this guide full of tips and trips will make you more familiar with the various settings, features and functionalities of the Canon R6. Now it’s time to turn your camera on and press the Menu button. You’ll be able to follow along page by page with this guide. Please note that in order to see all the pages, set the camera’s mode to Av, Tv or M as some other modes provide only a small subset of available menu options.
Canon EOS R6 Menu system
The Shoot Menu (Red Camera Icon)
Page Shoot 1 (SHOOT1)
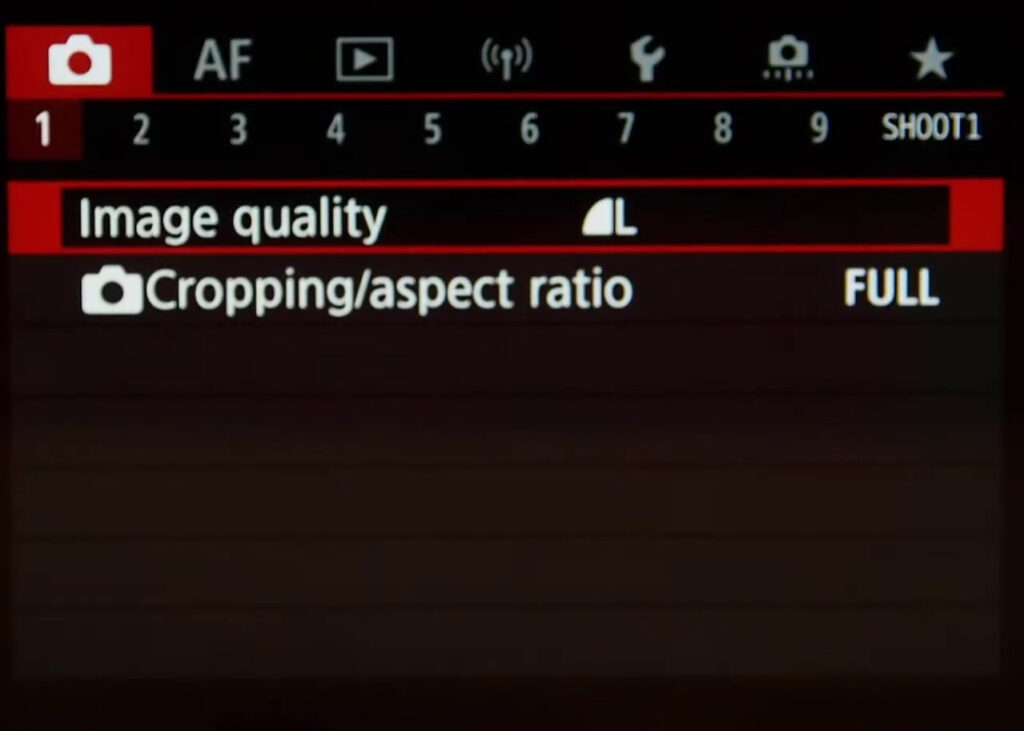
Image quality
You primarily need to decide whether to shoot RAW or JPEG. Raw records all the data from the sensor, Jpeg is basically a much smaller file that has all kinds of information already baked in. Most serious photographers shoot RAW, as this gives you the most flexible file to work with in an application like Adobe Lightroom.
You’ll be able to recover more colour in the highlights of your image, for instance, and pull more detail out of the shadows with a Raw file than with a Jpeg. The only downside are the larger files and the fact that you must develop them later on. RAW file average size of 20.8 MB an JPEG file average size of 10 MB with the EOS R6.
You’ll see that there is also a cRAW option. This is a format that uses lossy compression to reduce file sizes by roughly 40%. This is fine to use, the deterioration is negligible.
If you shoot Jpeg, you can choose between Large (7Mb), Medium (4Mb) or Small (2.8Mb), each with a Fine or Normal setting. I would advise Large and Fine.
Cropping/aspect ratio
This describes how square (1:1) or wide (16:9) your image is. It’s expressed as a figure, like this: width:height (width always comes first). The aspect ratio of a Full Frame sensor is 3:2, and you should use this if you want to use the full surface of the sensor. Cropping can also be done later.
- Full (3:2): the native sensor dimension of the full frame mirrorless Canon EOS R6.
- 1.6x: this is wat is called crop mode, and is used when you use EF-S lenses from the APS-C cameras.
- 1:1: a basic square setting.
- 4:3: native resolution of a micro-four-thirds camera .
- 16:9: for a wider perspective.
Page Shoot 2 (SHOOT2)
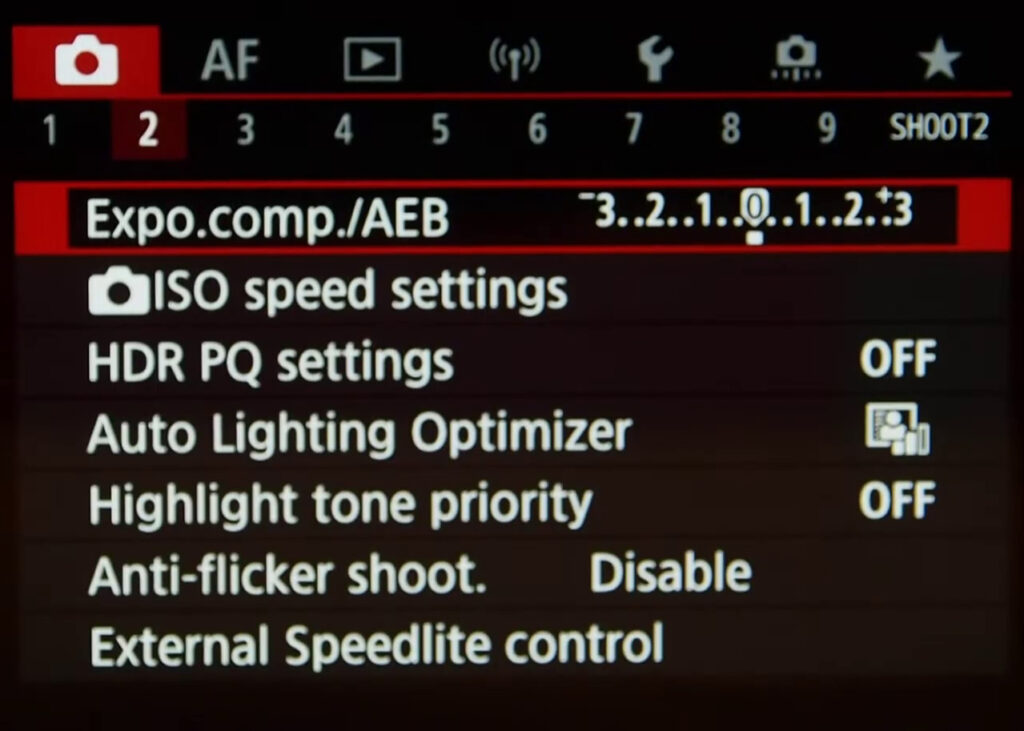
Expo.comp./AEB: Exposure Compensation and Auto Exposure Bracketing.
Exposure compensation: If you believe that your camera is over- or underexposing your images, or you want to do this for creative reasons, you can change the level of exposure by a scale of plus or minus 3 EV.
Auto Exposure Bracketing.: Using the exposure compensation setting, you can capture images at different exposure levels, and then select the optimal image later with a +/- 5 EV scale. These two functions can the be used in combination.
ISO speed settings for photos
ISO speed: can either be set to Automatic or determine an appropriate value for yourself. Say for landscapes when using a tripod this is generally set to what is called base ISO 100. ISO 100 would give you the optimal quality for this sensor, but for many other types of photography you’ll need a higher ISO in order to have a fast enough shutter speed and hence no movement in your images. Leave this on auto for most uses.
ISO Auto: This is used to set the max for Auto, from 400 to the top value of 40000. When raising the ISO value, you are effectively raising the sensitivity of the sensor by boosting the output. This leads to more and more noise with every doubling of power. A Maximum of 12800 is as far as I would go with the Canon EOS R6.
HDR PQ Settings
PQ in HDR PQ refers to the gamma curve of the input signal for displaying HDR images. HDR PQ settings enable the camera to produce HDR images conforming to the PQ specification defined in ITU-R BT.2100 and SMPTE ST.2084 (with actual display depending on monitor performance).
- Shots are captured as HEIF or RAW images.
- PQ stands for Perceptual Quantization.
Auto Lighting Optimizer
Auto-corrects image brightness and contrast. This only affects Jpeg and not your Raw files, but it can be handy for the Jpeg shooters out there. Have a go and see if you like the effect set to low or standard.
Highlight tone priority
Improves gradation in highlights to avoid over exposure in bright subjects. What the camera does in highlight tone priority is underexpose the image to avoid clipping highlights, then boost the shadows up to give the appearance of a wider dynamic range in the jpegs. It does the same thing you might do when processing raw files, except it just applies it to jpegs. Another great feature to experiment with. Either Off or enabled.
Anti Flicker Shoot.
With anti-flicker shooting, the camera detects the frequency of the light source’s blinking and takes the picture when the flicker’s effect on the exposure or color is detectable.
If you shoot an image with a fast shutter speed under a light source such as fluorescent light, the blinking of the light source causes flicker and the image may be vertically unevenly exposed. If continuous shooting is used under these conditions, uneven exposures or colors across the images may result. With anti-flicker shooting, the camera detects the frequency of the light source’s blinking and takes the picture when the flicker’s effect on the exposure or color is minimal.
External speedlite control: Using this menu item, you can adjust flash power. The Flash Control option also enables you to customizeas well as control an external flash head.
- Flash firing: Normally, this option is set to Enable. If you want to disable the flash, you can choose Disable instead.
- E-TTL II meter: This option enables you to switch from the default flash metering approach, called Evaluative. In this mode, the camera exposes the background using ambient light when possible and then sets the flash power to serve as fill light on the subject. If you instead select the Average option, the flash is used as the primary light source, meaning that the flash power is set to expose the entire scene without relying on ambient light. Typically, this results in a more powerful (and possibly harsh) flash lighting and dark backgrounds.
- Slow synchro: Slow Sync Flash is a function found on many cameras that tells your camera to shoot with both a longer shutter speed as well as firing the flash. This means you get the best of both worlds above and can both get a relatively sharp shot of your main subject as well as get some ambient light from the background and foreground.
- Safety FE: The camera automatically changes the shutter speed or aperture value when the flash fires to avoid overexposing and blowing out the highlights in the scene.
- Flash func. Setting and External flash C.Fn setting: these last 2 options on the Flash Control list relate to how to control external flashes from the EOS R6 itself. This depends very much on what flash you’re using, and you should consult the flash manual in order to set this up.
Page Shoot 3 (SHOOT3)
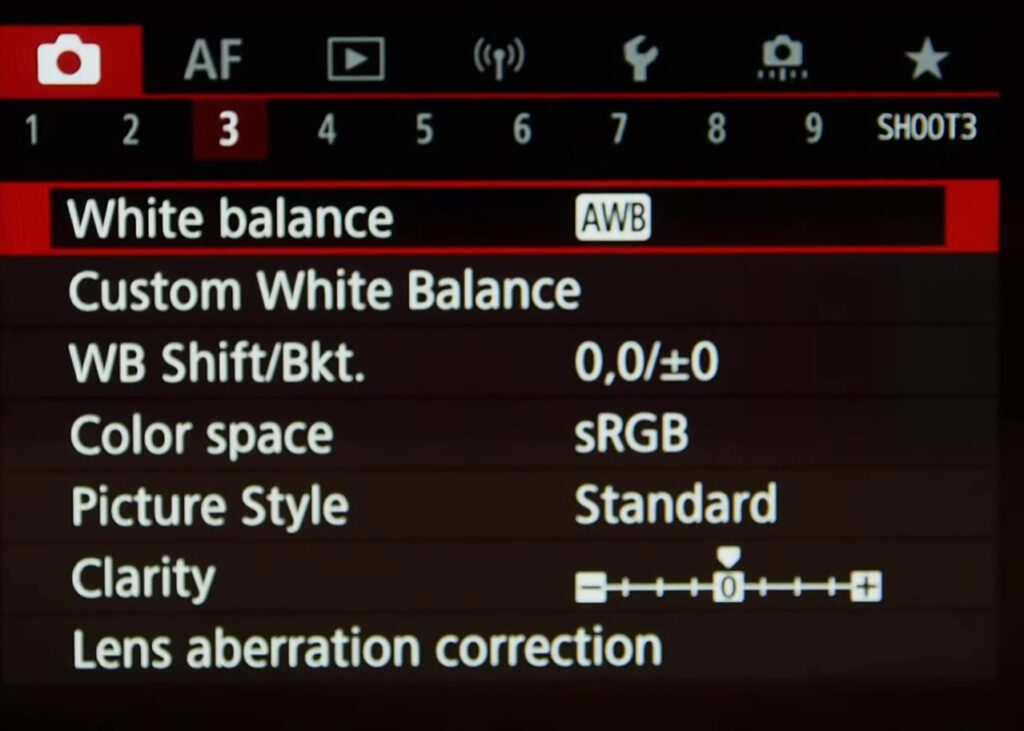
White balance
Normally AWB (auto white balance) will do just fine but you also have the option to change this to AWB W (auto white balance with white priority This setting is amazing for indoor lighting), Daylight, Shade, Cloudy, Tungsten, White fluorescent, Flash, Custom and Colour Temperature adjustable.
Custom white balance
This setting brings up compatible images to use. Set the white balance under the same light source that will illuminate your shot.
WB Shift/Bkt.
White balance shift is a setting on the EOS R6 camera that allows a photographer to bias the colours in images in either blue, amber, magenta or green directions. This colour shift can be used to add or remove colour shifts that may occur when shooting in mixed lighting conditions. Typically think flash and daylight, flash and indoor lights, street lights and daylight and so on. White balance can be shifted from -9 to +9 in both blue / amber and green / magenta directions, or combinations of blue/amber and green/magenta shifts. The blue/amber shift is equal to five mired for each step.
Color space
sRGB is what is used online, and Adobe RGB has a more extended colour profile that mimics the human eye. You might think that the latter is preferable, but unless you print a lot of photos with professional equipment, Adobe RGB is more hassle than its worth since you’ll need to proof every picture you want to use online and convert it to sRGB.
Picture Style
Picture style allows you to take photos in the color tones that Canon deems most suitable to each subject . These include normal presets like Standard, Portrait and Landscape but also advanced scenarios like Monochrome, Fine Detail, Neutral and Faithful.
All these picture styles can be individually adjusted to taste with adjustments like Sharpness, Fine detail, Threshold, Contrast, Saturation, Hue. These adjustments can be saved in 3 user defined slots and even transferred to other EOS cameras.
Auto, Standard, Portait, Landscape, Fine Detail, Neutral, Faithful, Monochrome, User Def. 1, 2 and 3.
Set to Neutral with Strength = 1 (Note: the low contrast “Neutral” picture style provides a histogram on the back of the camera that most-accurately shows me blown highlights and blocked shadows on the camera LCD. I usually change the Picture Style to “Standard” in DPP after capture.)
Clarity
You can adjust image clarity, as determined by the contrast of image edges. Set toward the negative end to make images look softer or toward the positive end for a sharper appearance.
Lens aberration correction: digital technology provides the ability to adjust images in-camera. One area this can be useful is in correcting for optical performance. By mapping the performance of each camera and lens at a variety of focal lengths, focus distances and apertures, it is possible to correct for these irregularities and bring the lens performance closer to ‘perfection’. These corrections are only available for photos captured in the JPEG file format. There is no reason to turn this off, except if you’re noticing a slow down when shooting in burst mode, then this might be the reason.
- Peripheral illumination correction: This is called lens light fall-off or drop in the corners or vignetting.
- Distortion correction: If you’re shooting with a wide-angle lens you may have noticed that at the wide end you will most likely find some distortion. This corrects distortion for any lens in the lens database.
- Digital Lens Optimizer: Performs high- level correction for lens aberration in-camera
- Chromatic aberr corr: Automatically remove color fringing due to Chromatic aberration.
- Diffraction correction: a camera and lens specific correction that uses a profile of the lens used to ameliorate the effects of diffraction caused by small apertures (usually f/11 and beyond where there will be decrease in sharpness).
All options “OFF” (though Chromatic Aberration correction is a good option to leave enabled for most).
Page Shoot 4 (SHOOT4)
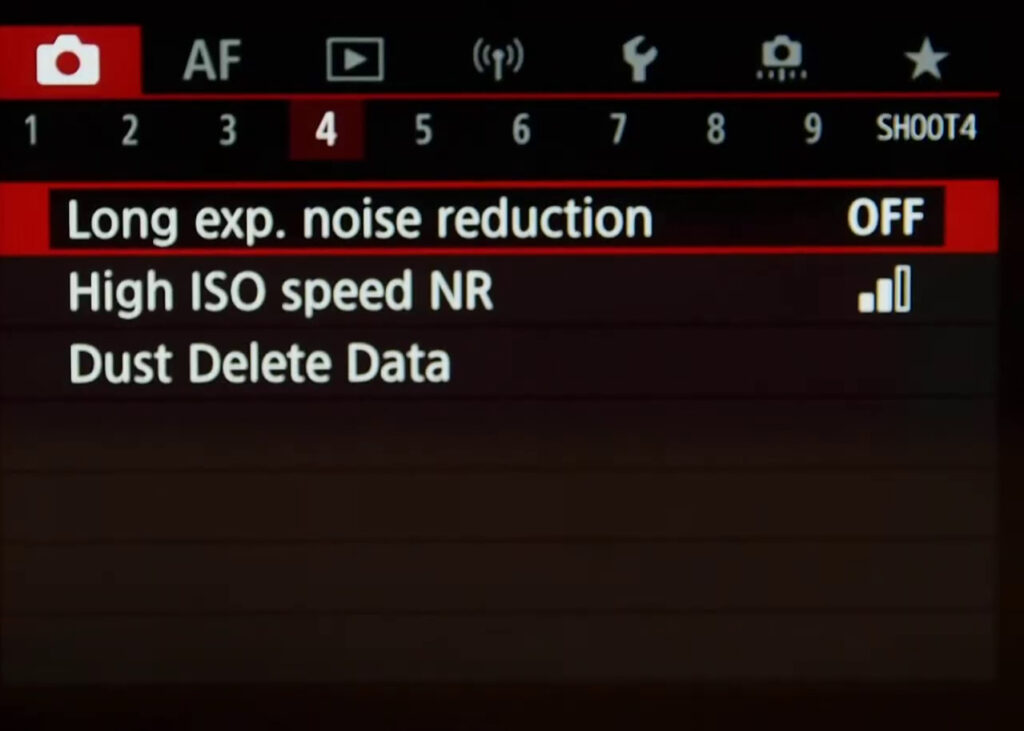
Long exp. noise reduction
Turn On noise reduction for exposures of 1 second or longer with the Canon EOS R6. This function takes a second black or dark frame (with the shutter closed) with the identical shutter time of your first photo. The noise in this frame is then subtracted from the original photo. This method is the most reliable type of noise reduction, as the noise is measured specifically at that place and time with the same level of humidity and temperature. All factors that can contribute to noisy images especially in long exposures.
Some photographers however find it annoying to have to wait for this to finish as it doubles the time. You can turn it off and experiment with other types of noise reduction in Lightroom or any other photo editor if you shoot RAW.
High ISO speed NR
You can choose from 3 levels of noise reduction: Standard, High or Low. This function is especially effective when shooting at high ISO speeds.
Multishot: This technique automatically combines four images captured at once to reduce noise. Compared to setting High ISO speed NR to High, this feature minimises loss of image quality while reducing noise. Best technique for Jpeg shooters.
Again, noise reduction is destructive to images details. I prefer to add noise reduction sparingly during post processing.
Dust Delete Data
This function allows you to download your shots to your computer using the canon software. The software will analyse the images and any dust spots that show up on multiple images will be registered. This database is then relayed back to the Canon R that will ignore the pixels with dust on.
I don’t think this is necessary, as periodically wet cleaning yourself or by a professional should be part of your camera cleaning routine anyway.
Page Shoot 5 (SHOOT5)
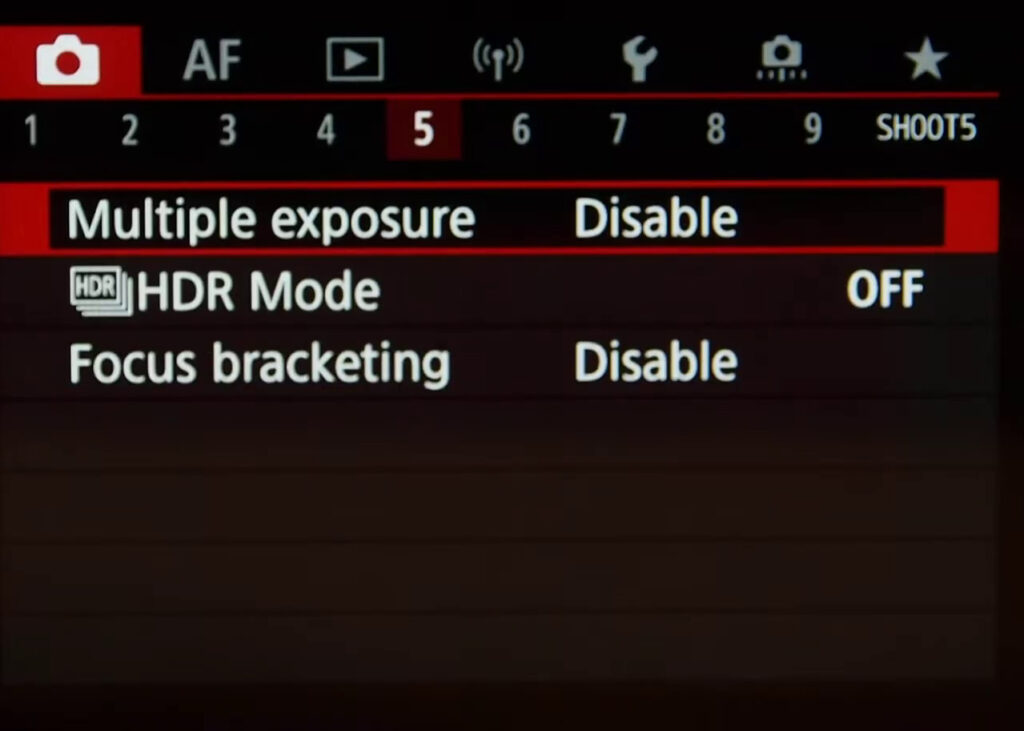
Multiple Exposure
As you shoot multiple exposures (2–9), you can select how the images will be merged into a single image.
- On: Func/Ctrl (Function and control priority) Convenient when shooting multiple exposures gradually as you check the results. During continuous shooting, the continuous shooting speed will decrease greatly.
-
On: ContShtng (Continuous shooting priority) Used for continuous multiple exposures of moving subjects.Continuous shooting is possible without the following operations: menu viewing, image review after capture, image playback, and undo last image.
Multi-expos ctrl setting:
- Additive: The exposure of each single image captured is added cumulatively. Based on the number of exposures setting, set a negative exposure compensation. Follow the basic guide below to set the exposure compensation amount. (Two exposures: -1 stop, three exposures: -1.5 stop, four exposures: -2 stops)
-
Average: Based on the number of exposures setting, negative exposure compensation is set automatically as you shoot multiple exposures. If you shoot multiple exposures of the same scene, the exposure of the subject’s background will be automatically controlled to obtain the standard exposure.
- Bright/Dark: Brightness (or darkness) of the base image and added images is compared at the same position, and bright (or dark) portions are retained. Some overlapping colors may be mixed, depending on the relative brightness (or darkness) of the image.
HDR Mode
You can shoot still photos with clipped highlights and shadows reducedfor a high dynamic range of tones even in high-contrast scenes. HDR shooting is effective for landscape and still-life shots.
With HDR shooting, three images of different exposures(standard exposure, underexposure, and overexposure) are captured consecutively for each shot and then merged together automatically. The HDR image is recorded as a JPEG image.
You can select the dynamic range of the HDR images and an effect like Natural, Art standard, Vivid, Bold or Embossed.
HDR images will always be saved as Jpeg!
Focus Bracketing
When enabled, the focus bracketing feature instructs the camera to take a series of pictures with the lens’ focus distance setting increasing between each image captured until the specified number of images are captured or until infinity focus is reached. The resulting set of images can then be focus stacked during post-processing with the result being an increased depth of field, potentially by a significant amount, while avoiding the softening effects of diffraction caused by very narrow apertures use.
This technique is commonly used in macro photography as the depth of field is typically extremely shallow at very close focus distances. Landscape photographers frequently use this technique to keep entire scenes that include a close foreground subject in focus.
There are four settings used to control the focus bracketing feature.
- Activate Focus Bracketing (Enable/Disable)
- Input number of shots (2 to 999)
- Focus increment (1-10)
- Exposure smoothing (Enable/Disable)
The number of shots instructs the camera to capture up to the specified number of images. I say “up to” because the camera stops taking photographs when infinity focus distance is reached and this may only require a small number of images regardless of the number of shots setting. Use this setting to limit the camera to a shorter focus distance range, or set the number very high to ensure that all distances including infinity are covered.
The focus increment setting is definitely the vaguest on this list. This setting deals with the granularity of the focus distance adjustment between each shot with 1 requesting fine increments and 10 requesting wide increments. Specific distance changes are not able to be input and with the depth of field increasing with distance, a non-specific increment value makes sense. Focus brackets always start with the initial focus distance and proceed toward infinity (the ending distance cannot be directly specified). “The wider the pre-set lens aperture, and the closer the lens is to the subject for the first shot, the finer the focus increments should normally be, and the more Focus Bracketed shots should be dialed-in.”
Exposure smoothing is disabled by default, but when enabled, the camera keeps image brightness consistent through the image set. This feature is primarily useful for compensating for light transmission losses when lenses, especially macro models, are focused at very close distances.
Optional is for the camera to create a new folder on the memory card before the bracketed sequence starts, making it easy to separate a potentially large number of images. Tapping the “Folder +” icon creates a new folder and subsequent images are saved there.
Page Shoot 6 (SHOOT6)
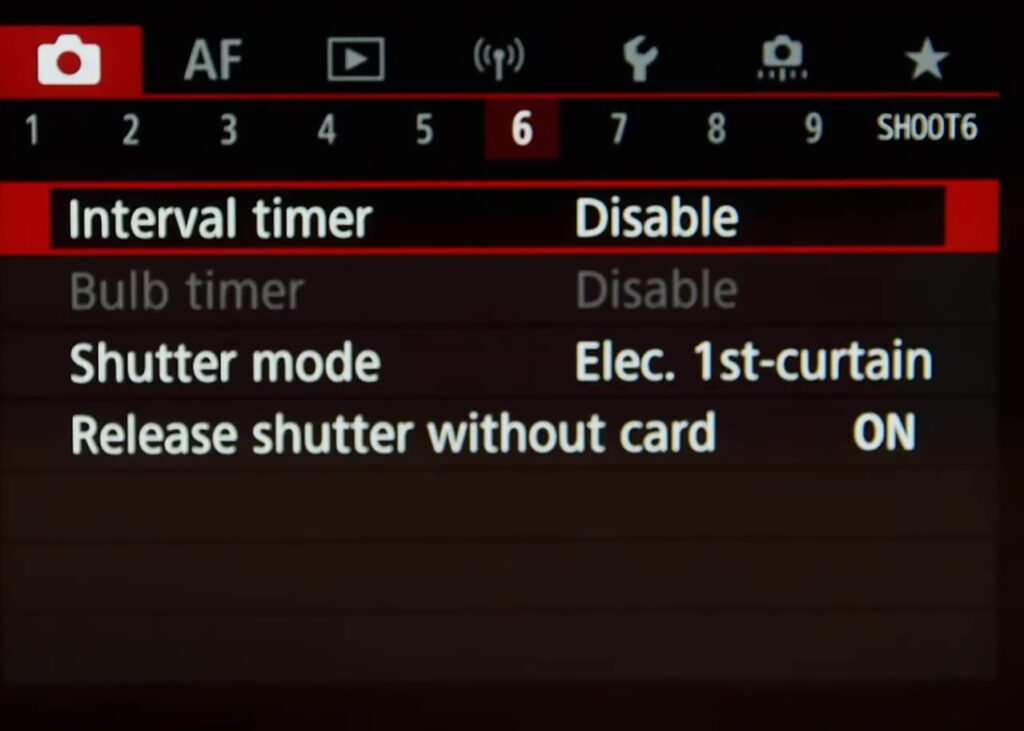
Interval timer
For fully customisable time-lapse photos and movies.
Bulb Timer
This is used for long exposures. Turn this, on, set the exposure timer to your desired setting and then shoot a Bulb exposure. If you want to end the exposure early, just tap the shutter.
Shutter Mode
Mechanical: use the traditional mechanical shutter system.
Elec. 1st-curtain: the EOS R6 will use the electronic shutter for the front, first curtain and the mechanical shutter for the second curtain. Possible problems include only half of a sunstar flare and it can introduce slightly nervous bokeh.
Electronic: uses the full electronic shutter functionality. This is the fastest shutter available but can cause problems like rolling shutter in for instance helicopter blades and can’t be used with flashes.
Release shutter without card
If this is set to ON, you want be able to use the shutter button if there is no SD card inserted in the camera. This is a security feature, so that you won’t start shooting images without actually recording them on an SD card. On the other hand, if you’re just testing the features of the camera, you probably won’t wan’t to store these files, and then you can leave it ON.
Page Shoot 7 (SHOOT7)
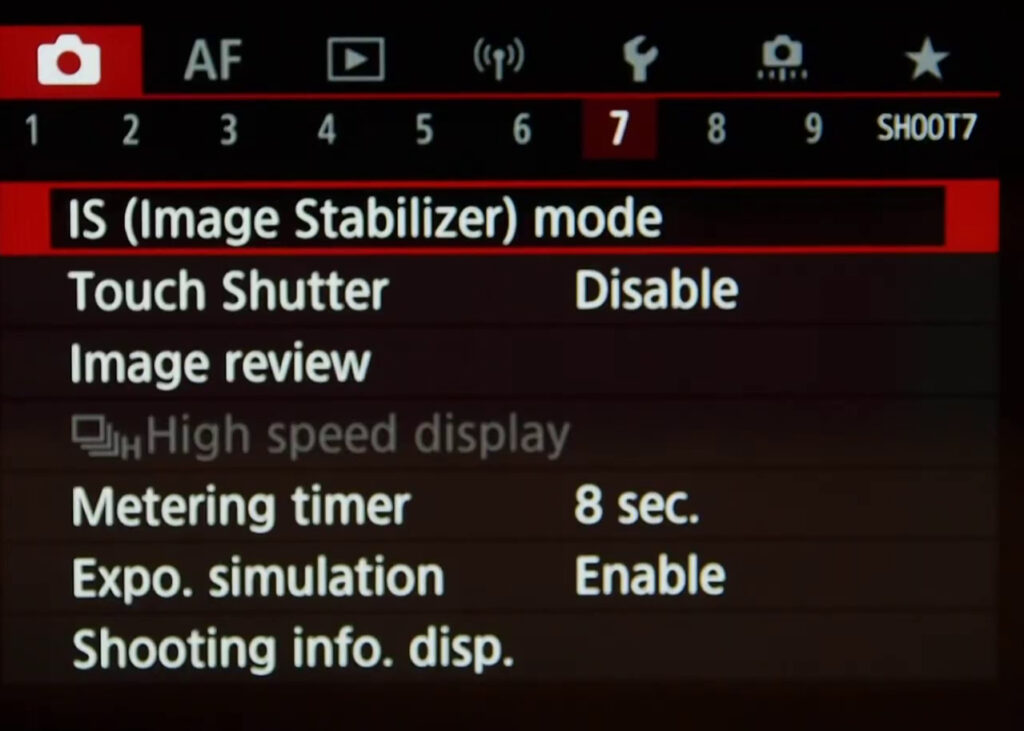
IS (Image Stabilizer) Mode
You can turn of the sensor stabilisation system here
Touch Shutter
If the Touch Shutter function is set to On, you can take shots easily by having the camera focus on your subject and adjust the brightness simply by touching. I don’t use this function, but if you’re coming from a smartphone, you could find it very useful.
Image review: You can modify the amount of time the image displays on the LCD monitor after your EOS R6 writes it to the memory card. You can set the preview time from 2 to 8 seconds or display the image until you turn off the camera. Or you can turn it OFF if you don’t want this.
I turn it off as I can always press the play button if I decide to review a shot I’ve just taken..
- Off
- 2 sec
- 4 sec
- 8 sec
- Hold
High Speed Display
The Canon EOS R6 must be set to high speed frame rate to enable this option. This setting lets the EVF update faster than the 5 FPS rate at which the EOS R6 shoots in Continuous Hi mode. Doesn’t work with adapted lenses.
Set to ON. The camera must be set to Servo AF and high speed continuous frame rate to enable this option.
Metering timer
When you half press the shutter (or use back button focus) in one of the creative zone modes and then release it, the camera’s meter takes a reading and sets the exposure values. These values time out and disappear after the amount of time set by this option. You have to half press again to take a new reading at that point. From 4, 8, 16, 30 sec too 1, 10, 30 min.
Expo. Simulation
When ‘Exp.SIM’ (which stands for Exposure Simulation) is on, indicates the image you are seeing on the rear screen and EVF is what the final image will look like. You can leave this on except when using flash in the studio as you’ll only see a dark frame in that case.
Shooting info. Disp.
There are a few sub menus here, let’s see what they do.
Screen info. settings: these settings give 5 different screen options. The first 3 allow you to configure the data overlaid on live view and save them as 3 separate screen types. You can turn on or off the basic shooting info (the data at top and bottom of screen), the detailed shooting info (the icons running down the left and right sides), whether the data acts as a touch button or not – if not, it loses the white frame and grey background – this applies to the Q menu button, the touch shoot button, the magnify button, the shutter speed, aperture, EV compensation scale and ISO value and “buttonizes” or “debuttonizes” them all at once; the histogram; the level gauge.
The fourth screen style is just the AF targets and the exposure info when it is active, and the last screen type is the black, non-live view DSLR-style info screen. These options are the ones you cycle through with the Info button when shooting with the camera – effectively this section allows you to customise them to taste.
Still within this submenu we haveL VF info/toggle settings (3 different EVF choices – one with basic shooting info under the screen, the other two configurable to individually add and combine as desired the vertical detailed shooting info icons, histogram, level gauge]. Like the previous item, it’s a way of customising what you get when you cycle through the styles of VF display whilst shooting when you use the Info button to do so.
Then the submenu has Grid display [Off, 3×3, 6×4, 3×3+diag], Histogram disp [Brightness/RGB, Large/Small], Reset. That’s the end of this submenu.
Set to: Screen info. settings: Enable 1 (press Info, disable basic shooting info and enable Electronic level), 3 and 4.
Page Shoot 8 (SHOOT8)
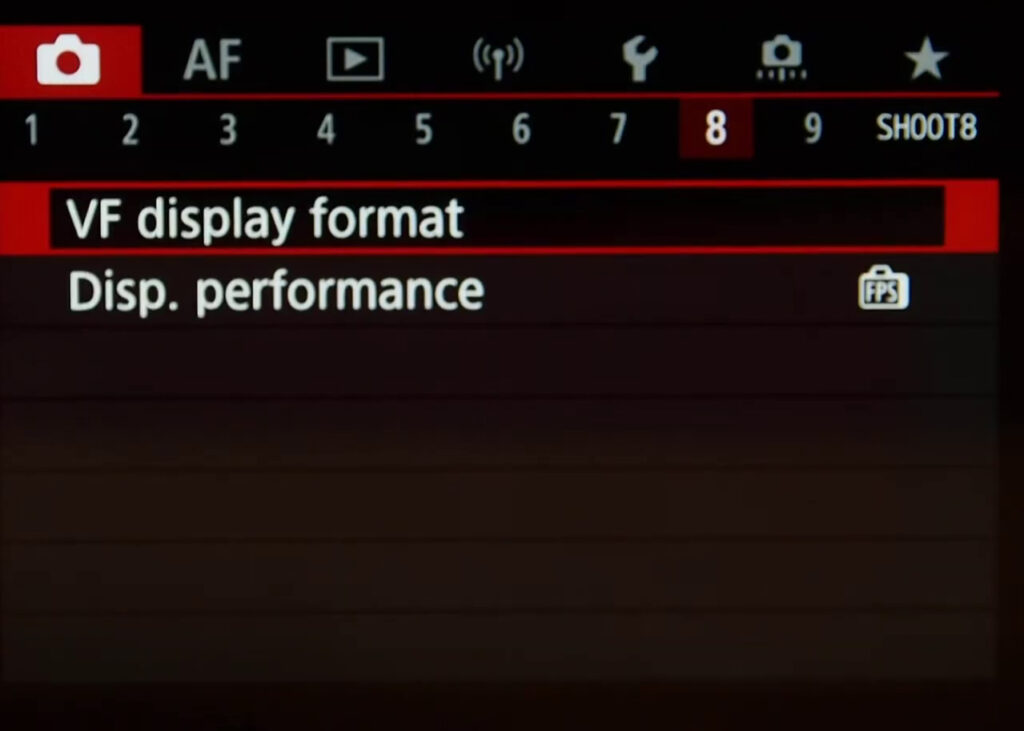
VF display format
Display 1 shows the Live View image across the entire viewfinder screen. This allows you to fully maximize use of the EVF display, but shooting icons such as those indicating white balance settings and the Auto Lighting Optimizer will be overlaid on the sides of the viewfinder image. If you do not fancy that, you may prefer [Display 2], which features a smaller Live View image, with the shooting icons in the borders surrounding the image.
The icons displayed are customisable to some extent, and rotate accordingly when you switch to portrait orientation.
Disp. Performance
You can set this to Power-saving to conserve battery life, even though refresh rates will be a bit slower than with the Smooth setting.
Page Shoot 9 (SHOOT9)
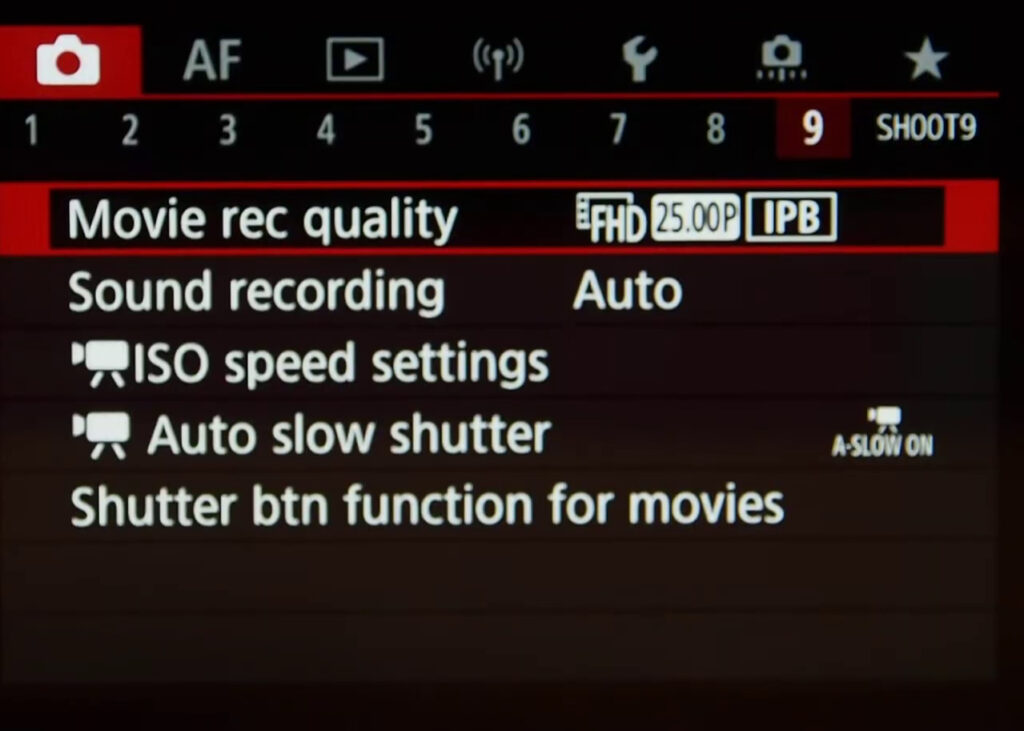
Movie rec Size
Either MPEG-4, H.264 or H.265.
- 3840 x 2160 @ 60p / 230 Mbps, MOV, H.264, Linear PCM
- 3840 x 2160 @ 30p / 120 Mbps, MOV, H.264, Linear PCM
- 3840 x 2160 @ 23.98p / 120 Mbps, MOV, H.264, Linear PCM
- 1920 x 1080 @ 120p / 120 Mbps, MOV, H.264, Linear PCM
- 1920 x 1080 @ 60p / 60 Mbps, MOV, H.264, Linear PCM
- 1920 x 1080 @ 30p / 30 Mbps, MOV, H.264, Linear PCM
- 1920 x 1080 @ 23.98p / 30 Mbps, MOV, H.264, Linear PCM
Sound Recording
You can record movies while recording sound with the built-in stereo microphone or an external stereo microphone. You can also freely adjust the sound-recording level.
- Auto: The sound-recording level is adjusted automatically. Auto level control will take effect automatically in response to the sound level.
- Manual: You can adjust the sound-recording level as needed. Select Rec. level and press the left/right keys while looking at the level meter to adjust the sound-recording level. Look at the peak hold indicator, and adjust so that the level meter sometimes lights up on the right of the –12 dB mark for the loudest sounds. If it exceeds “0”, the sound will be distorted.
- Disable: Sound will not be recorded.
Wind Filter: Set to Auto to reduce wind noise automatically when there is wind outdoors. Only activated when the camera’s built-in microphone is used. When the wind filter function takes effect, part of the low bass sounds will also be reduced.
Attenuator: Automatically suppresses sound distortion caused by loud noises. Even if Sound rec. is set to Auto or Manual for recording, sound distortion may still result if there is a very loud sound. In this case, setting it to Enable is recommended.
Using a microphone:
Normally, the camera’s built-in microphone records in stereo.
If an external microphone equipped with a miniature stereo plug (3.5 mm diameter) is connected to the camera’s external microphone IN terminal, the external microphone will be given the priority. Using the Directional Stereo Microphone DM-E1 is recommended.
Using headphones:
By connecting commercially available headphones with a 3.5 mm mini plug to the headphone terminal, you can listen to the sound as movies are recorded.
ISO Speed settings for movies
ISO speed: can either be set to Automatic or determine an appropriate value for yourself.
ISO Auto: This is used to set the max for Auto, from 400 to the top value of 204800. When raising the ISO value, you are effectively raising the sensitivity of the sensor by boosting the output. This leads to more and more noise with every doubling of power.
Auto slow shutter
You can choose whether to shoot movies that are brighter and less affected by image noise than when set to Disable by automatically slowing the shutter speed under low light.
- Disable: You can choose whether to shoot movies that are brighter and less affected by image noise than when set to Disable by automatically slowing the shutter speed under low light.
- Enable: Enables you to shoot brighter movies, less affected by image noise, than when set to Disable by automatically reducing the shutter speed to 1/30 sec. (NTSC) or 1/25 sec. (PAL) under low light.
Shutter btn function for movies
When the EOS R6 is set to Movie mode, you can set the shutter button to start and stop movie recording instead of the Rec button.
The Autofocus Menu (AF)
AF Page 1
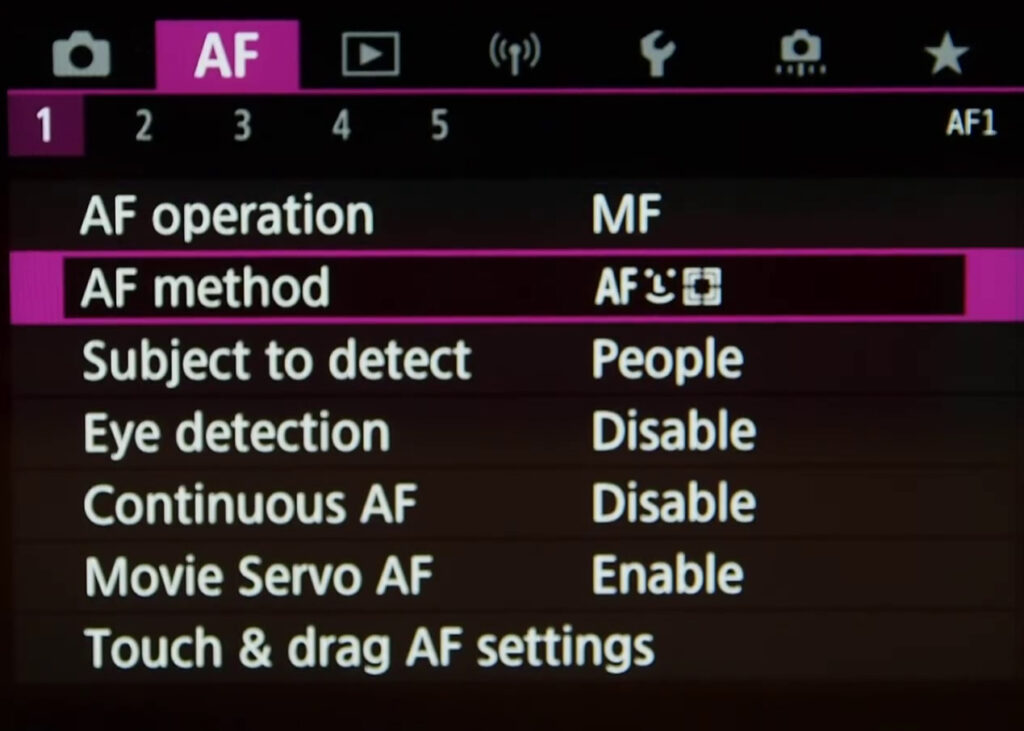
AF operation
One Shot: for Still Subjects. When you press the shutter button halfway, the camera will focus only once.
- When focus is achieved, the dot inside the AF point achieving focus lights up briefly in red, and the focus confirmation light in the viewfinder will also light up.
- With evaluative metering, the exposure setting will be set at the same time focus is achieved.
- While you hold down the shutter button halfway, the focus will be locked. You can then recompose the shot if desired.
Servo: This AF operation is for moving subjects when the focusing distance keeps changing. While you hold down the shutter button halfway, the subject will be focused continuously.
- The exposure is set at the moment the picture is taken.
- When the AF point selection is automatic, the camera first uses the center AF point to focus. During autofocusing, if the subject moves away from the center AF point, focus tracking continues as long as the subject is covered by another AF point.
AF method
Face + Tracking:
- the Canon R searches for faces in the frame. If it finds one, it displays a white focus frame over the face.
- In a group shot where more than one face is recognized by the camera, you see arrows on either side of the focus frame. To choose a different face as the focusing target, tap the face or use the Multi-controller to move the target frame over the face.
- To lock focus on the face, press and hold the shutter button halfway down or press and hold the AF-ON button. When focus is locked, the focus frame turns green, as shown on the right above, and the camera emits a beep. (Disable the sound effect via the Beep option on Shooting Menu 1.) If focus isn’t successful, the focus frame turns red.
Center AF: focus point is situated in the center of the screen.
1 point AF: only one AF point is used for extremely precise autofocus.
Expand AF area: Focusing uses one AF point and points above, below, and to the left and right. Effective for moving subjects, which are difficult to track with 1-point AF. Although Servo AF requires you to focus on a subject initially with an AF point, focusing is easier with this AF method than with Zone AF.
Expand AF area: Around: Focusing uses one AF point and surrounding points. Enables focusing over a wider area than F point expansion. Effective for moving subjects, which are difficult to track with 1-point AF. Servo AF operation is the same as for AF point expansion.
Zone AF: Uses auto selection AF in Zone AF frames to cover a larger area than AF point expansion, which makes focusing easier than with 1-point AF/AF point expansion and also effective for moving subjects. Generally focuses on the nearest subject. Note the camera attempts to focus on faces of any people in the Zone AF frame.
Large Zone AF: Vertical: Uses auto selection AF in a vertical Large Zone AF frame to cover a larger area than Zone AF, which makes focusing easier than with 1-point AF/AFpoint expansion and also effective formoving subjects. Generally focuses on the nearest subject. Note the camera attempts to focus on faces of any people in the Zone AF frame.
Large Zone AF: Horizontal: Uses auto selection AF in a horizontal Large Zone AF frame to cover a larger area than Zone AF, which makes focusing easier than with 1-point AF/AF point expansion and also effective for moving subjects. Generally focuses on the nearest subject. Note the camera attempts to focus on faces of any people in the Zone AF frame.
Subject to detect
You can choose between People, animals or no priority.
Eye Detection AF
When AF Method is set to Face Detect + Tracking, the entire active AF area (see the colored outlines in the graphics above) is used for focusing. And, if a human face is detected, the Face Detect technology has been enhanced — the camera doesn’t simply focus on the most prominent face in the scene. Instead, it now is able to detect the nearest eye on that face, and puts a smaller focus box on that eye. If that person moves around the picture area, the Eye Detection AF continues to track that eye, as long as it remains visible.
When Eye Detection AF is active, you’ll see a large, outer box indicating that Face Detection has recognized a human face. And within it, a smaller box will surround the actual eye that is being concentrated upon for Eye Detection AF.
This means that sharp focus will more than ever be placed on the “leading” eye of your subjects, whether you’re shooting portraits or candid pictures. Where many experienced photographers might have previously made the effort to change to a single AF point, and move it manually to cover the face of a human subject, the new Eye Detection AF technology means that the process can be left to the EOS R6 in many cases.
All that has to be done to activate Eye Detection AF is to Enable Eye Detection AF in the 3rd Shooting Menu screen, and be sure that Face Detect + Tracking is the active AF Method. It will function in most shooting modes.
While Eye Detect AF will normally focus upon the eye nearest to the camera, if you want to concentrate on the subject’s other eye, that’s easy to do — just press the AF Point Select button, on the back of the camera, twice. You’ll see the smaller “box” surrounding the detected eye jump to the subject’s other eye.
For Face Detection AF, and the more advanced Eye Detection AF to function, the camera basically has to be able to identify typical human facial features two eyes, a nose, and a mouth. Accordingly, there can be some limits to the EOS R’6s Eye Detection AF:
- It will not function with Servo AF, so it’s unable to work with moving subjects (therefore, Eye Detection AF is not possible in Sports Mode or Panning Mode).
- It’s disabled if you’re using the Miniature effect or Fish-eye effect settings, within the Creative Filters modes.
- Eye Detection AF cannot be used when recording video (overall Face Detection is possible during video recording, including when continuous Movie Servo AF is active).
- The primary face in the scene needs to be sufficiently close to take up a certain amount of space in the picture — if a detected face is too distant or small in the frame, the EOS R6 will revert to conventional Face Detection, and you won’t see the smaller “box” displayed over a subject’s eye before you take the picture.
- Eye Detect AF may have problems if the subject’s eyes are partially or fully closed.
- The primary face needs to be turned so it’s essentially facing toward the camera, and the eyes need to be somewhat in the camera’s direction as well. While direct eye contact with the camera isn’t required, if the subject’s eyes are angled significantly to one side or the other, the EOS R6’s Eye Detection AF may not be able to detect the eye nearest the camera (again, it will usually revert to ordinary Face Detection, or conventional Automatic AF point selection).
- If one or both of the subject’s eyes are in deep shadow, Eye Detection AF (and sometimes overall Face Detection AF) may have difficulty functioning.
- Sunglasses, excessive make-up around the eyes, masks, and so on will usually prevent the Eye Detection AF from being able to detect and focus upon the nearest eye. And, like Face Detection, it’s designed to detect human eyes… it normally will not work with animals or other non-human subjects.
Continuous AF
Enable or disable continuous AF where the camera constantly tries to acquire focus, even without pressing the shutter. Turn this Off.
Movie Servo AF
With this function enabled, the camera focuses on the subject continuously during movie recording.
Touch & drag AF settings
Touch & Drag AF basically means that you can drag the desired autofocus point to anywhere on the screen. This is much faster than any other method to do this.
You can select the active touch area: Whole panel, Right, Left, Top Right, Btm Right, Top Left, Btm Left. I have it set to the Bottom Left since this allows you to look through the EVF and change the focus point easily at the same time.
AF Page 2
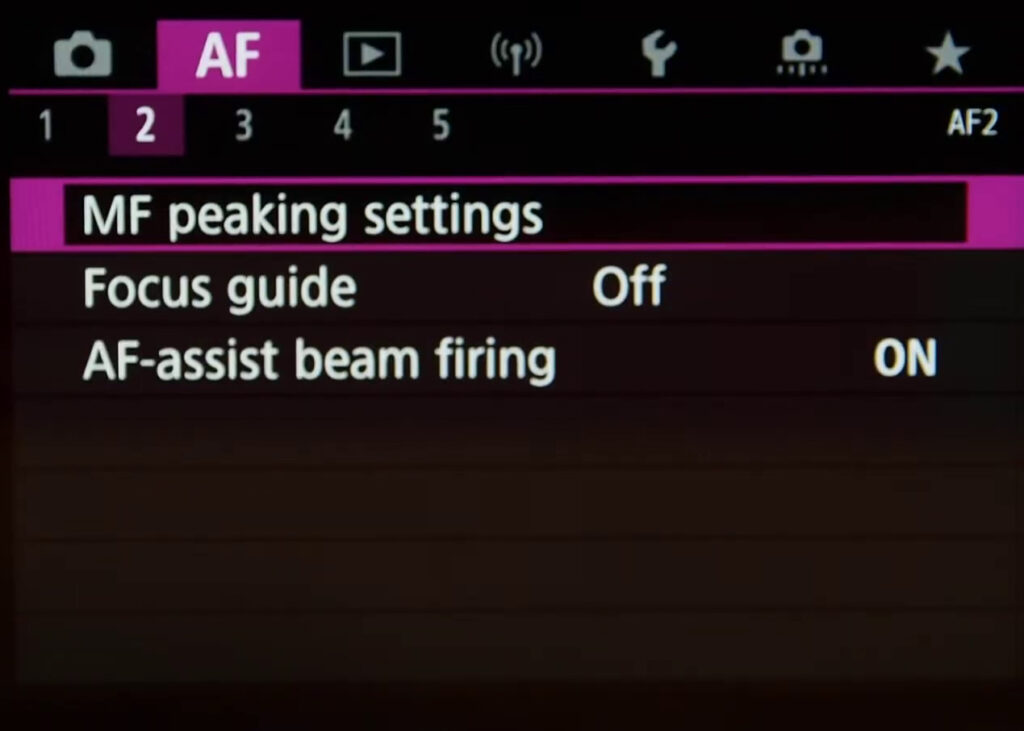
MF peaking settings
Peaking is a focussing aide when the camera is set to manual focus. The in-focus area will have a type of coloured noise superimposed onto scene in the EVF or on the screen. This is of course not stored, it’s merely an aide that helps you determine where your focus lies and if your subject will be in focus. Very handy feature, I have it set to the Color red and Level High.
Focus Guide
Setting Focus guide to On provides a visual guide that shows which direction to adjust focus and the extent of adjustment needed. The guide frame is displayed near any eyes that are detected for the main subject when for instance Face +Tracking is used.
AF Assist Beam Firing
You can enable or disable the assist beam when using a flash that has one.
AF Page 3
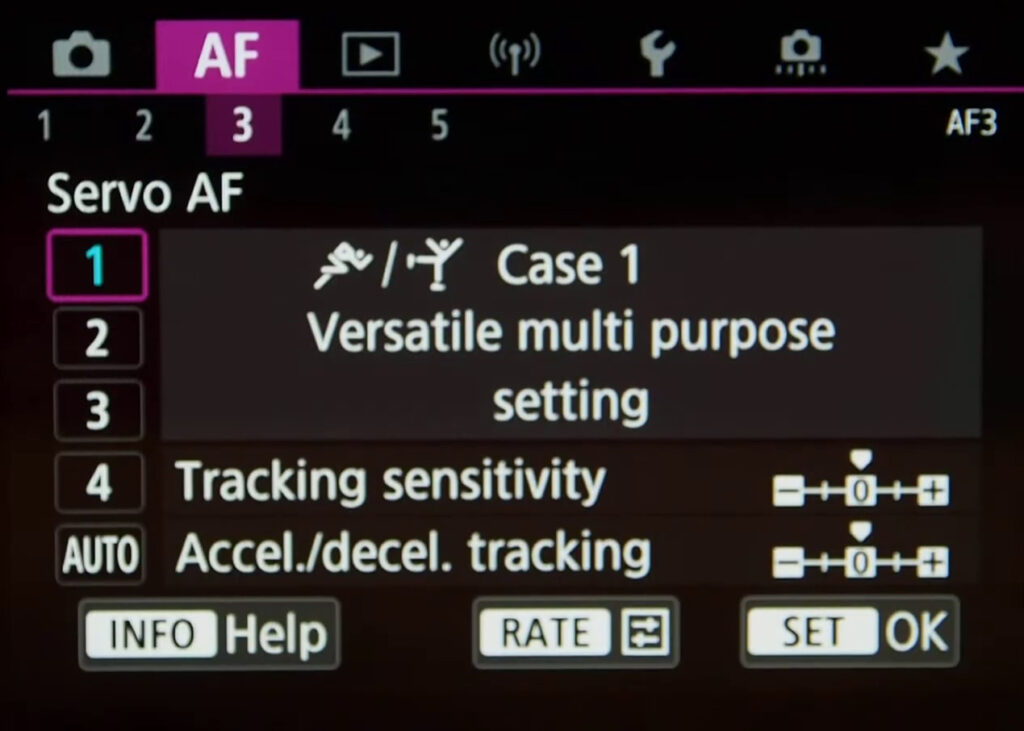
Servo AF
Servo AF is a brand new feature. This AF operation is for moving subjects in different scenarios.
- Case 1 Versatile multi purpose setting: can be used in the majority od cases where you’re photographing movement with the EOS R6. For instance, fast track running, ice skating, boxing, etc.
- Case 2 Continue to track subjects, ignoring possible obstacles: A preset for ball sports where you want the camera to track people’s movement but not the objects they are playing with.
- Case 3 Instantly focus on subjects suddenly entering AF points: Great for roadside sports where you want the camera to acquire instant focus when your subjects enter the frame. Good examples are motor sports and cycling.
- Case 4: For subjects that accelerate/decelerate quickly: a different scenario from the other three, where sudden changes in movement can be detected and the EOS R6 will adjust autofocus speed accordingly.
- Case A (Auto) Tracking automatically adapts to subject movement: will switch between all four scenarios accordingly. Though I would recommend choosing the most suited scenario for optimal performance.
In each scenario, you can fine-tune tracking sensitivity and accelerate/decelerate tracking performance.
AF Page 4
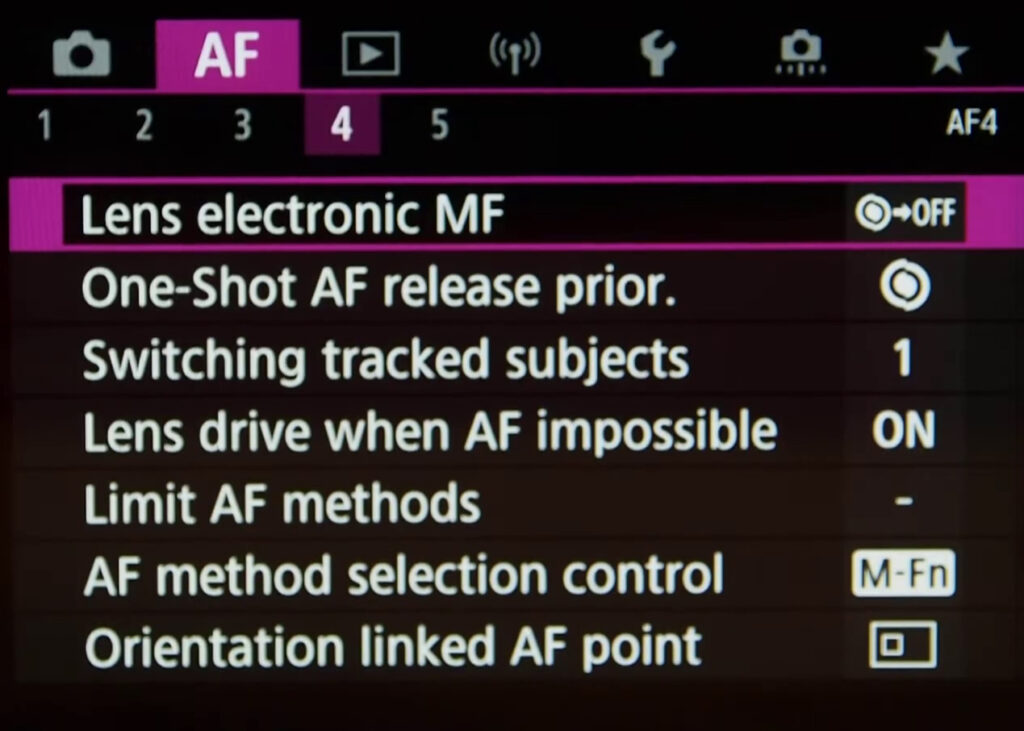
Lens electronic MF
Disable after One-Shot AF: turns off manual fine-tune focus after one shot in AF mode whilst half-pressing the shutter button.
One shot enabled: allows you to fine-tune focus manually in AF mode whilst half-pressing the shutter button.
One shot enabled (magnify): allows you to fine-tune focus manually in AF mode whilst half-pressing the shutter button and magnifies your point of focus. (very cool)
Disable in AF mode: entirely disables manual fine-tune focus in AF mode whilst half-pressing the shutter button.
One-Shot AF release prior.
Effective when you want to achieve focus before capturing the shot. You can set the AF operation characteristics and shutter-release timing during continuous shooting after the first shot with AI Servo AF. Equal priority is given to focusing and continuous shooting speed.
Switching tracked subjects
Set the ease of switching to other subjects from the subjects currently tracked. Can be used in ‘Face+Tracking’, ‘Zone AF’ and ‘Large Zone AF: Horizontal’ and ‘Large Zone AF: Vertical’
Lens Drive when AF impossible
This setting can effectively speed up your action photography, especially with tele lenses. Super telephoto lenses can become grossly out of focus during continuous focus search, taking more time to achieve focus the next time.
Limit AF Methods
You’ll find a list of all AF methods here, you can select and deselect which ones you use or don’t use, so that there’s less clutter in the AF Method Menu.
AF method selection control
With this menu option a user can select their ‘AF method selection control’ with either the use of the M-Fn Button or the Main Dial.
Orientation linked AF Point
Also called autofocus point orientation.
You can select up to three different AF point selection methods corresponding to whether you hold the camera in a landscape orientation, portrait with the grip up or portrait with the grip down orientation. Simply rotating the camera will choose whichever AF point or AF point selection method you have set for that orientation.
This is very useful for many situations. At a sport game for example you may choose to use the central point when shooting in a landscape format but the middle top AF point for focusing on a face when shooting in a portrait mode.
It is also possible to select an alternate, or favourite, AF point that you can switch to immediately by using one of the customisable buttons on the EOS R6. This customisation can also be used to select an alternate set of AF settings that can be recalled using a single button press. You may find this useful when photographing a running race for example. You may wish to use two different AF point selection methods, one for the start of the race and one for the end as the runners dip for the line.
AF Page 5
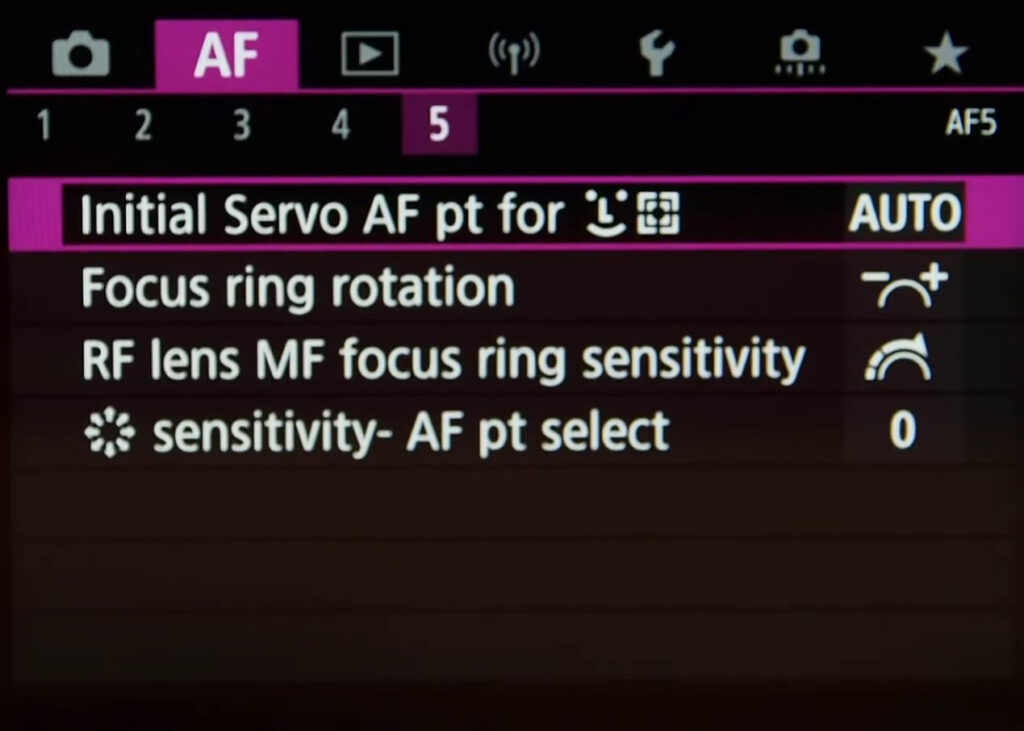
Initial Servo AF pt for…
This setting allows you to select a specific point for the AF system to start tracking things when AF is set to specific Autofocus modes.
Focus ring rotation Yes, the same goes for the lens focus ring, this can be reversed.
RF lens MF focus ring sensitivity When using Canon RF lenses, you can control the sensitivity of the focus ring.
Sensitivity- AF pt select
The sensitivity of the Multi- Controller joystick AF point selection can be adjusted to a user’s desire with the EOS R6.
Playback Menu (blue playback icon)
Page Play 1 settings (PLAY1)
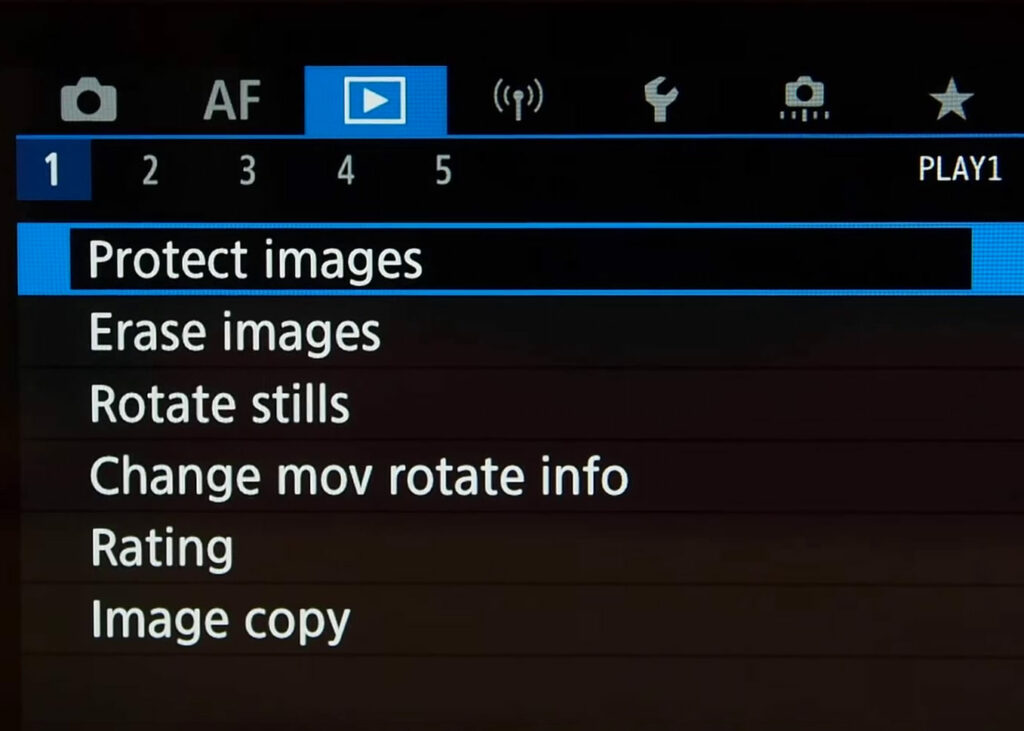
Protect images
You can select how to protect and unprotect an image from deletion on the EOS 50D. Once an image is protected, it cannot be erased by the camera’s erase function. To erase a protected image, you must first cancel the protection. If you erase all the images, only the protected images will remain. This is convenient when you want to erase unnecessary images all at once.
You can choose to Select images, Select range, All images in folder, unprotect all images in folder, All images on card or unprotect all images on card.
Erase images
Select and erase images by selecting a range or All images in folder orAll images on card.
Rotate image
Vertical images are rotated automatically so they are displayed vertically on the camera’s LCD monitor and personal computer instead of horizontally. The setting of this feature can be changed.
- Immediately after image capture, the vertical image will not be automatically rotated for the image review.
- If the vertical image is taken while the camera is pointed up or down, the image might not rotate automatically for playback.
- If the vertical image is not automatically rotated on the personal computer screen, it means the software you are using is unable to rotate the image.
Change mov rotate info
You can manually change movie orientation information (which determines which side is up)
Rating
You can rate images on a scale of 1–5
Image copy
With the dedicated software Image Transfer Utility 2, you can send images on the camera to a computer automatically. You’ll need to setup the Wifi connection first.
Page Play 2 settings (PLAY2)
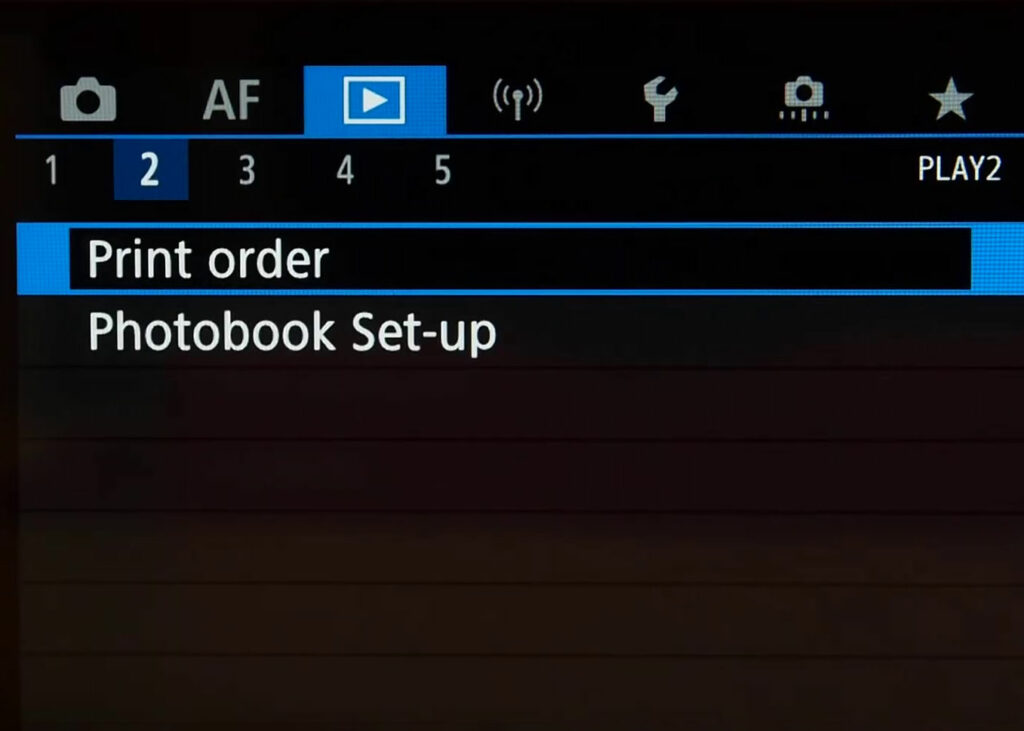
Print order
You can connect the camera to a printer via Wi-Fi to print your images directly. This setting takes you to the selection screen where you can select a single image, multiple images for printing and the general set up. See the tutorial below on how to connect to a smartphone, it is the same procedure to connect to a printer
Photobook Set-up
This function is useful for ordering photobooks online and for printing photobooks on a printer.
When you select images to use in photobooks (up to 998 images) and use EOS Utility (provided software) to transfer them to a computer, the selected images will be copied into a dedicated folder. This function is useful for ordering photobooks online and for printing photobooks on a printer.
Page Play 3 settings (PLAY3)
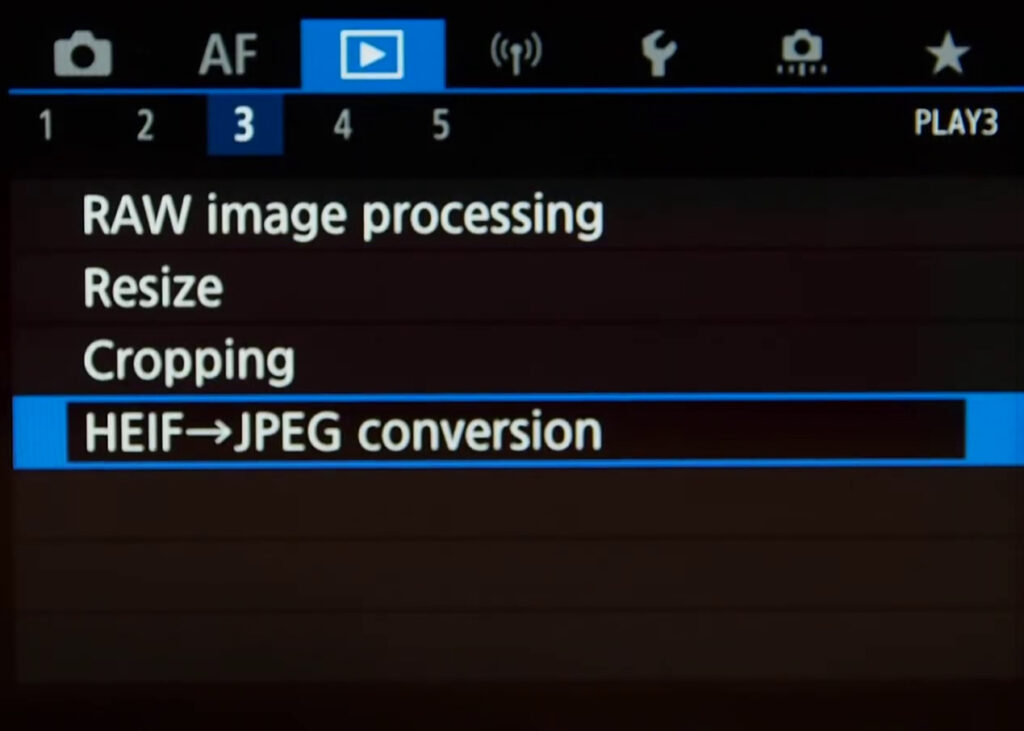
RAW image processing (RAW/DPRAW)
Being able to perform RAW image post-processing right after shooting on a camera is a function that comes in very handy.
These settings are available on the Canon R:
- Brightness adjustment: EV-1, EV-2/3, EV-1/3, EV±0, EV+1/3, EV+2/3, EV+1
- White balance: WB: Shot settings, Auto, Day Light, Shade, Cloudy, Tungsten light, White fluorescent light, Flash, Colour temperature
- Picture Style: Picture Style: Shot settings, Auto, Standard, Portrait, Landscape, Fine Detail, Neutral, Faithful, Monochrome, User Def. 1, User Def. 2, User Def. 3
- Auto Lighting Optimizer: Disable, Low, Standard, High
- High ISO speed Noise Reduction: Disable, Low, Standard, High
- Image quality: write small, medium and large jpeg files in fine or standard resolution.
- Peripheral illumination correction: Enable/Disable
- Chromatic aberration: Enable/Disable
- Diffraction correction: Enable/Disable
Resize
You can resize your RAW images internally and save them in-camera for posting on social media for instance.
Cropping
Complementary to the other in-camera RAW processing feature, you can crop your image or multiple images here freely or according to preset dimensions.
HEIFF to jpeg
The EOS R6 capable of recording (HDR-PQ Shooting) still images in HEIF file format. These 10-bit files feature broader tonal range and bit depth in-comparison to 8-bit JPEG image, allowing for even more highlight detail to be captured, when displayed on HDR-compliant monitors or via HDR printing workflow. you can convert these HEIF files to jpeg here.
Page Play 4 settings (PLAY4)
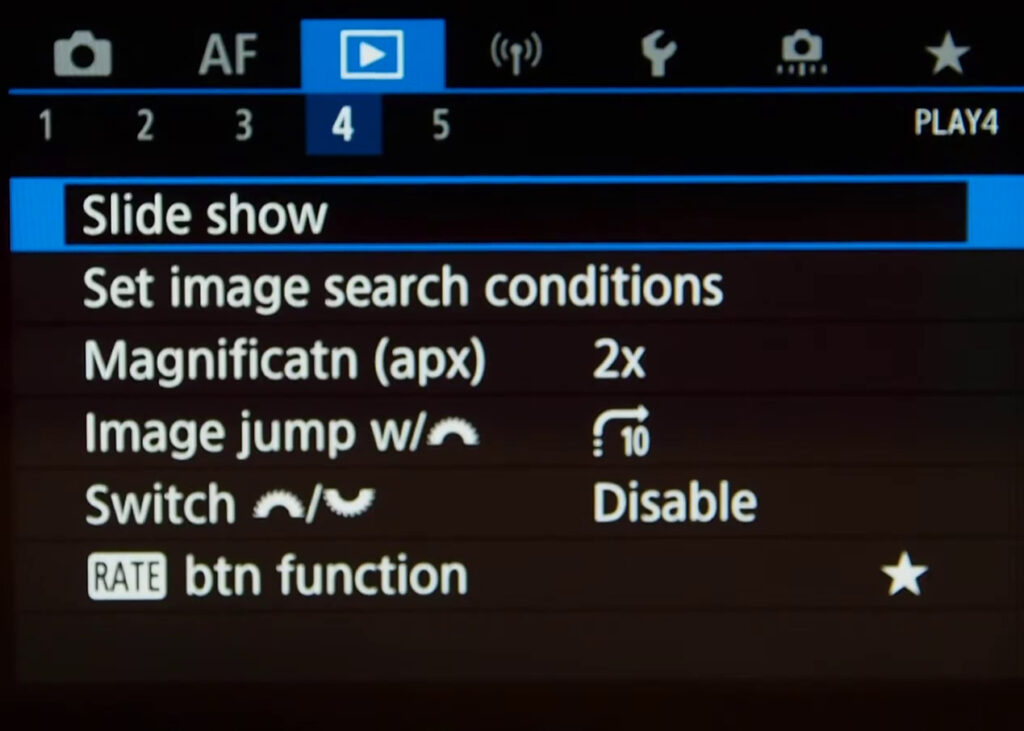
Slide show
You can setup and start an in-camera slideshow here.
Set image search conditions
You’ll find lots of factors to choose here, I honestly don’t know why this was implemented and never use it.
Magnificatn (apx)
you can set the starting magnification and initial position for the magnified view.
-
1x (no magnification): The image will not be magnified. The magnified view will start with the single-image display.
- 2x, 4x, 8x, 10x (magnify from center): he magnified view will start at the image center at the selected magnification.
-
Actual size (from selected point): The recorded image’s pixels will be displayed at approx. 100%. The magnified view will start at the AF point that achieved focus. If the photo was taken with manual focus, the magnified view will start at the image center.
-
Same as last magnification (from center): The magnification will be the same as the last time you exited the magnified view. The magnified view starts from the image center.
Set to “Actual size (from selected pt)”. It allows one button press during playback to zoom deeply into the image.
Image jump w/dial
This setting selects how much of the jump your image library will tale when you turn the dial.
You can select one by one, jump 10, jump by specified number, by date, by folder, display movies only, stills only, protected only or display by image rating.
Switch dial
Switch the functionality of the dials here.
Rate/Mic button function
You can change the functionality of those buttons here.
Page Play 5 settings (PLAY5)
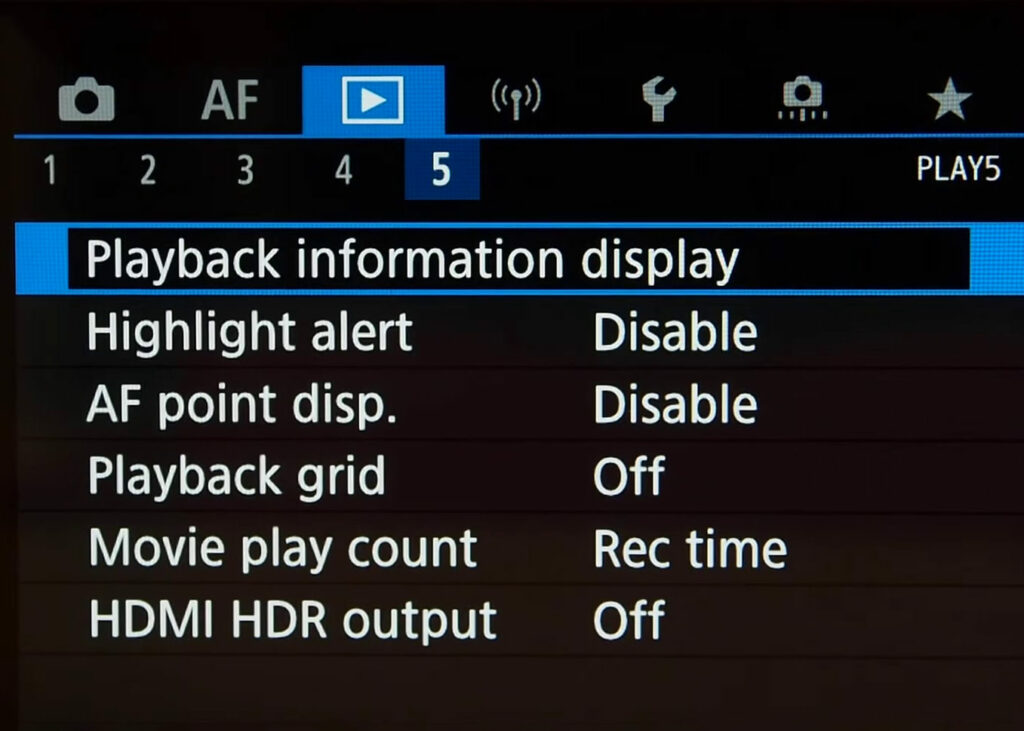
Playback information display
You can enable up to 9 individual screens – all except the first, which is the basic shooting info overlay, allow the histogram to be specified as brightness or RGB, and in some cases, both. Enable to avoid too many playback options.
Highlight alert
The Highlight Alert setting will show you where the overexposed areas in your images are located. The image preview will blink in areas that are completely white and have no detail.
Set to Enable, it causes overexposed pixels to blink.
AF point disp.
This setting either shows or hides the number of AF points on screen and in your EVF.
Playback Grid
Sets the number of images or previews in the grid when you select Playback.
Set to 3×3, it helps with checking alignment.
Movie play count
Set the movie play count to either recording time or Time Code for sync.
HDMI HDR output.
You can choose to turn on HDR in the HDMI output.
Wifi Menu
Wifi page 1
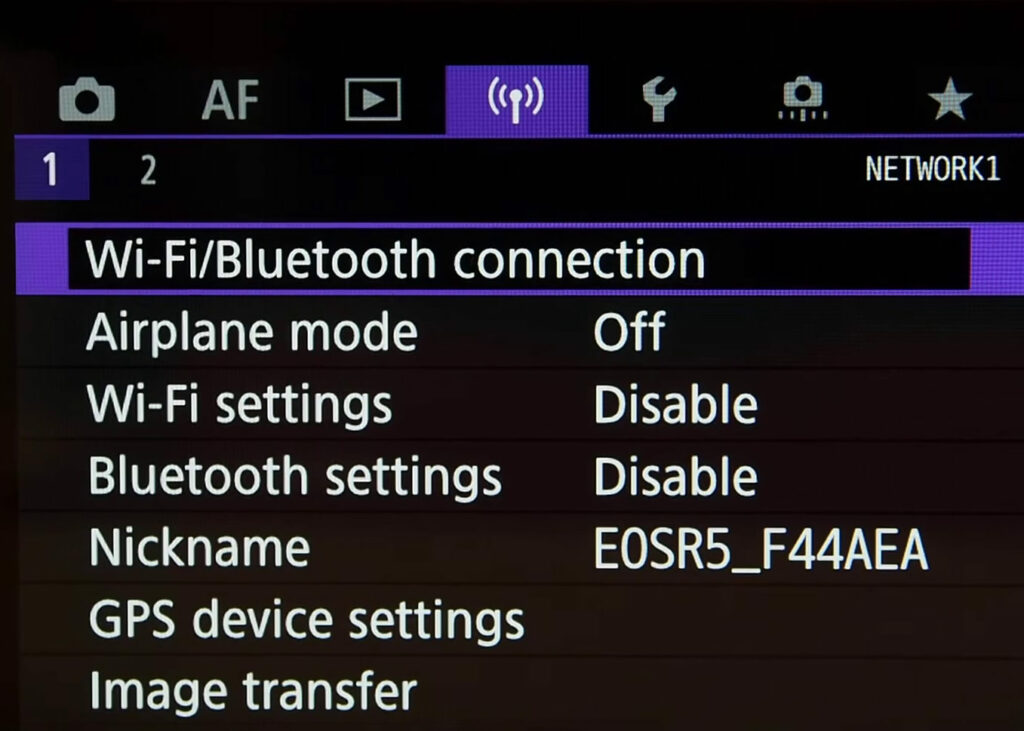
Wi-Fi/Bluetooth connection
On this screen, you can change the wireless communication function settings.
Wi-Fi settings
- You can set whether to Enable or Disable the wireless communication function.
- Password: Set to None to allow a Wi-Fi connection to be established without a password (except when connecting to an access point via Wi-Fi).
- Connection history: You can set whether to Show or Hide the history of the Wi-Fi connected devices.
- Auto send images to computer: With the dedicated software Image Transfer Utility 2, you can send images on the camera to a computer automatically.
- Send to smartphone after shot: Your shots can be sent to a smartphone automatically.
- MAC address: You can check the MAC address of the camera.
Wi-Fi function:
- Communicate with smartphones
- Remote control (EOS Utility)
- Print from Wi-Fi printer
- Send images to Web service
Bluetooth function: Displays the screen on which you can set or check the Bluetooth functions.
Send images to smartphone: While the camera is connected to a smartphone, use this function to send images stored in the camera to the smartphone.
Nickname: You can change the nickname using the virtual keyboard.
Clear settings: Clear all wireless communication settings.
Airplane mode
Airplane mode disables all wireless communication. If you’re not using it, best to turn it on all the time. This also saves battery life.
Wi-Fi settings
You can enable or disable the WiFi functionality here.
Bluetooth Settings
You can enable or disable the Bluetooth functionality here.
Nickname
You can change the default name of your camera here. This is the name that you’ll see on your phone when trying to connect with your EOS R6.
GPS Device settings
When you’re shooting while connected to a compatible smart device via Bluetooth, EOS R6 can collect GPS data and automatically add it to your images using the Canon Camera Connect app. It makes identifying locations easy and provides a useful editing feature for when you’re back home.
Image transfer
With the dedicated software Image Transfer Utility 2, you can send images on the camera to a computer automatically. You’ll need to setup the Wifi connection first.
Wifi Page 2
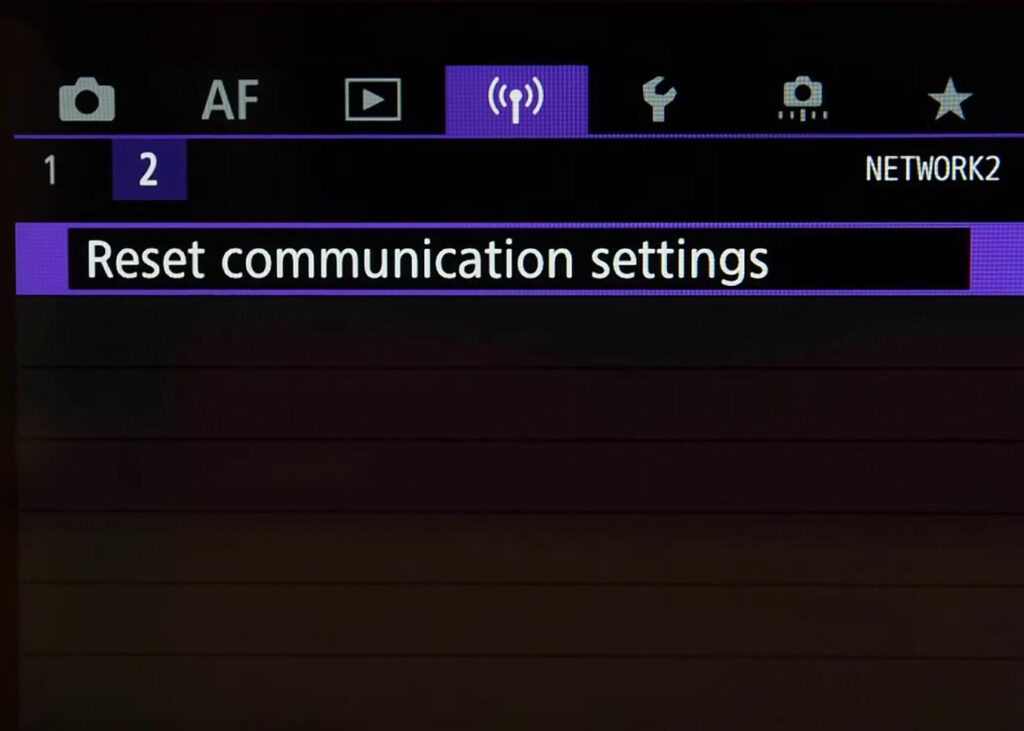
Reset communication settings
Reset all WiFi and communication settings to the factory defaults.
Set Up Menu (Spanner, gear icon)
Set Up Menu Page 1 (SET UP1)
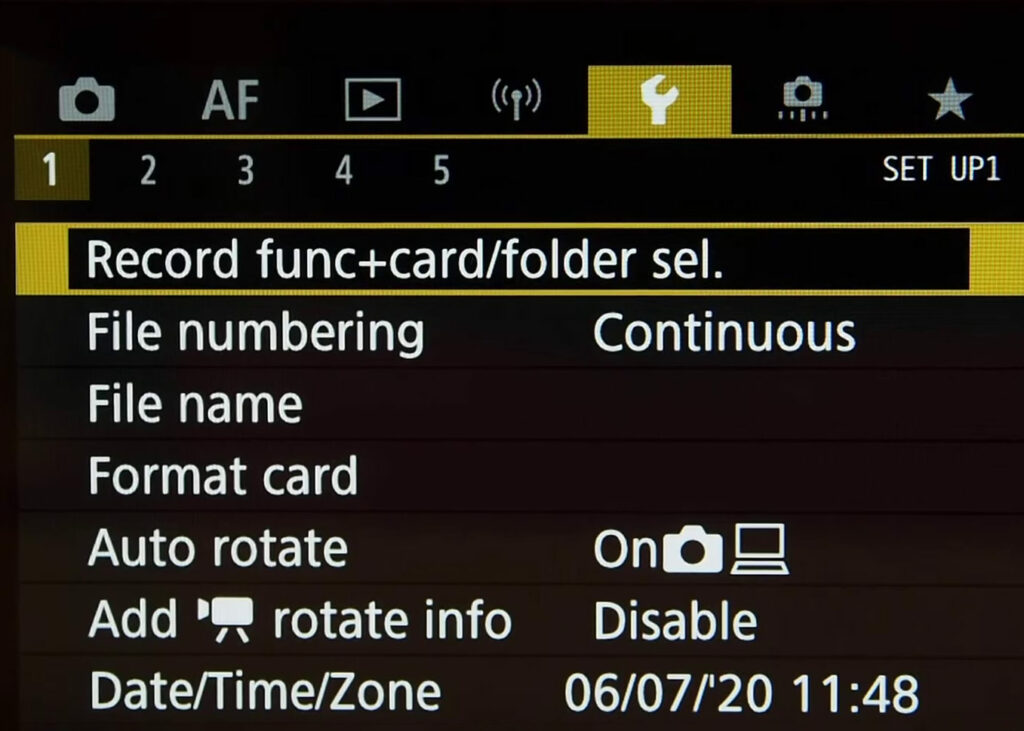
Record func+card/folder select
f you insert a CF card and SD card, you can select the recording method and select which card to use for recording and playing back images.
- Standard: Images will be recorded to the card selected with Record/play.
- Auto switch card: Same as with the Standard setting, but if the card becomes full, the camera will automatically switch to the other card to record images. When the camera switches to the other card, a new folder will be created automatically.
- Rec. separately: You can set the image-recording quality for each card. Each image is recorded to the CF and SD cards at the image recording quality you have set.
- Rec. to multiple: Each image is recorded to the CF and SD cards simultaneously at the same image size. You can also select RAW+JPEG.
When separately is set, the maximum burst will decrease greatly When Rec. separately or to multiple is set, the image will be recorded under the same file number to the CF and SD cards. Also, the LCD panel will display the number of possible shots of the card having the lower number. If one of the cards becomes full, Card full will be displayed and shooting will be disabled. If this happens, either replace the card or set the recording method to Standard or Auto switch card and select the card with space remaining to continue shooting
File numbering
You can set the file numbering for each new shot to Continuous or Auto Reset/Manual Reset. Continuous will consecutively number your photos. Auto reset will reset the numbering every time an SD card is inserted, and Manual reset will reset the numbering once.
File name
Choose your own image naming scheme here.
Format card
You should format your card in-camera every time you insert a memory card when starting a new session. This to make sure that there won’t be any writing errors. Remember that formatting will erase all the images on the card, and won’t even be recoverable if you choose the low level format option.
Auto rotate
Auto rotate automatically rotates your images that are shot in portrait mode to fit the screen size. You can turn this on or off and decide whether this will behaviour will also apply to images imported to your PC using the canon software .
Add video rotate info
add rotation info to video files or not.
Date/Time/Zone
Select the date, time and worldwilde zone of your Canon EOS R6.
Set Up Menu Page 2 (SET UP2)
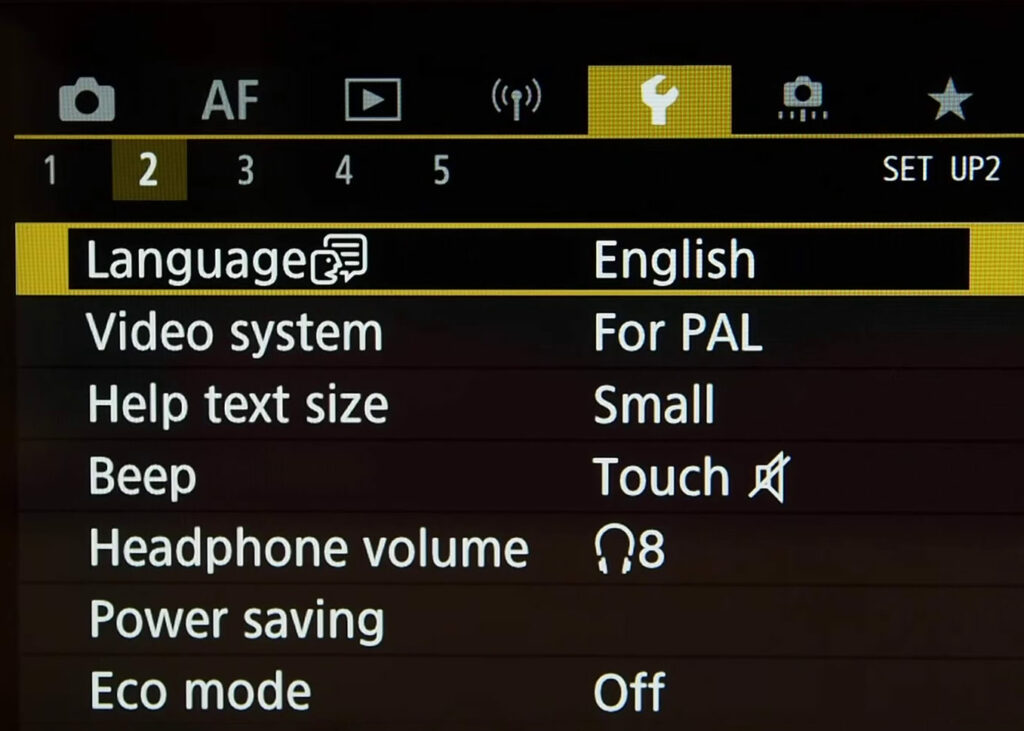
Video system
select either PAL or NTSC video systems depending on your area.
Help Text Size
Select the size of the optional menu help messages between small, medium or large.
Beep
You can either enable or disable the beep when you engage the shutter as well as when you touch the screen.
Set to disable as you don’t to hear you beeping camera setting changes or focus confirmation.
Headphone volume
Set the volume of the headphone outputs of the Canon EOS R6.
Power saving
The power will shut off in the following circumstances. Press the power button again to restore power.
Shooting ModePowers down approximately 3 minutes after the last control is accessed on the camera. The LCD monitor automatically turns off 1 minute* after the last control is accessed even if [Auto Power Down] is set to [Off]. Press any button other than the power button to turn the LCD monitor back on.Playback Mode or connected to a Printer.Powers down approximately 5 minutes after the last control is accessed on the camera.
Eco mode
This function allows you to conserve battery power.When the camera is not in use, the screen quickly darkens to reduce battery consumption.
Set Up Menu Page 3 (SET UP3)
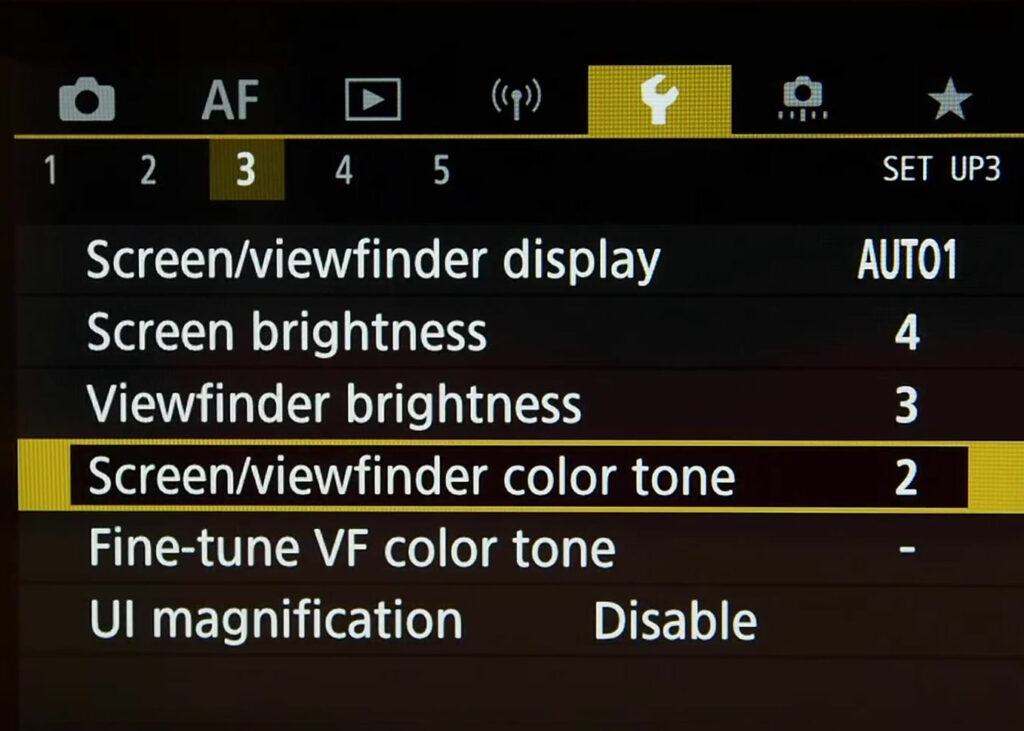
Screen/viewfinder display
You can select to display or hide the operating state of the R6 on the LCD screen/viewfinder . The display also appears on a TV connected to the camcera.
Screen brightness
Change the brightness of the LED screen here.
Viewfinder brightness
Change the brightness of the EVF here.
Screen/Viewfinder color tone
Make the screen and viewfinder color tone warmer or colder.
Fine-Tune VF color tone
A perfect EVF color tone is important to many photographers. Besides the coarse adjustments made with the menu above, you can further tweak the EVF color tone here.
Ui magnification
You can magnify menu screens by double-tapping with two fingers. Double-tap again to restore the original display size.
Magnification is also available on the Quick Control screen in viewfinder shooting, the Custom Quick Control screen, and the electronic level screen.
Set Up Menu Page 4 (SET UP4)
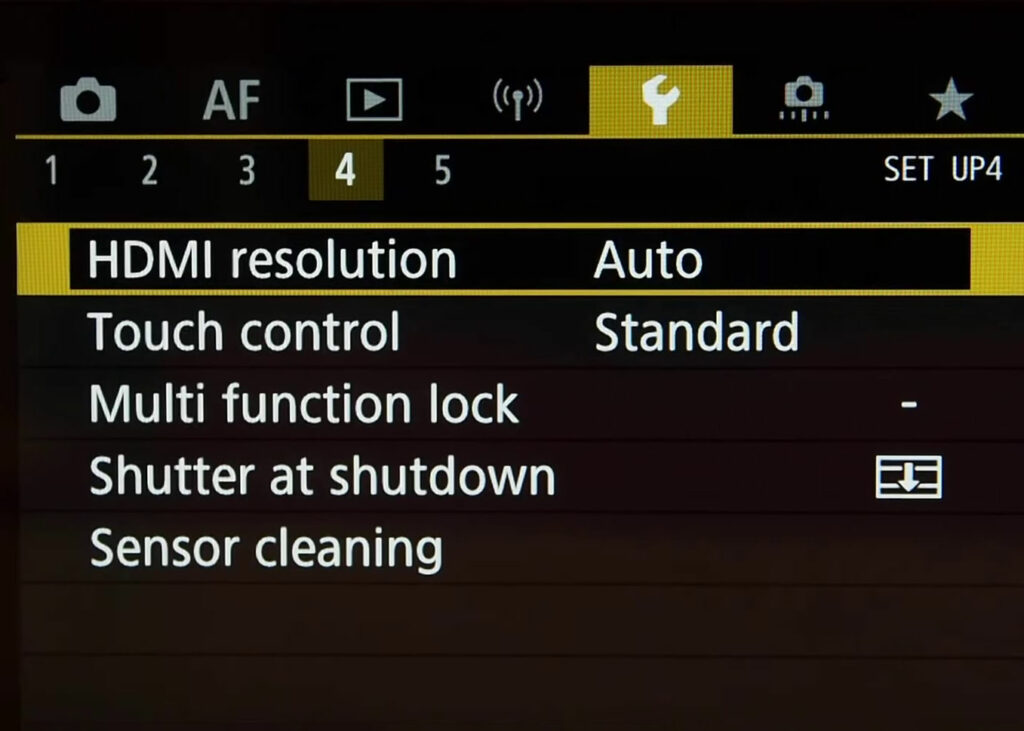
HDMI resolution
You can choose either Auto where the camera will decide automatically what type of device it’s connected too, 1080p or 4K.
Touch control
You can turn on or off the touch sensitive screen on the back of your Canon EOS R6. Standard/Sensitive/Disable.
Multi function lock
If you find yourself regularly changing settings on the camera accidentally while moving around, then making use of the multi-function lock can avoid issues when you come to shoot in a fast-paced environment. The lock switch below the quick command dial can be used to lock the main dial, the multi-controller or the quick control dial – simply select which you would like to lock through the custom function in Group 2 Disp./Operation. When you come to change a setting, you may see L displayed in the viewfinder and on the top LCD panel. If this happens, you will be unable to change the setting because the multi-function lock is set. Simply flick the switch and the camera will return to normal.
Shutter at shutdown
You can tell the EOS R6 to close the mechanical shutter when you turn off the camera. This to avoid getting dust on the sensor or protecting it.
Sensor cleaning
You should set this to Auto cleaning. This will send a charge through your sensor every time you turn it off, dislodging any dust particles that might be on the sensor. You should also make a habit of regularly cleaning the señor cage with a simple air blower.
If you prefer to only periodically clean the sensor, you can use the ‘clean now’ function to immediately do this procedure.
Set Up Menu Page 5 (SET UP5)
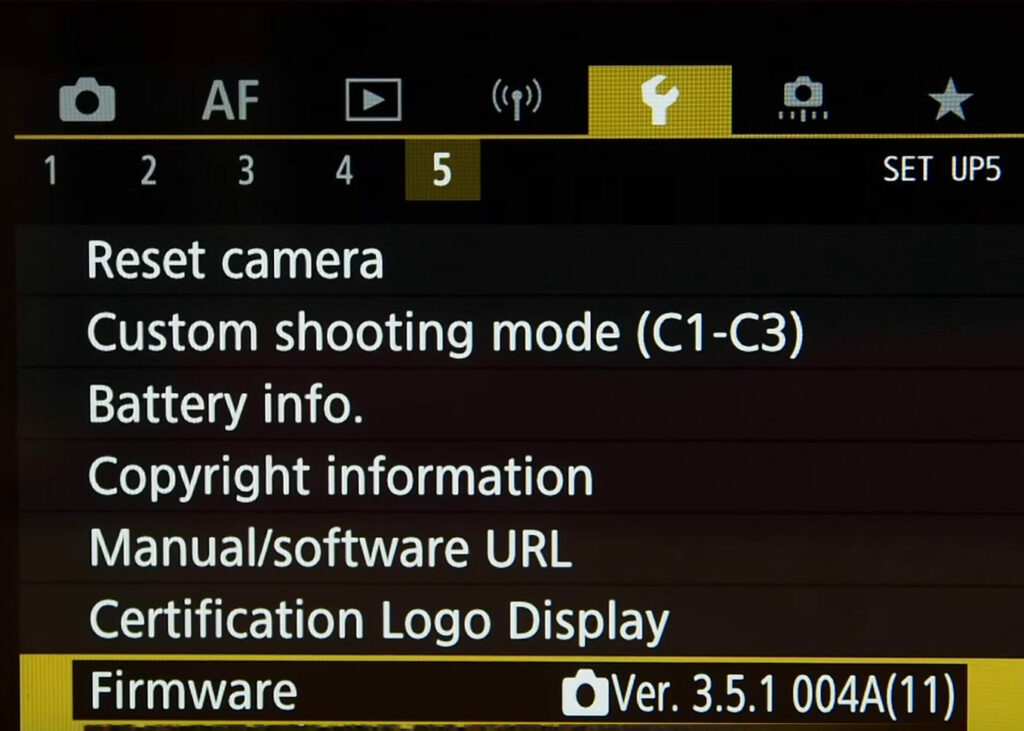
Reset camera
As a last resort in case of problems, you can fully reset the R6 to factory settings here.
Custom Shooting Mode (C1-C3)
You can register current camera settings, such as the shooting mode, menu functions, and Custom Function settings, as Custom shooting modes under the Mode Dial’s C1, C2, and C3 positions.
Battery info
You can check the remaining capacity, shutter count and recharge performance of your battery here.
Copyright information
Insert your own copyright information here. This will be written to every image you take.
Certification logo display
You can find the url to the Canon software manual here. But mine is better…
Certification Logo Display
A bunch of certification logos. You officially have my permission to ignore this :).
Firmware
You can check the firmware revision number here.
Custom Function Menu
C. Fn1: Exposure Settings
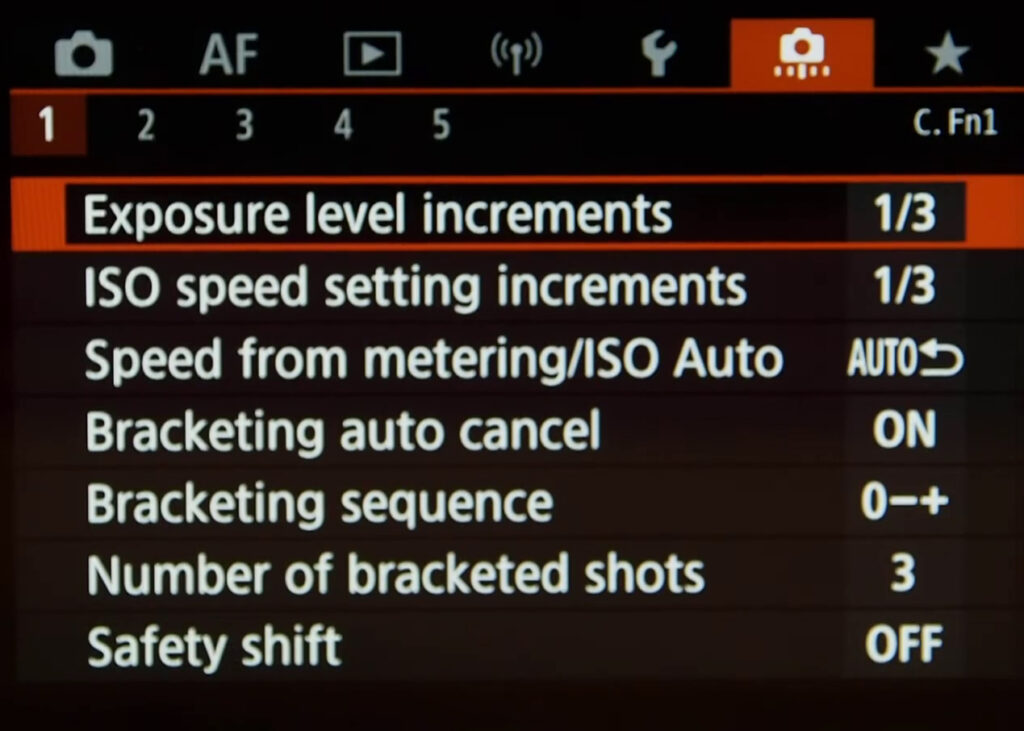
Exposure level increments Sets 1/2-stop increments for the shutter speed, aperture, exposure compensation, AEB, flash exposure compensation, etc. This is effective when you prefer to control the exposure in less fine increments than 1/3-stop.
ISO speed setting increments You can change the manual ISO speed setting increments to 1-stop or 1/3 stop.
Bracketing auto cancel ON: Enable When you set the power switch to 2, the AEB and white balance bracketing settings will be canceled. AEB will also be canceled when the flash is ready to fire or if you switch to movie shooting. OFF: Disable The AEB and white balance bracketing settings will not be canceled even if you set the power switch to <2>. (If the flash is ready to fire or if you switch to movie shooting, AEB will be canceled temporarily, but the AEB range will be retained.
Bracketing sequence The AEB shooting sequence and white balance bracketing sequence can be changed from the starting point zero plus/minus 1.
Number of bracketed shots The number of shots taken with AEB and white balance bracketing can be changed from the default, 3 shots, to 2, 5, or 7 shots.
Safety shift OFF: Disable Tv/Av: Shutter speed/Aperture. This takes effect in the shutter-priority AE (s) and aperture priority AE (f) modes. If the subject brightness changes and the standard exposure cannot be obtained within the autoexposure range, the camera will automatically change the manually-selected setting to obtain a standard exposure. ISO: ISO speed. This works in the Program AE (d), shutter-priority AE (s), and aperture-priority AE (f) modes. If the subject brightness changes and the standard exposure cannot be obtained within the autoexposure range, the camera will automatically change the manually set ISO speed to obtain a standard exposure.
C. Fn2: Exposure Settings
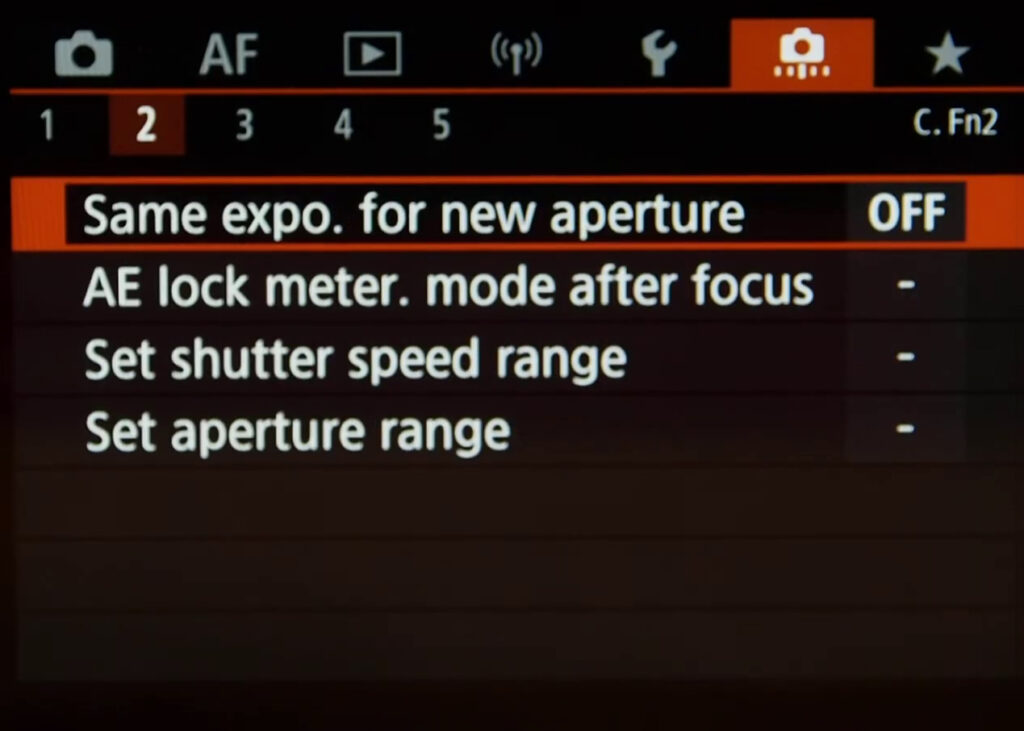
Same exposure for new aperture
If the ‘a mode’ (manual exposure shooting) is set and the ISO speed is set manually (other than Auto ISO or H (12800) is set), the maximum aperture’s f/number may change to a higher number (smaller aperture) if you do any of the following: 1. Change the lens, 2. Attach or detach an Extender, or 3. Use a zoom lens whose maximum aperture f/number changes. If you then shoot at the exposure setting as is, the image will be underexposed by the amount the maximum aperture f/number changes to a higher number. However, by changing the ISO speed or shutter speed (Tv) automatically, you can obtain the same exposure that would be obtained before you did 1, 2, or 3. OFF: Disable Automatic changes in settings to maintain the specified exposure will not be applied. The ISO speed, shutter speed, and aperture already set will be used for shooting. If you do 1, 2, or 3 and the maximum aperture f/number increases, adjust the ISO speed and shutter speed before you shoot. ISO: ISO speed If you do 1, 2, or 3, the ISO speed will automatically increase to compensate for the amount that the maximum aperture f/number increases by. The same exposure that would be obtained before you did 1, 2, or 3 is thereby obtained. Tv: Shutter speed If you do 1, 2, or 3, a slower shutter speed will automatically be set to compensate for the amount that the maximum aperture f/number increases by. The same exposure that would be obtained before you did 1, 2, or 3 is thereby obtained.
AE lock meter. mode after focus
If you check “spot” metering for AE locked after focus, then I can lock the exposure when the shutter button is pressed halfway to focus. Then you can recompose the image using AE (perhaps evaluative) and Auto ISO. The new compostion will now register new AE and Auto ISO.
Set shutter speed range
You can set the shutter speed range. In the <s> <a> modes, you can set the shutter speed manually within the shutter speed range that you have set. In the <d> <f> modes, the shutter speed will be set automatically within the shutter speed range that you have set.
- Highest speed: You can set it from 1/8000 sec. to 15 sec.
- Lowest speed: You can set it from 30 sec. to 1/4000 sec
Set aperture range
You can set the aperture range. In the <f> <a> <F> modes, you can set the aperture manually within the aperture range that you have set. In the <d> <s> modes, the aperture will be set automatically within the aperture range that you have set.
- Min. aperture (Max. f/): You can set it from f/91 to f/1.4.
- Max. aperture (Min. f/): You can set it from f/1.0 to f/64.
C. Fn3: Operation Settings
Dial direction during Tv/Av
Dial turning direction when setting the shutter speed and aperture can be reversed.
Control ring rotation
The control ring rotation function can also be reversed here.
Customize buttons
Within the Customize buttons category, the EOS R6 lets users change the function of 14 different camera controls for still-image shooting; if the camera is set to a video recording mode, that drops to 12 different buttons.
A few general points here, before we dive into the details. First, while the number of potential changes users can apply to most of the buttons are much more extensive than we’ve seen on previous Canon EOS DSLRs, each control has a specific, factory-set list of possible functions you can apply. And, these do vary in some cases, from one control to another. For instance, there are 25 possible choices to modify the rear AF point select button when you shoot still images, but 41 for the adjacent AE Lock button.
Furthermore, it’s not possible (as of late 2018) to add or delete items from the factory-set customization list for each control — if a feature isn’t listed on the menu for customizing a particular button, it can’t be added to that button’s capabilities.
Even with this, the list of possible changes is far more extensive than we’ve seen in previous Canon EOS DSLRs. To take just one example, the AF-ON button on the top-of-the-line EOS-1D X Mark II digital SLR camera gives the user 9 possible ways to customize it; the same AF-ON button on the EOS R6 provides 41 possible choices.
And, the EOS R6’s customization changes, depending on if the camera is in a still-image shooting mode, or switched over to a video shooting mode. Set to video, you lose the ability to customize the function of the Movie Start button (on top of the camera, with the red dot icon), and the shutter button, via the Customize buttons menu. (However, in a video shooting mode, there are settings in the 4th Set-up Menu screen for Shutter Button function, allowing users to modify how it operates for a half-press and full press during video shooting.)
And, in a video shooting mode, the possible functions you can apply to a particular button sometimes change from what’s available in a still-image shooting mode. This is absolutely normal, and not a sign of any malfunction.
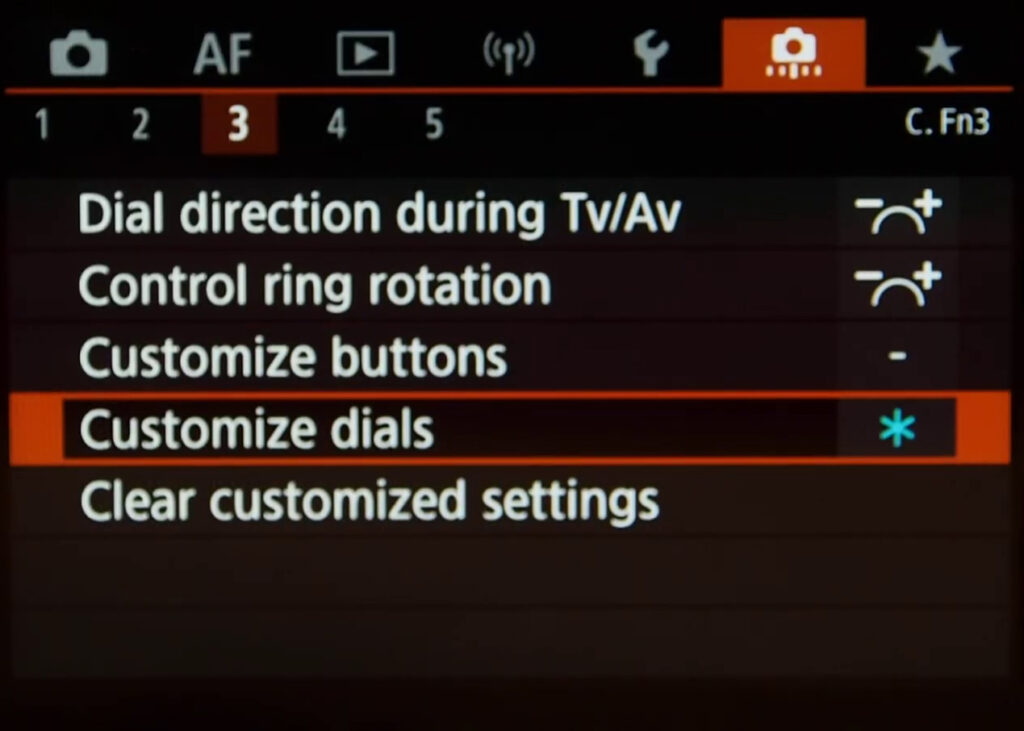
Customize dials
Change the operation of the Main Dial, Quick Control Dial, and Control Ring on Canon’s RF lenses (and on the optional Control Ring Lens Mount Adapter EF-EOS R6)
Clear customised settings
Clear all your custom settings.
C. Fn4: Operation Settings

Add cropping information
It is possible to capture a full frame but add in crop marks for various aspect ratios such as 6:6 or 4:5. In the DPP software this makes it very much quicker to achieve an image in the aspect ratio you require for your end usage. If you plan to make use of the cropping information setting in the Custom Functions, first ensure that the crop/aspect ratio setting in the red ‘Shoot4’ is set to FULL. If it is set to anything else, you will be unable to add cropping information through the custom function menu.
Audio compression
turn on audio compression here.
Default erase option
You can specify which options will be your default when erasing images. This way, you don’t have to go through the default process when selecting images for erasing.
Release shutter w/o lens
You’ll be able to engage the shutter without the Canon EOS R6 detecting a lens. This is a handy option if you’re using third party manual lenses without electronic contacts. When using these lenses, the camera is unaware of the fact that a lens is connected, and the shutter would otherwise not work.
Retract lens on power off
If a powered zoom lens is attached to the EOS R6, setting this function to ON would cause the lens to retract when the camera is powered off.
Add IPTC information
If this function for adding IPTC (International Press Telecommunications Council) information is equipped with the camera, you can edit and register IPTC information. IPTC information registered on the camera can be added to shot images. IPTC information is comment information, such as captions, credits, and shooting location.
C. Fn5: Other Settings
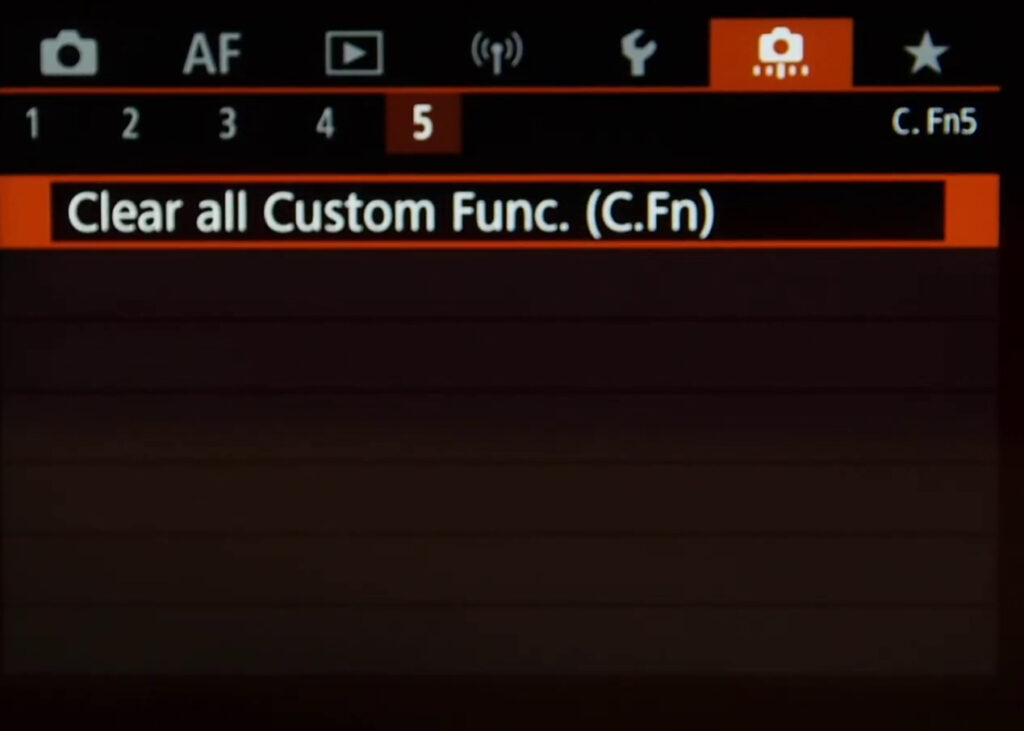
Clear all Custom Func. (C.Fn)
Clears all the user custom functions saved in the Custom functions Menu and resets them to the factory defaults.
My menu (green)
MY MENU1
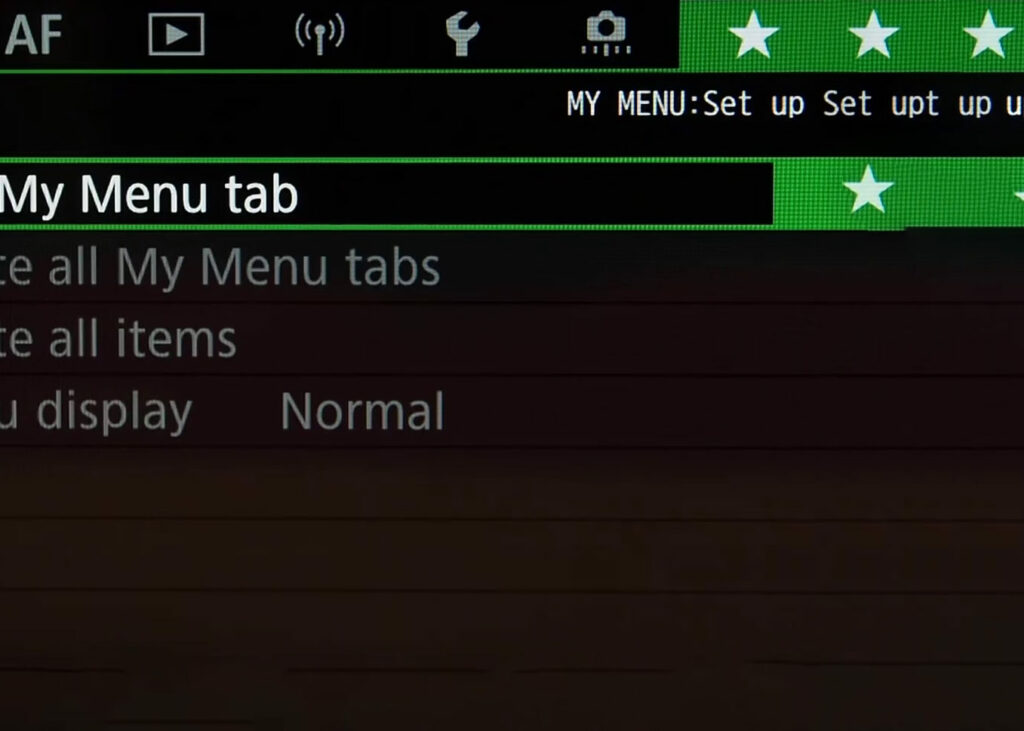
My Menu allows you to build your own menus. You can add all your most used Menu functions to this page like Format for instance. Adding favourite functions to this menu means that you’ll be able to access them quicker than having to browse through the entire Menu system.
Conclusion
The EOS R6 is a fantastic mirrorless camera, and as you might have noticed there are many features hidden inside the Menu system. Even when coming from another Canon full frame camera the Canon EOS R6 is somewhat different because this is a mirrorless system with it’s own strengths and weaknesses.
An EVF like this might take some time to get used too for instance, but the addition of features like Eye AF should make your job as a photographer easier on the other. A great way to get to know the Canon EOS R6 is to read this thorough menu run-through alongside your camera, set it up and do some testing of your own.
If you have any questions, feel free to ask them in the comment section below. Happy shooting!
the table for the file sizes for the various JPG choices is missing on the first page. you refer to a table above in the text but the table is actually missing. Thx for the detailed manual.
Thanks Frank. Updated.
Ik wil graag weten of het objectief bij focus bracketing automatisch de stapjes maakt om de scherpstelling te verplaatsen naar een volgen scherpstel punt in de range die afhankelijk is van het aantal opnames.
Hi Carlo, I’ll answer in English so everyone can understand. Yes, in Focus Bracketing, the camera automatically changes focus distance depending on the number of shots and the ‘focus increment’ setting inside this menu (rang from narrow to wide).
Is it possible to pair EOS R6 to a computer with an USB cable? If yes how, because my computer doesn’t find the camera? It isn’t due to the fire wall !
Hi Georges, what do you mean by “pair”? In order to connect your R6 to the computer, you need to install the Canon EOS Utility .
I see some people shooting with eos r6 at 50 ISO, but i cant find any setting to get 50 ISO. Is there a trick for that?
you need to ISO set speed range to L in ‘ISO SPEED SETTINGS’ to do that.
In my R6 I have looked for this option L in ISO i cannot find it ,am i missing something
You should be in Tv, Av or M to do that.
Hi Wim,
Thank you for a well written, practical and informative document for the R6.
I do have a question regarding Resetting the camera to the full factory settings. There appears to be 2 types or options for resetting; first one for the C functions and second one that dives bit deeper, which I assume is the factory reset. In the second option, however, it shows the choice for resetting root certificate. What does this mean and should I do it?
Thank you for your response.
Peter
Hi Peter, your root certificate is used to connect your camera over LAN to a server. it’s mainly used by journalists and reporters who have this infrastructure.
This was so helpful, thank you!
Hi Wim,
How can I customize the lens control ring (RF 85mm f2 MACRO) in the EOS R6 menu ?
Marc
Marc, you can check if this is possible in “C. Fn3: Operation Settings”. Though I don’t think in this case you can change the function.
Wim
Great job! Spent most of yesterday afternoon going through A4 copy of manual but this is superb. And I’ve been a Canon user since 1979!
Wim,
Making my life easier with my new R6. Is there any chance you could offer a printed version? At a cost I’m sure.
Thanks.
Hi Wim,
How is the iso locked when using Tv or Av?
Now the iso value keeps changing.
What is the difference between Fv and
(Tv and Av)?
Regards,
Oswald
You must have it on Auto ISO. TV – you set SS and camera sets f/stop.
Av – You set f/stop and camera sets SS.
Fv – Fv stands for Flexible value. It sets the camera to Flexible Priority Auto Exposure mode. It’s flexible because it allows you to swap between program, aperture priority, shutter priority and manual mode. It also gives you convenient control over sensitivity (ISO) and exposure compensation.
I have a question regarding the display on my screen. In some instances the shutter speed and aperture setting both are in red and I can’t figure out why. Thanks in advance.
Very good blog,thank so much for your effort in writing the posts.
Long time Canon user, less enthused by canon manuals, just set up my new R6 with your help and with minimal pain.
Many thanks
i have a question. when recording video if battery shuts down the recorded video corrupted why is that happening. other cameras save the video file but r6 wont
If I am using one of the three custom preset memories, AE lock does not function on the R6.
Regarding customizing buttons, could you please shed some light on what happens in the following scenario?
1. Shutter is set to AF+Metering (default)
2. AF-ON is set to start Eye AF tracking (Eye – not the on off toggle, but the actual af tracking)
3. Selected AF mode is set to 1-Point AF and mode is set to Servo
Usage:
a) Pressing the shutter halfway, the AF starts tracking the selected object using 1-Point AF.
b) Pressing the AF-ON button, the Eye AF takes over, finds an eye and begins tracking that. Pressing the shutter to take the picture does not seem to affect the Eye AF operation.
Is this a proper way to work? Because in every article I have been reading, they say that the Shutter should be decoupled from the focusing operation. Why does my scenario work (does it???)? Does the AF-ON button always override the shutter AF function? Or am I messing up the camera by using this method in a way I have not figured out yet??
Cheers.
I had my R6 set up with the AE lock button (*) as eye detect but now it won’t work. It gives me about 20 blue focus points and won’t recognize the eye. I switched the AF-ON and (*) button and the eye detect works perfectly again. I have reset my camera 100 times using the same video I used initially but it won’t work at all now with the AF-ON as my back button focus and the (*) as my eye detect. Any suggestions? It is about to drive me crazy!