
Welcome, photography enthusiasts! Have you ever found yourself captivated by stunning landscape photographs and wondered how you can capture similar breathtaking images? Look no further, because in this article, we will unlock the secrets of stunning landscape photography.
Landscape photography allows us to capture the beauty and grandeur of nature, from majestic mountains to serene seascapes and everything in between. It is an art form that blends technical skill and creativity to create images that evoke emotions and transport viewers to another world.
Whether you are a beginner looking to develop your skills or a more experienced photographer seeking to refine your techniques, this article will provide you with expert tips and techniques to elevate your landscape photography to new heights. We will delve into everything from camera equipment and composition to lighting and post-processing.
So, grab your camera and get ready to embark on a journey through the world of landscape photography. We will guide you step by step, unlocking the secrets that will enable you to capture stunning images that truly showcase the beauty of the natural world. Let’s get started!
Understanding the Basics of Landscape Photography
When it comes to landscape photography, there are a few fundamental aspects you need to understand in order to capture stunning shots. From choosing the right camera equipment to mastering composition and utilizing natural lighting, these techniques will help you take your landscape photography to the next level. So let’s dive in and unlock the secrets of stunning landscape photography!
Choosing the Right Camera Equipment
Having the right gear is crucial for landscape photography. Here are some essential camera equipment tips:
- Camera: Invest in a DSLR or mirrorless camera that allows you to have full manual control over settings.
- Lenses: Wide-angle lenses are highly recommended for capturing the vastness of landscapes. Look for lenses with focal lengths between 14mm and 35mm.
- Tripod: A sturdy tripod is essential for keeping your camera steady during long exposures or in low-light conditions.
- Filters: Consider using filters such as neutral density filters to control light and graduated neutral density filters to balance exposure between the sky and the land.
Mastering Composition and Framing
Composition plays a crucial role in landscape photography. Here are some tips on mastering composition:
- Rule of Thirds: Divide the frame into nine equal sections with two horizontal and two vertical lines. Place key elements along these lines or at their intersections to create a visually appealing composition.
- Leading Lines: Use leading lines, such as rivers or paths, to draw viewers’ attention into the scene and create depth.
- Foreground Interest: Include a strong and interesting foreground element to create a sense of depth and add visual interest to your images.
- Symmetry and Patterns: Look for symmetrical elements or natural patterns in the landscape, such as reflections or repetitive shapes, to add visual impact.
Utilizing Natural Lighting
Lighting is a critical factor in landscape photography. Here are some tips for utilizing natural lighting:
- Golden Hour: The golden hour, which occurs during the first hour after sunrise and the last hour before sunset, provides soft and warm light that enhances the beauty of landscapes.
- Blue Hour: The blue hour refers to the period before sunrise and after sunset when the sky takes on a blue hue. It’s ideal for capturing stunning twilight shots.
- Weather Conditions: Pay attention to weather conditions and plan your shoot accordingly. Clouds, mist, or stormy skies can add drama and interest to your images.
- Dynamic Range: To capture the full details of the scene, use techniques like exposure bracketing or graduated filters to balance the bright highlights and dark shadows.
By understanding the basics of landscape photography, you’ll be ready to explore the great outdoors and capture breathtaking scenes. So grab your camera and venture out into nature with these essential tips in mind. Stay tuned for the next section, where we will discover the importance of scouting locations and planning for successful landscape photography.
Scouting Locations and Planning
When it comes to landscape photography, one of the most important steps to capturing stunning shots is scouting locations and planning ahead. Taking the time to research potential shooting spots, understand weather conditions, and create a shot list can greatly enhance your chances of capturing that perfect landscape shot. In this section, we will explore the essential aspects of scouting locations and planning for your landscape photography adventures.
Researching Potential Shooting Spots
Before heading out into the wilderness with your camera gear, it’s crucial to research potential shooting spots in advance. Here are some tips to help you find the best locations:
- Online Resources: Utilize websites, forums, and social media platforms dedicated to landscape photography to gather information about popular shooting spots.
- Local Knowledge: Reach out to local photographers or photography clubs in the area you plan to visit. They can provide valuable insight and recommendations.
- Scouting Apps: Take advantage of scouting apps that provide information about topography, elevation, and sunrise/sunset times for specific locations.
Understanding Weather and Timing
Weather conditions can greatly impact the mood and lighting of your landscape photos. Here’s what you need to consider:
- Cloud Cover: Overcast skies can create a soft and diffused light, ideal for certain landscapes. Clear skies, on the other hand, provide more vibrant colors and dramatic shadows.
- Timing: Sunrise and sunset, also known as the golden hour, offer the most beautiful lighting for landscapes. Blue hour, which occurs just before sunrise or after sunset, can give your images a serene, blue-toned look.
- Seasons: Research how different seasons affect the landscapes you plan to capture. Spring brings lush greenery, while autumn showcases vibrant foliage.
Creating a Shot List
A shot list is a valuable tool that helps you stay organized and ensures you don’t miss any key shots. Here’s how to create an effective shot list:
- Research Iconic Shots: Look for well-known landmarks or scenic spots in the area you plan to photograph. These iconic shots can serve as a starting point for your shot list.
- Consider Different Perspectives: Include a variety of angles and perspectives to capture the landscape from different viewpoints. This adds depth and visual interest to your portfolio.
- Take Notes: Jot down specific details about each shot, such as the desired composition, desired lighting conditions, and potential challenges you may encounter.
By taking the time to scout locations and plan ahead, you set yourself up for success in landscape photography. A well-planned shoot increases your chances of capturing breathtaking images and allows you to fully enjoy the experience of immersing yourself in nature’s beauty.
“The best-laid plans for a landscape shoot will always be thwarted by poor location scouting, so taking the time to assess a location prior to shooting, alongside good planning and research, are key to successful landscape photography.”
Capturing the Perfect Landscape Shot
When it comes to capturing stunning landscape photographs, there are a few key factors to consider. From setting the right camera parameters to utilizing accessories and stabilization techniques, every detail plays a role in creating that perfect shot. Here are some expert tips and techniques to help you capture the perfect landscape shot:
Setting the Right Camera Parameters
- Aperture: Use a smaller aperture (higher f-number) like f/11 or f/16 to increase the depth of field and ensure that both the foreground and background are in focus.
- ISO: Keep your ISO as low as possible (around 100-200) to reduce noise and maintain image quality.
- Shutter Speed: Adjust your shutter speed according to the lighting conditions and the effect you want to achieve. A faster shutter speed freezes motion, while a slower one creates a sense of movement or blur.
- Exposure Compensation: Experiment with exposure compensation to get the desired brightness in your landscape. Increase it for brighter scenes and decrease it for darker scenes.
Working with Filters and Accessories
- Polarizing Filter: Use a polarizing filter to reduce glare and enhance colors, especially in landscapes with water or a blue sky.
- Graduated Neutral Density (ND) Filter: These filters help balance the exposure between the sky and the landscape, especially when there is a large difference in brightness.
- Remote Shutter Release: Use a remote shutter release or the self-timer function to minimize camera shake and ensure sharpness when shooting on a tripod.
- Lens Hood: Always use a lens hood to prevent lens flare and protect the lens from stray light.
Utilizing Tripods and Stabilization Techniques
- Tripod: A sturdy tripod is essential for capturing sharp landscape images, especially in low light conditions. Make sure to use one that suits the weight and size of your camera setup.
- Mirror Lock-Up: When using a tripod, engage the mirror lock-up function (if available) to reduce vibrations caused by the mirror moving up before the shutter opens.
- Image Stabilization: If your lens or camera has image stabilization (IS) or vibration reduction (VR), turn it off when using a tripod. It can create slight vibrations that may affect image sharpness.
Remember, capturing the perfect landscape shot requires patience and creativity. Take your time to experiment with different techniques, compositions, and settings until you achieve the desired result. Keep practicing and refining your skills, and don’t be afraid to push your boundaries to create unique and captivating landscape photographs!
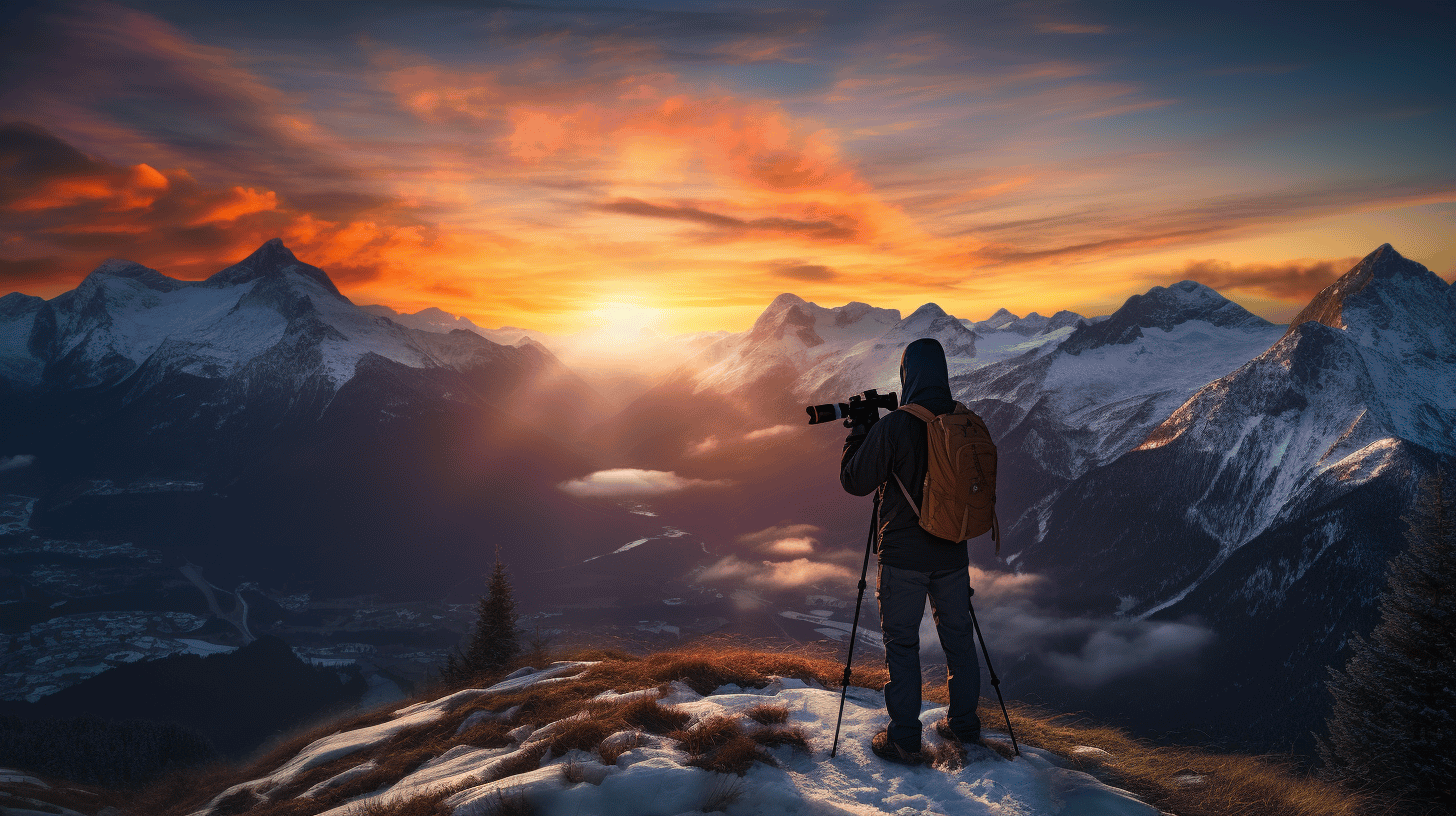
Understanding and Enhancing Natural Light
One of the key elements in landscape photography is the use of natural light. Understanding how light behaves and learning how to make the most of it can significantly improve the quality of your photographs. In this section, we will explore the different aspects of natural light and how to enhance it to create stunning landscape shots.
Golden Hour and Blue Hour Photography
- The golden hour refers to the period shortly after sunrise or just before sunset when the light is soft, warm, and casts long shadows. It is often considered the best time for landscape photography due to the beautiful quality of light.
- The blue hour, on the other hand, occurs just before sunrise or after sunset when the sky takes on a deep blue hue. This time can also produce captivating photos, especially when combined with cityscapes or water bodies.
Working with Sunrise and Sunset
- Sunrise and sunset can provide dramatic lighting conditions that can add depth and interest to your landscape shots. Here are a few tips for capturing stunning sunrise and sunset scenes:
- Arrive early and scout the location to find the best viewpoint.
- Use a tripod to stabilize your camera and ensure sharp images.
- Experiment with different exposures to capture the full range of colors in the sky.
- Include interesting foreground elements to create a sense of depth.
Mastering Exposure and Dynamic Range
- Exposure refers to the amount of light that reaches the camera’s sensor, and mastering it is crucial for achieving well-balanced landscape photos. Here are some tips for getting the exposure right:
- Use the camera’s histogram to ensure that you are not clipping the highlights or losing details in the shadows.
- Utilize exposure bracketing to capture a series of images with varying exposures, which can be useful for blending them later in post-processing.
- Consider using graduated neutral density filters to balance the exposure between the bright sky and darker foreground.
Understanding and harnessing natural light is essential for creating captivating landscape photos. Experiment with different lighting conditions and techniques to add depth, mood, and interest to your images.
Post-processing and Editing Techniques
Post-processing and editing are crucial steps in landscape photography that allow you to enhance and bring out the best in your images. With the right techniques, you can transform a good photo into a stunning masterpiece. In this section, we will explore some essential post-processing and editing techniques that will help you take your landscape photos to the next level.
Organizing and Selecting the Best Shots
Before diving into the editing process, it’s important to organize your photos and select the best shots. Deal with the overwhelming number of images by utilizing image management software such as Adobe Lightroom or Capture One. Here are a few tips to help you streamline your workflow:
- Create a folder structure: Organize your photos into folders based on location, date, or subject, making it easier to find specific images later on.
- Rating system: Develop a rating system to quickly identify your best shots. Assign a higher rating to exceptional images that you want to prioritize during editing.
- Cull your photos: Delete any duplicates, out-of-focus shots, or images with technical issues such as overexposure or underexposure. It’s better to work with a smaller selection of high-quality images.
Color Correction and White Balance
Correcting colors and adjusting white balance is essential to ensure accurate and visually appealing landscape photographs. Here are a few techniques to keep in mind:
- White balance adjustment: Adjust the white balance to fix any color casts and to achieve the desired mood of the image. Use the eyedropper tool in post-processing software to select a neutral color and let the software do the rest.
- Color grading: Consider experimenting with color grading to add a unique and artistic touch to your images. Enhance certain colors or create a specific mood by adjusting the hue, saturation, and luminance of individual colors.
Enhancing Details and Sharpness
Sharpening your landscape photos helps to bring out the fine details and make the image appear more crisp and visually appealing. Here’s how you can enhance details and sharpness:
- Use the right sharpening tools: Most post-processing software have specific tools for sharpening. Experiment with the sharpening sliders or use adjustment brushes or filters to selectively sharpen certain areas of your image.
- Avoid over-sharpening: While sharpening can make your image pop, be careful not to overdo it. Too much sharpening can create unappealing halos and artifacts. Zoom in and preview your image at 100% to ensure you achieve the right balance.
“Post-processing and editing are crucial steps in landscape photography that allow you to enhance and bring out the best in your images.”
Remember, the aim of editing is to enhance the image, not to completely alter its authenticity. Experiment with different techniques, but always strive for a natural and realistic result.
In the next section, we will delve into the fascinating world of nightscapes and astrophotography, where capturing the dark skies and celestial wonders requires a unique set of skills and techniques.
Illuminating Nightscapes and Astrophotography
Nightscapes and astrophotography present unique and captivating opportunities for landscape photographers. From capturing starry skies to showcasing the beauty of celestial events, this branch of landscape photography allows you to explore the wonders of the night sky. In this section, we’ll uncover the secrets to illuminating nightscapes and astrophotography, equipping you with the knowledge to capture breathtaking images after the sun sets.
Understanding Nighttime Photography Gear
Before venturing into nighttime photography, it’s important to have the right gear. Here are some essential equipment and accessories that will help you capture stunning nightscapes and astrophotography shots:
- Camera: Invest in a camera with a good high ISO performance to capture clear and noise-free images in low-light conditions. Full-frame cameras are particularly suitable for astrophotography due to their larger sensors.
- Lenses: Wide-angle lenses with a large aperture (f/2.8 or wider) are ideal for nightscapes and astrophotography. They allow more light to enter the camera, enabling you to capture the grandeur of the night sky.
- Tripod: To avoid camera shake and capture long exposures, a sturdy tripod is crucial. Look for one that can handle the weight of your camera and lens.
- Remote Shutter Release: A remote shutter release or intervalometer will ensure minimal camera shake when taking long-exposure shots.
- Flashlight or Headlamp: Having a flashlight or headlamp with a red light mode is essential for navigating in the dark without disturbing your night vision or ruining the shot.
Mastering Long Exposures and Star Trails
Long exposures are key to capturing the beauty of nightscapes and astrophotography. Here’s how you can master this technique:
- Stabilize your camera: Mount your camera on a tripod to keep it steady during long exposures.
- Set a low ISO: Start with a low ISO setting (e.g., ISO 100 or 200) to reduce noise in your images.
- Open your aperture: Use the widest aperture your lens allows (e.g., f/2.8) to gather as much light as possible.
- Adjust shutter speed: Experiment with different shutter speeds to achieve the desired exposure. Longer exposures (e.g., 20-30 seconds) capture more starlight and create beautiful star trails.
- Use a remote shutter release: To minimize camera shake, use a remote shutter release or a self-timer mode to trigger the shutter without touching the camera.
- Focus on infinity: Set your lens to manual focus and adjust it to infinity for sharp stars. Use the live view mode to fine-tune the focus if necessary.
- Experiment with light painting: To add visual interest to your nightscapes, try using a flashlight to paint light onto foreground elements during a long exposure.
Star trails are another captivating aspect of astrophotography. To capture these mesmerizing trails, follow these tips:
- Find a location away from light pollution.
- Use a wide-angle lens and set a long exposure of 30 minutes to several hours.
- Set your camera to bulb mode or use a remote shutter release to control the exposure time.
- Take multiple consecutive images and later stack them using software like Adobe Photoshop or specialized astrophotography software to create stunning star trails.
Tips for Milky Way and Aurora Photography
Capturing the Milky Way and aurora can be an awe-inspiring experience. Here are some tips to make the most of these extraordinary phenomena:
Milky Way Photography:
- Find a location with minimal light pollution and a clear view of the sky.
- Plan your shoot during the New Moon or when the moon is below the horizon to minimize its brightness.
- Use a wide-angle lens with a fast aperture to capture as much light as possible.
- Experiment with different shutter speeds and ISO settings to achieve the desired level of exposure and detail.
- Consider employing foreground elements, such as trees or mountains, to add depth and interest to the composition.
Aurora Photography:
- Head to locations near the Earth’s magnetic poles, such as Iceland or northern Scandinavia, to increase your chances of witnessing and photographing the aurora borealis (northern lights) or the aurora australis (southern lights).
- Plan your shoot on nights with high auroral activity and clear skies.
- Use a wide-angle lens to capture the vastness of the sky and the dancing lights.
- Start with an ISO of around 1600 and experiment with shutter speed to capture the movement and colors of the aurora.
- Be patient and allow the camera to capture multiple exposures to increase the chances of capturing dynamic aurora displays.
With the right gear, techniques, and a bit of luck, you’ll be able to create stunning nightscapes and capture the magic of the night sky. Take your time, experiment with different settings, and let your creativity shine through your images.
So, grab your camera, embrace the darkness, and unlock the secrets of illuminating nightscapes and astrophotography!
Safety and Ethical Considerations
When venturing out into nature to capture stunning landscape photography, it’s important to prioritize safety and ethical considerations. By following these guidelines, you can ensure that you not only preserve the beauty of the environment but also respect the wildlife and local communities that call these places home.
Here are some essential safety and ethical considerations to keep in mind:
1. Respecting Nature and Wildlife
- Stay on designated paths and trails to minimize your impact on the environment.
- Avoid trampling vegetation and sensitive areas.
- Do not disturb or approach wildlife to ensure their safety and wellbeing.
- Keep a safe distance from animals and use telephoto lenses to capture close-up shots without causing harm or stress.
2. Mindful Interaction with Local Communities
- Research and understand the local customs and traditions of the areas you plan to visit.
- Seek permission from local authorities before photographing in private or protected areas.
- Respect any restrictions or regulations in place, such as no-fly zones or restricted access areas.
- Be mindful of the impact of your presence on local communities and their way of life.
3. Leave No Trace Practices
- Pack out any trash or waste you generate during your photography sessions.
- Minimize your footprint by leaving the natural environment as you found it.
- Avoid introducing non-native plants or animals into delicate ecosystems.
- Adhere to any fire and camping regulations to prevent accidental damage or wildfires.
By adhering to these safety and ethical considerations, you not only protect the environment and wildlife but also contribute to sustainable tourism practices. Remember, our responsibility as photographers goes beyond capturing beautiful images – it extends to preserving the places and communities we encounter along the way.
“Nature is not a place to visit. It is home.” – Gary Snyder
Building a Portfolio and Showcasing Your Work
So, you’ve captured some stunning landscape photos, and now you’re ready to showcase your work to the world. Building a portfolio is a crucial step in establishing your photography brand and gaining recognition for your talent. Here are some expert tips on how to create a compelling portfolio and effectively showcase your landscape photography:
Curating Your Best Shots
When it comes to building a portfolio, quality trumps quantity. It’s important to curate your best shots to create a cohesive and captivating collection. Take the time to review and select images that truly showcase your unique style and vision. Here are some tips to help you curate your portfolio:
- Choose diverse and impactful images: Select a variety of landscape photos that highlight different locations, seasons, and lighting conditions. Aim for a mix of wide-angle vistas, intimate details, and breathtaking landscapes.
- Focus on storytelling: Each photo in your portfolio should tell a compelling story. Consider the narrative behind each image and how it can engage viewers on an emotional level.
- Pay attention to composition: Ensure that each photo has strong composition, balanced elements, and a clear focal point. Avoid including similar shots or redundant compositions in your portfolio.
Creating an Online Photography Portfolio
In the digital era, having an online portfolio is essential for showcasing your work to a wide audience. Here are some key steps to create an impressive online portfolio:
- Choose a reliable platform: There are numerous online platforms specifically designed for photographers to showcase their work. Popular options include Squarespace, Wix, and Adobe Portfolio. Select a platform that offers customizable templates and an easy-to-use interface.
- Design a clean and user-friendly layout: Opt for a clean and simple design that allows your photos to take center stage. Avoid cluttered layouts that distract from your images. Use high-resolution images and consider using a responsive design that looks great across different devices.
- Organize your portfolio: Structure your portfolio into logical categories, such as landscapes by location or by theme. This helps visitors navigate your work and find what they’re looking for. Include a concise and engaging description for each category or series of images.
- Include a captivating bio and contact information: Introduce yourself to your audience with a brief and engaging bio. Include relevant details about your photography style, experience, and any accolades or exhibitions. Don’t forget to provide clear contact information for potential clients or collaborations.
Building Your Photography Brand
In addition to showcasing your work, building your photography brand is essential for establishing yourself as a professional photographer. Here are some strategies to build a strong brand presence:
- Consistent style and editing: Develop a consistent style and editing approach that is unique to your work. This helps create a recognizable brand identity and sets you apart from others. Experiment with different techniques but aim for a cohesive look across your portfolio.
- Engage with the photography community: Join photography groups, forums, and social media platforms to connect with fellow photographers, gain exposure, and learn from others. Engage with your audience by responding to comments and feedback on your work.
- Participate in exhibitions and contests: Enter photography contests and submit your work to exhibitions to gain recognition and exposure. This can help elevate your profile and provide valuable networking opportunities.
- Showcase collaborations and client work: If you’ve worked with clients or collaborated with other brands or artists, include those projects in your portfolio. This demonstrates your versatility and professional experience.
Remember, building a portfolio and showcasing your work is an ongoing process. Continually update your portfolio with your best and latest work to keep it fresh and engaging. With dedication, practice, and a strong online presence, you can effectively showcase your landscape photography and attract the attention of potential clients and admirers of your craft.
Conclusion
Conclusion
Congratulations! By now, you should have a solid understanding of landscape photography and the techniques needed to capture stunning landscapes. Here’s a quick recap of what we covered:
- We discussed the importance of choosing the right camera equipment, from cameras to lenses and accessories. Remember, your gear should suit your specific needs and budget.
- Composition and framing are essential elements in creating impactful landscape images. Consider using the rule of thirds, leading lines, and foreground interest to add depth and interest to your photos.
- Natural lighting plays a crucial role in landscape photography. Take advantage of the golden hour and blue hour for soft, warm light. Experiment with sunrise and sunset to create dramatic silhouettes and vibrant colors.
- Scouting locations and planning ahead are essential for successful landscape photography. Research potential shooting spots, understand weather patterns and timing, and create a shot list to capture the beauty of each location.
- When capturing the perfect landscape shot, be sure to set the right camera parameters and consider using filters and accessories to enhance your images. Utilizing tripods and stabilization techniques ensures sharp and well-exposed photos.
- Post-processing and editing techniques can elevate your landscape photos to the next level. Organize and select the best shots, correct color and white balance, and enhance details and sharpness.
- Don’t forget about illuminating nightscapes and astrophotography! Explore nighttime photography gear, master long exposures and star trails, and learn tips for capturing the Milky Way and auroras.
- Safety and ethical considerations are essential when photographing landscapes. Respect nature and wildlife, interact mindfully with local communities, and practice Leave No Trace principles.
- Finally, building a portfolio and showcasing your work allows others to appreciate and enjoy your photography. Curate your best shots, create an online photography portfolio, and build your photography brand.
Now, armed with these tips and techniques, go out and explore the world through your lens. Remember, practice makes perfect, so keep refining your skills and capturing breathtaking landscapes. And don’t forget, if you’re looking for more photography tutorials, reviews, tips, and tricks, be sure to visit Wimarys.com. Happy shooting!
Frequently Asked Questions
- What are some expert tips for stunning landscape photography?
Some expert tips for stunning landscape photography include: 1. Use a tripod for stability, 2. Utilize the golden hour for beautiful lighting, 3. Experiment with different compositions and perspectives, 4. Use filters to enhance the colors and contrasts, and 5. Pay attention to the foreground and background elements.
- What type of camera and lenses are recommended for landscape photography?
For landscape photography, it is recommended to use a DSLR or mirrorless camera with a wide-angle lens. A focal length between 16mm to 35mm is ideal for capturing the expansive beauty of landscapes.
- How can I create depth in my landscape photos?
To create depth in landscape photos, you can use techniques such as incorporating foreground elements, leading lines, and capturing a sense of scale by including objects that provide a reference point.
- What are some post-processing tips for enhancing landscape photos?
Some post-processing tips for enhancing landscape photos include adjusting exposure and contrast, boosting colors, sharpening details, reducing noise, and using selective editing to enhance specific areas of the image.
- What are some common mistakes to avoid in landscape photography?
Some common mistakes to avoid in landscape photography are overexposure or underexposure, not paying attention to the composition, using excessive post-processing, failing to scout locations in advance, and forgetting to bring essential accessories like spare batteries or lens cleaning tools.


0 Comments