
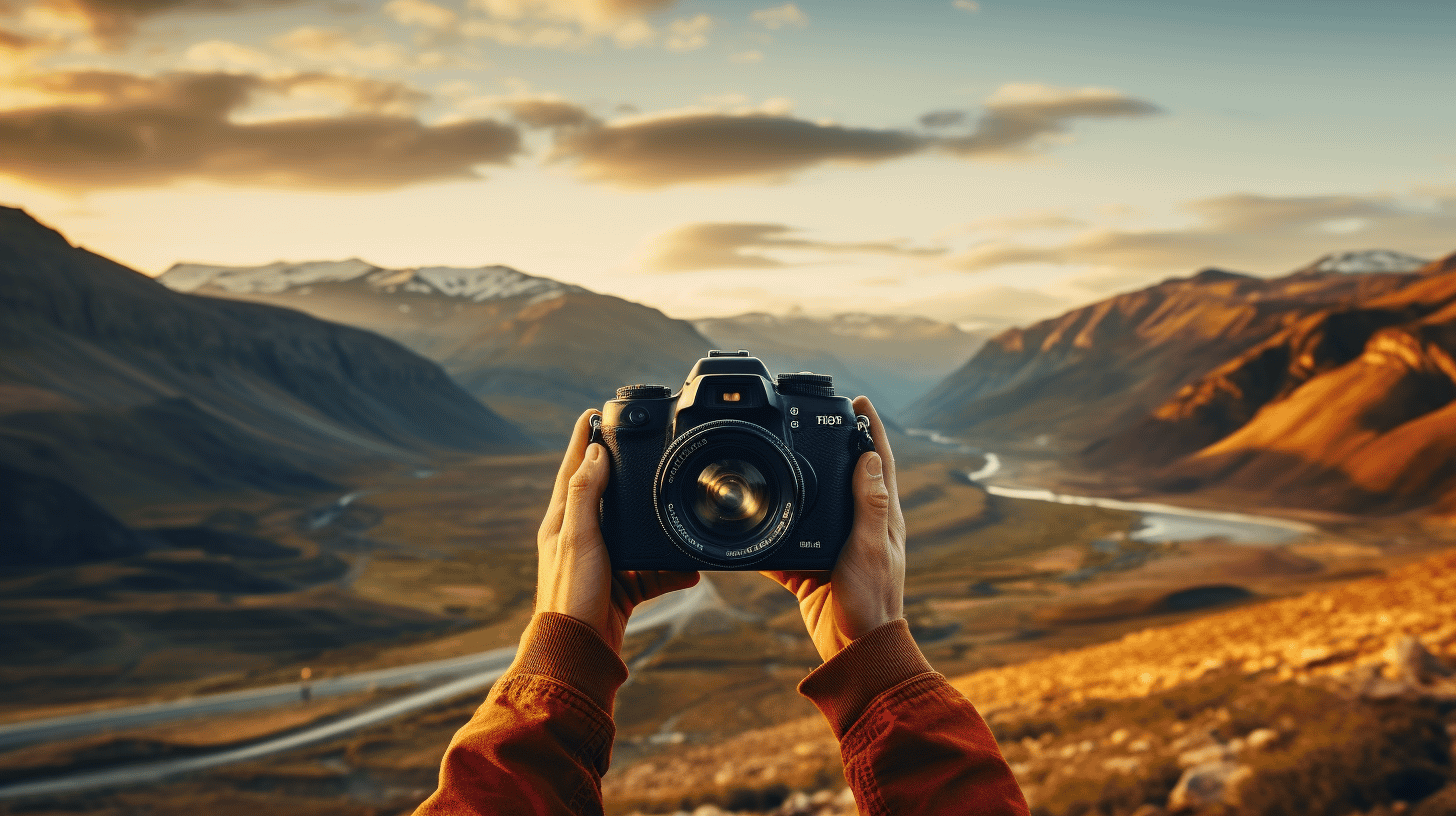
Long exposure landscape photography is a captivating technique that allows photographers to capture stunning and ethereal images. By extending the shutter speed, this style of photography creates unique visual effects, such as silky smooth waterfalls, streaking clouds, and a sense of motion in still subjects. Whether you’re a beginner or an experienced photographer looking to level up your skills, mastering long exposure landscape photography opens up a world of creative possibilities.
In this guide, we will delve into the art of long exposure landscape photography, exploring techniques, essential camera settings, tips for beginners, and ways to enhance your landscape shots. By the end, you’ll have a solid understanding of the key elements involved in this technique and the tools and knowledge needed to create breathtaking images.
So grab your camera and tripod, and let’s embark on a journey to capture the beauty of the natural world through long exposure landscape photography.
Understanding Long Exposure Photography
Long exposure photography is a technique that allows photographers to capture stunningly unique and mesmerizing images. It involves using a slow shutter speed to create a beautiful blur effect, capturing movement over an extended period of time. This technique is particularly popular in landscape, astrophotography, and urban exploration genres.
Definition and Purpose
Long exposure photography refers to the process of using a longer shutter speed to capture an image. Unlike typical photography, where the shutter is open for a split second, long exposure requires the shutter to remain open for several seconds or even minutes. This extended exposure time allows for creative effects such as light trails, silky smooth waterfalls, and star trails.
The purpose of long exposure photography is to create a sense of motion and transform ordinary scenes into something extraordinary. By extending the exposure time, photographers can capture movement that is otherwise invisible to the naked eye. This technique adds a surreal quality to the images, evoking a sense of calm and tranquility.
Using Slow Shutter Speeds
To achieve long exposure shots, photographers need to use slow shutter speeds. This means setting the camera’s shutter speed to a duration longer than the standard 1/60th of a second. Here are a few steps to get started with long exposure photography:
- Manual Mode: Switch your camera to manual mode to have full control over the settings, including the shutter speed.
- Decrease ISO: Lower the ISO to the lowest setting (e.g., ISO 100) to reduce noise in your images.
- Attach a Tripod: Since long exposures require keeping the camera steady during the exposure, it’s crucial to use a tripod to avoid any camera shake.
- Use Remote Shutter Release: Consider using a remote shutter release or the camera’s self-timer to eliminate any additional camera movement from pressing the shutter button.
By using slow shutter speeds, we can achieve surreal effects like light painting, where moving light sources are captured as streaks of color, or silky waterfalls where the water appears smooth and flowing.
Importance of a Tripod
Having a stable base is critical when it comes to long exposure photography. Even the slightest camera movement can result in blurry images. Here’s why a tripod is essential for long exposure shots:
- Stability: Tripods provide a stable platform, minimizing camera shake and ensuring sharp images.
- Extended Exposure Time: Slow shutter speeds require extended periods of time with the shutter open. Holding the camera by hand for that long is nearly impossible without inducing blur.
- Composition: Tripods enable photographers to carefully compose their shots, allowing for precise framing and alignment.
Investing in a sturdy tripod is worthwhile for any photographer looking to explore the world of long exposure photography. Look for one that can support the weight of your camera and is easy to adjust to different heights and angles.
In conclusion, long exposure photography is a fascinating technique that allows photographers to capture movement and create visually stunning images. By using slow shutter speeds and a tripod, photographers can unlock their creativity and produce captivating photographs that evoke a sense of artistry and wonder. So grab your camera, experiment with long exposures, and let your imagination run wild!
Techniques for Long Exposure Landscape Photography
Introduction
Long exposure landscape photography is a captivating way to capture the beauty of nature and create stunning, ethereal images. By using long exposure techniques, photographers can convey movement, add drama, and create a sense of stillness in their photographs. In this article, we will explore some key techniques that can help you master the art of long exposure landscape photography.
Panning for Capturing Movement
One technique widely used in long exposure landscape photography is panning. Panning involves following a moving subject with your camera while using a slow shutter speed to create motion blur in the background. This technique works exceptionally well when photographing subjects such as flowing waterfalls, cascading waves, or wind-blown trees.
By panning horizontally or vertically, you can capture the movement of woodland trees or along the horizon, adding a dynamic element to your images. To achieve a successful pan, it’s important to have steady hands and follow the movement of the subject smoothly and consistently.
Shooting in RAW Format
When it comes to long exposure landscape photography, shooting in RAW format is highly recommended. RAW files contain uncompressed data captured by your camera’s sensor, allowing for greater flexibility during post-processing. With RAW files, you have more control over adjusting exposure, white balance, and other essential elements in your images.
Furthermore, shooting in RAW format ensures the best quality and captures the most information. This is particularly crucial when dealing with challenging lighting conditions, such as high contrast scenes or low light situations. RAW files provide more latitude for recovering details in highlights and shadows, resulting in richer and more vibrant long exposure landscape photographs.
Setting the ISO
The ISO setting plays a significant role in long exposure landscape photography. It determines the sensitivity of your camera’s sensor to light. When shooting long exposures, it’s preferable to use a low ISO setting to minimize the appearance of noise in your images.
Higher ISO settings tend to introduce more digital noise, which can reduce the overall image quality. By using a low ISO, you can achieve cleaner and crisper results, especially when capturing subtle details in the landscape or capturing the movement of stars in the night sky.
Timing and Location
Choosing the right timing and location is crucial for creating impactful long exposure landscape photographs. The natural elements, such as water, clouds, or foliage, play a significant role in adding a sense of movement to your images. Here are a few tips to consider:
- Opt for early morning or late evening hours when the light is soft and golden.
- Look for interesting weather conditions, such as stormy skies or fog, to add drama and mood to your images.
- Find locations with naturally moving elements, such as waterfalls, rivers, or windy coastal areas.
By carefully selecting the timing and location of your photography outings, you can maximize the effect of natural moving elements and create stunning long exposure landscape photographs.
Conclusion
Mastering long exposure landscape photography requires a combination of technical know-how, creativity, and patience. By utilizing techniques such as panning, shooting in RAW format, setting the ISO appropriately, and considering timing and location, you can capture breathtaking images that showcase the beauty and dynamism of the natural world. So grab your camera, venture into nature, and experiment with these techniques to elevate your long exposure landscape photography to new heights.
Essential Camera Settings
When it comes to taking stunning photographs, having the right camera settings is crucial. Without the proper settings, your photos may come out blurry, overexposed, or lacking depth of field. In this section, we will cover three essential camera settings that will help you capture the perfect shot.
Covering the Viewfinder
One often overlooked camera setting is covering the viewfinder. During long exposures, light can enter the camera through the viewfinder and cause light leak, resulting in unwanted artifacts on your photos. To prevent this, simply cover the viewfinder with a viewfinder cover or use your hand to shield it from light. This small but important step can make a significant difference in the quality of your long exposure shots.
Pro Tip: If you don’t have a viewfinder cover, you can also use a piece of black tape or even a black cloth to cover the viewfinder.
Aperture Setting
Another crucial camera setting is the aperture setting. The aperture determines how much light enters the camera and also controls the depth of field in your photos. For sharp images with proper depth of field, it’s recommended to set the aperture between f/8 and f/14. This range ensures that your subject is in focus while also maintaining a pleasant background blur, especially in landscape and portrait photography.
Pro Tip: Keep in mind that a smaller aperture (higher f-number) will result in a greater depth of field, while a larger aperture (lower f-number) will create a shallower depth of field.
Remote Trigger or Mobile App
Camera shake can be a significant issue when capturing long exposures or using a slow shutter speed. Even the slight movement from pressing the shutter button can result in unwanted blur in your photos. To minimize camera shake and achieve crisp, sharp images, consider using a remote trigger or a mobile app that allows you to control your camera settings and trigger the shutter remotely.
Using a remote trigger or a mobile app not only eliminates the risk of camera shake but also gives you precise control over your long exposure settings. This allows you to experiment with different exposure times and capture stunning photos of light trails, starry skies, and silky smooth waterfalls.
Pro Tip: Some cameras even have built-in Wi-Fi or Bluetooth capabilities, allowing you to connect them directly to your smartphone and control them using a dedicated app.
Remember, by covering the viewfinder, setting the aperture correctly, and using a remote trigger or a mobile app, you’ll have the essential camera settings needed to take breathtaking photos. So, next time you head out with your camera, don’t forget to review and adjust these settings to capture the perfect shot. Happy shooting!
Tips for Beginners
Long exposure photography is an exciting technique that can create stunning and captivating images. If you’re just starting out in the world of long exposure photography, there are a few tips that can help you get started on the right foot. In this article, we’ll explore some beginner-friendly tips to help you capture beautiful long exposure photos.
Accessibility for Beginners
Long exposure photography may seem intimidating at first, but it’s actually a technique that can be easily learned by beginners. Here are a few accessibility tips to help you get started:
- Use a sturdy tripod: To capture sharp and steady long exposure shots, it’s important to invest in a good quality tripod. This will keep your camera stable during the long exposure and prevent any camera shake or blurriness.
- Master the basics of exposure: Understanding the fundamentals of exposure, such as shutter speed, aperture, and ISO, is crucial for long exposure photography. Take the time to learn about these settings and how they affect your final image.
- Experiment with different subjects: Long exposure photography can be applied to various subjects, such as landscapes, cityscapes, or even waterfalls. Try experimenting with different subjects to find what interests you the most and provides the best opportunities for long exposure shots.
Using ND Filters
ND filters, or neutral density filters, are essential tools for long exposure photography. They reduce the amount of light entering your camera and enable longer exposures, even in bright daylight. Here’s why ND filters are a game-changer for long exposure photography:
- Extended exposure times: ND filters allow you to use longer exposure times, which can create stunning effects like smooth waterfalls or streaking clouds in the sky. Without an ND filter, achieving these effects would be challenging, especially in daylight conditions.
- Balanced exposures: ND filters help you achieve balanced exposures when using longer exposure times. By reducing the amount of light, they prevent overexposure and keep detail in both the highlights and shadows of your image.
- Creative possibilities: By using different strengths of ND filters, you can experiment with various exposure times and create unique and creative effects in your long exposure photos. This opens up a world of artistic possibilities for your photography.
Taking Advantage of Overcast Weather
While many photographers prefer shooting in optimal lighting conditions, overcast weather can actually add interest and drama to long exposure photos. Here’s how you can make the most of overcast weather conditions:
- Enhanced mood and atmosphere: Overcast skies can create a moody and atmospheric backdrop for your long exposure shots. The subdued lighting and lack of harsh shadows can add a sense of drama and depth to your photos.
- Reduced contrast: Overcast weather tends to reduce the overall contrast in a scene, which can be advantageous for long exposure photography. The softer lighting can help you achieve a more balanced exposure and capture more details in both the highlights and shadows of your image.
Avoiding High ISO Settings
To capture clean and noise-free long exposure images, it’s important to avoid using high ISO settings. Here’s why:
- Noise reduction: High ISO settings can lead to increased noise in your photos, especially in long exposure shots. By using lower ISO settings, you can minimize noise and maintain the overall image quality.
- Retaining details: Lower ISO settings allow you to retain more details in your long exposure photos, especially in the shadow areas. This helps create a more dynamic and visually pleasing image.
So there you have it – some valuable tips for beginners in long exposure photography. By applying these tips, you’ll be well on your way to capturing stunning long exposure images that will impress and inspire. Get out there, experiment, and have fun with this creative technique!
Exploring Creative Possibilities
When it comes to photography, there are so many avenues to explore and creative possibilities to uncover. One exciting area that photographers often delve into is long exposure photography. By using longer exposure times, photographers can capture unique effects and create stunning images that stand out from the crowd.
In this section, we will explore three specific creative possibilities that come with long exposure photography. So, grab your camera, tripod, and let’s dive into the world of artistic long exposures.
Creating Smooth Water Surfaces
One of the most popular applications of long exposure photography is capturing silky smooth water surfaces. By using longer exposure times, water movement becomes blurred, creating a serene and dreamy effect. It’s like freezing time and capturing the ethereal beauty of flowing water.
Imagine standing by a picturesque waterfall, setting up your camera on a sturdy tripod, and using a slow shutter speed. The water cascading down the rocks will transform into a soft and velvety flow, creating a sense of tranquility in your image. This technique is also ideal for photographing seascapes, rivers, and even calm lakes during sunset or sunrise.
To achieve this effect, follow these steps:
- Use a tripod to keep your camera steady during the long exposure.
- Set your camera to manual mode to have full control over the exposure settings.
- Choose a low ISO setting to reduce noise in the image.
- Select a small aperture (high f-stop number) to increase your depth of field.
- Set a slow shutter speed, typically a few seconds or more, depending on the desired effect.
With these settings in place, you can create captivating images of smooth water surfaces that will add a touch of elegance to your photography portfolio.
Capturing Moody Skies
Long exposure photography isn’t just limited to capturing water; it’s also a fantastic technique for capturing moody skies. By using longer exposure times, the movement of clouds becomes blurred, adding drama, atmosphere, and a sense of motion to your images.
Imagine yourself on a stormy day, watching dark clouds rolling across the sky. By using a long exposure, you can turn those turbulent clouds into a dynamic element in your composition. The streaks and swirls of the moving clouds will add an element of mystery and intrigue to your photographs.
To capture moody skies effectively, keep the following tips in mind:
- Use a neutral density (ND) filter to reduce the amount of light entering the camera, allowing for longer exposure times.
- Experiment with different shutter speeds to achieve the desired effect. Longer exposures will result in more dramatic motion blur, while shorter exposures will capture subtle cloud movement.
- Look for interesting foreground elements or compositions to complement the dramatic skies, adding depth and visual interest to your images.
By applying these techniques, you can add a touch of drama and emotion to your photographs and create captivating images that evoke powerful moods.
Timing for Low Light Conditions
Long exposure photography can come alive during low light conditions. As the ambient light decreases, photographers have the opportunity to capture and freeze motion in a way that’s not possible in well-lit environments. This opens up a whole new world of creative possibilities.
Imagine a nighttime cityscape with cars streaking by, leaving trails of light behind them. By using a long exposure, you can capture the movement of the cars as light trails, transforming a busy city street into a mesmerizing scene. This technique also works well for capturing star trails, fireworks, and any source of light in low light conditions.
To make the most of low light conditions for long exposure photography, consider the following:
- Use a tripod to keep your camera steady since longer exposures require stability.
- Experiment with different exposure times to capture the desired amount of light trails or desired effect.
- Consider using a remote shutter release or self-timer function to minimize camera shake.
By exploring long exposure photography in low light conditions, you can push the boundaries of your creativity and capture stunning images that have a touch of magic and mystery.
In conclusion, long exposure photography offers a plethora of creative possibilities. Whether it’s creating silky smooth water surfaces, capturing moody skies, or experimenting with low light conditions, this technique allows photographers to push their artistic boundaries and create truly captivating images. So, grab your camera, head out into the world, and let your creativity soar through the magic of long exposures.
Camera Modes and Battery Considerations
When it comes to photography, understanding different camera modes is essential for capturing the perfect shot. In addition to mastering various modes, proper battery management is crucial, especially when shooting in specific modes that require longer exposure times. Let’s dive into these two critical aspects to help you elevate your photography skills.
Choosing the Right Camera Mode
Selecting the appropriate camera mode can significantly impact the outcome of your photos. Here are a few modes to consider:
- Bulb Mode: If you’re aiming for exposures lasting 2 seconds or longer, consider using the bulb mode. This mode allows you to control the shutter speed manually, giving you the flexibility to experiment with longer exposure times. Use a remote shutter release or a cable to avoid any camera shake caused by physically pressing the shutter button.
- Shutter-Priority Mode: Also known as “TV” (Time Value) mode, this setting lets you control the shutter speed while the camera automatically adjusts the other exposure parameters, such as aperture and ISO. Ideal for capturing moving subjects or freezing fast-action scenes, it allows you to prioritize controlling the shutter speed based on your creative vision.
- Aperture-Priority Mode: Referred to as “AV” (Aperture Value) mode, this setting allows you to set the desired aperture while the camera automatically adjusts the shutter speed and ISO. This mode is particularly useful for landscape photography, where having control over depth of field is crucial. By adjusting the aperture, you can play with the foreground and background sharpness to create captivating landscape images.
Battery Management
Long exposure shots and extended camera use can drain your battery quickly. To ensure you don’t miss out on capturing stunning images, here are a few battery management tips:
- Charge Fully: Before heading out for a photography session, make sure your camera battery is fully charged. This preparation will give you peace of mind, knowing that you have sufficient power to last through extended shooting periods.
- Carry Spare Batteries: Carrying spare batteries is always a smart move. It allows you to seamlessly swap out drained batteries and continue shooting without any interruptions. Be sure to invest in high-quality, compatible batteries to maintain optimal performance.
- Power-Saving Features: Most cameras come equipped with power-saving features that help prolong battery life. Enable features like auto power-off, which automatically turns off the camera after a period of inactivity. This small adjustment can make a significant difference in extending your battery life.
Remember, having a solid understanding of camera modes and managing your battery effectively is key to capturing remarkable photographs. Experiment with different modes and always be prepared with fully charged batteries to unleash your creativity and never miss a moment.
Enhancing Landscape Shots
When it comes to capturing stunning landscape shots, there are various techniques and tools that photographers can use to enhance their photographs. One such tool that can significantly elevate the quality and impact of landscape images is a polarizing filter.
What is a Polarizing Filter?
A polarizing filter is a piece of equipment that can be attached to the front of your camera lens. It is primarily used to reduce glare, control reflections, and enhance colors in your landscape photography. This versatile filter can be a game-changer when it comes to capturing breathtaking landscapes.
How Does a Polarizing Filter Work?
A polarizing filter works by selectively blocking certain orientations of light waves. This allows you to manipulate the light entering your lens, resulting in several benefits to your landscape photography:
- Reducing Glare: A polarizing filter can eliminate unwanted glare and reflections from non-metallic surfaces such as water, glass, and foliage. This helps to reveal the true colors and details of the landscape.
- Enhancing Colors: By filtering out scattered light, a polarizing filter can intensify colors and increase their saturation. This is particularly effective for capturing vibrant blue skies, lush greenery, and vivid reflections.
- Increasing Contrast: With the ability to darken skies and emphasize clouds, a polarizing filter can add depth and drama to your landscape shots. This contrast boost can make your images pop and create a more visually appealing composition.
Using a Polarizing Filter Effectively
To make the most of your polarizing filter, keep the following tips in mind:
- Consider the Angle: Adjust the polarizing filter’s angle to achieve the desired effect. Rotating the filter can alter the level of polarization and the resulting impact on glare and reflections.
- Balance with Exposure: A polarizing filter can reduce the amount of light entering your lens, so be mindful of your exposure settings. Adjust your camera’s aperture, shutter speed, or ISO as needed to maintain a well-balanced exposure.
- Experiment with Subjects: While a polarizing filter is commonly used for capturing vibrant landscapes, don’t limit yourself to just that. Try using it with other subjects like architecture, still life, or even portraits to see how it can enhance different scenes.
Conclusion
A polarizing filter is a versatile and essential tool for landscape photographers. By reducing glare, enhancing colors, and increasing contrast, it can help you capture stunning and impactful landscape shots. Experiment with different angles and subjects to fully explore the creative possibilities offered by a polarizing filter. So, why not add this valuable tool to your camera bag and take your landscape photography to the next level?
Please keep in mind that polarizing filters come in different sizes, so make sure to select one that fits your specific lens diameter.
Frequently Asked Questions
-
What is long exposure photography?
Long exposure photography is a technique where the camera shutter is left open for an extended period of time, usually seconds or minutes, resulting in a smooth and blurred effect in moving subjects such as water or clouds.
-
Why is long exposure photography popular in landscape photography?
Long exposure photography is popular in landscape photography as it allows capturing the motion and flow of elements like water or clouds, creating a sense of tranquility and adding a dramatic effect to the image.
-
What equipment do I need for long exposure landscape photography?
To create long exposure landscape photographs, you will need a sturdy tripod to keep your camera stable, a remote shutter release to prevent camera shake, and a neutral density (ND) filter to block excess light and allow for longer exposures.
-
What camera settings should I use for long exposure landscape photography?
For long exposure landscape photography, set your camera to manual mode, use a low ISO setting (e.g., ISO 100), select a small aperture (higher f-stop number), and set a longer shutter speed to achieve the desired effect.
-
How can I ensure sharpness in long exposure landscape photos?
To ensure sharpness in long exposure landscape photos, use a sturdy tripod, enable mirror lock-up if available, use a remote shutter release to minimize camera shake, and avoid touching the camera during the exposure to prevent any vibrations.

0 Comments