settings, tips and tricks for the Samsung NX500
Samsung NX500: tips and tricks
Introduction
The Samsung NX500 is the company’s low-cost version of the NX1. It features the same APS-C BSI sensor, yet with a smaller buffer and slower processing times and no incorporated viewfinder. Nonetheless, this is a very capable camera, especially if you’re a JPEG shooter and don’t need the features and advanced functionality of the flagship NX1.
Menu System and touch screen
Although very intuitive, you’ll need to get to grips with the Menu System if you’ve never used a Samsung camera before. Everything is very straightforward, and I’d invite you to read the simple manual provided by Samsung first. I’ll be going over the Menu system in detail later.
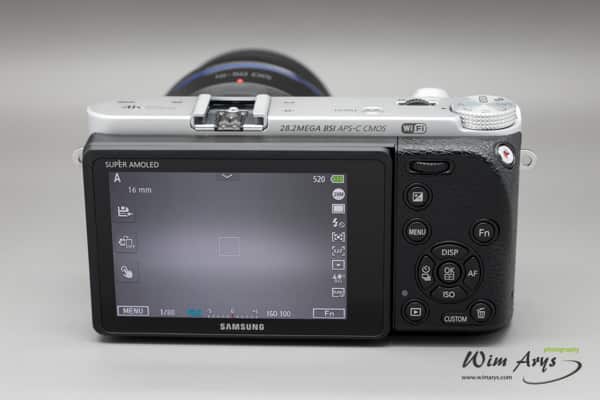
The NX500 is packed with the latest technology, including a Super AMOLED display like you’ll find in the most recent Galaxy Phones. It features an integrated digitizer, meaning that the layer that detects multiple finger touch is integrated into the screen, rather than overlaid on top of it. This feature means all functionality is also accessible via the touch screen, besides the usual buttons and dials.
Autofocus
first things first: firmware update for best autofocus performance
Many reviewers have made the mistake of not updating older NX mount lenses to the latest firmware, which offers full compatibility with said camera. So head on over to their support website and make sure you have the latest firmware installed for both camera and lenses you have.
Use S-AF (single AF) with older lenses
Although there are quite a few NX lenses available, some are not ideally suited to the NX500. The Samsung NX 85mm f/1.4, for instance, a fantastic portrait lens, will tend to hunt quite a bit when your camera is set to C-AF. I would suggest setting it to S-AF with lenses where you experience a lot of focus hunting.
Drive Settings
Depending on the type of lens, autofocus results in C-AF may vary considerably depending on the lens used. The three ‘S’ range lenses are fully supported:
- Samsung 16-50 mm F2-2.8 S ED OIS
- Samsung 16-50 mm F3.5-5.6 Power Zoom ED OIS NX
- Samsung 50-150 mm F2.8 S ED OIS
As usual in digital cameras, there are three drive settings:
- Continuous High: Continuously capture photos while you are pressing the Shutter. You can capture up to 8, 10, 12, or 15 pictures per second.
- Continuous Low: continuous shooting while the shutter is engaged at a lower rate.
- Single: When you press the Shutter button halfway, the focus fixes in the focus area. The area turns green when the focus is achieved.
Active AF
When half-pressing the shutter, the camera automatically detects the subject‘s movements and switches between Single AF and Continuous AF. It adjusts focus when the subject goes away from the camera (Single AF). It continues to focus automatically when the subject gets closer to the camera (Continuous AF). This mode is recommended for shooting subjects that are moving unpredictably.
Tracking AF
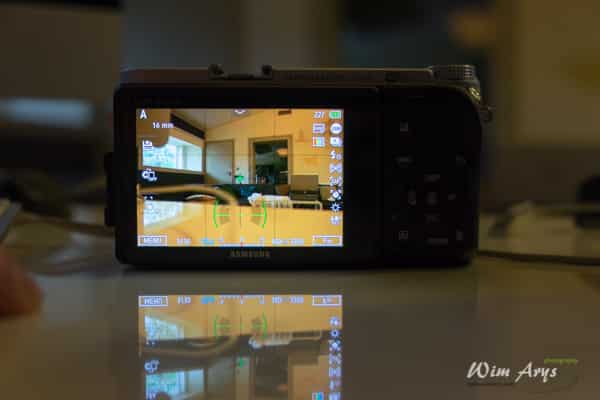
AF tracking is only available via the touch screen. You’ll need to turn on Touch AF in the menu (or touch screen) and select Tracking AF. You’ll see a white square appear when you touch your subject on the display, this means Tracking AF has been engaged. When you half-press the shutter, you’ll see the white square turn free, meaning focus was achieved. If the camera for any reason can’t focus (subject is too small, moves irregularly, is backlit), the square will turn red.
Manual focus
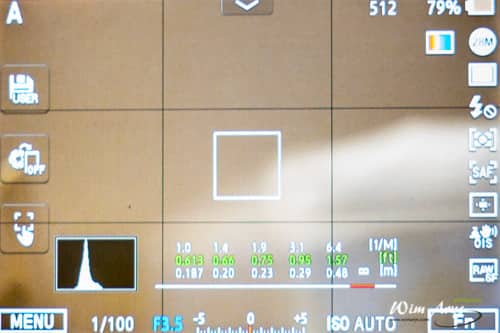
You can manually focus on a subject by rotating the focus ring on the lens. The MF Assist function lets you quickly bring a subject into focus. While you are turning the focus ring, the focus area is magnified. When you use the Focus Peaking function, the color you selected appears on the focused subject. This mode is recommended for shooting a subject similar in color to the background, a night scene, or fireworks.
Menu settings
Accessing the MENU settings is possible via the MENU icon on the touch screen.
level guide, menu camera icon on your bottom left
MENU – Camera Icon
Photo Size
Photo Size selects the dimensions and size in pixels of your stored images. As the Samsung uses a 28 Megapixel APS-C sensor, the crop is best left to 3/2 and full resolution 6480×4320. This setting will leave you with the most flexible jpeg file, and you can always decide another image crop in your preferred image editor later.
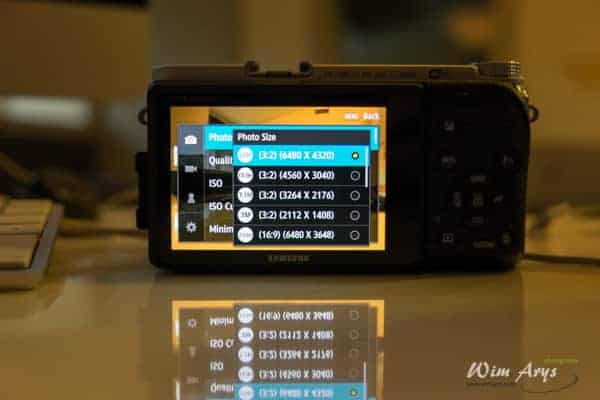
Photo size
Photo Quality: RAW vs. JPEG
I’m sure you know the difference between an RAW and JPEG file. An RAW file (named .SRW in Samsung language) records all data from the sensor uncompressed while JPEG compresses this data with settings applied. An RAW file will always be more flexible when it comes to editing your image in post production. This flexibility means more sharpening, colour information, highlight and shadow recovery, etc. will be possible later on with RAW files. JPEG files will compress the data to have smaller files, and will also have in-body noise reduction applied according to your settings.
JPEG is available in Super Fine, Fine and Normal; this depicts an increase in image compression. Although I would always recommend shooting in RAW for optimal flexibility, I have fun that the Super Fine JPEG setting does still retain a lot of useable information in post processing.

Quality, JPEG, Super Fine
ISO Auto settings
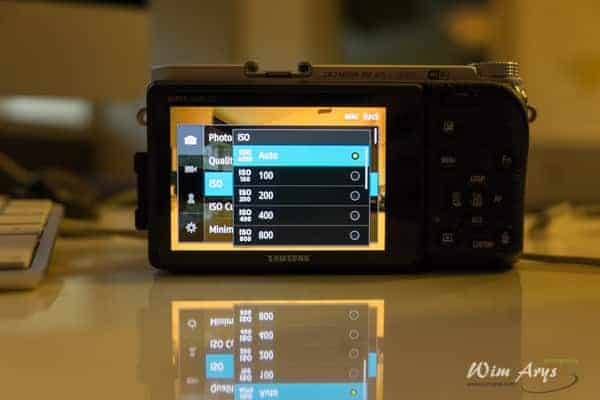
ISO settings, ISO auto
Here you can change the ISO range that the NX500 will use when set to ISO Auto. As you can read in my NX500 review, the back-illuminated sensor performs very well, even at mid-to-high levels. Conservatively, you can set max ISO to 3200 or even 6400 where you will find that your images are still very usable, especially with close-ups. For busy scenes with lots of details, you might see some loss of detail there, but that is always the case drawback of an APS-C sensor. For optimal performance, the lower the ISO, the better as always. If you find that shutter speeds are getting too long, or if the camera has problems focussing, you might want to raise the ISO above 6400 manually (or make a user preset). It’s always better to have an in-focus shot than a ton of blurred images.
Super Amoled display
The Samsung NX500 has a fantastic touch sensitive Super Amoled Display, rendering beautiful realistic colours and detail. In the OLED color Menu setting, you can optimise performance for this kind of display. The factory settings have it turned off, probably because it’s always better for a manufacturer that your image look best on your (perhaps inferior) desktop screen than on the LCD, but I turn it on, as I have an excellent desktop screen as well.
Minimum shutter speed and how to get ‘Tack Sharp’ images
Auto linking shutter speed to focal lengths: Longer focal lengths will accentuate camera shake so you’ll need to choose a faster shutter speed. Traditional photography theory tells you to choose a shutter speed with a denominator that is larger than the focal length of the lens. For example, if you’re shooting with the Samsung 50-150 at 150mm, you’ll probably want to shoot at a minimum of 1/150. Samsung’s image stabilisation will give you between 2 and 3 stops advantage though, which is not bad. Linking minimum shutter speed to focal length takes all these things into account, and it’s best left set-up this way.
White Balance
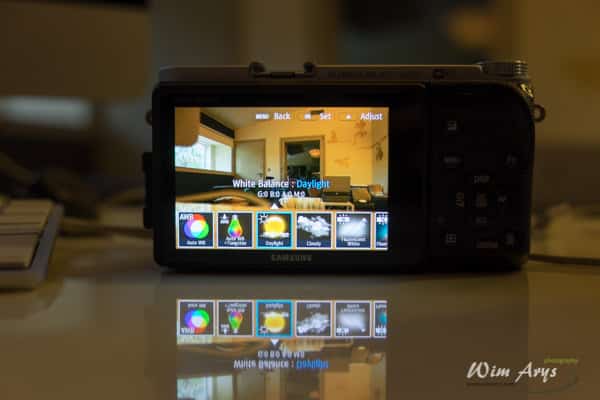
white balance
Samsung needs to improve Auto White balance in the next firmware upgrade, although manually selecting the desired White Balance for your different lighting scenes works better. I’ve found AWB to be quite cold, and needed to turn it up at least 2000K for a more neutral and realistic balance.
Picture Wizard
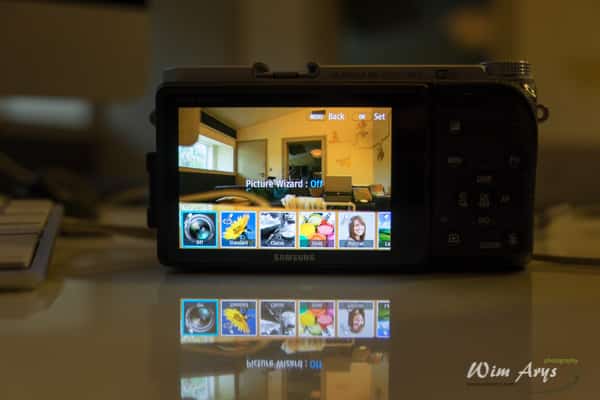
Picture wizard
The Picture Wizard Menu is one of the features that will make most professionals shiver. It’s basically a set of filters you can apply to JPEG images in-body. It is also a way for Samsung to show of the capabilities of their DRIMe V processor.. Once you’ve worked with the NX500, I don’t think anyone will deny the fact that it is one of the most powerful camera processors out there. And I actually found the Portrait effect useful in some situations. Think of it as a mini version of desktop software like Portrait professional, as you are able to make your subject feel a bit better with how they look, and does an OK job at decreasing wrinkles and pores. Nice to have if you don’t have time to do any real post processing.
Autofocus settings
Next in the menu, you’ll find the Autofocus settings. Compared to a sports camera in the same price bracket like the Sony A77M2, it is true that the NX500 offers less flexibility when it comes too autofocus tweaking. This means you’ll have to get to grips with how the available settings work, instead of customising the camera to what you are used to. One of the most-visited posts on my blog is the Sony A77 II tips and tricks page, mainly because it’s so difficult to wrap your head around, and in real life it’s true that not everyone needs this advanced customisation. Honestly, this might be a blessing in disguise for many because this means there is less of a learning curve.
AF Modes
- Single AF (SAF): autofocus is engaged when you half press the shutter button. If you find the AF ‘hunts’ to much with some lenses like the 85mm f/1.4 in CAF, try SAF. Works better.
- Continuous AF (CAF): Autofocus is continuously trying to lock. Advantageous in some situations but drains the battery more rapidly.
- Active AF (AAF): switches between Single AF and Continuous AF as the camera deems fit.
- Manual Focus (MF): only available if your lens is also set to MF, if it is set to AF, you’ll see this option greyed out. Use Focus Peaking to help you get the focus right in MF.
AF Area
- Selection AF: selection AF allows you to use a specific, selectable autofocus point on the sensor.
- Multi AF: Multi AF uses all available focus points. I personally never like to use all focus points, as this AF area setting is so unpredictable. You can change the size of the AF area in multi AF to a smaller square though, a tweak which I did find very useful.
- Face Detection AF: NX500 will give focus priority to detected faces. When Face Detection is on, the camera is automatically set to Multi AF.
- Self Portrait AF: The ultimate selfie tool, where the camera will focus on your face close to the camera and automatically engage the shutter when it is detected.
Tracking AF, Touch AF and Focus tracking
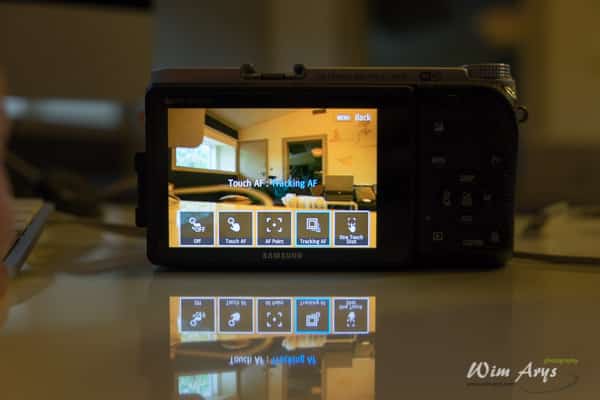
Touch AF, tracking AF
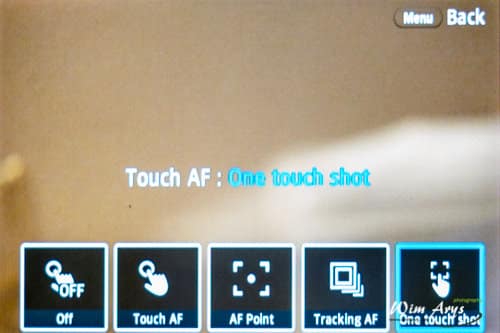
Another fantastic feature of the Samsung NX500 is the touch screen. To many it might look like a gimmick, but my guess is that you’ll quickly find it very useful for easy operation and, at times, it actually is the fastest way of having the camera focus on exactly what you want. The Touch AF menu setting allows for customisation of what happens when you touch the screen.
In my view, turning this feature off largely negates how this camera is made to be used. You’ll have to get into Samsung’s frame of mind if you want to get optimal performance out of this camera, especially if you come from a non touch-screen DSLR.
- Off: Touch AF is disengaged.
- Touch AF: Turns touch screen usage on for AF operation.
- AF point: Allows you to select a specific auto-focus point by touching the screen.
- Tracking AF: Lets you select a moving target for auto-focus tracking. This setting automatically enables C-AF, so you can set your camera to Selection AF, and quickly change to C-AF when needed if Touch AF is set to Tracking AF. This is the only way to engage AF tracking by the way.
- One Touch Shot: the camera will focus on anywhere you touch the screen and take an image.
MF assist
This is a focussing assist aide, which will enlarge your point of focus 5 or 8 times. Since there is currently no Eye-AF available, I have it set to 5 times and when doing portraiture in a custom mode.
Focus Peaking
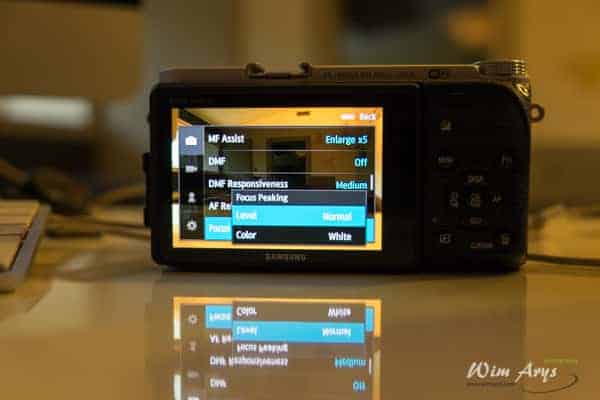
Focus peaking, level
Focus peaking is now found in all cameras as a manual focussing aide. It adds a white, red or yellow ‘noise’ on your image in order to guide you in getting your focus exactly right. Setting it to ‘Normal’ will suffice in the NX500, it works as well as this feature in any other camera I’ve tried.
Link AE to AF point
This setting is basically telling your camera to link Exposure point to focus point when using spot metering or multi metering. So your camera will decide on correct exposure depending on your subject. It’s a valuable tool at times, but you might want to consider turning it off as often having exposure set to AF point can lead to blown highlights.
Brightness Adjustment Guide
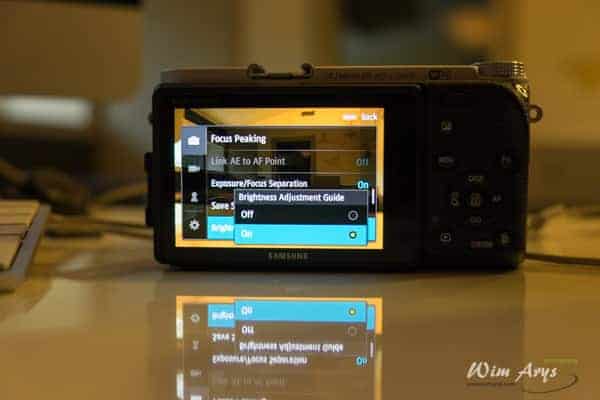
Brightness adjustment guide
Adjust the brightness using the selected area as a reference. The brightness of the selected area is displayed as a value to help you to conveniently adjust the brightness. This is available only in Program, Aperture Priority, or Shutter Priority mode. I personally don’t use this feature.
Overexposure guide
View overexposed areas on a photo in Shooting mode before capturing a photo. Setting this feature will cause the overexposed areas of a photo to blink. Very handy at times, especially when shooting video. Others might find that it clutters your screen or viewfinder though.
Framing Mode
When you adjust the aperture value or shutter speed, the exposure changes according to the settings, so the display may darken. With this function on, the brightness of the display is constant regardless of the settings, so you can better frame your shot in certain conditions, like a studio setting.
OIS (Anti Shake)
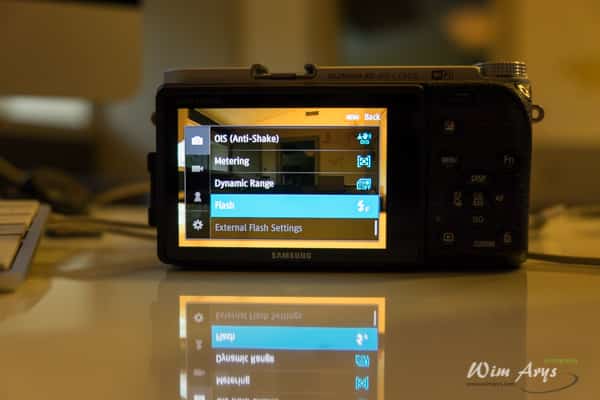
OIS, metering, dynamic range, flash
Drive Settings
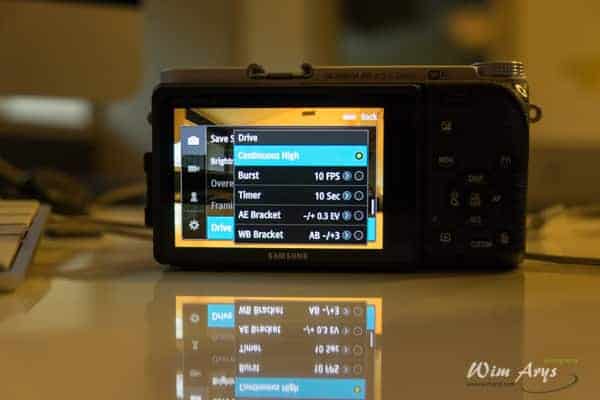
Drive, Continuous high
The Menu drive settings allow you to customise the timing of the Drive rotator.
- Continuous High: sets the Drive setting for continuous shooting mode. It might be a good idea to set it to 12 or 10 fps if you want to have more keepers when using CAF.
- Timer: sets the timer for using the timer shooting mode.
- Bracket: sets the functionality of the bracket shooting mode.
Interval Capture
Set the shooting interval, the number of shots, and shooting start time for interval captures. Use this function to capture photos at regular intervals like a lunar eclipse or a sunrise. You can also save an interval capture as a movie if you set the Time Lapse function to ON.
Metering Mode
Metering Mode sets the way the camera measures exposure of your captures. This is standard set to Center Weighted but I often change to Multi if I want to better capture the mood of a scene.
- Multi:calculates the amount of light in multiple areas. When light is sufficient or insufficient, the camera adjusts the exposure by averaging the overall brightness of the scene. This mode is suitable for general photos.
- Center Weighted: calculates a broader area than the Spot mode does. It sums up the amount of light in the center portion of the shot (60–80 %) and that of the rest of the shot (20–40 %). It is recommended for situations where there is a slight difference in brightness between a subject and its background or where the area around a subject is large compared to the overall composition of the photo.
- Spot: calculates the amount of light in the center. When you capture a photo in conditions where there is a strong backlight behind a subject, the camera adjusts the exposure to shoot the subject correctly. For example, when you select the Multi mode in a strong backlight condition, the camera calculates that the overall amount of light is abundant, which results in a darker photo. The Spot mode can prevent this situation as it calculates the amount of light in a designated area.
Dynamic range (only for JPEG)
OIS, metering, dynamic range, flash
Automatically corrects the loss of bright detail that can occur due to shading differences in the image when shooting Jpeg.
Flash settings
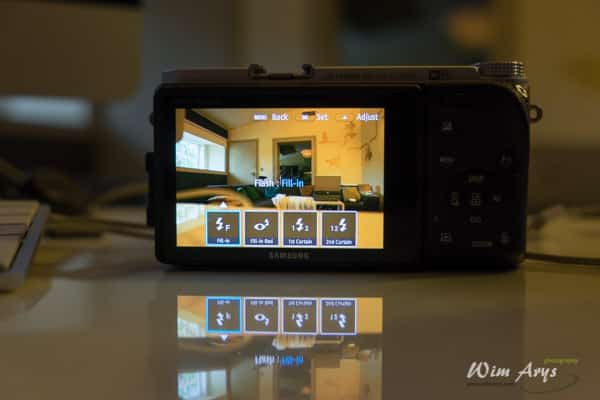
Flash: Fill in
- Fill-in flash: Fill flash is a photographic technique used to brighten deep shadow areas, typically outdoors on sunny days,
- Fill-in Red Eye: Flash will fire a few pre-flashes in order to reduce red eye
- First curtain: also know as front curtain sync. This is the normal flash mode, with the flash being triggered near the start of the shutter duration.The flash finishes quick, and freezes the motion.
- Second curtain: also known as rear curtain or slow sync. With moving subjects, the shutter opens and the lights record their streaks. Then the flash illuminates the subject right before the end of the exposure. The streaks from the lights lead up to the subject, giving the illusion of speed.
External Wireless settings
Set the flash mode, exposure value, flash brightness, or multi flash when you attach an external flash to the camera. You can also set wireless sync to control the internal or external flash. The flash settings are supported only when you attach a compatible, optional external flash (SEF-580A).
If data can be exchanged between the camera and the flash, the settings for the external flash can be adjusted on the camera or the flash. Your previous options will be applied.
Flash Mode
A-TTL: In the A-TTL (Advanced Through The Lens) mode, the camera measures the light reflected by the subject through the lens. Then, it calculates the optimum exposure based on the exposure value and shutter speed.
Manual Flash: The flash emits the full amount of light or the flash intensity can be adjusted manually.
Multi Flash: When you press [Shutter], the flash fires multiple times based on the number you have set.
Flash EV
Set the exposure of the flash when the flash mode is A-TTL.
Flash Output
Set the brightness of the flash when the flash mode is Manual Flash.
Multi Flash Settings
Set the count, brightness, or frequency of the flash when the flash mode is Multi Flash.
Wireless Flash controller
Set wireless sync to control internal and external flash units remotely
via wireless signals. The remote system consists of a master flash that is mounted on the camera and one or more slave flash units. A slave flash is assigned to one of three groups: A, B, or C.
Use a Wireless Flash
Set to use wireless sync with TTL functionality
Channel Selection
Select channels for wireless sync. There are four remote channels available to allow multiple remote systems to operate at the same time. Master and slave flash units, in the same remote system, must be set to the same channel. (Ch. 1, Ch. 2, Ch. 3, Ch. 4)
Group Mode flash
Set the flash mode for group A, B, or C. Changes to the flash mode must be made on the master flash. The changes are then applied to slave group A, B, or C, and the slave groups operate as a remote system of the flash mode (TTL or manual) according to the settings for the master flash.
- A-TTL: Set the exposure of the flash when the flash mode is A-TTL.
- Manual Flash Set the brightness of the flash when the flash mode is Manual Flash.
- Off : Do not fire the flash.
Movie size
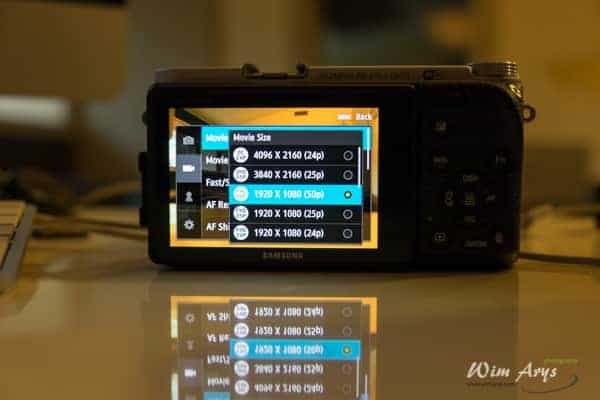
Movie size
Select different Movie sizes according to your needs, from 4K to medium sized video, aspect from 16-9 to 4:3.
Movie Quality
Normal: Record videos in normal quality.
HQ: Record videos in high quality.
Fast/Slow Movie
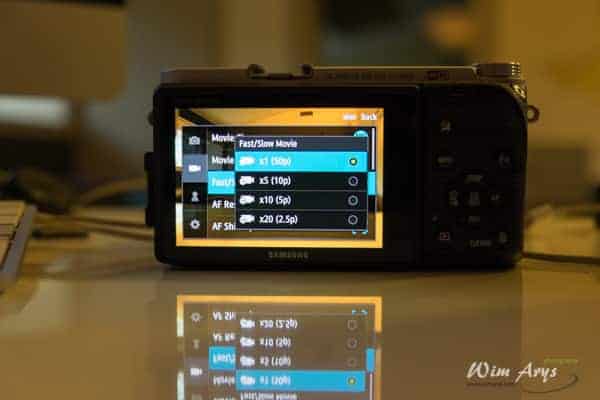
Fast/slow movie
Set the playing speed of a video. If you select an option other than x1, the sound recording function and the Distortion Correct function will not be supported.
x0.25: Record a video to view it at 1/4 normal speed during playback. Available only with 1280X720 (30p/25p), 640X480 (30p/25p).
x0.5: Record a video to view it at 1/2 normal speed during playback. Available only with low-HD 1280X720, 640X480 (60p/50p/30p/25p).
x1: Record a video to view it at normal speed during playback. x5: Record a video to view it at 5X normal speed during playback.
x10: Record a video to view it at 10X normal speed during playback.
x20: Record a video to view it at 20X normal speed during playback.
Fader
You can fade a scene in or out using the fader function on the camera. Set the fade in option to gradually fade in at the start of a scene. Set the fade out option to gradually fade out at the end of a scene.
- Off: The fader function is off.
- In: Scene gradually fades in.
- Out: Scene gradually fades out.
- In-Out: The fader function is applied at the start and end of the scene.
Voice
Sometimes, a muted video is more appealing than one with sound. Turn Voice off to record a muted video.
Wind Cut
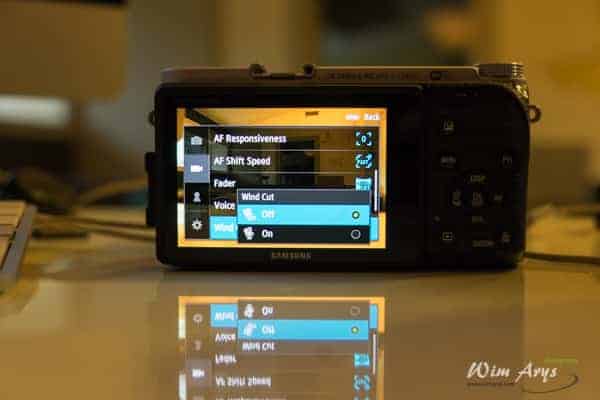
Wind cut
When you record videos in noisy environments, unintended sounds can be recorded in videos. In particular, severe wind noise can prevent you from enjoying your videos. Use the Wind Cut function to remove some surrounding noise in addition to wind noise.
A filter is applied to the internal microphone or mic input in order to reduce noise.
Mic Level
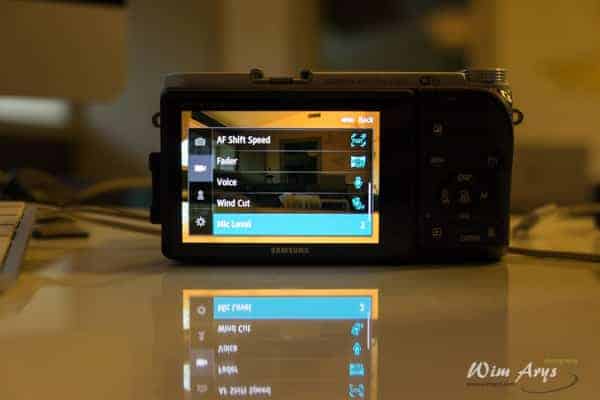
Mic Level
Set the Microphone input level in a range between 1 and 10.
Smart Range
Corrects for the loss of bright detail when shooting JPEG.
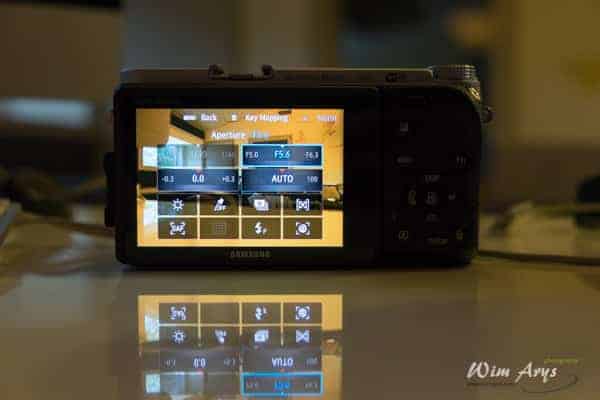
Manage Custom Mode in Key Mapping
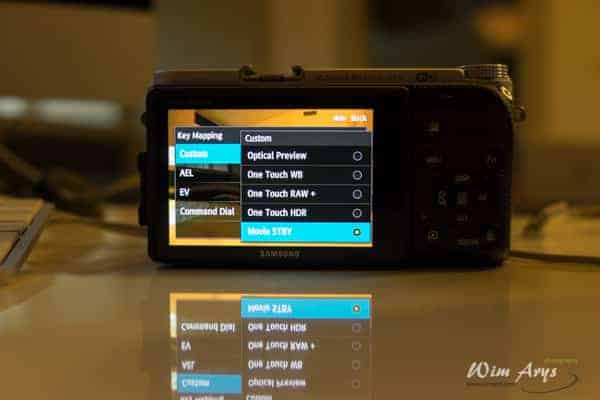
Key Mapping, custom
Manage the custom button, where you can set-up your Samsung NX500 according to your own preferences for use in specific situations.
Auto ISO Range
ISO settings, ISO auto
One of the most important settings on any camera, where you can select the range between minimum and maximum ISO values to be used when set to ISO Auto. Setting this conservatively to a maximum of ISO 1600 will ensure you’ll still have quite flexible files in post processing. However, the Samsung NX500’s fantastic sensor can still yield very usable images up to 6400 (and even 12800) if not too much detail is required. As lighting conditions deteriorate, you’ll need to go to higher ISO in order to achieve a fast enough shutter speed, so it is advisable to change ISO auto settings (or go full manual) according to the scene you’ll be shooting.
Color Space
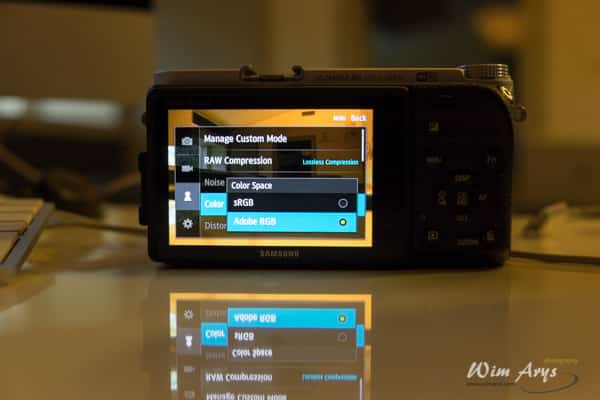
Color Space, Adobe RGB
You’ll find the usual colour space options: sRGB, Adobe RGB and ProPhoto RGB. The latter two have an expanded colour range, so you might find it useful to select ProPhoto RGB if you intend to do a lot of post processing in an image editor like Lightroom if you shoot RAW.
iFn Customising
Many Samsung lenses have a customisable iFn button on the lens itself. This is an easy way of changing your frequently used settings on-the-fly by pressing the iFn button and using the focus ring to change the value. Which settings are exactly available is customisable in this menu. You might find it useful to set ISO only as an option, and use a conservative ISO Auto range. This will allow you to quickly change the ISO value you’re shooting at if you find that the camera cannot achieve fast enough shutter speeds in low light conditions. As I have mentioned before, autofocus seems to work better in low light at higher (suitable) ISO’s, so this can be a way of increasing AF performance in low-light. Another option is to assign Aperture only to the iFn button, effectively allowing the focus ring to be used as an aperture ring.
User Display

level guide
You can add or remove shooting information from the screen in this setting. As you’ll find that the touch screen is very useable when it comes to quickly changing setting on the Samsung NX500, I would advise you to at least set the Buttons enabled. Icons will give you a quick overview of your current camera settings.
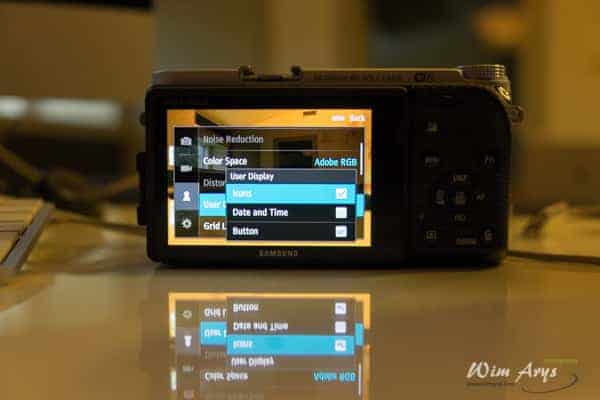
User display, icons
Key Mapping
Key mapping
After a few weeks with the NX500, I’l sure you’ll find that there are some buttons you rarely use, and some settings you wish you had more direct control of. The Key Mapping menu allows for advanced customisation of all the camera’s buttons and dials. I always set command dials to aperture and shutter speed, as I very much like a hands-on control type camera.
AF Release Priority
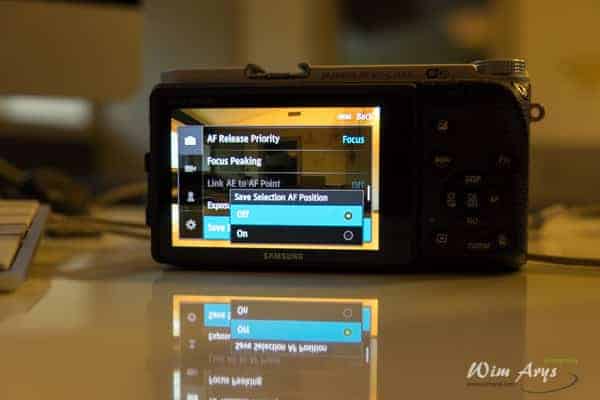
AF release priority, Save selection AF position
Focus: Capture a photo only when the focus is achieved. When you select the Continuous High shooting method, the focus is prioritised only on the first shot. It should always be set to Focus.
Mobile Link/NFC
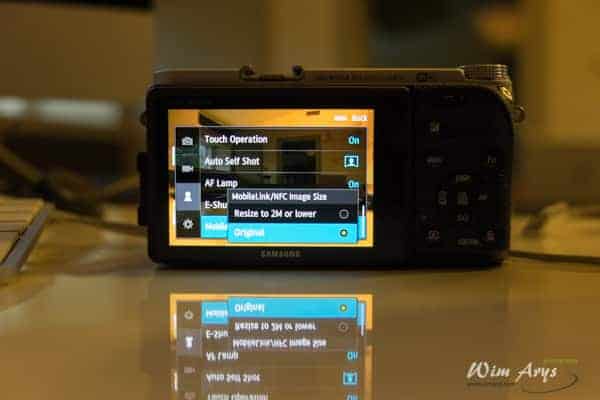
Mobilelink NFC image size
Set the size of photos to transfer to a smart phone using the MobileLink or NFC function.
- Resize to 2M or lower: If a photo’s size is larger than 3M, the camera will transfer it after resizing it to 2M or lower.
-
Original: The photo will be transferred in its original size.
AF light
Select the AF lamp brightness. When shooting in dark places, turn the
AF lamp on to improve the operation of the auto focus. The Auto Focus functions more accurately in dark places when the AF lamp is on. The AF lamp emits the light in irregular vertical patterns. I’d suggest you leave it at High Brightness unless you’re in a situation where your subject finds it bothersome.
- Off
- High Brightness
- Medium Brightness
- Low Brightness
Electronic Shutter
This feature is available only when you attach a Samsung lens with a Samsung NX mount.
When you use a large diameter lens and a fast shutter speed, a “bokeh“ effect (an aesthetic blur in out-of-focus areas) may be affected by the subject and the shooting conditions. To make the bokeh effect appear correctly, set the E-Shutter to Off.
When you change the E-Shutter settings, the first curtain of the shutter is adjusted and you will hear a noise as the shutter adjusts. This is normal when preparing the camera to operate the E-Shutter.
This feature is not available when you attach an external flash like the SEF-580A.
- Off: Set to use the mechanical shutter.
-
On: Set to use the electronic shutter curtain first and the mechanical curtain second.
Quick View
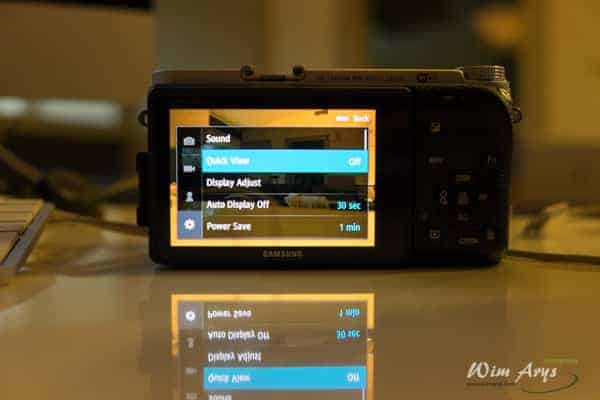
Quick view
Set the Quick View time length–the amount of time the camera displays a photo immediately after you capture it. Select Hold+Focus Zoom to display the image after shooting with the focus area enlarged. I find this feature very useful for checking if my focus is exactly where I want it, and have it set to Hold + Focus Zoom.
Other possibilities:
- Off
- Hold+Focus Zoom
- Hold
- 1 sec
- 3 sec
- 5 sec
Brightness adjustment guide

Brightness adjustment guide
Adjust the display brightness, auto brightness setting, display color, or level gauge.
- Display Brightness: You can adjust the display brightness manually.
- Auto Brightness: Turn auto brightness on or off.
- Display Color: You can adjust the display color manually. Horizontal Calibration: Calibrate the level gauge. If the level gauge is not level, position the camera on the level surface, and then follow the on-screen instructions.
Auto Display
Set the display off time. The display turns off if you do not use the camera for the time you set.
(Off, 30 sec, 1 min, 3 min, 5 min, 10 min)
Power Save
Set power shut off time. The camera shuts off if you do not use it for the time you set. (30 sec, 1 min, 3 min, 5 min, 10 min, 30 min). Factory setting is 1 minute, this is to conserve battery power, but I have it set to a medium 3 minutes.
Help Guide Display
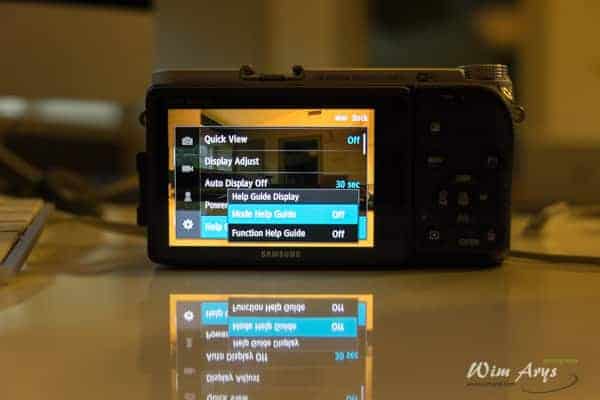
Help Guide
The Help Guide display can be very useful when first starting out with the NX500.
- Mode Help Guide: Set to display help text about the selected mode when changing shooting modes.
-
Function Help Guide: Set to display help text about menus and functions.
Tip: Press trash to hide the help text.
Language
Set a language the camera shows on the display. I would advise you to set it to English, as it will be easier to google trouble-shoot any problems you have with the camera .
Date And Time
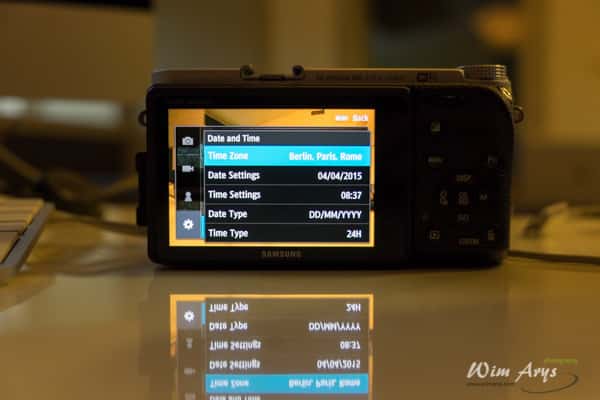
Date and time
Set date, time, date format, and time zone. (Time Zone, Date Settings, Time Settings, Date Type, Time Type)
Video Out
Set the video signal output to the appropriate system for your country when connecting the camera to an external video device, such as an HDMI-supported TV.
- NTSC: USA, Canada, Japan, Korea, Taiwan, Mexico, etc.
- PAL (Supports only PAL B, D, G, H, or I): Australia, Austria, Belgium, China, Denmark, Finland, France, Germany, England, Italy, Kuwait, Malaysia, New Zealand, Singapore, Spain, Sweden, Switzerland, Thailand, Norway, etc.
Anynet plus
When you connect the camera to an HDMI-supported TV that supports Anynet+ (HDMI-CEC), you can control the playback functions of the camera with the TV remote control.
- Off: You cannot control the play function of camera with the TV remote control.
- On: You can control the play function of camera with the TV remote control.
HDMI Output
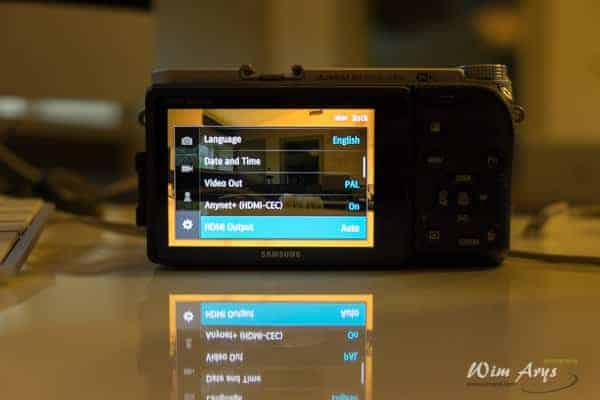
HDMI output
When you connect the camera to an HDMI-supported TV with an HDMI cable, you can change the resolution of the image.
NTSC: Auto, 4096x2160p, 4096x2160p Clean out, 3840x2160p, 3840x2160p Clean out, 1920x1080p, 1280x720p, 720x480p, 720x576p (activates only when PAL is selected)
File Name
Set the method of creating file names. Standard*: SAM_XXXX.JPG (sRGB)/_SAMXXXX.JPG (Adobe RGB) Date:
– sRGB files – MMDDXXXX.JPG. For example, for a photo captured on Jan. 01, the file name would be 0101XXXX.jpg.
– Adobe RGB files – _MDDXXXX.JPG for the months Jan through Sept. For the months Oct through Dec, the month number is replaced by the letters A (Oct.), B (Nov.), and
C (Dec.).
For example, for a photo captured on Feb. 03, the file name would be _203XXXX.jpg. For a photo captured on Oct. 05, the file name would be _A05XXXX.jpg.
File Number
Set the method of numbering files and folders.
- Reset: After using the reset function, the next file name is started at 0001.
- Series: New file numbers continue the existing number sequence, even if you have installed a new memory card, formatted the card, or deleted all photos.
Folder Type

Folder Type, standard
Set the type of folder.
- Standard: XXXPHOTO
- Date: XXX_MMDD
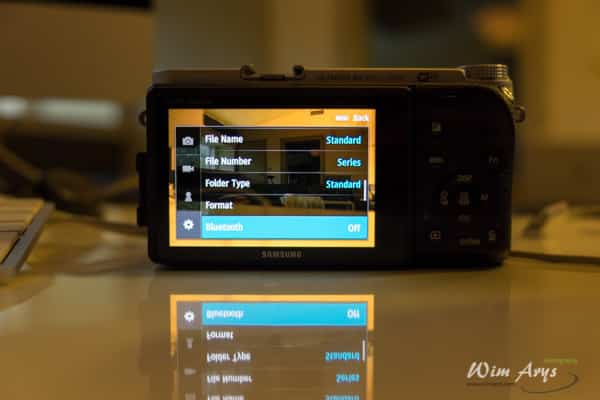
Bluetooth
Set to connect your camera to a smart phone automatically via the Bluetooth feature. If the devices have previously been connected and you launch Samsung Camera Manager on the smart phone, they will connect via Bluetooth automatically.
Format
Errors can occur if you use a memory card formatted by another brand of camera, a memory card reader, or a computer. You should always format memory cards in the camera before using them to capture photos.
Format the memory card: Formatting deletes all existing files including protected files.
Wi-Fi Network
Set to connect to a Wi-Fi network.
My Smartphone
View the model name and connection status of the smart phone registered on the camera and edit the registered smart phone.
Delete My Smartphone: Delete the registered smartphone and register a different smart phone.
WiFi privacy lock
Bluetooth Auto Time Set
Set to sync the camera’s date and time with the smart phone when connecting the camera to a smartphone via Bluetooth
Wifi Privacy Lock
Bluetooth
Set to require a PIN when connecting the camera and a smart phone.
PIN: Enter a PIN before connecting.
None: Allow a connection without requiring a PIN.
Connections will automatically be made without requiring a PIN when using the NFC function.
PINs are automatically generated and renewed only when you reset the camera settings or update the firmware.
If you have previously connected your camera to a smart phone via a PIN, they will connect automatically.
Sensor Cleaning
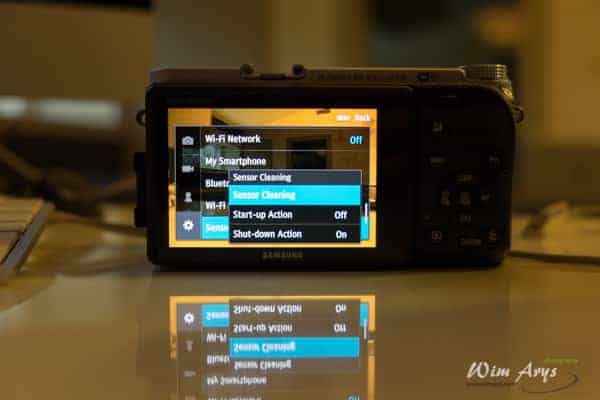
Sensor cleaning
Factory setting is OFF, but I would strongly advise you to select “Shut Down Action” in order to keep the sensor free of dust.
- Sensor Cleaning: Remove dust from the sensor immediately.
- Start-Up Action: When on, the camera performs sensor cleaning each time you turn it on.
- Shut down Action: When on, the camera performs sensor cleaning each time you turn it off.
Mobile Link
Mobilelink NFC image size
Set a frequency for using the camera as an AP for the Quick Transfer, MobileLink, or Remote Viewfinder features. (2.4 GHz, 5 GHz)
Reset
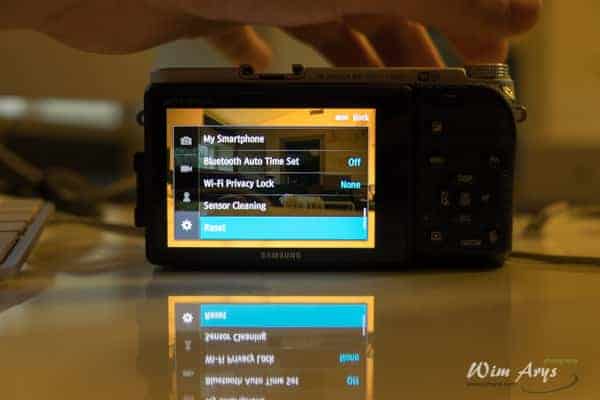
Full reset
Camera Menu: Return the setup menu and shooting options to the factory defaults.
Key Mapping: Return the custom button functions to the factory defaults.
C1/C2 Mode: Return the Custom 1 and Custom 2 mode settings to the factory defaults.
Bluetooth/Wi-Fi: Return the connection history, ID, and password of the Bluetooth and Wi-Fi functions to the factory defaults.
All: Return all settings to the factory defaults. (Date, time, language, and video output settings will not change.)
Device Information and software update
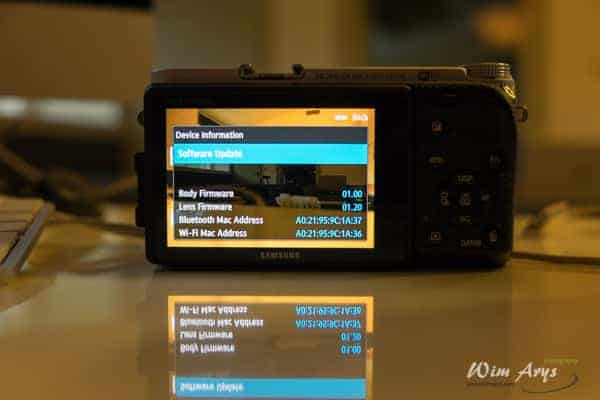
Device information, software update
View the firmware version of the body and the lens,the Wi-Fi MAC address, Bluetooth MAC address, and network certification number, or update the firmware.
Software Update: Update the firmware of the camera body or lens. (Body Firmware, Lens Firmware)
You can update the firmware by connecting the camera to a computer and starting i-Launcher.
You cannot run a firmware update without a fully charged battery. Recharge the battery fully before running a firmware update.
If you update the firmware, user settings and values will be reset. (Date, time, language, and video out will not change.)
Do not turn the camera off while the update is in progress.
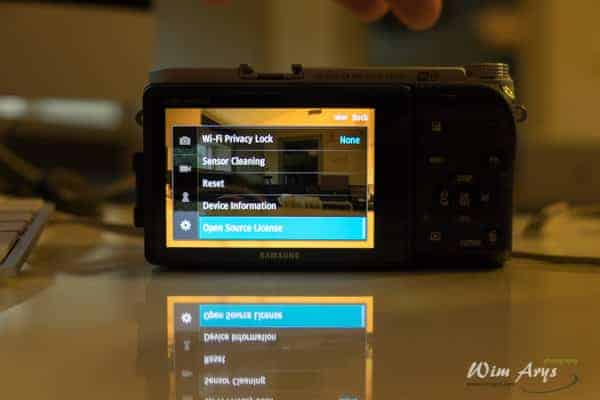
Licence
Simple: view the open source licenses.

Hi Wim, great site and helpful review. Just wondering what version of the NX500 you have. None of the ones in the US with the stock firmware offer video recording at Pro quality in any movie setting. I wish they did! Do you have a firmware version higher than 1.0?
Best,
Branson
Hi Branson,
I only sparingly record movies, and mainly use the NX1 for that. Anyway, I double checked and you are right, no Pro quality movie recording with the NX500. Very unfortunate, as I found many Pro features lacking in this otherwise nice camera. It could have been so much better if Samsung hadn’t decided to implement all these cost-cutting measures. I’ve corrected this in my tips & tricks.
Thanks for for thete, W. Maybe Samsung will release a Pro quality firmware update, but let’s not hold our breaths!
*thanks for the update, Wim
We all know that’s not going to happen :). I’d like them to work on a better lens line-up too.
Thanks for your article. I just bought the nx500 as my first foray beyond a point and shoot. So I have a lot to learn and the manual didn’t help as much as this. I am especially interested in aperture as I am doing a lot of mountain pictures and need depth of field. The stock lens has a range of 3.5-5.6, and I was thinking about buying the wide angle lens to get a smaller aperture up to 22. But then I started playing with aperture priority mode and it allows me to scroll all the way to 22 despite the limit of the lens supposedly being 5.6. I called Samsung to ask about this and their support folks didn’t seem to understand my questions. I was pretty sure that I could only go as far down as the limit imposed by the lens but maybe I am missing something or the camera is broken? I also saw that there is an option of raw+superfine format and didn’t know what that was. I’ve been told to only shoot in raw, so I don’t know if I should pick raw or raw+superfine? Thanks again for your article, it had been very helpful to read!
Hi Joe, the 3.5-5.6 range states the maximum aperture at the different zoom positions. The maximum aperture shows the speed of the lens. A lens that has an aperture of say f/1.4 is considered to be a fast lens because it can pass through more light than a lens with a maximum aperture of f/3.5. This means the shutter speed, the time it takes to make a correct exposure (not too dark, not overexposed), will be shorter.
The minimum aperture of f/22 is available on practically all lenses. The hole that allows light in through the lens will be a lot smaller at f/22. This aperture (or opening) is variable.
for landscapes, it is best to set your aperture about 3 steps down from the maximum aperture. I tested this lens, it would be about f/8 to f/11 in this case.
Shooting RAW allows you to have more data to work with if you use a RAW developer like Adobe Lightroom. Setting your camera to RAW+superfine will save the RAW file (all the data captured by the sensor) alongside a JPEG (compressed and processed file) of high quality.
I hope this all makes sense, you’ll find your way around the camera and quickly learn all these things while shooting!
Wim, thank you very much for this info! I thought the range of 3.5-5.6 was the entire available range for the lens, not just the maximums at the given zoom. The support at Samsung even thought my camera needed to be factory reset because of what I had described. So that insight is very helpful and was not at all obvious to a newby like myself. The manual is very high level also so I am learning as I go and I was really hung up on this point! You have set me straight! Although I do think it is strange that the lens doesn’t give a min and max for the given zoom (focal length?). Do you know of a compatible lens that would be the best for landscapes and snowy mountains in particular that I should get, or should I just keep playing with the stock lenses for now (my package also came with the 50-200mm lens)? Thanks a million for your insight!
Hi Joe, the Samsung 16-50mm f/2-2.8 S ED OIS Lens would be your safest bet I think. But it won’t balance well with your NX500. I would stick with what you have for now and delay investing in new equipment until you have figured everything out. Good luck and enjoy shooting this summer!
Thanks again this is a big help!
Question about shooting with Time Lapse. I have my NX500 set to a 1 second interval, total of 25 photos, Shutter priority. I then ‘Start interval capture’.
The 500 begins shooting photos but it does not take a picture every second. It only seems to be able to take a picture about once every 2.7 seconds (to have my cell phone timer running so I can see exactly when the photo is captured).
Is this a setting problem that I need to adjust? Or is this simply a ‘bug’ in this camera? And it really cannot take photos at a one (or even two ) second interval?
Thanks
Hi Mike, what type of SD card are you using? Could be that the card write times are too slow.
I hate asking other people to take pictures of me (since they rarely frame it the way I want), so I got this for the self-portrait feature. Unfortunately, while my face comes out super clear, the “amazing” background I wanted to capture myself in comes out super duper blurry. Is there a way to fix that? I want both myself and the landmark to come out clear. How? HELP!
Hi kdramanut, change your aperture to f/8 and your background should be more in-focus.
I have the nx500 and I was wonder if this camera can record video while snapping pictures at the same time? When I am recording I try to take a picture and my video stops 🙁 I cannot find an answer to my question anywhere I’m hoping you could help me!
I don’t think this is possible Lorraine. Best, Wim
Thank for the nice illustration.
I was wondering whether it is possible to connect the NX500 to the Bluetooth of the selfie stick. Otherwise, if I used the timer is it possible to set it to take more than shoot every couple of seconds.
Thanks
Hi Ahmed, no it’s not possible unfortunately.
I now own 3 Samsung NX cameras…NX1000, NX20, and recently NX500. I bought the latter a week ago, knowing Samsung got out of the camera business. I wanted that AMOLED screen.
Last year I bought a Photasy PX/NX adapter in order to use Pentax lenses on NX. It had been relatively useless on my old Pentax K20D due to the visual constriction of APS-C finder optics …
I was thrilled to learn the brilliant NX500 screen, as well as the intelligence of the camera, combined with a cheap non-optical Photoasy adapter, makes my several carefully acquired manual focus (not autofocus) Pentax lenses, particularly the 50/1.4 and 85/2 remarkably useful.
That simple Photasy adapter lets those f1.4 and 2.0 lenses to deliver BOKEH that’s not commonly available with zooms, which are almost always a lot slower, delivering very little bokeh. I checked this morning and found the Pentax 100-300 zoom performed just as well with the Photasy adapter.
Unlike my NX lenses, the Pentax manual focus lenses do not have OIS (optical image stabilization).
The NX brain somehow allows viewing @ small apertures to be just a bright as at large apertures and, thanks to the AMOLED screen allows very good appraisal of bokeh in-camera. .