Alien Skin Exposure 6
Alien Skin Exposure 6: new features and redesigned user interface
Introduction
Exposure 6 is the latest version of Alien Skin’s film emulation software. Although you can use it in stand-alone mode, most photographers use it as a plug-in in Adobe Lightroom or Photoshop. The idea is that you do some basic editing in Lightroom and then find the final ‘look’ of your image in Exposure.
Getting that look that suits your particular image is always a challenge for many photographers, and this software makes it easy by providing loads of film emulations presets as a starting point.
The film types offered range from B&W to colour and darkroom developing techniques.
New Features in Alien Skin Exposure 6
- Exposure 6 now has their creative focus and lens simulation program, Bokeh. It features simulations of fast lenses like the Canon EF 85mm f/1.2 L, Nikon 300mm f/2.8, Sony 24-70 f/2.8 and also tilt/shift and motion blur looks.
- Automatically displays full-sized instant previews as you mouse over to help you quickly check presets on your images.
- An updated user interface with a cleaner layout for quicker navigation.
- Preset browser now also offers a list view as well as optional thumbnails for a more visual experience.
- New primary control panel, containing sliders to tweak exposure, contrast, highlights, shadows, clarity, vibrance and saturation for faster editing.
- New lighting effects like a sun flare, vintage borders from the archives and you can now import your custom borders and textures and share them across multiple computers.
- Now supports Apple retina displays.
Layout
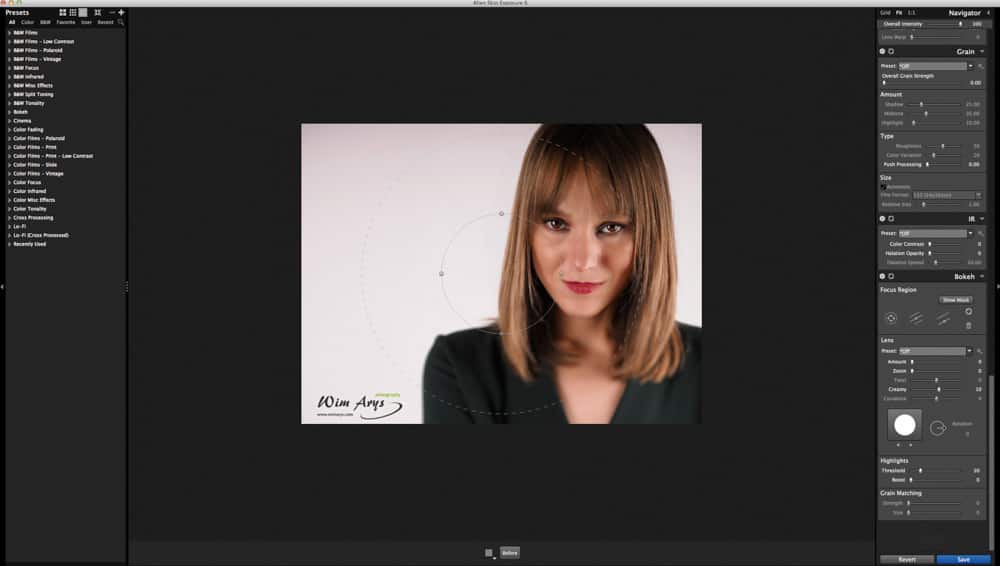
All software editing and effects suites look quite similar. The image you’re working on is displayed in the centre, presets on the left and other control tabs on the right. In Exposure 6, you can quickly drag and resize all tabs to get the experience that suits you.
Preset Tab
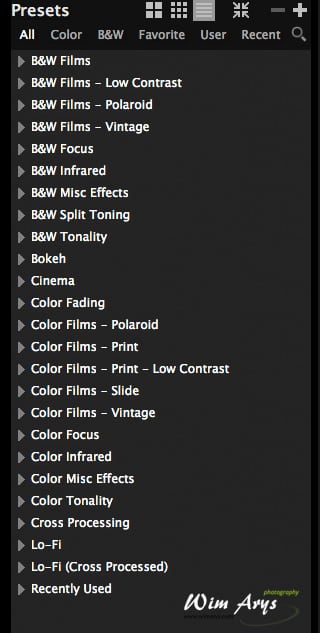
presets tab
Exposure 6 has some of the best presets, and most users use them as a starting point. There is now a redesigned search function that works very well, always handy if you know the type of film you’re after. You can also find Tabs per category, which makes for a less cluttered preset browsing experience. Once you open up any of the preset folders, previews will start generating. These are significant improvements over Exposure 5, and helps with a faster workflow. We’ll go over some of the presets later.
The right-hand tab
The right-hand tab gives you total control over all the modules used in the presets, and you’ll be able to add unused modules too.
The Basic tab
The basic tab is a new feature, allowing for more independent use of the software. You can now tweak basic settings here, something that you had to do in Lightroom first before exporting in previous versions. All necessary functionality is available: Exposure, Contrast, Highlights, Shadows, Clarity, Vibrance and satiation in either Color or Black and White.
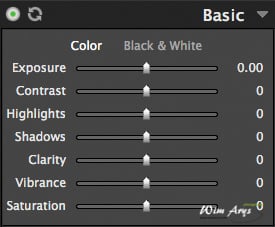
Basic tab
The Color tab
The colour filters will add tones to an image, just like placing a coloured filter in front of your lens. Filter behaviour affects damages differently in black & white and colour films.
In black & white images, colour filters influence the conversion of images tones. A red or orange filter can smoothen skin tones, reducing the appearance of blemishes. Blue filters, on the other hand, are very efficient at darkening the image and enhancing the appearance of haze and mist.
In colour photography, these filters will add the specified colour tone across the entire picture.
The Preserve Luminosity checkbox prevents radical changes in brightness of your image.
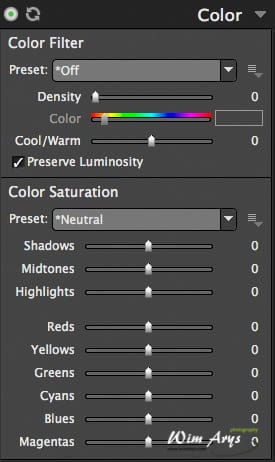
Color tab
The Tone Curve tab
Toning is a processing technique from the dark room development days. Using chemicals, the coloration of an image is changed. Split toning uses multiple tones in this development process. It’s an easy way to add colour to your pictures.

Tone Curve tab
The Focus tab
You can apply sharpening or soft focus here. I’m not a big fan of sharpening it this way, I prefer directly boosting micro-contrast, but it might work for you.
The Lens Warp simulates the distortion caused by lenses at the edges of the image. It’s used in the Exposure presets to imitate the soft look created by using toy cameras with plastic lenses.
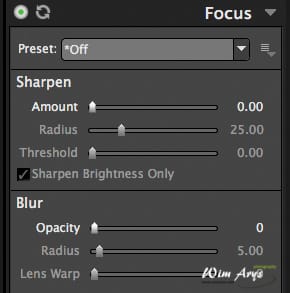
Focus tab
The Grain tab
Modern cameras use higher ISO values for increased sensitivity to light, introducing different kinds of (ugly) digital noise. Analogue film did the same, but (as it is analogue) added more eye-pleasing grain. Since we are used to seeing this in images, some photographers prefer adding some texture to their images for a more analogue look.
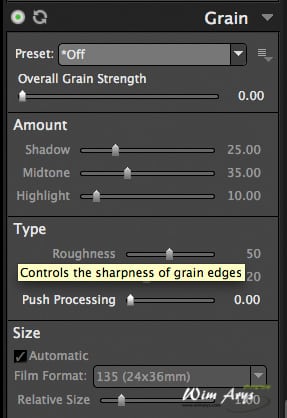
Grain tab
Infrared (IR) tab
This tab lets you imitate the look created by using monochrome infrared film. Not my cup of tea, but it’s there.
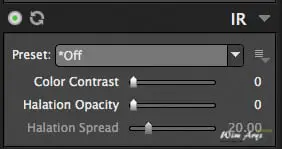
IR tab
The Vignette tab
Vignetting is an excellent way to draw the spectators’ eye towards your subject. Image corners are darkened in various ways, and although you’ll find this in many RAW editors, Exposure adds a lot more customizability. This customization includes control over Distortion and Lump Size that modify the shape of the vignette.
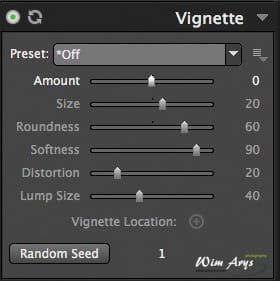
Vignette tab
The Overlays tab
You can add borders, light leak effects, or dust and scratches here I’m not a big fan of their borders (I prefer mine simple). But all are very customizable, and you can now even import your own.
Light leaks and texture effects do look beautiful, very realistic.
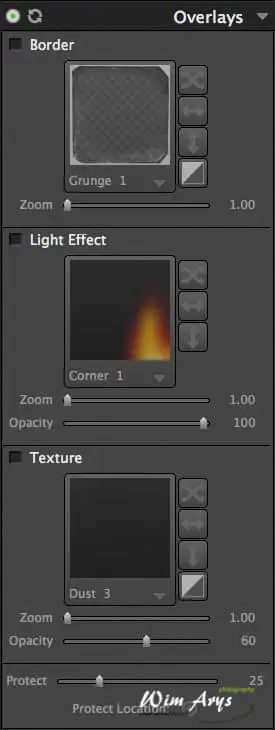
Overlays tab
The Bokeh tab
Bokeh is a new feature, first introduced in Alien Skins’ Bokeh software. You can select focus region, different emulated lenses, amount, zoom. This effect can look fantastic, and (I’ll explain later) I often use it as an alternative to vignetting.
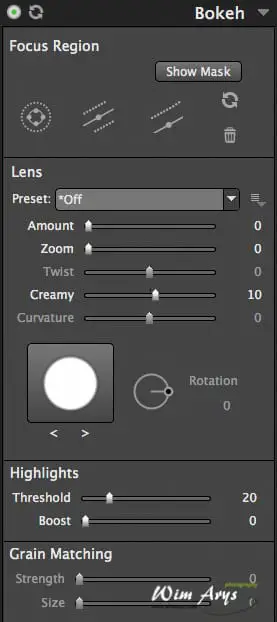
Bokeh tab
Presets
You’ll find the presets tab on the right-hand side. It’s resizable by dragging the tab to your left for easy auditioning of all the presets. The live preview for each film render very fast (much more quickly than in Exposure 5). You can select what preset category you wish to audition on the top of the tab, as well view your custom made and recently used presets.
There is a search function that allows you to find specific film emulations and can be further refined by clicking B&W or color tabs.
presets tab
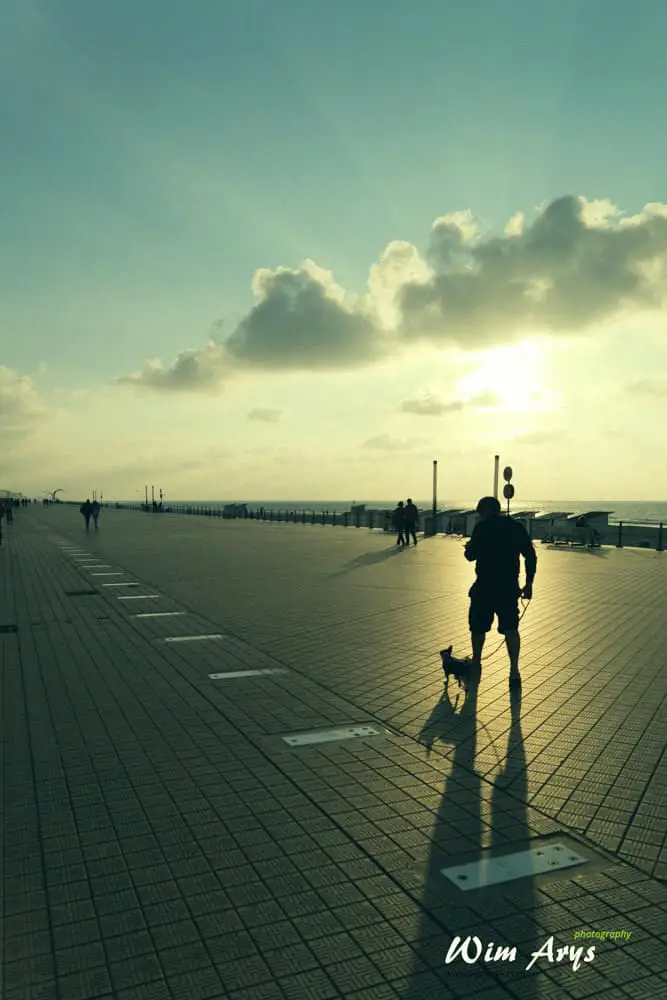
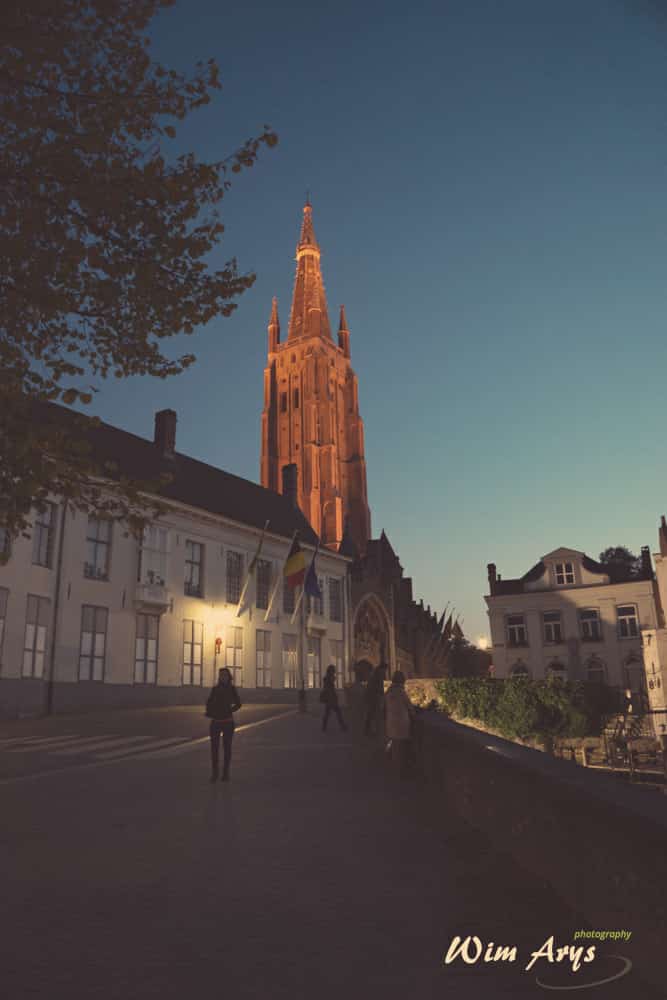
These are examples of images with the preset film emulations applied. Higher numbers in the preset names indicate higher ISO analog film emulated. Remember that noise appeared much faster in analogue film than it does with the same ISO values in modern-day cameras.
Color Films
The major strength of Exposure 6 is the vast amount of presets, that use a combination of the softwares’ modules. These can easily be tweaked to your liking in the appropriate module tab , although Alien Skin does make very useable presets.
Presets are divided into 2 basic categories: Colour and Black & White. I’ll go through all the presets with you, and show some examples of what this software is can do straight out of the box.
Color Fading
These presets offer various faded effects, including simulation of old film types like Kodachrome and Ektachrome.
Agfacolor Neu

Ektachrome Mild

Kodachrome
Kodacolor (1942-1953)
Polaroid
Unsurprisingly, these simulate the look of colour polaroid films, including Polachrome and Fuji FP. The polaroid look is something we all know, and Exposure 6 is especially good at these.
Time-Zero Film (Dust scratches)
600 Faded

669 yellowed

Fuji FP-100C

Polachrome (no grain)
SX-70 Blend Film
Print emulates colour negative films from Fujifilm to Kodak. Passing your images through one of these presets after basic editing in Lightroom can give them a more finished look, without looking overly processed. Another new feature is that Exposure 6 now adaptively changes the noise levels according to your settings and tweaks. This makes the emulations look less like an effect and a more accurate emulation.

Fuji Pro 160C

Fuji Pro 160S
Fuji Pro 400H

Fuji Reala
KODAK EKTAR 100
KODAK Portra 160NC
KODAK Portra VC
Vintage
If you like the vintage look, these presets will be your cup of tea. There are lots of old films emulated, just remember where the noise tab is to tweak these levels.

Exposure-6-Kodahrome-II-1962-1974
Kodahrome-1936-1962
Autochrome
Slide

Agfachrome 1000 RS
Agfa RSX II 100
Fuji Astia 100F
Fuji-Provia-100F
Fuji-Provia-400F

Fuji-Velvia-50

Fuji-Velvia-100F

GAF 500
Kodak-Ektachrome-100G

Kodak-Ektachrome-100GX
Kodak Ektachrome 100VS
Kodak Ektachrome mid 1970
Agfa RSX II 100
Infrared
Infrared emulates the use of infrared film. Not my type of photography, although I am looking to mod one of my camera sensors for infrared, but this yields totally different results.
Kodak-Ektachrome-EIR
Lo-Fi and Lo-Fi Cross Processed
Lo-Fi offers more artistic effects, with heavy usage of light effects, textures, vignetting and scratches. I like these too sometimes.
Fuji-NPS160-expired-creamy-yellow
Kodak-200-Gold-Diana-F
Agfa CT Precisa 100 Blue Sky (dark)
Fuji Sensia 100 Lomo LC-A
Black And White Films
Besides Colour film, lots of Black and White Film emulations are available. These presets have more-or-less the same grouping as the colour presets.
B&W Films Basic
You’ll find most (if not all) of the highly regarded Black and White films here. From the Ilford Delta to the Kodak Tri-X, they have all been emulated to a high degree of precision.
AGFA APX 25

AGFA SCALA 200
Fuji Neopan 1600
Ilford Delta 100
Ilford HP5 Plus-400
Kodak Pantomic X Pushed 1 stop
Kodak Plus X 125

Kodak T-MAX 100

Kodak Technical Pan Technidol
Kodak TRi-X 400

Kodalith
Polapan
Polapan is an instant black and white slide film made by Polaroid.
Polapan Dust and scratches

Polapan no grain
Polaroid 55
Polaroid 55 is an instant film that peels apart to give both a monochrome print and a black and white negative. You’ll notice that the emulations have the distinctive border where the two parts of the film are stuck together.
Polaroid-55-Blue
Polaroid 55
Vintage
You’ll find photographic processes such as Calotype, Cyanotype, Daguerreotype and Wet Plate here
Calotype Sepia no grain
Infrared
Infra-red Black And White film like the Ilford SFX200.
Ilford SFX 200
Lo-Fi
The Lo-Fi presets imitate the type of look you would get if you used a toy camera such as a Holga, Lomo or Diana. Some have scotches and ageing applied in a quite convincing way.
Agfa-APX-400
Bokeh
One of the major new features in Exposure 6 is the inclusion of their lens simulation program, Bokeh. It features simulations of fast lenses like the Canon EF 85mm f/1.2 L, Nikon 300mm f/2.8, Sony 24-70 f/2.8,…
Bokeh effects draw the viewers’ attention to a specific area, by blurring the rest of the image. Although a simulation like this can never replace a true Bokeh shot with a lens and large aperture, as an add-on effect, it can work in the same way you’d normally use vignetting.
The out-of-focus parts do look creamy and smooth.
Nikon 105mm f/2.8 Bokeh
Conclusion
The updated Alien Skin Exposure 6 offers new functionality (like the Bokeh software now included), nice improvements and a faster and more useable interface.
I’ve tried most film emulation software, and they all seem to offer something different. You might find that’s it’s easier to use VSCO and RNI film packs, as they come as presets in Lightroom, while you’ll have to export your images to use the Exposure emulations. The external editor approach does offer advanced functionality and tweak-ability which you won’t find in the Lightroom preset variety.
Exposure 6 has some of the best colour film simulations out there, and I’m thinking especially of the Polaroid and Vintage film presets. I also love the fact that Dust and Scratches can be applied while still looking realistic, and it’s my go-to app when I want to make an image realistically look old and deteriorated.
I’m not as fond of their Black & White emulations, but that might be a personal preference as I like a more modern approach to B&W conversion. Although their border collection is large, I’m still missing some basics like a simple white or black square, although you can now import your own.
Another improvement I really like is that it now renders grain accurately across the full dynamic range of your image, a feature I have not seen anywhere else. Other film emulations just seem to indiscriminately pepper it across your image, whilst here you actually see it adapt to changes in the global settings here. This makes for a more realistic film grain where it’s more pronounced in the mid-tones.
I find the now-included Bokeh module quite useful as an alternative to vignetting, so basically a way of drawing attention to a part of your image. I own a few of the lenses emulated, and the out-of-focus area does look similar, although it’s no substitute for actually shooting at large aperture with a high quality lens. You can never really get the edges and transition to match the real deal. But it’s a nice added feature, and gives you more creative freedom during post processing.
You can purchase Exposure 6 on their website, upgrading costs $69, full version $149.


can more than one preset be used at a time?
No Donna, but you can tweak presets.